Cisco Crosswork Planning Design 7.2.x User Guide

PDF

Cisco Crosswork Planning Design 7.2.x User Guide

Configure ASes

Want to summarize with AI?

Log in

Describes how to configure ASes in your network topology to establish routing domains and enable proper BGP communication between different administrative boundaries.


Create ASes

Use this task to create an empty AS.

After creating the AS, you still need to associate nodes with it and create the relationship between this AS and others. Refer to Associate nodes with an AS and Edit AS routing policies.

Procedure

1.

Open the plan file (refer to Open plan files). It opens in the Network Design page.

2.

From the toolbar, choose Actions > Insert > AS.

Alternatively, in the Network Summary panel on the right side, click The AS tab in the Network Summary panel allows users to create an empty Autonomous System (AS) by clicking the designated icon. in the AS tab.

The AS tab is available under the More tab. If it is not visible, then click the Show/hide tables icon (The AS tab in the Network Summary panel displays options for creating Autonomous Systems (ASes), including fields for entering the AS number and name, as well as distinguishing between internal and external AS types.) and check the AS check box.

3.

Configure the AS properties:

  • ASN: AS number, which is a text string that can be a number or name.

  • Name: AS name.

  • Type: Internal ASes have a full topology. External ASes have a collapsed topology with just border nodes and a virtual node.

  • External mesh: When creating a demand mesh, this option tells Cisco Crosswork Planning whether to create external meshes. When one or both ASes are set to Include, Cisco Crosswork Planning creates a mesh between the external ASes (default). If both are set to Exclude, no demands are created.

  • IGP protocol: Choose OSPF, ISIS, or EIGRP from the drop-down.

  • Description: A text description of the AS.

4.

Click Submit to create an AS.

5.

To change the routing policy, select the AS and click The AS is created with the specified properties and is displayed in the Network Design view and AS tab. and then click the AS Relationships tab (refer to Edit AS routing policies).

The AS is created with the specified properties.


Associate nodes with an AS

Use this task to associate nodes with an AS to establish proper network topology and routing relationships within your network design.

Procedure

1.

Open the plan file (refer to Open plan files). It opens in the Network Design page.

2.

In the Network Summary panel on the right side, choose one or more nodes from the Nodes table.

3.

Click Node-AS association illustrates the process of linking network nodes to an Autonomous System (AS) for effective routing and boundary definition in network design..

Note

If you are editing a single node, you can also use the The diagram illustrates the process of associating nodes with an Autonomous System (AS), highlighting the steps involved when editing a single node through the Actions column. > Edit option under the Actions column.
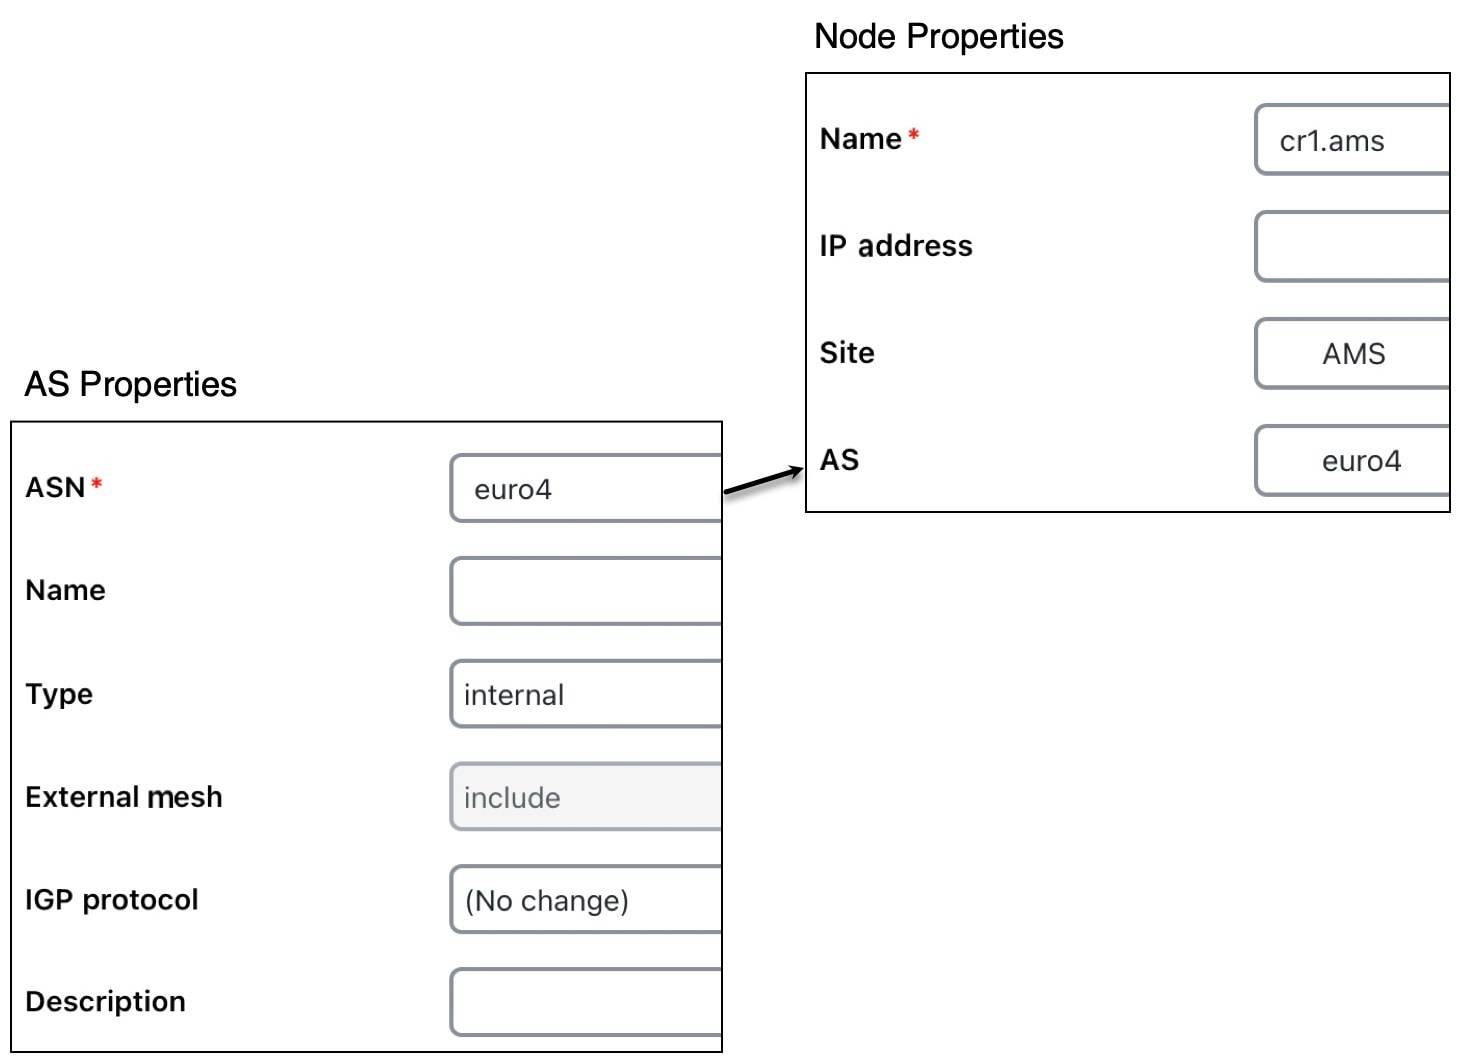
AS-Node association
4.

From the AS drop-down list, choose the AS to which you want to assign the nodes.

5.

Save the changes.

The selected nodes are now associated with the specified AS.


Edit AS routing policies

Use this task to create AS relationships by setting the routing policy for ASes.

Procedure

1.

Open the plan file (refer to Open plan files). It opens in the Network Design page.

2.

In the Network Summary panel on the right side, select an AS from the AS table.

3.

Click The image illustrates the steps to edit AS routing policies, highlighting the process of establishing routing relationships between autonomous systems in a network design. or use the The image illustrates the steps required to edit AS routing policies, including the configuration of AS relationships. > Edit option under the Actions column.

4.

Click the AS Relationships tab.

5.

Select the AS pair you want to configure. There is a separate line for each direction in the relationship so you can configure them independently.

6.

Click The AS routing policy configuration interface allows users to define routing relationships for the selected AS pair based on specified policy settings., and set the Routing policy to Respect MEDs or Shortest Exit. For more information, refer to Route demands between ASes.

7.

Submit your changes.

The AS routing policy is configured for the selected AS pair, establishing the routing relationship according to your specified policy settings.