Cisco Crosswork Planning Design 7.2.x User Guide

PDF

Cisco Crosswork Planning Design 7.2.x User Guide

Dashboards

Want to summarize with AI?

Log in

Outlines the dashboard page’s role in Cisco Crosswork Planning, detailing its overview and customization options.


A Dashboard is a UI page that

  • provides a quick operational summary of Cisco Crosswork Planning

  • allows you to navigate directly to relevant pages and functions, and

  • consists of multiple dashlets that vary according to the installed application.

The Collections and Archive network models dashlets appear only if you have installed the Cisco Crosswork Planning Collector application. Similarly, the My network design models, My design jobs, and Design engine dashlets appear only if you have installed the Cisco Crosswork Planning Design application.
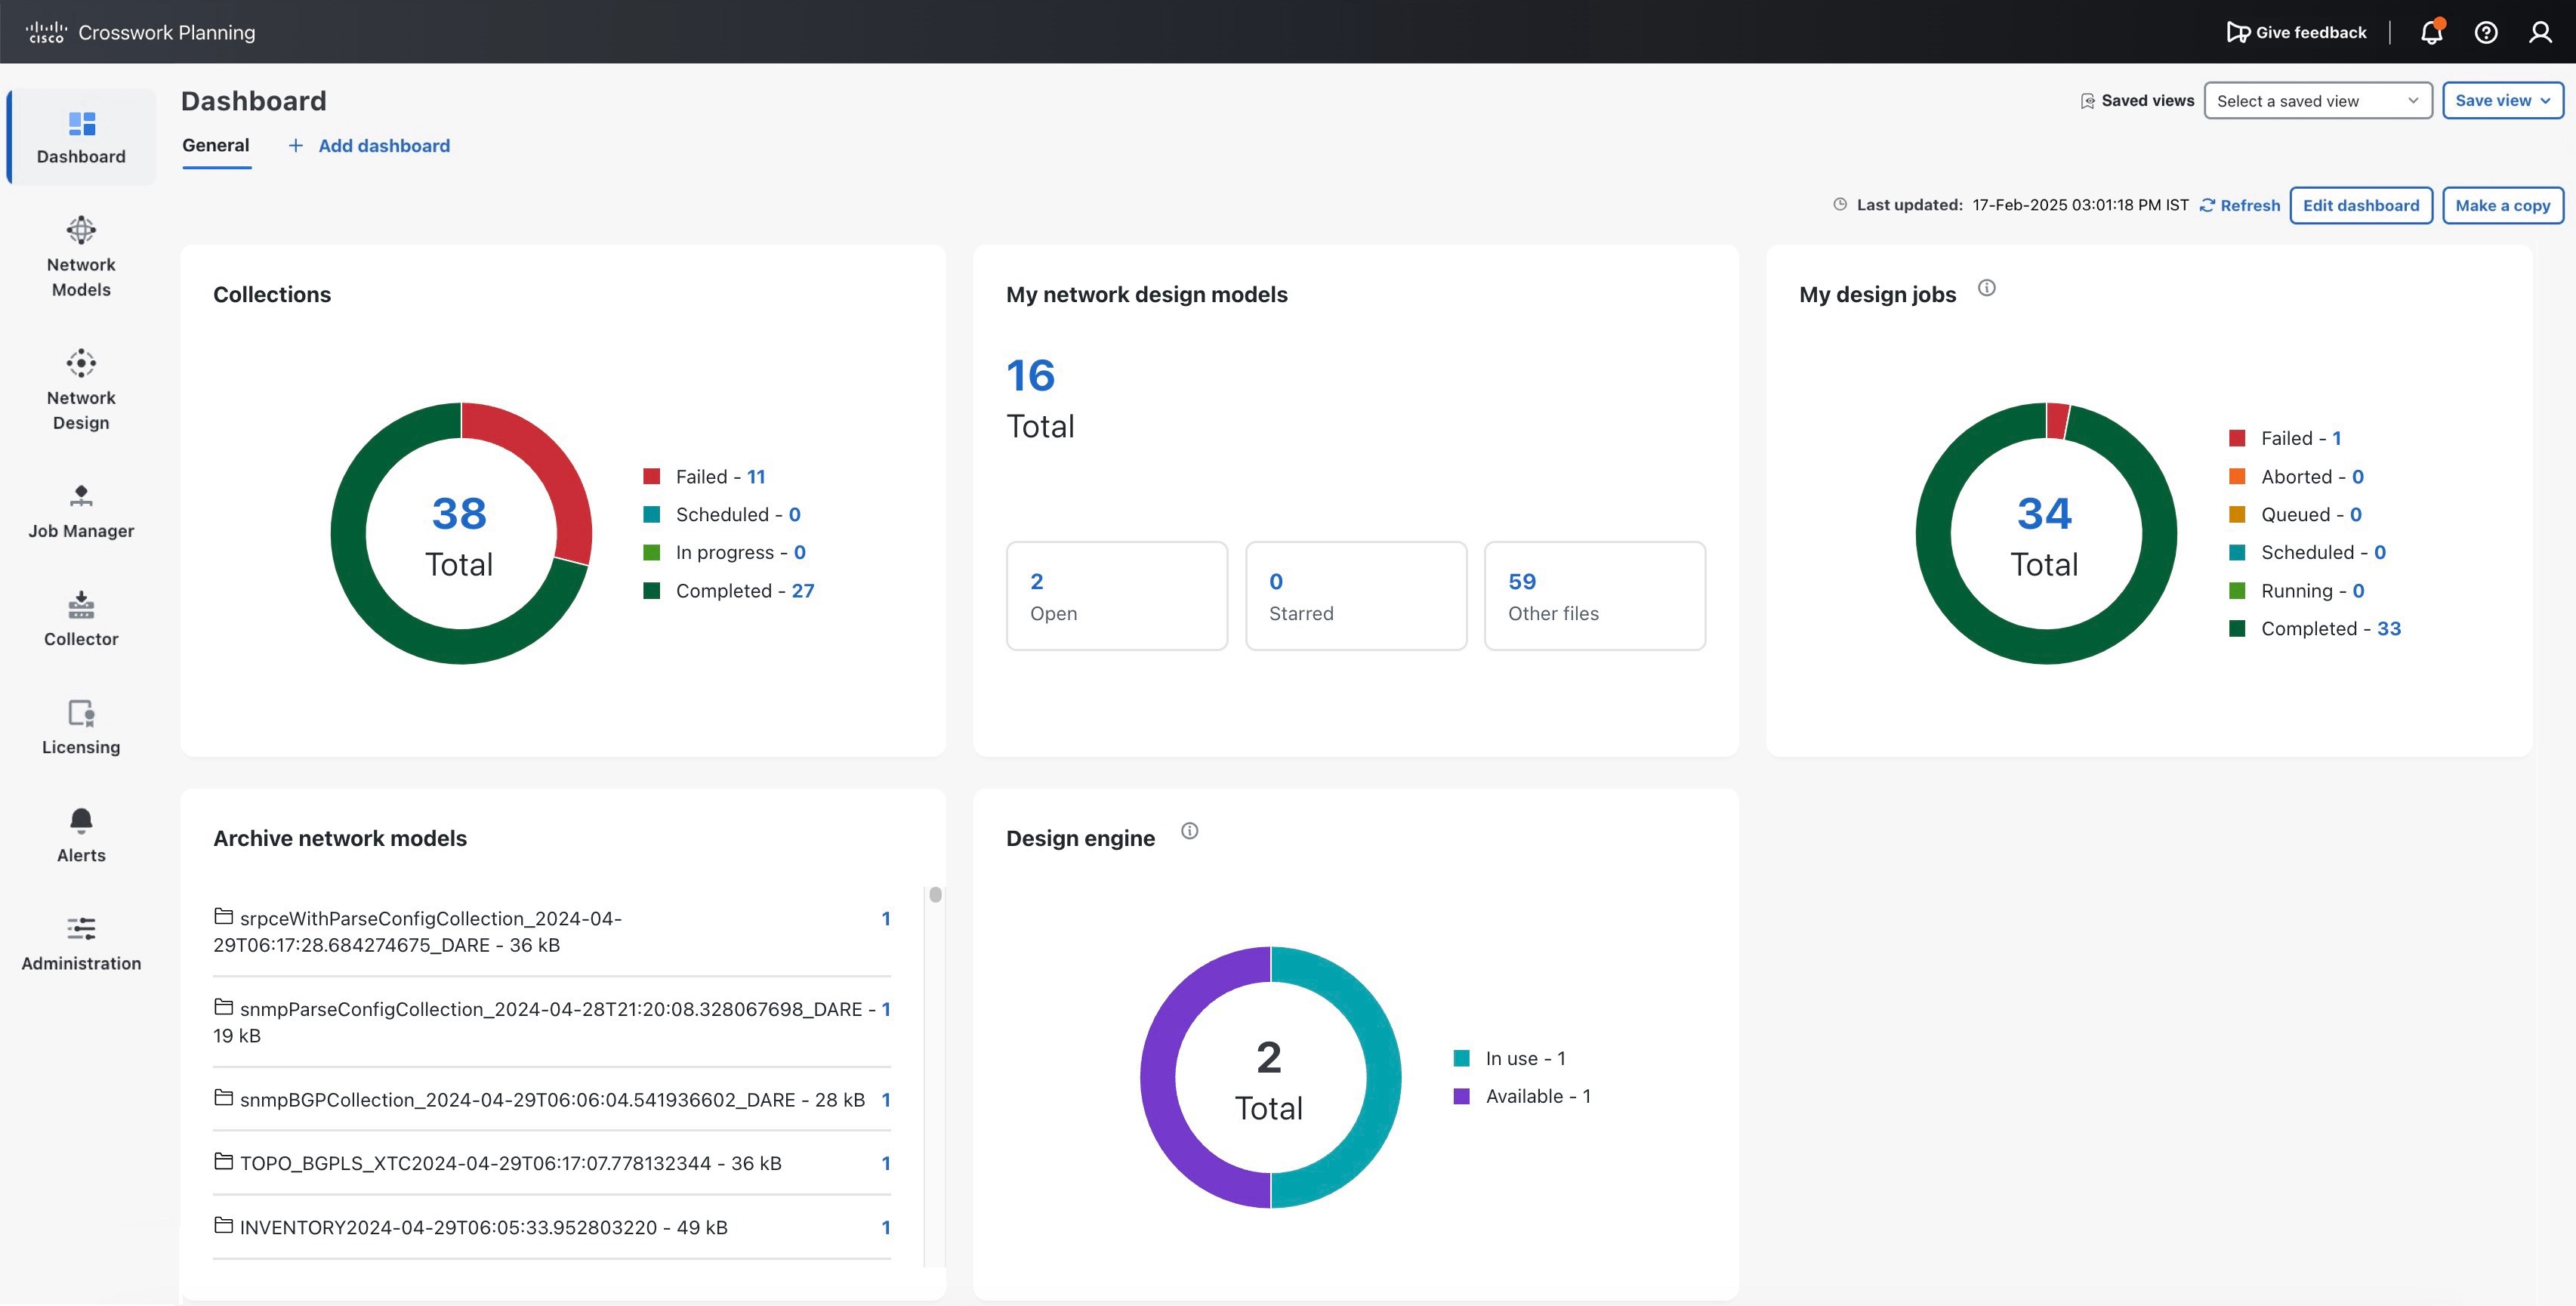
Figure 1. Dashboard view
Crosswork Planning Dashboard

Dashlet navigation

Links in each dashlet allow you to navigate to the desired pages easily. For example, in Dashboard view, link 2 in the Open tab in the My network design models dashlet indicates that there are two network models open in the UI. If you click this number 2, the two opened network models are displayed in the Network Design page.

Dashlet customization

Use the Edit dashboard button at the top right corner to customize how the dashlets appear.


Customize dashlets

Using Edit dashboard at the top right corner, you can

  • rearrange the dashlets as per your requirement

  • add dashlets to the dashboard

  • remove dashlets from the dashboard

  • edit the names of the dashlets, and

  • make copies of the dashlets.

Procedure

1.

From the main menu, navigate to Dashboard.

The Dashboard page opens with the default General tab. The configured custom dashboards appear as individual tabs.

2.

Go to the required dashboard and click Edit dashboard at the top right. The page becomes editable.

3.

To rearrange dashlets:

  1. Click in the dashlet you want to move, and drag and drop to the position you want.

  2. Save the changes.

4.

To add dashlets to the dashboard:

  1. Click + Add dashlet at the top right. The Add Dashlets window appears.

  2. From the list, select the dashlet you want.

  3. Click + Add.

  4. Save the changes.

5.

To edit dashlet names:

  1. In the text field displaying the current dashlet name, enter the new name for the dashlet. Ensure that the title is between 5 and 50 characters long.

  2. Save the changes.

6.

To copy dashlets:

  1. Click > Copy in the dashlet you want to copy.

    A copy of the dashlet appears in the dashboard.

  2. Save the changes.

7.

To remove dashlets:

  1. Click > Delete in the dashlet you want to delete.

    The selected dashlet is removed from the dashboard.

  2. Save the changes.


Custom dashboards

A custom dashboard is a dashboard page that

  • you can create to include dashlets of your choice

  • is displayed as a separate tab within the Dashboard page, and

  • can be renamed or deleted.

Cisco Crosswork Planning includes a default dashboard tab named General, which you cannot rename or delete.


Create custom dashboards

Use this task to create a custom dashboard and to add relevant dashlets.

Procedure

1.

From the main menu, navigate to Dashboard.

The Dashboard page opens with the default General tab.

2.

Click the + Add dashboard at the top right to create a new dashboard tab.

3.

Click the edit icon () next to the default title, and enter a meaningful name for the dashboard. Ensure that the title is between 5 and 50 characters long.

4.

Add the required dashlets:

  1. Click + Add dashlet.

  2. In the Add Dashlets drawer, select the dashlet you want.

  3. Click + Add.

    The selected dashlets are added to your dashboard.
  4. Enter a unique, meaningful title for each dashlet.

5.

Click Save to save the dashboard.


Edit custom dashboards

You can modify a custom dashboard by renaming it, or by adding or removing dashlets.

Note

You cannot rename the default General dashboard. You can rename only the custom dashboards created by users.

Procedure

1.

From the main menu, navigate to Dashboard.

The Dashboard page opens with the default General tab. The configured custom dashboards appear as individual tabs.

2.

Go to the required custom dashboard and click Edit dashboard at the top right.

3.

Edit the dashboard settings as required:

  • Rename the dashboard: Click next to the dashboard title at the top left and enter a meaningful name. Ensure that the title is 5 to 50 characters long.

  • Modify dashlets: To modify dashlets, refer to Customize dashlets.

4.

Click Save to save the dashboard.


Delete custom dashboards

Use this task to delete the custom dashboards that you no longer need.

Note

You cannot delete the default General dashboard. You can delete only the custom dashboards created by users.

Procedure

1.

From the main menu, navigate to Dashboard.

The Dashboard page opens with the default General tab. The configured custom dashboards appear as individual tabs.

2.

Go to the required custom dashboard and click Edit dashboard at the top right.

3.

Click Delete dashboard at the top right.

4.

Click Delete in the confirmation dialog box.

The selected custom dashboard is permanently removed from the Dashboard page.

Reset the General dashboard to the default view

Note

You cannot perform this procedure on custom dashboards.

Use this task to reset the General dashboard to the default view.

Procedure

1.

From the main menu, navigate to Dashboard.

The Dashboard page opens with the default General tab. The configured custom dashboards appear as individual tabs.
2.

On the General dashboard, click Edit dashboard at the top right.

3.

Click Reset to default at the bottom of the page.

The Reset Dashboard confirmation dialog box appears.

4.

Click Reset in the confirmation dialog box.


Copy dashboards

Use this task to make a copy of the dashboard.

Procedure

1.

From the main menu, navigate to Dashboard.

The Dashboard page opens with the default General tab. The configured custom dashboards appear as individual tabs.

2.

Go to the required dashboard and click Make a copy at the top.

The system creates a copy of the dashboard named dashboard(COPY).