Configuration Guide for Cisco Optical Site Manager, IOS XR Release 26.x.x

PDF

Configuration Guide for Cisco Optical Site Manager, IOS XR Release 26.x.x

Alarm profiles

Want to summarize with AI?

Log in

This section explains alarm profiles in Cisco Optical Site Manager. Alarm profiles offer flexibility by allowing users to apply different profiles at various levels of the network hierarchy, enabling tailored alarm management.


An alarm profile enables you to customize alarm severities by creating unique profiles for individual components such as ports, cards, chassis, passive units, optical cross-connects, and optical interfaces.

Cisco Optical Site Manager includes two predefined alarm profiles:

  • Default profile

  • All suppressed alarms profile

Additional information

Default profile

The Default profile serves as the baseline for alarm severities and provides a standardized configuration for all alarms:

  • The default alarm profile is preprovisioned on the node and contains all alarms.

  • It sets alarm severities according to standard Telcordia GR-474-CORE guidelines, which cannot be changed.

  • Default severities are applied to all alarms and conditions until a new custom profile is created and applied.

  • Example of inheritance: A card with an inherited alarm profile adopts the severities applied at the node level.

  • Different profiles can be applied at various levels (e.g., node, card, port). You could use the Default profile on a node, cards, and ports, but apply a custom profile to downgrade alarms on a specific card.

All suppressed alarms Profile

The all-suppressed-alarms profile focuses on alarms that are intentionally excluded from monitoring and management:

  • The profile includes all alarms that are suppressed.

  • It is helpful for troubleshooting by excluding non-critical alerts.

  • When applied, the profile ensures that suppressed alarms do not affect the monitoring process.
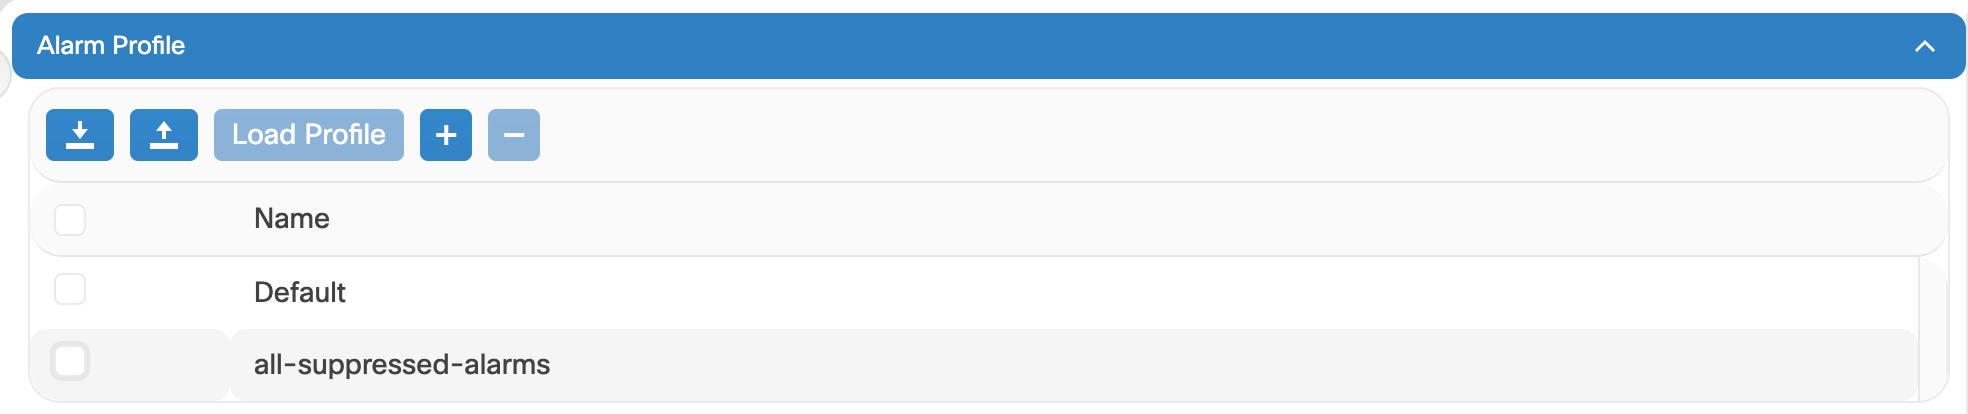
Figure 1. Alarm Profiles

Customizing alarm profiles

Alarm profiles offer flexibility by allowing users to apply different profiles at various levels of the network hierarchy, enabling tailored alarm management.

  • Default Behavior: Default severities remain active for all alarms and conditions until a new profile is created and applied.

  • Flexible Application: Alarm profiles can be applied at different levels of the network hierarchy, providing flexibility in alarm management. For example, the default profile can be used for the node, cards, and ports, while a custom profile may be applied to downgrade alarms on a specific card.

  • Severity Modification: When modifying an alarm profile, all Critical (CR) or Major (MJ) severity settings-whether default or user-defined-are demoted to Minor (MN) in Non-Service-Affecting (NSA) settings, and vice versa, as per Telcordia GR-474 standards.


Create and load alarm profiles

Use this task to create and load alarm profiles.

Using alarm profiles helps streamline fault monitoring and reduce alarm noise, making it easier to focus on critical issues in the network.

Before you begin

Log into Cisco Optical Site Manager

Follow these steps to create and load alarm profiles.

Procedure

  1. Click Fault Monitoring in the left panel.

  2. Click the Profiles tab.

  3. Click Alarm Profile to expand the section.

    The default profile all-suppressed alarms is displayed along with the list of alarms.
  4. Click the + button to create an alarm profile.

    The Alarm Profile dialog box appears.

  5. Enter the name of the custom alarm profile in the Name field.

  6. (Optional) Choose the resources such as card, ecu, and fan-tray from the Resources drop-down list.

    You can select multiple resouces from the list.

  7. Click Apply.

    The alarm profile is created and displayed in the list along with the default alarm profile.

  8. Select the check-box corresponding to the alarm profile and click Load Profile to load the alarm profile on the node.

    The alarms that belong to the selected alarm profile appear in the Alarms for Profile sub-section.

The create and load alarm profiles task is complete.


Associate alarm profiles

Use this task to associate alarm profiles.

Log into Cisco Optical Site Manager

Associate custom alarm profiles with the resources, such as ports, cards, chassis, passive units, optical cross-connects, and optical interfaces, to customize alarm severities.

Before you begin

No prerequisites are documented in the source content.

Follow these steps to associate alarm profiles.

Procedure

  1. Click Fault Monitoring in the left panel.

  2. In the Profiles tab, click Profile Association to expand the section.

  3. Follow these steps to create a profile association:

    1. Click the + button.
      The Profile Association dialog box appears.
    2. Type the name of the profile association in the Association field.
    3. Select the alarm profile from the Profile drop-down list and click Apply.
      The association name and profile are displayed in the table.
  4. Click the + button to expand the association name.

  5. Follow these steps to create a resource type:

    1. Click the + button above the Resource Type column to create a resource type.

      The Resource dialog box appears.

    2. Select a resource from the Resource Type drop-down list:

      The Resource Type drop-down list contains all the resources to which the alarm profile can be associated. Multiple resources can be associated with the same alarm profile.

    3. Select any of these options from the Inherited drop-down list.
      • true - To indicate if the association should be applied to all the children of this resource.

      • false - To indicate if the association should not be applied.

    4. Select the desired values from the other drop-down lists and click Apply.

When the alarm profile is associated with the resources, all the outstanding and new alarms matching these resources are immediately set with the new alarm severities.