Configuration Guide for Cisco Optical Site Manager, IOS XR Release 26.x.x

PDF

Configuration Guide for Cisco Optical Site Manager, IOS XR Release 26.x.x

Add a device

Want to summarize with AI?

Log in

Use this procedure to add a device in Cisco Optical Site Manager. Cisco Optical Site Manager automatically detects and onboards directly connected peer devices on the network.


Use this task to add a device.

Onboard a NCS 1000 or NCS 2000 device so it can be tracked, monitored, and managed within Cisco Optical Site Manager.

Note

Wait for the current device to complete synchronization before you add the next device to Cisco Optical Site Manager.
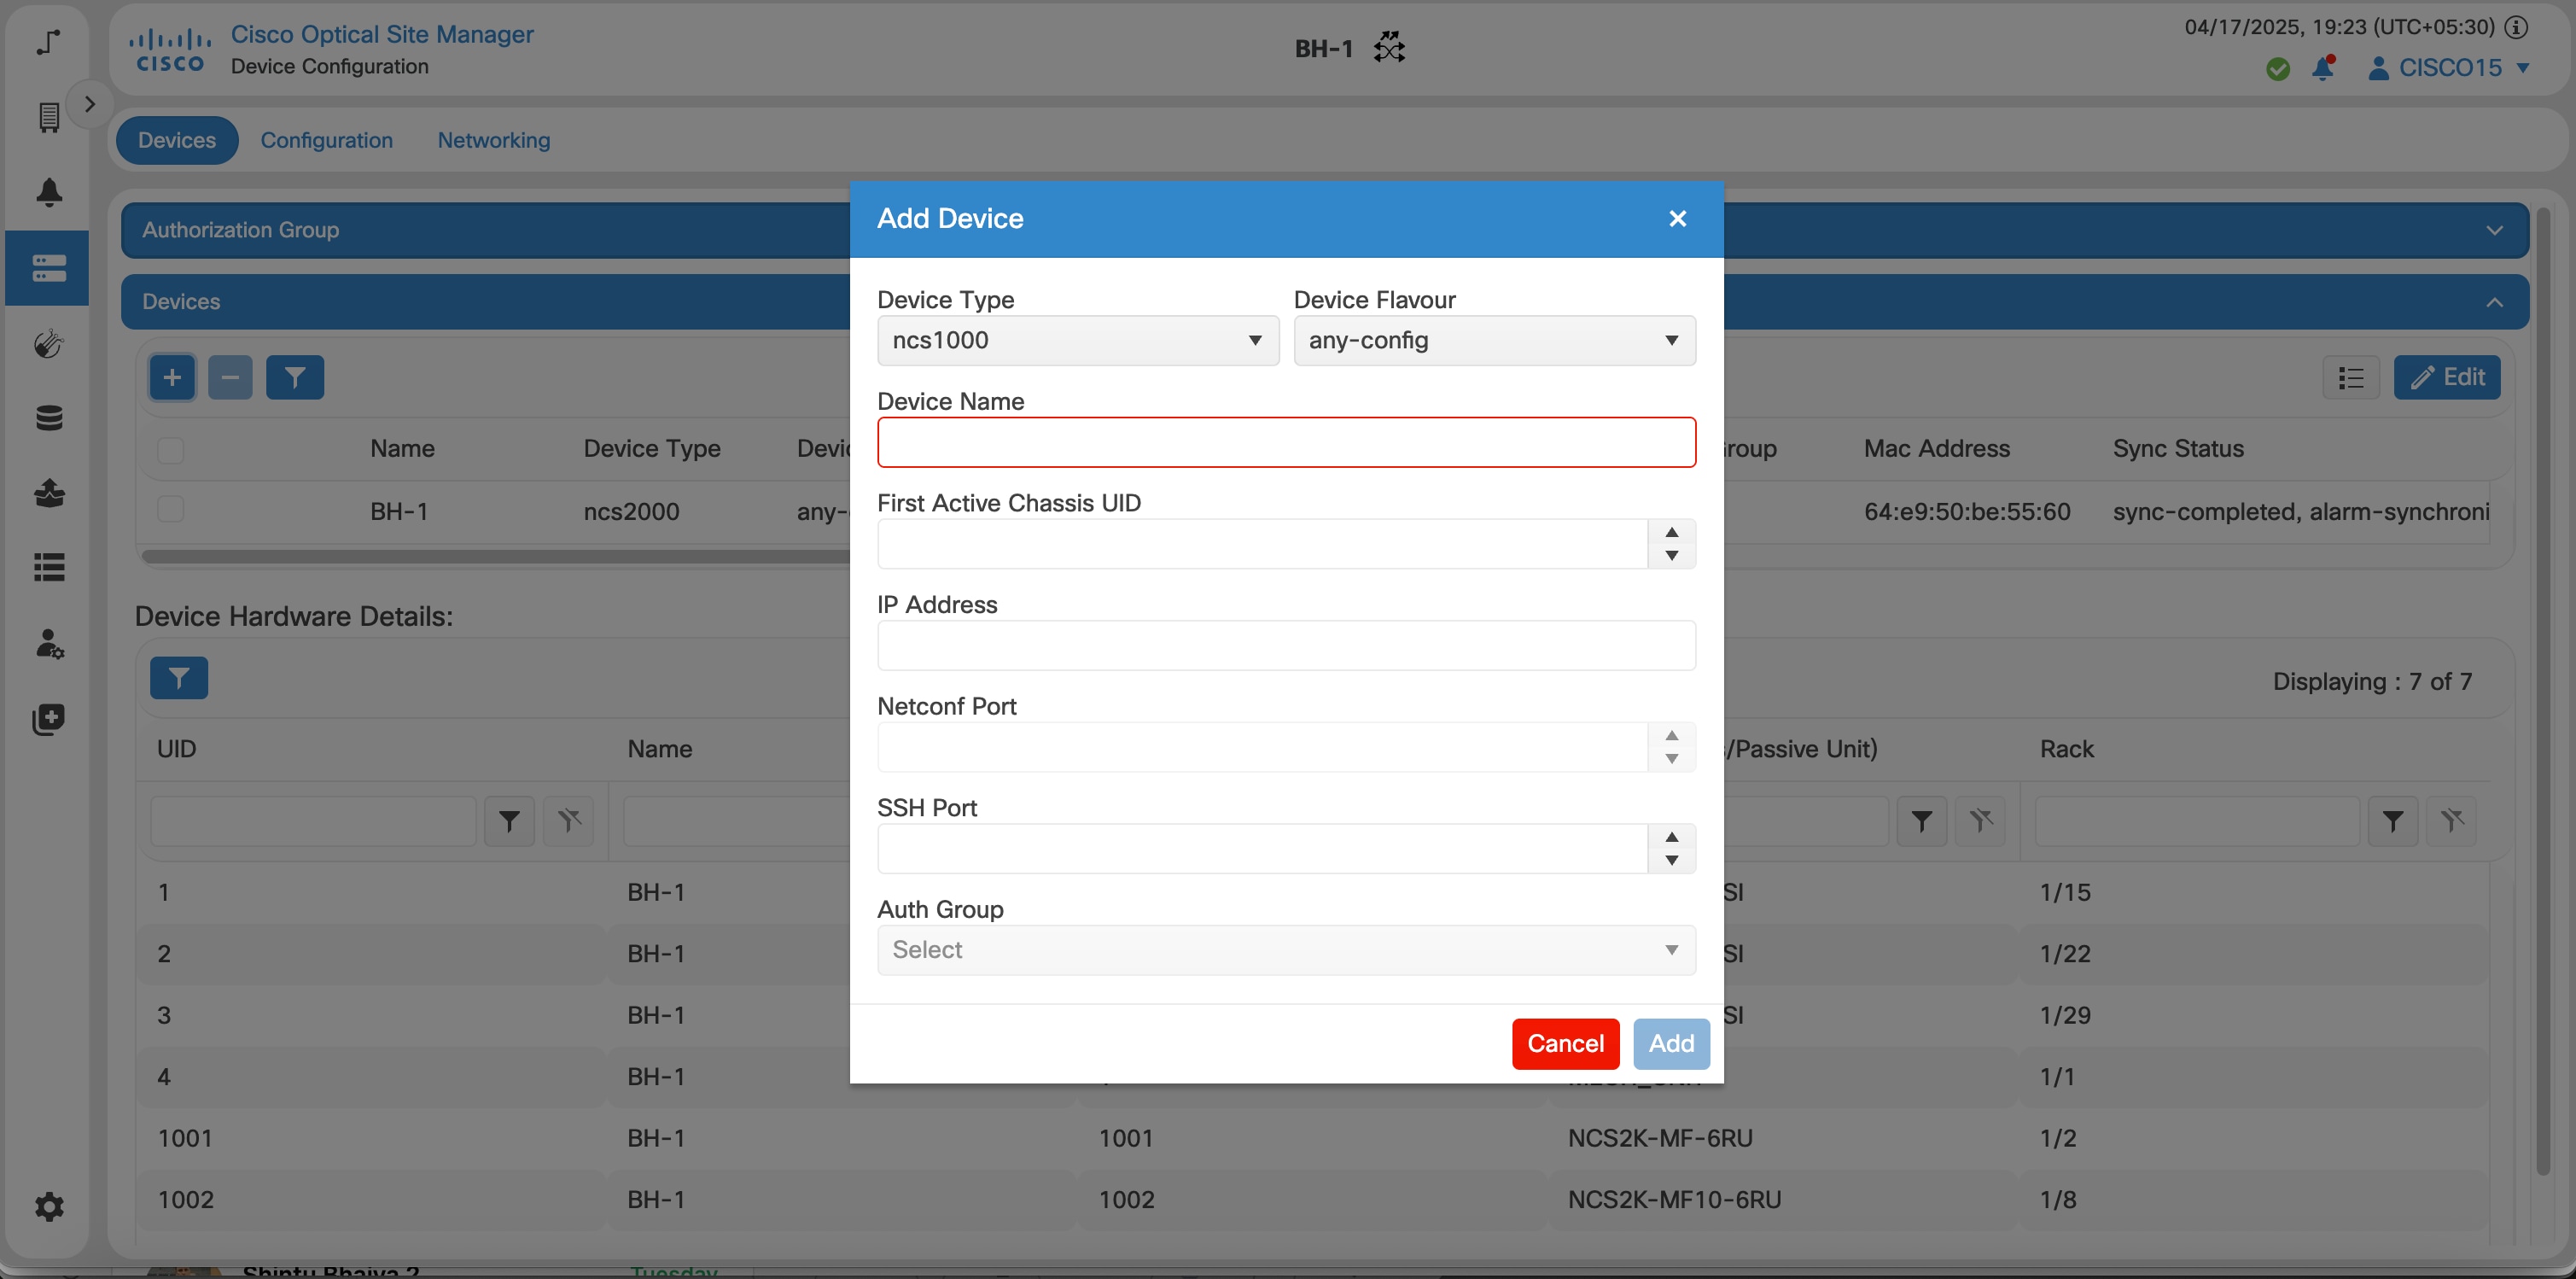
Figure 1. Add a Device

Before you begin

  • Log into Cisco Optical Site Manager

  • Use an authorization group with an IOS XR administrative account that has write-capable NETCONF access, such as a root-lr user or equivalent, for device onboarding. Cisco Optical Site Manager requires these privileges because it performs configuration changes on the XR device after onboarding.

  • Before onboarding an NCS 1001 device, verify that the device has a COSM-supported ECDSA crypto key. Cisco Optical Site Manager uses SSH/SFTP/SCP for device operations such as database backup, SOR file download, device diagnostics, and device software download or activation.

    On the IOS XR device, run:
    RP/0/RP0/CPU0:ios# show crypto key mypubkey ecdsa
     
    Key label: the_default
    Type     : ECDSA General Curve Nistp256
    Degree   : 256
    Created  : <timestamp>
    Data     :
     <key-data>
    The output must include one of these supported key types:
    Type     : ECDSA General Curve Nistp256
    Type     : ECDSA General Curve Nistp384
    Type     : ECDSA General Curve Nistp521

    If no supported ECDSA key is displayed, configure one of the following on the IOS XR device:

    RP/0/RP0/CPU0:ios# configure
    RP/0/RP0/CPU0:ios(config)# crypto key generate ecdsa nistp256
    RP/0/RP0/CPU0:ios(config)# commit
    You can configure one of these keys on the IOS XR device:
    crypto key generate ecdsa nistp256
    crypto key generate ecdsa nistp384
    crypto key generate ecdsa nistp521
    Note

    In Cisco Optical Site Manager R25.1.1 and R26.1.1, ED25519 keys are not supported for these COSM device operations. For NCS 1001 devices, ED25519 is the default key type, but a supported ECDSA key is required.

  • For Cisco Optical Site Manager device management, we strongly recommend to configure the authorization group with credentials for a local IOS XR user account on the managed device. The account must have write-capable NETCONF access, such as a root-lr user or equivalent.

    Use IOS XR credentials in this order of preference:

    1. A local IOS XR user account.

    2. If a TACACS+ account is required, configure a local user account with the same username, password, and privileges to ensure seamless management of the device even if TACACS server is not available.

    3. If TACACS+ authentication fails, Cisco Optical Site Manager can manage the device only when the TACACS+ and local user credentials match.

Procedure

  1. Click Devices in the left panel.

    The Device Configuration page appears.
  2. In the Devices tab, click the Devices section to expand it.

    A table appears that lists all the devices that are configured.

  3. Click the Add Device icon.

    The Add Device dialog box appears.
  4. Select the Device Type from the drop-down list.

    Select

    to

    ncs1000

    add a NCS 1000 device.

    ncs2000

    add a NCS 2000 device.

    unmanaged-network-element

    add a device that is not actively managed by NCS 1000 or NCS 2000.

  5. Enter the Netconf Port.

    Note
    This field is displayed only if ncs1000 is selected in the Device Type drop-down list.
  6. Enter the Device Name and IP Address.

    Use this table to identify the recommended IP address for onboarding NCS 1000 host devices.

    Table 1. Recommended IP address for onboarding NCS 1000 host devices
    Deployment mode NCS 1000 device onboarding IP address
    HA Use the IP address of the interface configured as cosm redundancy interface-name to onboard each host device.
    Standalone Use the IP address of the interface configured as the cosm mgmt-interface-name .

  7. Enter the UID.

    Note
    This field is displayed only if ncs1000 or ncs2000 is selected in the Device Type drop-down list.
  8. Select an authorization group from the Auth Group drop-down list.

  9. Click Add.

The device is added to Cisco Optical Site Manager and displayed in the Devices section.

In an NCS 1000 HA deployment, the Name column displays an A icon for the active node and an S icon for the standby node.

Warning

Do not perform any cross-connection-related changes through the IOS XR CLI once the device is managed by Cisco Optical Site Manager.
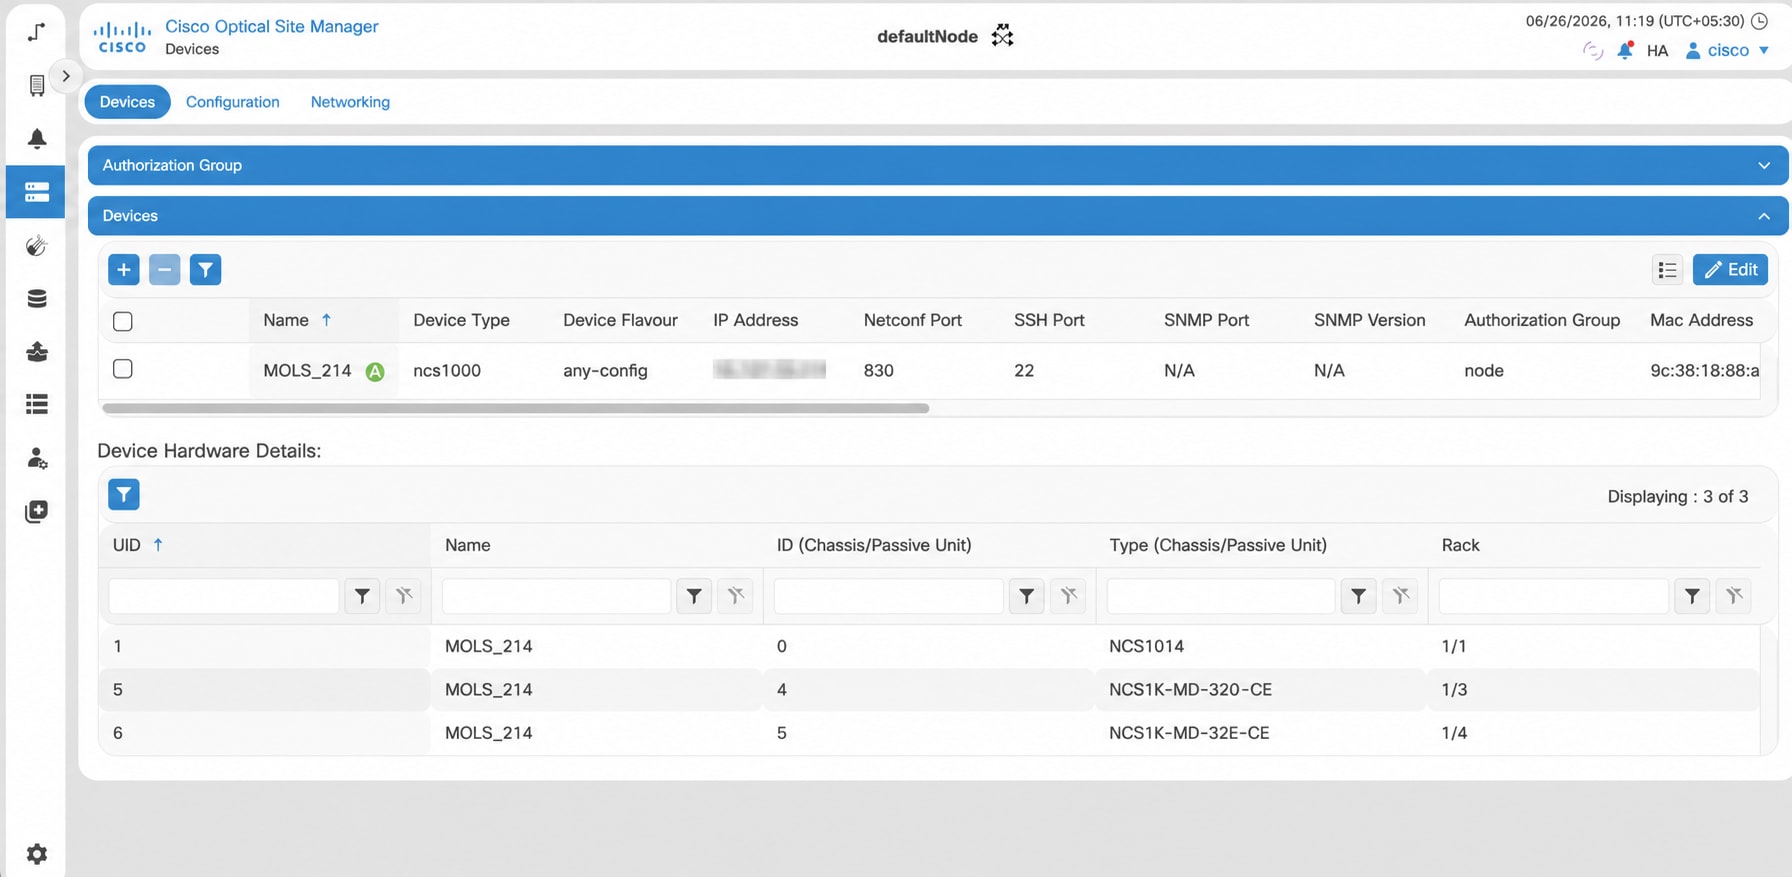
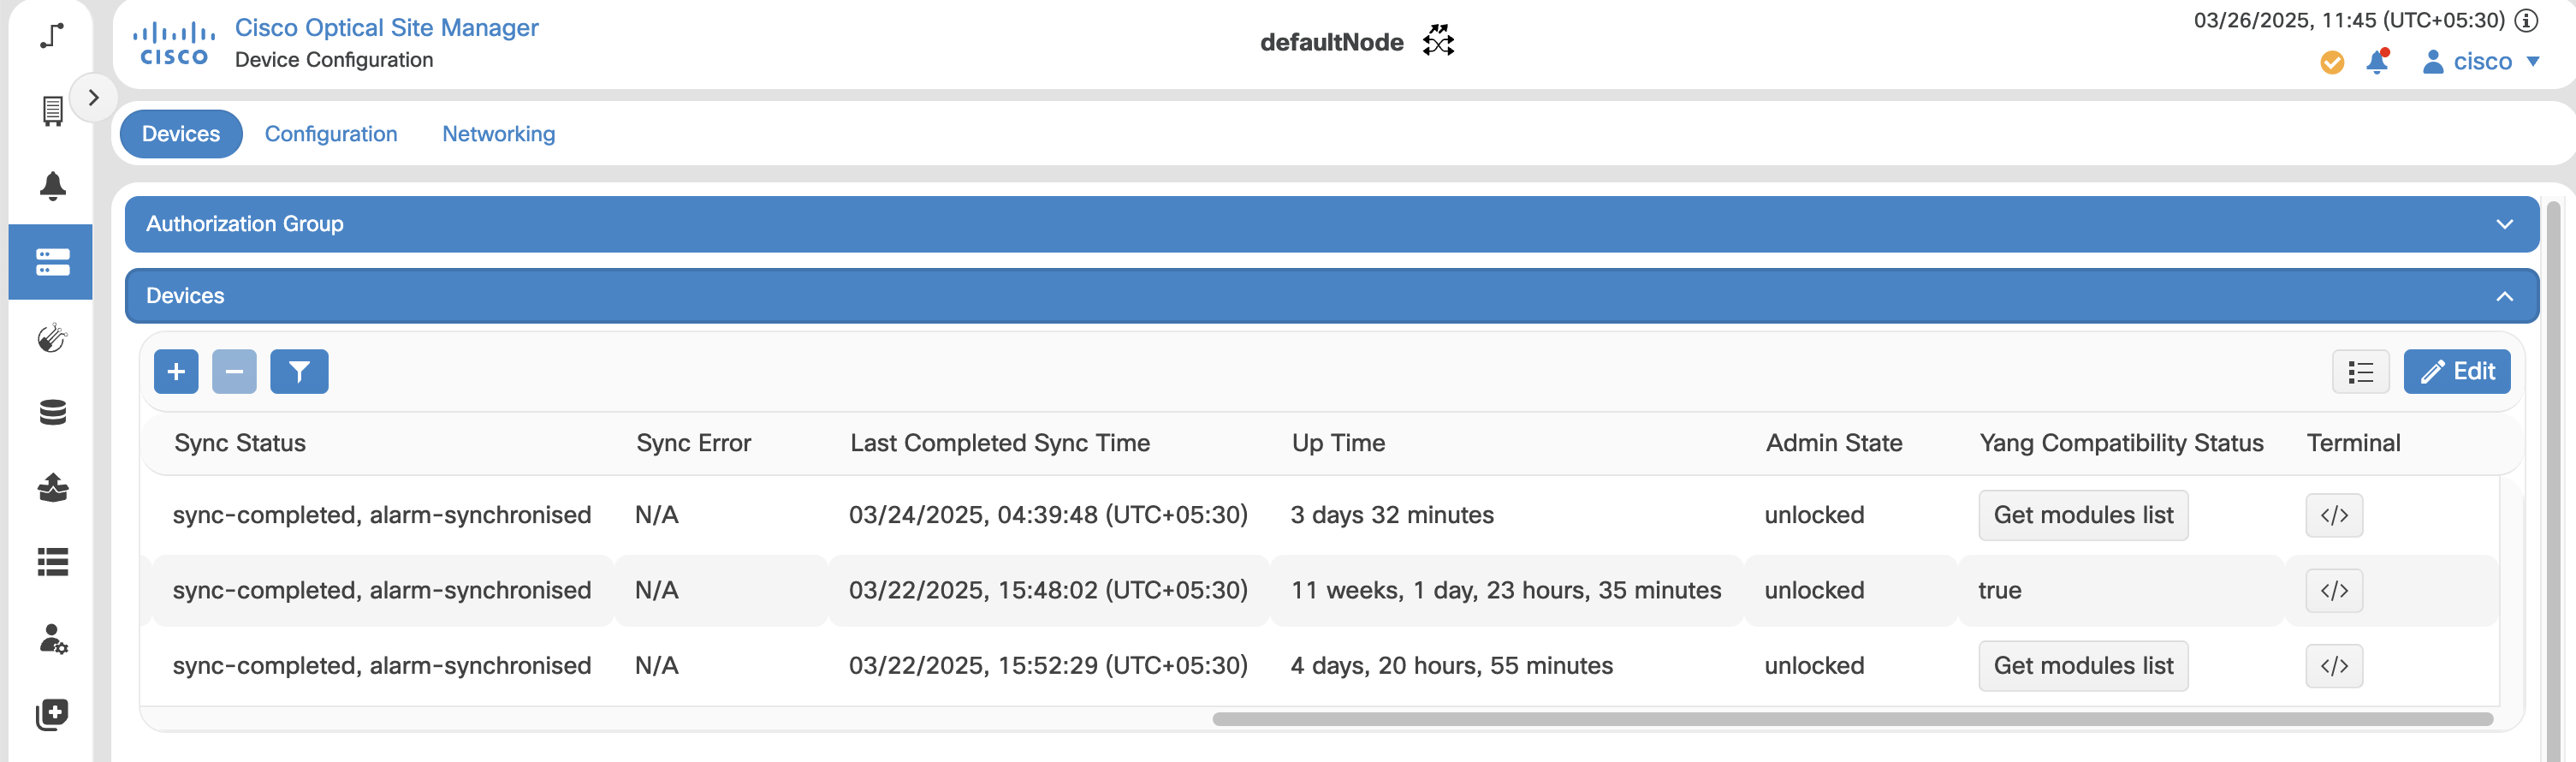
Figure 2. Device Added

Add Unmanaged Devices

Use this task to add an unmanaged device in Cisco Optical Site Manager.

  • Allows you to add and configure passive devices on the network.

  • Supports devices that are not actively managed by NCS 1000 or NCS 2000.

Unmanaged devices are devices that are not actively managed by NCS 1000 or NCS 2000. Examples include switches, LAN controllers, and passive optical devices.

The Add Device dialog box includes the unmanaged-network-element option, which enables adding unmanaged devices.

Table 2. Feature History

Feature Name

Release Information

Description

Add Unmanaged Devices

Cisco IOS XR Release 24.3.1

The Add Device dialog box includes the unmanaged-network-element option, allowing the addition of unmanaged devices.

This enhancement allows you to add and configure passive devices on the network.

  • After adding the unmanaged device, add it to a rack unit as a passive unit.

Before you begin

Log into Cisco Optical Site Manager

Follow these steps to add an unmanaged device.

Procedure

  1. Click Devices in the left panel.

    The Device Configuration page appears.

  2. In the Devices tab, click the Devices section to expand it.

    The table lists all configured devices.

  3. Click the Add Device icon.

    The Add Device dialog box appears.

  4. In the Add Device dialog box, perform these steps:

    1. Select unmanaged-network-element from the Device Type drop-down list.
    2. Click Add.

      The device is added to Cisco Optical Site Manager and displayed in the Devices section.

  5. In the rack view, perform these steps to add a passive unit:

    1. Right-click an empty rack unit and select Add a Passive Unit.

      The Add Passive Unit in Ru Position dialog box appears.

    2. Select the unmanaged device from the Select Device drop-down list.
    3. Select the passive type, slot, and passive UID from the respective drop-down lists.
    4. Click Provision.

    A confirmation message appears.

  6. Click OK.

  7. After adding the unmanaged or passive device to the rack, perform these device management actions, as needed.

    To Perform these steps
    Delete a device
    1. Right-click the unmanaged or passive device in the rack.

    2. Select Delete.

    Move a device to a different rack unit
    1. Right-click the unmanaged or passive device in the rack and select Cut.

    2. Right-click an empty rack unit and select Paste.

    View device properties
    1. Right-click the unmanaged or passive device in the rack and select Properties.

The unmanaged device is added to Cisco Optical Site Manager and displayed in the Devices section.

What to do next

After adding or modifying the passive unit, verify that it is displayed correctly in the rack view and in the device list.


Add an MPBC device

Add an MPBC device to Cisco Optical Site Manager to enable effective monitoring and management of the device within your optical network.

MPBC devices are compact packet-optical platforms used with the Cisco NCS 1000 series for high-capacity optical transport deployments, enabling pluggable client signal aggregation and service interface flexibility.

The supported models are:

  • MPB-2RU-MLD-1000-1426-1454-N2-C

  • MPB-2RU-MLDS-1000-1400-1410-N2-C

  • MPB-2RU-SRP-3000-1426-1454-N2-C

Table 3. Feature History

Feature Name

Release Information

Description

Support for MPBC Raman Pump Amplifiers

Cisco IOS XR Release 26.1.1

You can now add and manage MPBC devices using the Add Device dialog box. MPBC devices are primarily used for high-power Raman amplification applications in conjunction with the NCS1010 platform.

The Optical Degrees, Internal Patch Cords, and Optical Cross Connections panels now also support MPBC devices.

Before you begin

Log into Cisco Optical Site Manager

Follow these steps to add an MPBC device.

Procedure

  1. Click Devices in the left panel.

  2. In the Devices tab, click the Devices section to expand it.

  3. Click the Add Device icon.

  4. In the Add Device dialog box, perform these steps:

    1. From the Device Type drop-down list, select MPBC.
    2. In the Device Name field, type the name of the device.
    3. Specify the IP Address and SNMP Port.
    4. From the Authorization Group drop-down list, select the SNMP group.
    5. Click Apply.

The MPBC device is added to Cisco Optical Site Manager and displayed in the Devices section.

What to do next

MPBC devices are not added to the rack by default. To add an MPBC device to the rack, follow the steps in Add a chassis.


Manage a device using ios xr CLI

Use this task to manage a device using ios xr CLI.

Table 4. Feature History

Feature Name

Release Information

Description

Direct CLI Access for Managed Devices

Cisco IOS XR Release 25.1.1

You can now directly access the Cisco IOS XR CLI for managed devices from the Devices section.

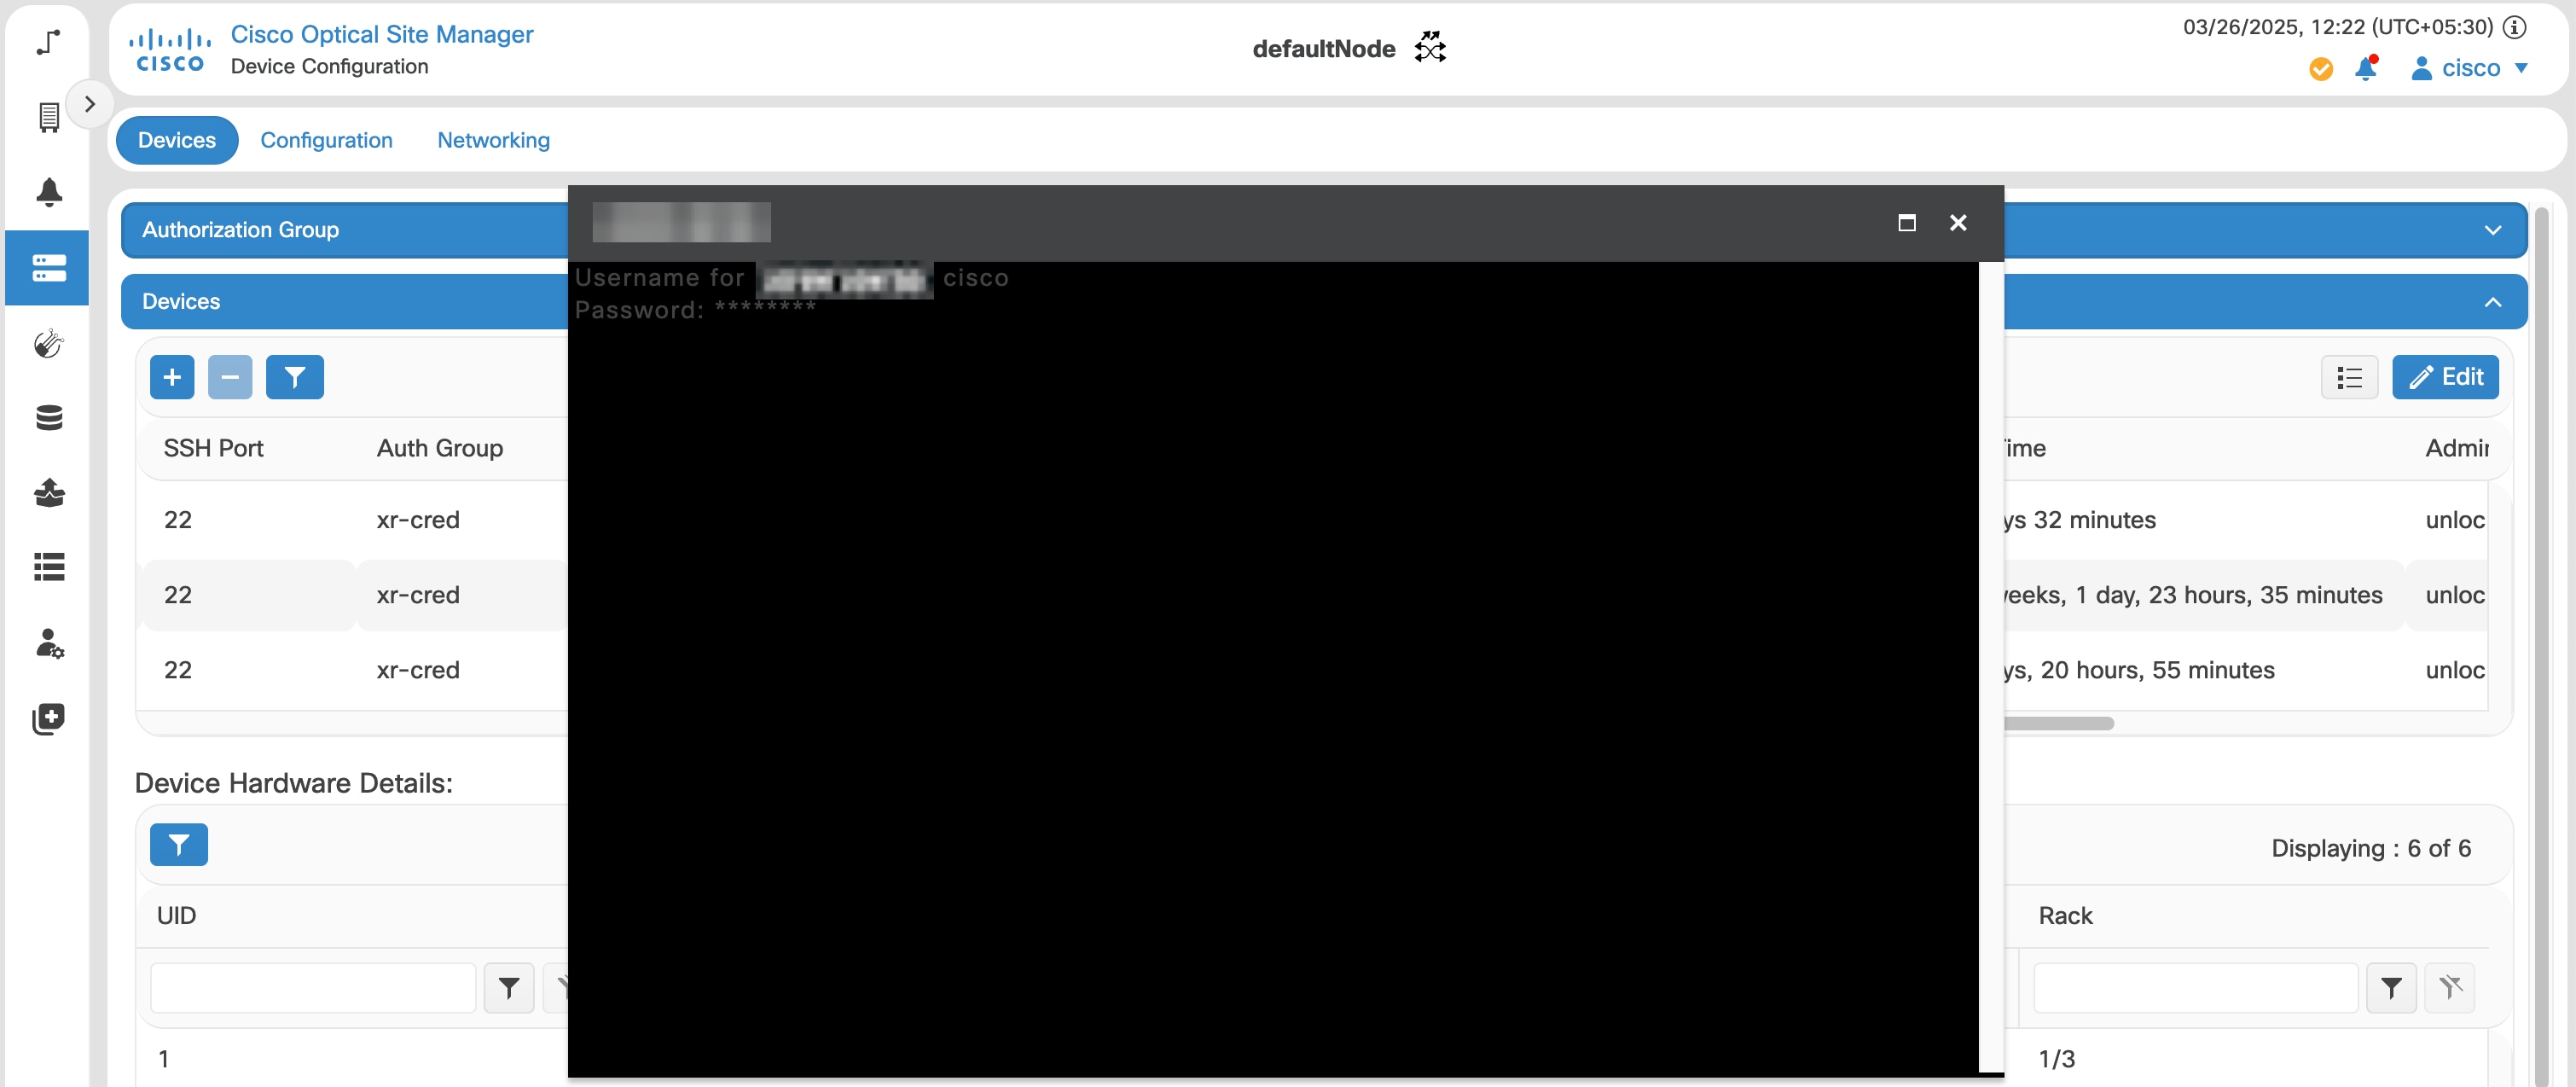
Cisco Optical Site Manager provides direct access to the Cisco IOS XR CLI for managed devices through the Devices section.

Figure 3. Manage a Device Using IOS XR CLI

Before you begin

Log into Cisco Optical Site Manager

Follow these steps to manage a device using ios xr CLI.

Procedure

  1. Click Devices in the left panel.

    The Device Configuration page appears.
  2. In the Devices tab, click the Devices section to expand it.

    A table appears that lists all the devices that are configured.

  3. Click the terminal icon next to the device under the Terminal column.

    The terminal window is displayed, and the system prompts you to enter the username.

  4. Type the username and press Enter.

    The system prompts you to enter the password.
  5. Type the password and press Enter.

The manage a device using ios xr CLI task is complete.


Move a device or view device properties

Manage devices by moving them between rack units or viewing their properties in Cisco Optical Site Manager.

Before you begin

Log into Cisco Optical Site Manager

Follow these steps to move or view properties of a device.

Procedure

  1. Click Devices in the left panel.

  2. In the Devices tab, click the Devices section.

  3. Perform these device management actions as needed.

    To Perform these steps
    Move a device to a different rack unit
    1. Right-click the device in the rack and select Cut.

    2. Right-click an empty rack unit and select Paste.

    View device properties

    Right-click the device in the rack and select Properties.


Delete devices, SNMP group, and authorization groups

Maintain network efficiency and security by regularly deleting obsolete devices, SNMP group, and authorization groups from the application.

Follow these steps to delete devices, SNMP groups, and authorization groups:

Before you begin

Log into Cisco Optical Site Manager

Follow these steps to delete a device, SNMP group, or authorizarion group.

Procedure

  1. Click Devices in the left panel.

  2. Perform these steps as needed.

    To Perform these steps
    Delete a device
    1. Click the Devices section.

    2. Select the check box corresponding to the devices you want to delete.

    3. Click Delete Device(s).

    4. Confirm the action when prompted.

    Delete an SNMP group
    1. Click the SNMP section.

    2. Select the check box corresponding to the SNMP group you want to delete.

    3. Click the - button to delete the SNMP group.

    4. Confirm the deletion.

    Delete an authorization group
    1. Click the Username and Password section.

    2. Select the check box corresponding to the authorization groups you want to delete.

    3. Click the - button to delete the authorization group.

    4. Confirm the action.

    A confirmation message appears.

  3. Click Yes.

The selected device, SNMP group, or autoriazrion group is removed from the system.


Retrieve device diagnostics

Use this task to retrieve device diagnostics.

Retrieve, download, and review diagnostics on the Diagnostics page.

Before you begin

Log into Cisco Optical Site Manager

Follow these steps to retrieve device diagnostics.

Procedure

  1. Click Devices in the left panel.

  2. In the Devices tab, click the Diagnostics section to expand it.

    The configured devices are listed in a table.

  3. Select the Node Diagnostics check box next to the device for which you want to retrieve the diagnostics.

  4. Click Retrieve.

    A confirmation message appears.

  5. Click Yes to proceed.

    A Request Accepted message appears.

  6. Click OK.

    A message appears when the diagnostic action is completed.

  7. Select the check box next to the device for which you want to download the diagnostics and click Download.

    The system downloads a zip file containing the logs.

The downloaded ZIP file contains diagnostic logs, which can be reviewed for troubleshooting, performance monitoring, or compliance purposes.


SOCKS proxy

Socket Secure (SOCKS) fis a proxy protocol developed by the IETF (Internet Engineering Task Force) that enables IP-based applications to connect securely to remote nodes.

Additional information

Limitations

A SOCKS Proxy server has specific limitations when used to connect to remote nodes in a Cisco Optical Site Manager network.

  • Use a SOCKS Proxy server only to connect to remote nodes that are small, such as OLA nodes.

  • A SOCKS Proxy server can serve a maximum of 5 NCS 1000 nodes.


Change the cooling profile control

Use this task to change the cooling profile control.

Cooling profile control lets you manage fan speed based on the line cards in the shelf. The cooling profile can be adjusted to automatic or manual.

Before you begin

Log into Cisco Optical Site Manager

Follow these steps to change the cooling profile control.

Procedure

  1. Click Devices in the left panel.

  2. In the Configuration tab, click the Device Settings section to expand it.

  3. In the Device Settings section, click Edit.

  4. Select the control from the Cooling Profile Control drop-down list.

  5. Click Apply.

    A confirmation message appears.

  6. Click Yes.

The change the cooling profile control task is complete.


Manage a DNS server address

Manage DNS server addresses to update the name-resolution capability of Cisco Optical Site Manager.

Use the DNS Server section in Cisco Optical Site Manager to view, add, or remove DNS server addresses. The table displays all configured addresses and the last update time.

Before you begin

Log into Cisco Optical Site Manager

Follow these steps to add or delete a DNS server address.

Procedure

  1. Click Devices, and then click the Networking tab.

  2. In the DNS Server section, perform the required actions.

    • To add a DNS server address:

      Click the + icon, enter the IP address in the Address field, and click Apply.

      The new address is added to the table.

    • To delete a DNS server address:

      Select the check box for the address you want to delete, and click the - icon.

      The selected address is removed from the table.

    • To refresh the table, click the refresh icon.

The DNS Server table reflects the current DNS server addresses configured in Cisco Optical Site Manager.