Configure onboarding of a Threat Defense cluster to Cloud-Delivered Firewall Management Center using a CLI registration key.
This task enables you to register a Secure Firewall Threat Defense cluster with Cloud-Delivered Firewall Management Center for centralized management and policy enforcement.
The following table provides information about device models that support cluster onboarding and creation on the Cloud-Delivered Firewall Management Center:
|
Secure Firewall Threat Defense Platforms |
Minimum Secure Firewall Threat Defense Version for Cluster Management |
Support cluster creation from Cloud-Delivered Firewall Management Center? |
|---|---|---|
|
VMware, KVM |
7.2.1 |
Yes |
|
AWS, GCP |
7.2.1 |
No |
|
Azure |
7.3 |
No |
|
Secure Firewall 3100 |
7.2.1 |
Yes |
|
Firepower 4100 |
7.2.x |
No |
|
Secure Firewall 4200 |
7.4 |
Yes |
|
Firepower 9300 |
7.2.x |
No |
When you onboard a Secure Firewall Threat Defense cluster to Cloud-Delivered Firewall Management Center, you register only the cluster CONTROL NODE. After the CONTROL NODE registers, Cloud-Delivered Firewall Management Center discovers the DATA nodes in the cluster.
Before you begin
Review these limitations:
-
Firepower 4100 and Firepower 9300 devices must be clustered through the device's Firewall Chassis Manager.
-
Secure Firewall 3100 devices, Secure Firewall 4200 devices, KVM, and VMware environments must be clustered through the Cloud-Delivered Firewall Management Center UI.
-
Azure, AWS, and GCP environment clusters must be created through their own environment and onboarded to Cloud-Delivered Firewall Management Center.
-
Verify that the Secure Firewall Threat Defense virtual devices are successfully configured as a cluster before you register the cluster with Cloud-Delivered Firewall Management Center.
For example, in the Secure Firewall Threat Defense CLI, enter the
show cluster infocommand. Confirm that the output shows the cluster asOn, one unit inCONTROL_NODEstate, and the remaining units inDATA_NODEstate.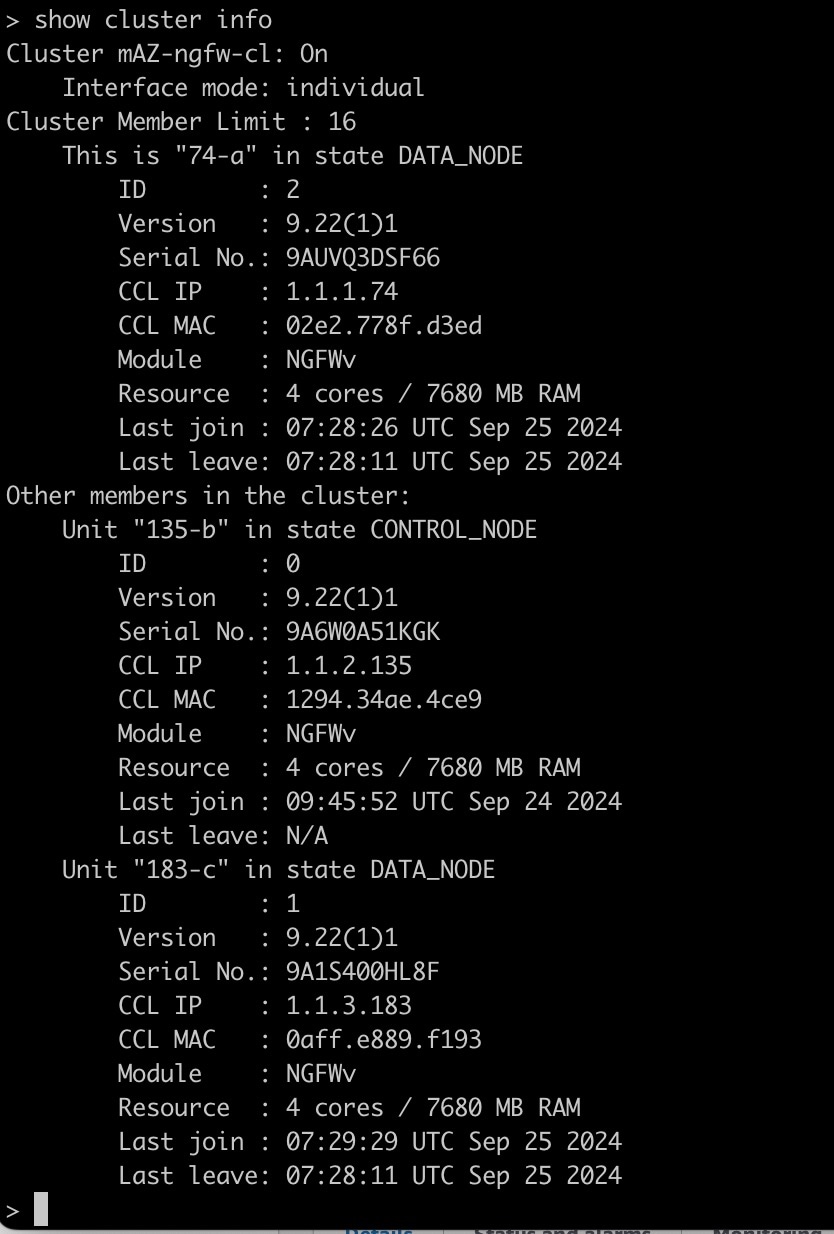
Follow these steps to onboard a Secure Firewall Threat Defense cluster:
Procedure
-
Click Onboard device or service (
 ) icon.