Cisco Optical Network Controller Configuration Guide, Releases 26.x.x

PDF

Cisco Optical Network Controller Configuration Guide, Releases 26.x.x

Set up authentication using LDAP

Want to summarize with AI?

Log in

Use this procedure to set up authentication using LDAP. The task helps you configure server details, bind credentials, and user search attributes for external authentication.


Use this procedure to set up authentication using LDAP in Cisco Optical Network Controller. Complete this task when you need to configure, verify, or manage the related network operation.

Set up user authentication using the Lightweight Directory Access Protocol (LDAP) on Cisco Optical Network Controller can be performed by following these instructions.

Before you begin

You need administrative user privileges to access Cisco Optical Network Controller.

Follow these steps to set up authentication using LDAP:

Procedure

1.

From the Cisco Optical Network Controller home page click Settings.

2.

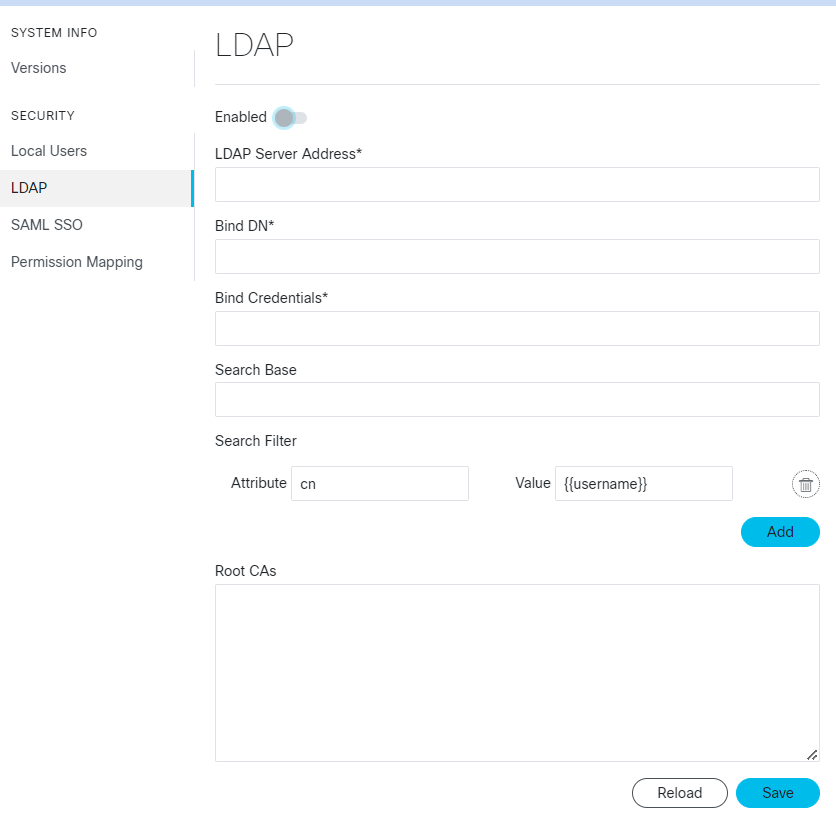
Click LDAP.

Figure 1. LDAP
Screenshot of LDAP
3.

Enable Enabled toggle switch.

4.

Fill in the mandatory fields marked with an asterisk.

Table 1. Madatory LDAP fields

Field

Description

Value

LDAP Server Address

The IP address to your LDAP server.

This ​server address is set by your organization's LDAP administrator.

Bind DN

The Distinguished Name of the user account used to connect to the LDAP directory.

This value is provided by your organization's LDAP administrator.​

Bind Credentials

The password to authenticate your user account.

This value is provided by your organization's LDAP administrator.​

LDAP Server Address, Bind DN and Bind Credentials are mandatory fields. The Search Filter, Search Base and Root CAs are optional fields.

5.

Click Save.

You have successfully completed the LDAP authentication setup.