Learn how to update the web certificate for Crosswork Network Controller by generating and binding a certificate signing request (CSR).
Starting with version 7.0.1, Crosswork Network Controller enables updating web certificates via a Certificate Signing Request (CSR) to enhance trust and security.
Before you begin
-
Updating the certificate can disrupt the existing trust chain of certificates used for client authentication if enabled, so proceed with caution.
-
This process requires the Crosswork server to be restarted, which will take several minutes to complete.
-
Set the AAA mode to Local to enable client authentication.
Procedure
-
Click
 on the web certificate ( Crosswork-Web-Cert ) and select Update Certificate .
The Certificate Update Method window appears.
-
Create a CSR to submit to the Certificate Authority.
- Enter the required relevant values for the fields. Click the
 icon next to the field for more information. The mandatory fields are:
-
Common name (CN): By default, this is the fully qualified domain name (FQDN) of the server, but it can be any unique name that identifies the server. The length should not exceed 64 characters.
-
IP address: This is the Crosswork VIP address used in this deployment. Additional IP addresses should only be added if necessary for certificate validation.
-
Key type: The options are RSA and ECDSA. By default, RSA is selected.
-
Key size (in bits): The options are 2048, 3072, and 4096. By default, 2048 is selected.
-
Key digest: The options are SHA-256, SHA-384, SHA-224, and SHA-512. By default, SHA-256 is selected.
-
- Enter the required relevant values for the fields. Click the
-
After generating the CSR, click Download to download it and use the CSR to get a signed certificate from your CA.
Figure 1. Certificate Signing Request (CSR) window 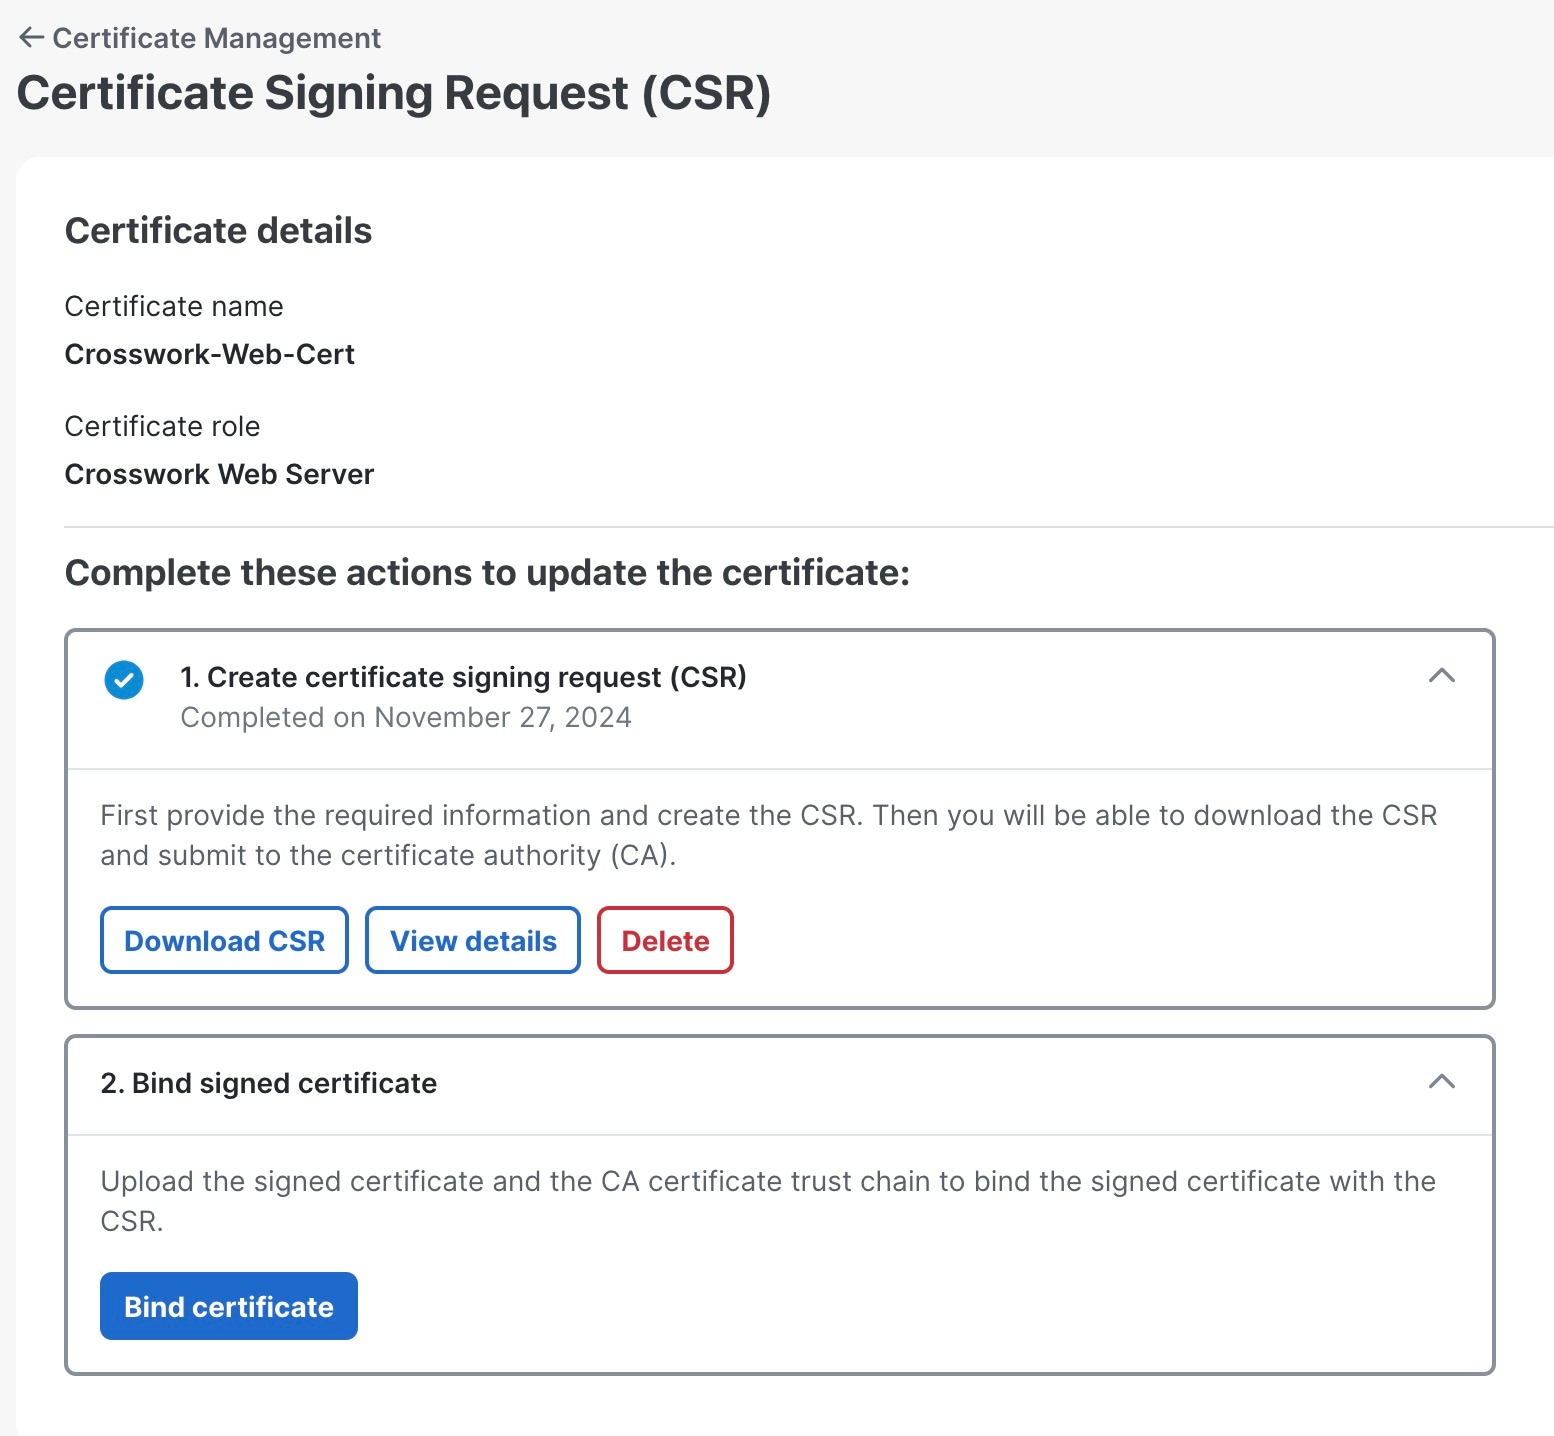
-
Upload the CA-signed certificate and CA certificate trustchain to bind the certificate.
- In the Certificate Signing Request (CSR) window, click Bind certificate .
The Bind signed certificate window is displayed.
Figure 2. Bind signed certificate 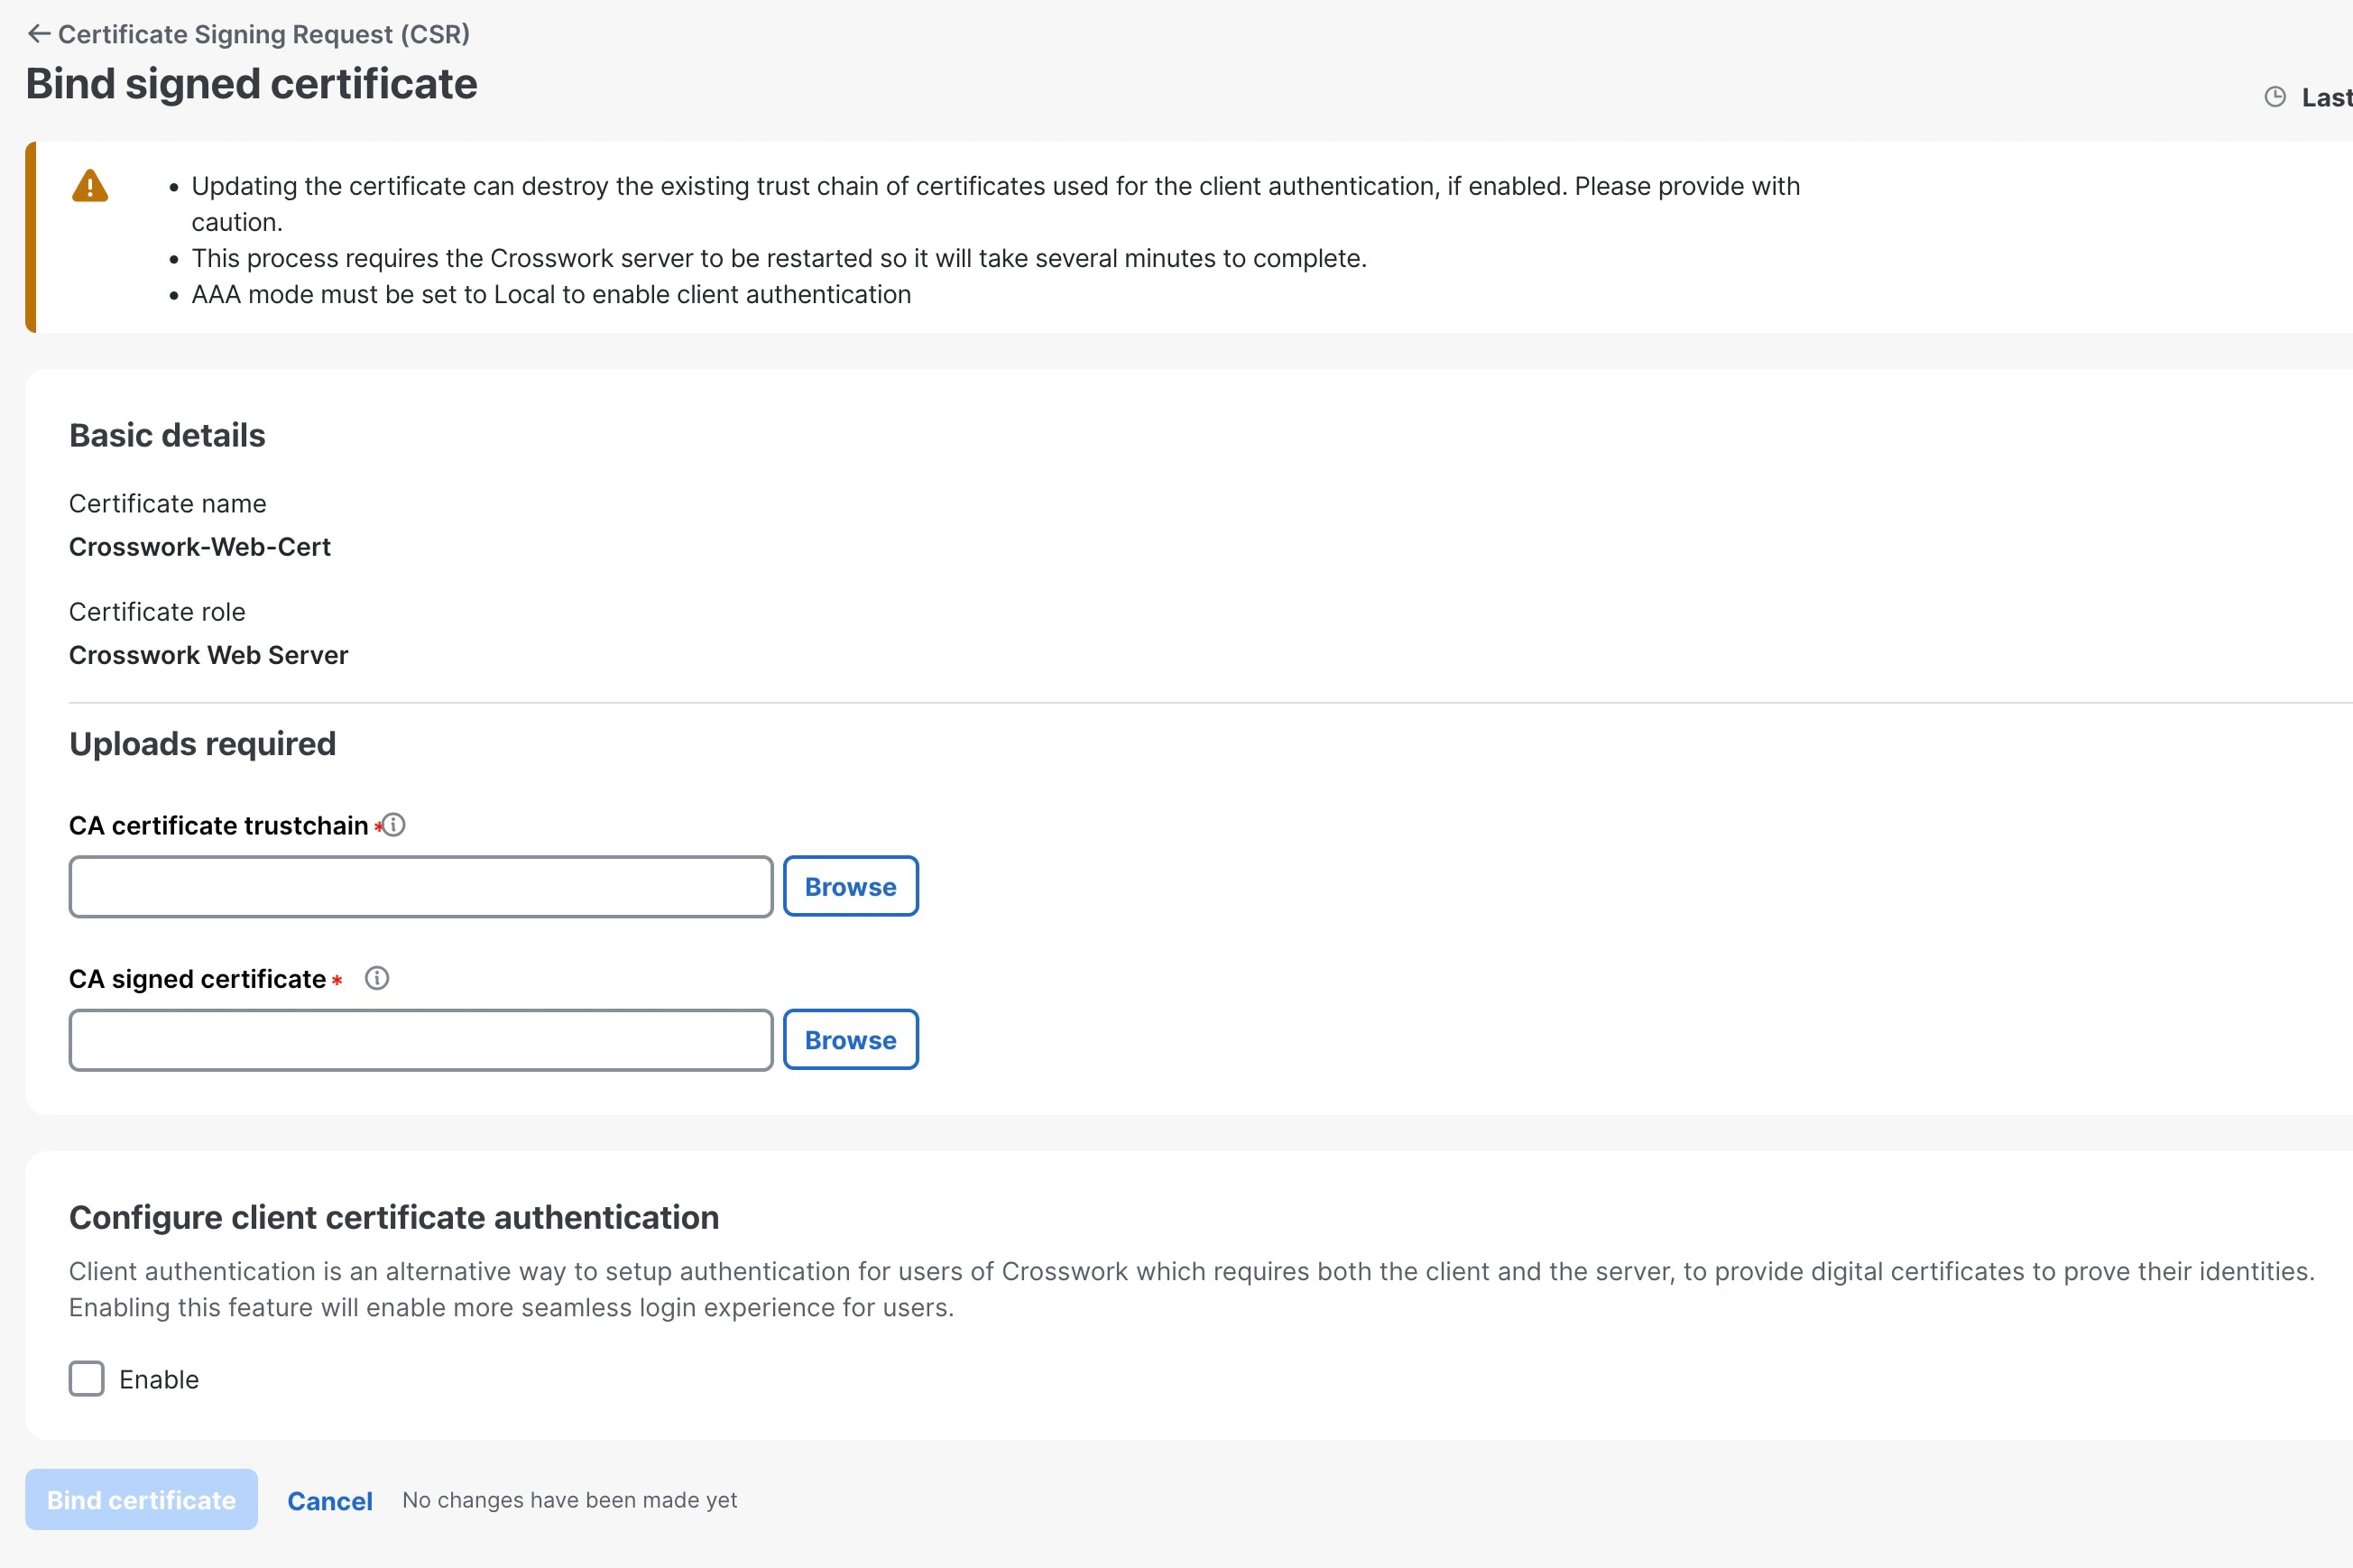
- Upload the relevant data for the fields provided. Click the icon next to the field for more information.
-
CA certificate trustchain: This is the certificate trust chain for the web server certificate obtained from the CA.
-
CA signed certificate: This is the final signed certificate for the web server obtained from the CA.
-
- In the Certificate Signing Request (CSR) window, click Bind certificate .