Cisco Security Cloud Control: Secure Firewall ASA Management

PDF

Cisco Security Cloud Control: Secure Firewall ASA Management

ASA command line interface

Want to summarize with AI?

Log in

An overview of ASA command line interface, including interface names, security levels, IP addressing, VLANs, and enablement options.


You can use the Security Cloud Control Firewall Management command line interface (CLI) for managing or troubleshooting the ASA and other device types.

For more information, see .


Configure ASA Using Security Cloud Control CLI

You can configure an ASA device by running the CLI commands in the CLI interface provided in Security Cloud Control. See ASA command line interface.

Add a New Logging Server

System logging is a method of collecting messages from devices to a server running a syslog daemon. Logging to a central syslog server helps in aggregation of logs and alerts.

For more information, see the 'Monitoring' section of the 'Logging' chapter in the CLI Book1: Cisco ASA Series General Operations CLI Configuration Guide of the ASA version you are running.

Configure the DNS Server

You need to configure DNS servers so that the ASA can resolve host names to IP addresses. You also must configure DNS servers to use fully qualified domain names (FQDN) network objects in access rules.

For more information, see the 'Basic Settings' chapter of the 'Configure the DNS Server' section in CLI Book1: Cisco ASA Series General Operations CLI Configuration Guide of the ASA version you are running.

Add Static and Default Routes

To route traffic to a non-connected host or network, you must define a route to the host or network, either using static or dynamic routing.

For more information, see the 'Static and Default Routes' chapter of CLI Book1: Cisco ASA Series General Operations CLI Configuration Guide.

Configure Interfaces

You can configure the management and data interfaces using CLI commands. For more information, see the 'Basic Interface Configuration' chapter of CLI Book1: Cisco ASA Series General Operations CLI Configuration Guide.


ASA Bulk CLI Use Cases

The following cases are possible workflows you may experience when using Security Cloud Control's bulk CLI function for ASA devices.


Show all users in the running configuration of an ASA and then delete one of the users

Procedure

1.

In the left pane, click Security Devices.

2.

Click the Devices tab to locate the device.

3.

Click the ASA tab.

4.

Search and filter the device list for the devices from which you want to delete the user and select them.

Note

Make sure that the devices you choose are synced. Only the following commands are allowed when the device is not synced: show, ping, traceroute, vpn-sessiondb, changeto, dir, copy, and write.

5.

Click >_Command Line Interface in the details pane. Security Cloud Control lists the devices you chose in the My List pane. If you decide to send the command to fewer devices, uncheck devices in that list.

6.

In the command pane, enter show run | grep user and click Send. All the lines in the running configuration file that contain the string user will be displayed in the response pane. The Execution tab opens to display the devices on which the command was executed.

7.

Click the By Response tab and review the responses to determine which devices have the user that you want to delete.

8.

Click the My List tab and select the list of devices from which you want to delete the user.

9.

In the command pane, enter the no form of the user command to delete user2 and then click Send. For the sake of this example, you are going to delete user2:

no user user2 password reallyhardpassword privilege 10
10.

Look in the history panel for the instance of the show run | grep user command, you used to search for the user name. Select that command, look at the list of devices in the Execution list and select Send. You should see that the username has been deleted from the devices you specified.

11.

If you are satisfied that you have deleted the correct users from the running configuration and that the correct users remain in the running configuration:

  1. Select the no user user2 password reallyhardpassword privilege 10 command from the history pane.

  2. Click the By Device tab and click Execute a command on these devices.

  3. In the command pane, click Clear to clear the command pane.

  4. Enter the command deploy memory and click Send.


Find all SNMP configurations on selected ASAs

This procedure shows you all the SNMP configuration entries in the running configuration of the ASA.

Procedure

1.

In the left pane, click Security Devices.

2.

Click the Devices tab to locate the device.

3.

Click the ASA tab.

4.

Filter and search for the devices on which you want to analyze the SNMP configuration in the running configuration and select them.

Note

Make sure that the devices you choose are synced. Only the following commands are allowed when the device is not synced: show, ping, traceroute, vpn-sessiondb, changeto, and dir.

5.

Click Command Line Interface in the details pane. The devices you chose are in the My List pane. If you decide to send the command to fewer devices, uncheck devices in the list.

6.

In the command pane, enter show run | grep snmp and click Send. All the lines in the running configuration file that contain the string snmp will be displayed in the response pane. The Execution tab opens to display the devices on which the command was executed.

7.

Review the command output in the response pane.


ASA Command Line Interface Documentation

Security Cloud Control fully supports the ASA command line interface. We provide a terminal-like interface within Security Cloud Control for users to send ASA commands to single devices and multiple devices simultaneously. The ASA command line interface documentation is extensive. Rather than recreating parts of it in the Security Cloud Control documentation, here are pointers to the ASA CLI documentation on Cisco.com.

ASA Command Line Interface Configuration Guides

Starting with ASA version 9.1, the ASA CLI Configuration Guide is broken into three separate books:

  • CLI Book 1: Cisco ASA Series General Operations CLI Configuration Guide

  • CLI Book 2: Cisco ASA Series Firewall CLI Configuration Guide

  • CLI Book 3: Cisco ASA Series VPN CLI Configuration Guide

You can reach the ASA CLI Configuration Guides on Cisco.com by navigating, Support > Products by Category > Security > Firewalls > ASA 5500 > Configure > Configuration Guides.

A Few Specific ASA Command Line Interface Configuration Guide Sections

Filtering show and more Command Output. You can learn about filtering show command output by using regular expressions in CLI Book 1: Cisco ASA Series General Operations CLI Configuration Guide under Filter show and more Command Output.


ASA Command Reference

The ASA Command Reference Guide is an alphabetical listing of all the ASA commands and their options. The ASA command reference is not version specific. It is published in four books:

  • Cisco ASA Series Command Reference, A - H Commands

  • Cisco ASA Series Command Reference, I - R Commands

  • Cisco ASA Series Command Reference, S Commands

  • Cisco ASA Series Command Reference, T - Z Commands and IOS Commands for the ASASM

You can reach the ASA Command Reference Guides on Cisco.com by navigating, Support > Products by Category > Security > Firewalls > ASA 5500 > Reference Guides > Command References > ASA Command References.


Manage the Device Configuration

The ASA stores its configuration in a single configuration file. You can view the configuration file on Security Cloud Control and perform a variety of operations on it.


Compare ASA Configurations Using Security Cloud Control

Use this procedure to compare the configurations of two ASAs.

Procedure

1.

In the left pane, click Security Devices.

2.

Click the Devices tab to locate the ASA device or the Templates tab to locate the ASA model device.

3.

Click the ASA tab.

4.

Filter your device list for the devices you want to compare.

5.

Select two of your ASAs. Their status does not matter. You are comparing the configurations of the ASAs stored on Security Cloud Control.

6.

In the Device Actions pane on the right, click Compare.

7.

In the Comparing Configurations dialog, click Next and Previous to skip through the differences, highlighted in blue, in the configuration files.


Restore an ASA Configuration

If you make a change to an ASA's configuration, and you want to revert that change, you can restore an ASA's past configuration. This is a convenient way to remove a configuration change that had unexpected or undesired results.

About Restoring an ASA Configuration

Review these notes before restoring a configuration:

  • Security Cloud Control compares the configuration you choose to restore with the last known configuration deployed to the ASA, it does not compare the configuration you choose to restore with a configuration that is staged but not deployed to the ASA. If you have any undeployed changes on your ASA and you restore a past configuration, the restore process will overwrite your undeployed changes and you will lose them.

  • Before you can restore a past configuration, the ASA can be in a Synced or Not Synced state but if the device is in a Conflict Detected state, the conflict must be resolved before you restore a past configuration.

  • Restoring a past configuration overwrites all intermediate deployed configurations changes. For example, restoring the configuration from 1/31/2023 in the list below overwrites the configuration changes made on 2/15/2023.

  • Clicking the Next and Previous buttons will move you through the configuration file and highlight the configuration file changes

  • If you originally applied a change request label to your configuration changes, that label appears in the Restore Configuration list.

Figure 1. ASA Restore Configuration Screen

ASA Restore Configuration Screen

How Long are Configuration Changes Kept?

You can restore an ASA configuration that is 1 year old or less. Security Cloud Control restores configuration changes logged in its changelog. The change log records changes every time a configuration change is written to or read from an ASA. Security Cloud Control stores 1 year's worth of changelogs and there is no limitation on the number of the backups made within the previous year.


How to Restore an ASA Configuration

Procedure

1.

In the left pane, click Security Devices.

2.

Click the ASA tab.

3.

Select the ASA whose configuration it is you want to restore.

4.

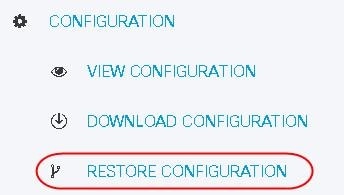
In the Management pane, click Restore.

5.

In the Restore page, select the configuration you want to revert to.

For example, in the picture above, the configuration from 1/31/2023 is selected.

6.

Compare the "Latest Running Configuration Verified by Security Cloud Control" and the "Selected Configuration from <date>" to ensure you want to restore the configuration displayed in the Selected Configuration from <date> window. Use the Previous and Next to compare all the changes.

7.

Click Restore, this stages the configuration in Security Cloud Control. In the Security Devices page, you see that the configuration status of the device is now "Not Synced."

8.

Click Deploy Changes... in the right-hand pane to deploy the changes and sync the ASA.


Troubleshooting

How do I recover changes I lost but wanted to keep?

Procedure

1.

In the left pane, click Security Devices.

2.

Click the Devices tab to locate the device or the Templates tab to locate the model device.

3.

Click the ASA tab.

4.

Select the required device.

5.

Click Change Log in the right pane.

6.

Review the changes in the change log. You may be able to reconstruct your lost configurations from those records.


Edit a Complete Device Configuration File

For these devices, you can view the device configuration file on Security Cloud Control and perform a variety of operations on it depending on the device.

Currently, only ASA configuration files can be edited directly using Security Cloud Control.

Caution

This procedure is for advanced users who are familiar with the syntax of the device's configuration file. This method makes changes directly to copy of the configuration file stored on Security Cloud Control.

Procedure

1.

In the left pane, click Security Devices.

2.

Click the Devices tab to locate the device or the Templates tab to locate the model device.

3.

Click the ASA tab.

4.

Select the device whose configuration it is you want to edit.

5.

In the Management pane on the right, click Configuration.

6.

In the Device Configuration page, click Edit.

7.

Click the editor button on the right and select the Default text editor, Vim, or Emacs text editors.

8.

Edit the file and save the changes.

9.

Return to the Security Devices page and preview and deploy the change.