Cisco Secure Access for Government Help

PDF

Cisco Secure Access for Government Help

Deploy Virtual Appliances

Want to summarize with AI?

Log in

Describes deploying virtual appliances. Secure Access requires that you deploy two Virtual Appliances (VAs) for a given site. It is critical that these VAs are not cloned or copied in any way.

Secure Access requires that you deploy two Virtual Appliances (VAs) for a given site. It is critical that these VAs are not cloned or copied in any way.

Guidelines

  • Set up and configure your virtual appliances manually. Do not copy or clone your virtual appliances. Cloning your virtual appliances may disrupt syncs with Secure Access if you have to restore the VAs.

  • VAs do not cache any data that would require backing up. Deploy two VAs on a site in order to avoid downtime if one of the VAs is not available.

  • You should understand how to deploy a virtual machine in your environments.


Deploy the Secure Access Virtual Appliances


Deploy VAs in Hyper-V for Windows 2012 or Higher

Deploy Cisco Secure Access Virtual Appliances in Microsoft Hyper-V for Windows Server 2012 or higher.

Note
You must deploy at least two Virtual Appliances (VAs) in a Secure Access Site. It is critical that these VAs are not cloned or copied in any way. Configure and set up each VA manually.
Configure Authentication for the Virtual Appliances

Before you can download the Virtual Appliance images in Secure Access, you must configure your Secure Access API keys for the Virtual Appliances in your organization. Secure Access enables the Download Components button only after the API keys for the VAs are configured. For more information, see Configure Authentication for Virtual Appliances.

Prerequisites

  • Full Admin user role. For more information, see Manage Accounts.

  • For information about the network requirements for deploying VAs, see Prerequisites for Virtual Appliances.

  • One of the following Windows Server operating systems:

    • Windows Server 2012, SP1, or R2 (Standard or Datacenter), 2016 or 2019 with Hyper-V role.

    • Hyper-V Server 2012, 2012 R2, 2016 or 2019.

  • Basic knowledge of Hyper-V.

Note
Secure Access does not support Virtual Appliances that are deployed using System Center Virtual Machine Manager (SCVMM).

Procedure


Step 1 - Download and Extract the Hyper-V Installer

Procedure

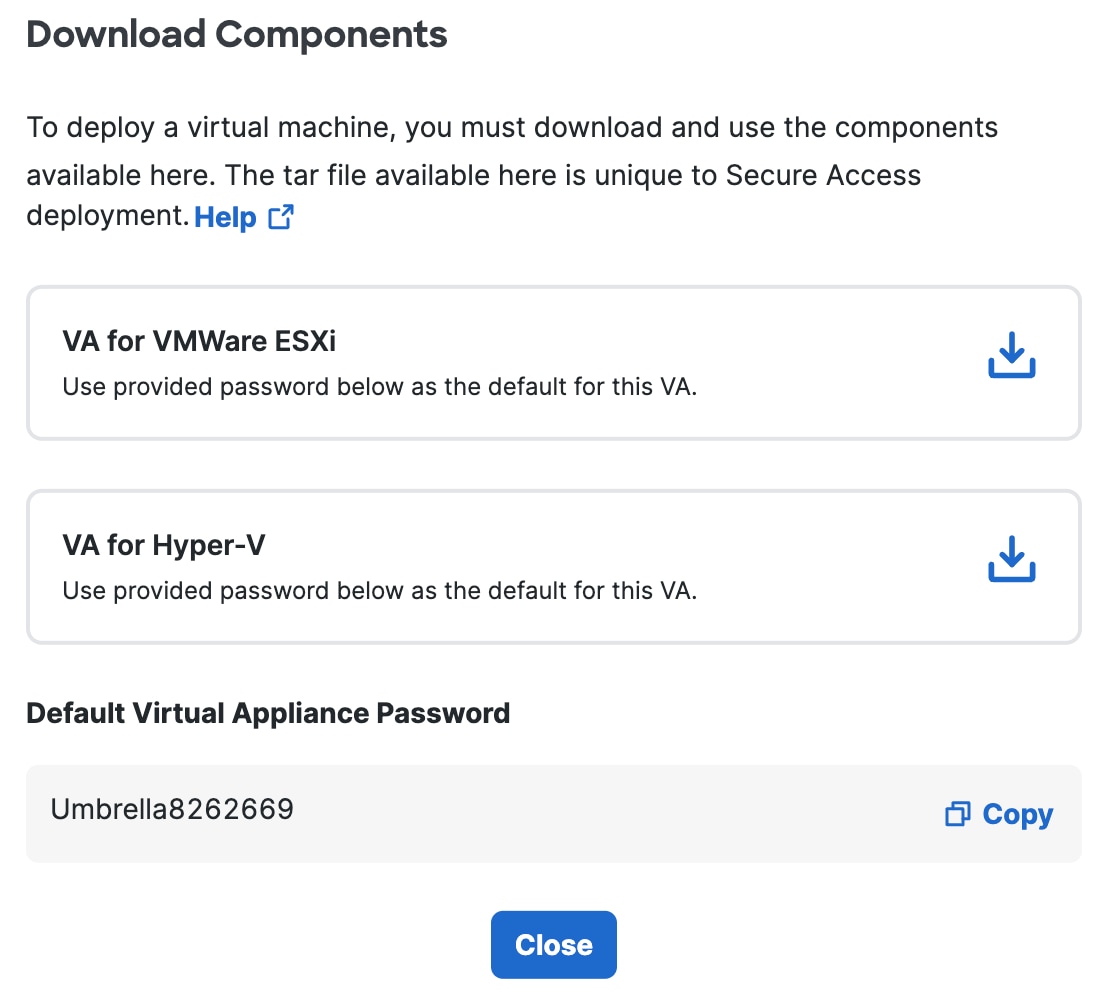
  1. Navigate to Connectors > DNS Forwarders and click Download Components.


    The Secure Access Forwards Main interface.
  2. Click Download for VA for Hyper-V.


    The Secure Access Download Va Images interface.

    Secure Access generates and downloads a tar file unique to your deployment. This tar file includes:

    • a zip file containing the virtual hard disks that need to be deployed on Hyper-V

    • a signature file

    • a Cisco public certificate to validate the signature

    • a readme file

  3. Extract the contents of the tar file using the command tar -xvf <tar filename> -C <Destination folder>. To verify the integrity of the downloaded file, validate the signature by following the instructions provided in the readme file. When successful, you will see a message saying “Verified OK."

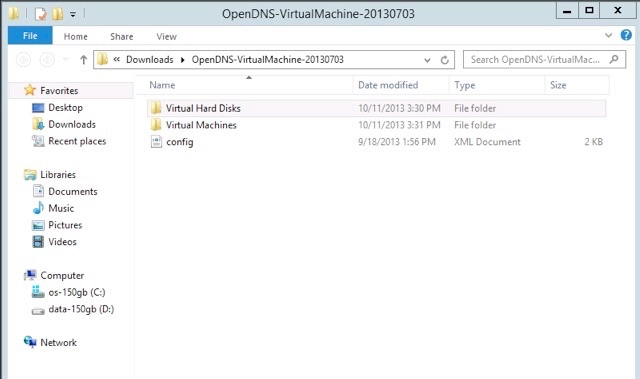
  4. Extract the .zip file. You'll find two folders—Virtual Hard Disks and Virtual Machines—and a config file.


    The 9v Vd9cra Qxm Al8t15u LD Extraction 1 interface.

Step 2 – Import the Virtual Appliance

Note
Using Windows 2012 R2 or Higher Versions

Microsoft has introduced a "Generation 2" style of VM profile on Hyper-V for Windows 2012 R2 and higher versions. As a result, the import steps below will fail with the error: "Hyper-V did not find virtual machines to import from location [path]"

You will need to create a new virtual machine as "Generation 1", then skip to 3. Copy and Rename Image Files.

For more information about Generation 1 vs. Generation 2, see Generation 2 Virtual Machine Overview.

Note
Step 2 in this procedure applies to Windows 2012 only, and not Windows 2012 R2 .

Procedure

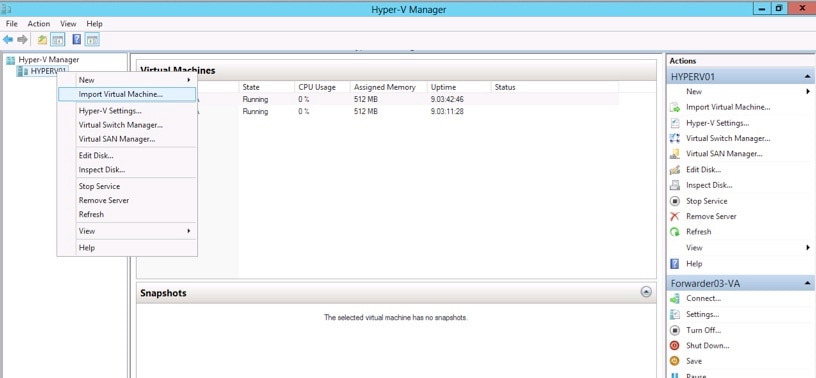
  1. Select your Hyper-V server, right-click its name and select Import Virtual Machine from the menu.

    The I Opeoyk Qq5ar Vszjsm Ef Import Virtual Machine interface.
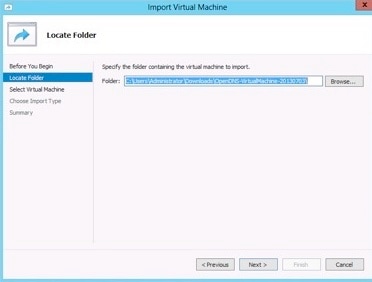
  2. Navigate to the extraction folder from your download, select that folder to import, and then click Next.

    The Ge Ryta Rckyn Bnuzemrwj Selectfolder interface.
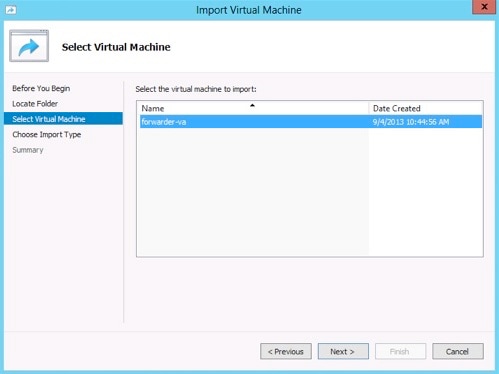
  3. Select forwarder-va as the virtual machine to import and click Next.

    The Cmh Zyp Bj T4 Krv KE0 I7uw Forward Va interface.
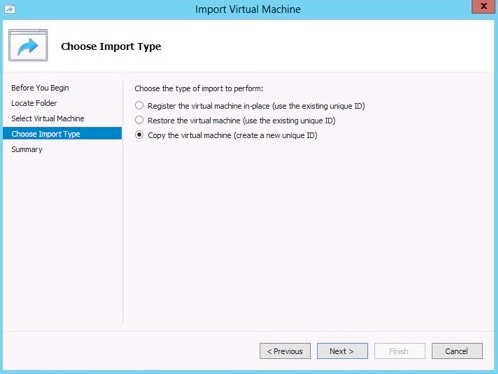
  4. Select Copy the virtual machine (create a new unique ID) and click Next.

    The Xccui9z Uqei3i Q2 Qknf5 Copyvm interface.
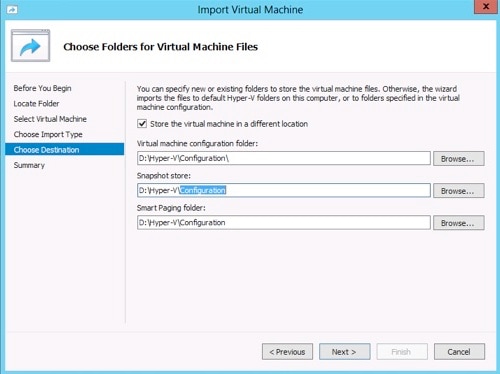
  5. Choose destination folders to install to. By default, these are the Hyper-V Configuration folders, but you can choose another folder.

    The U D2 Yw Jyk Qb SZY5 Exps ZV Selectlocation interface.
    Note
    If selecting a different folder, pick a drive with sufficient space and create a folder with a specific name for the virtual machine, such as \opendnsforwarder-1. This can be helpful to ensure you're able to distinguish between the two virtual appliances in your file structure.
  6. Click Finish.


Step 3 – Copy and Rename Image Files

Procedure

  1. In Windows Explorer, navigate to the \Virtual Hard Disks subfolder within the extracted download folder created in Step 1.

  2. Copy the two files from that location to the Virtual Machine Configuration Folder you specified in the previous step.

  3. The two files, dynamic and forwarder-va. must be renamed per the VA that is being installed. For example, rename:

    dynamic to Dynamic-VA-1

    and

    forwarder-va to Forwarder-VA-1

    If configuring your second VA, change the number accordingly. This can help ease the management of multiple virtual appliances and avoids conflicts between filenames when configuring your second VA.


Step 4 – Select Network Adapter

Procedure

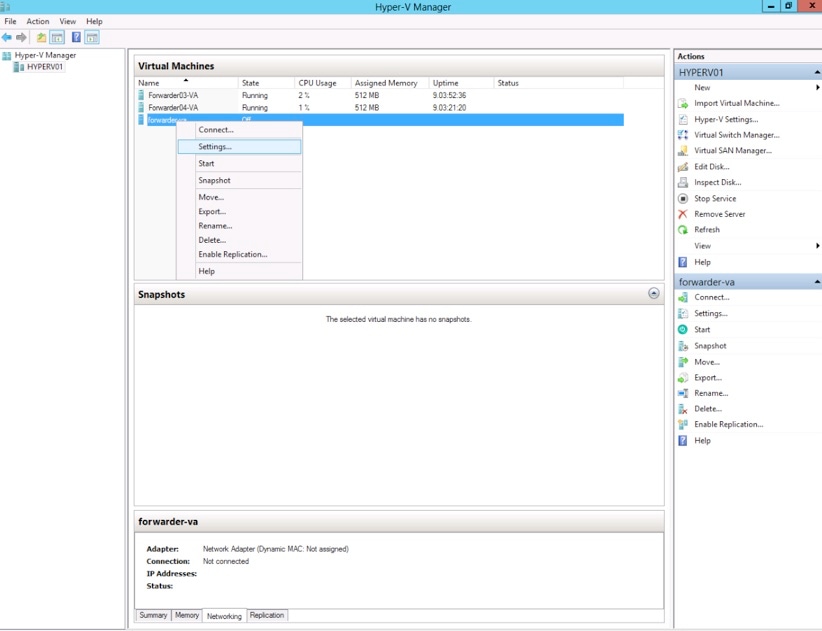
  1. In the Hyper-V Manager, select the virtual machine you've created, right-click and choose Settings.


    The T Dts Rvt Atoe7orsb Ubc Q Va Settings interface.
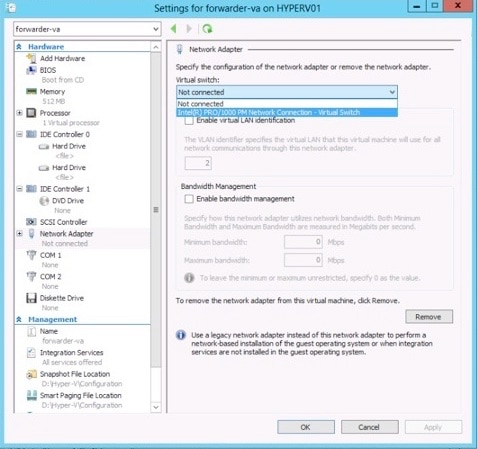
  2. Under Hardware, select Network Adapter, and then assign a virtual switch that has internet access.


    The Aa T2 Gneh Sv21f Ja Azu6j Forward Network interface.

Step 5 – Select Hard Drive

Procedure

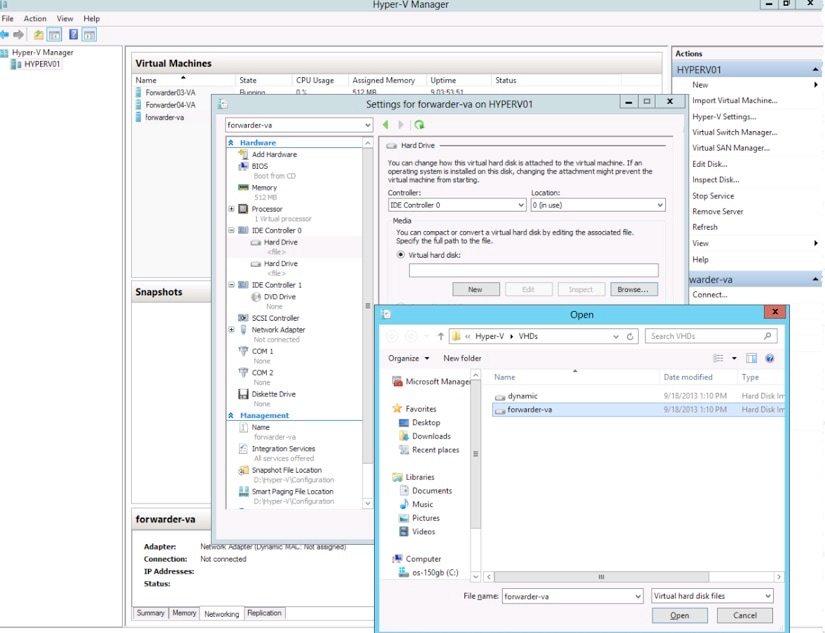
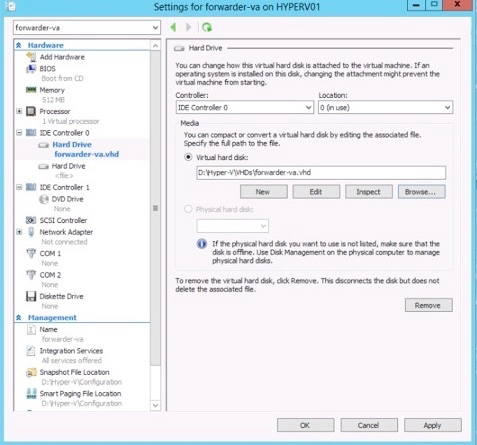
  1. In Settings for Hardware, select the hard drives.  Ideally, they should be under the same IDE controller. For hard drive settings, browse to the Virtual Machine Configuration Folder and the first hard drive should be set to the forwarder file (Forwarder-va) and the second hard drive should be set to the dynamic (Dynamic) file.


    The Jvrf Axl Zqe Onxua Ck8 Ng Import Hard Drive interface.

    The S8k8 QWB3 Tr So F3or5z XI Virtual Harddisk1 interface.
  2. Click Apply.


Step 6 – Power on the Virtual Machine


Step 7 – Repeat for the Second Virtual Appliance

Two VAs are required per Umbrella site. It is critical that these VAs are not cloned or copied in any way. Each VA must be set up and configured manually.
To build your second VA, repeat procedures starting at 2. Import Virtual Appliance.


Deploy VAs in VMware

Deploy Cisco Secure Access Virtual Appliances (VAs) in VMware.

Note
You must deploy at least two Virtual Appliances (VAs) in a Secure Access Site. It is critical that these VAs are not cloned or copied in any way. Configure and set up each VA manually.
Configure Authentication for the Virtual Appliances

Before you can download the Virtual Appliance images in Secure Access, you must configure your Secure Access API keys for the Virtual Appliances in your organization. Secure Access enables the Download Components button only after the API keys for the VAs are configured. For more information, see Configure Authentication for Virtual Appliances.

Prerequisites

  • Full Admin user role. For more information, see Manage Accounts.

  • For information about the network requirements for deploying VAs, see Prerequisites for Virtual Appliances.

  • Basic knowledge of VMware ESXi. For more information, see the VMware documentation.


Procedure


Step 1 - Download OVF Template

Procedure

  1. Navigate to Connect > DNS Forwarders and click Download Components.


    The Secure Access Forwards Main interface.
  2. Click Download for VA VMWare ESXi.


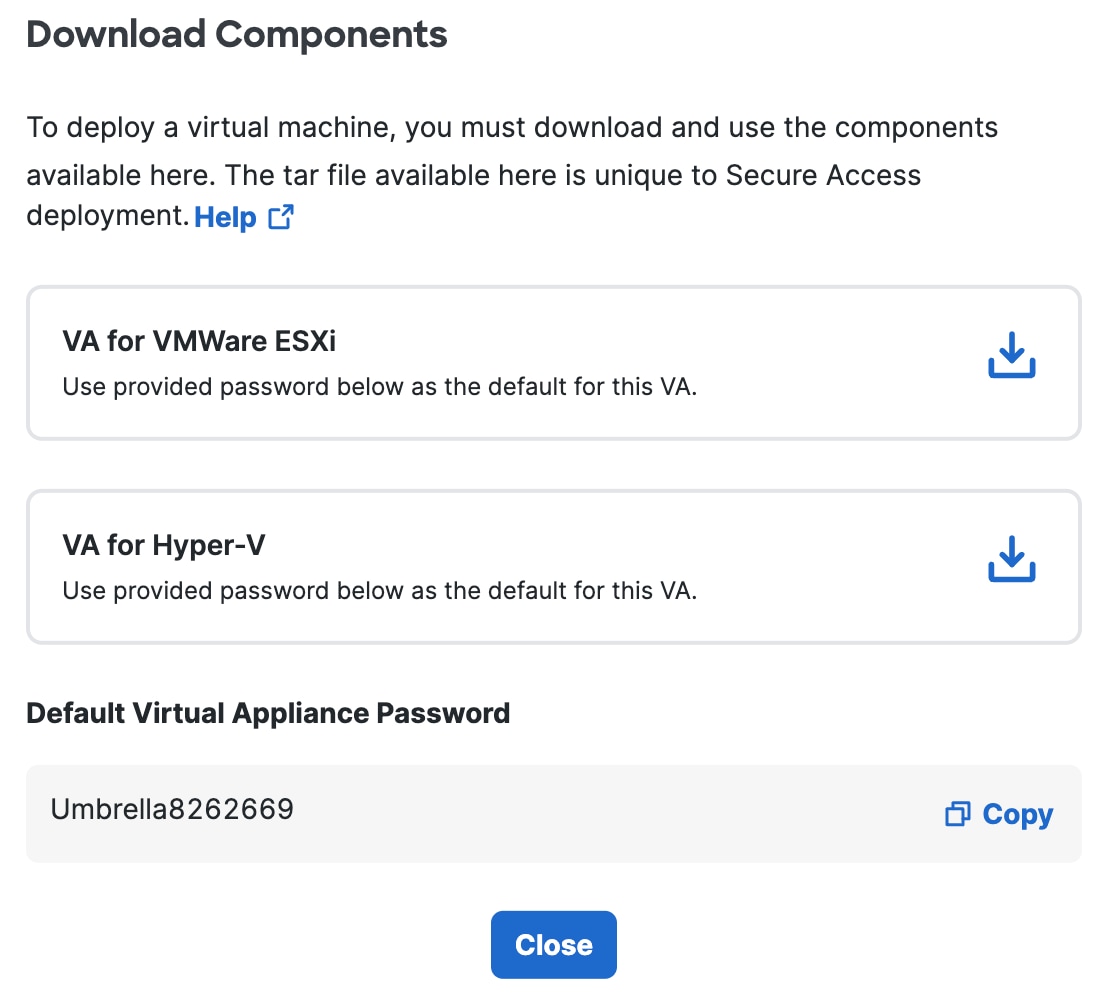
    The Secure Access Download Va Images interface.

    Umbrella generates and downloads a .tar file unique to your deployment. This tar file includes:

    • an .ovf template containing the virtual hard disks that need to be deployed on VMware

    • a signature file

    • a Cisco public certificate to validate the signature

    • a readme file

  3. Extract the contents of the tar file using the command tar –xvf <tar filename> -C <Destination folder>.

    To verify the integrity of the downloaded file, validate the signature by following the instructions provided in the readme file. On successful signature validation, you should see a message saying “Verified OK."


Step 2 – Deploy OVF Template

Procedure

  1. Log into your VMware vSphere client and select the File tab.

  2. Click Deploy OVF Template, choosing the downloaded .ova template.


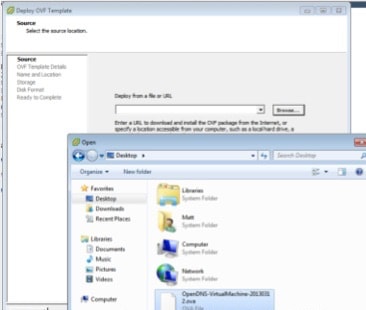
    The Lzax Gm Frf2o7g N3 Dha MQ Find Ova File interface.
  3. Follow the deployment wizard prompts, but be sure to follow these steps:

    • For the source, browse to the .ova file you just downloaded.

    • Specify a unique name and location for your VA.
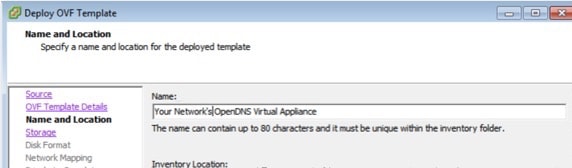
      The Engu5 RL5 R0qx Wow8 Vn5f Name and Location interface.
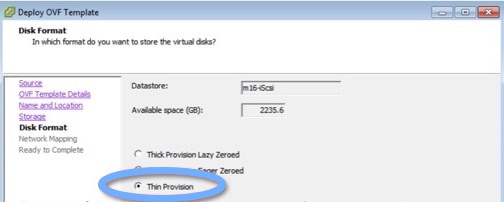
  4. Select the disks appropriate to your environment. It is recommended to select Thin Provision for the disk format, but it is not mandatory.


    The Disk Format Thin interface.
  5. Select or map a network.


    The Wtqe9 Wacrxchp Wcto3 Th Network Mapping interface.
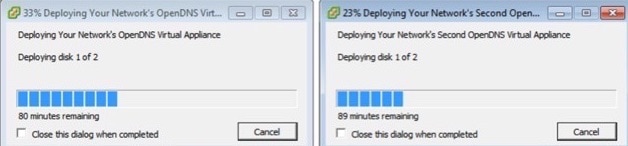
  6. Click Finish.The system begins to deploy the VA. During the deployment, subsequent prompts update you about the status of the deployment.


Step 3 – Deploy a Second Virtual Appliance

Procedure

While the first VA is deploying, repeat the previous two steps to configure your second VA.
Note

Two VAs are required per Umbrella site. It is critical that these VAs are not cloned or copied in any way. Each VA must be set up and configured manually.

The Pubnph V1 Sg G4 Nam Wyj RU Deploy 2 VA interface.

Step 4 – Power on the Virtual Machines

Procedure

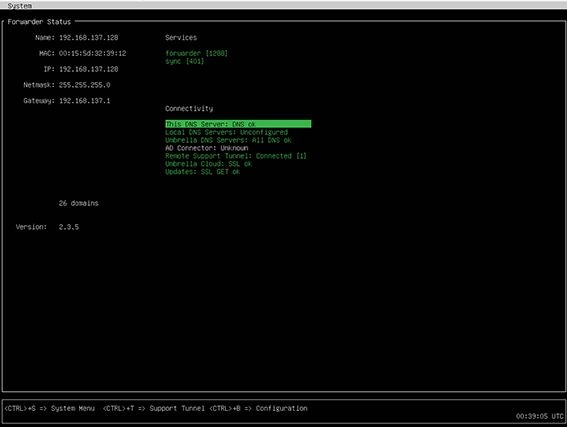
If the deployment succeeded, you'll see the VA console screen. For information about configuring VAs, see Configure Virtual Appliances.