Cisco Catalyst Center ITSM Integration Guide, Release 3.2.x

PDF

Catalyst Center integration with a generic REST endpoint

Want to summarize with AI?

Log in

Overview

This section describes the procedure for configuring Catalyst Center to publish network and automation events to a generic REST endpoint, detailing steps like bundle configuration and event settings.

This table describes how to configure Catalyst Center integration with a generic REST endpoint. You may wish to publish Network and Automation events to a generic REST endpoint outside a configuration management database. This can improve performance, security, or event response.

Table 1. Catalyst Center to generic REST endpoint integration procedure
Step Description

Step 1

Install or upgrade to the latest Catalyst Center release.

For information about installing Catalyst Center, see the Cisco Catalyst Center Installation Guide.

Step 2

Enable and configure bundles using the Bundles window in the Catalyst Center GUI.

For more information about configuring bundles, see Cisco Catalyst Center Platform User Guide.

Step 3

In the configuration slide-in pane, click Destination to receive events.

Step 4

To send the data to a different staging table in ServiceNow, select Generic REST Endpoint in ServiceNow as the destination to receive events.

Determine the generic REST endpoint, which serves as the destination URI for publishing Network and Automation events.

Step 5

Configure network event settings in Event Settings.

The Catalyst Center platform and ITSM integration allows you to select from a list of events specific to the configured bundles, to create and modify the severity of events, incidents, or problems to match business priorities.

For information, see Configure event settings.

Step 6

Configure the integration settings. From the main menu, choose System > Settings > System Configuration > Integration Settings. Enter your callback URL hostname or IP address.

Step 7

Access the generic REST endpoint in ITSM and review the network event data that has been posted using the REST APIs in this procedure. Then review and manipulate this data according to your business or network needs.


Configure network events

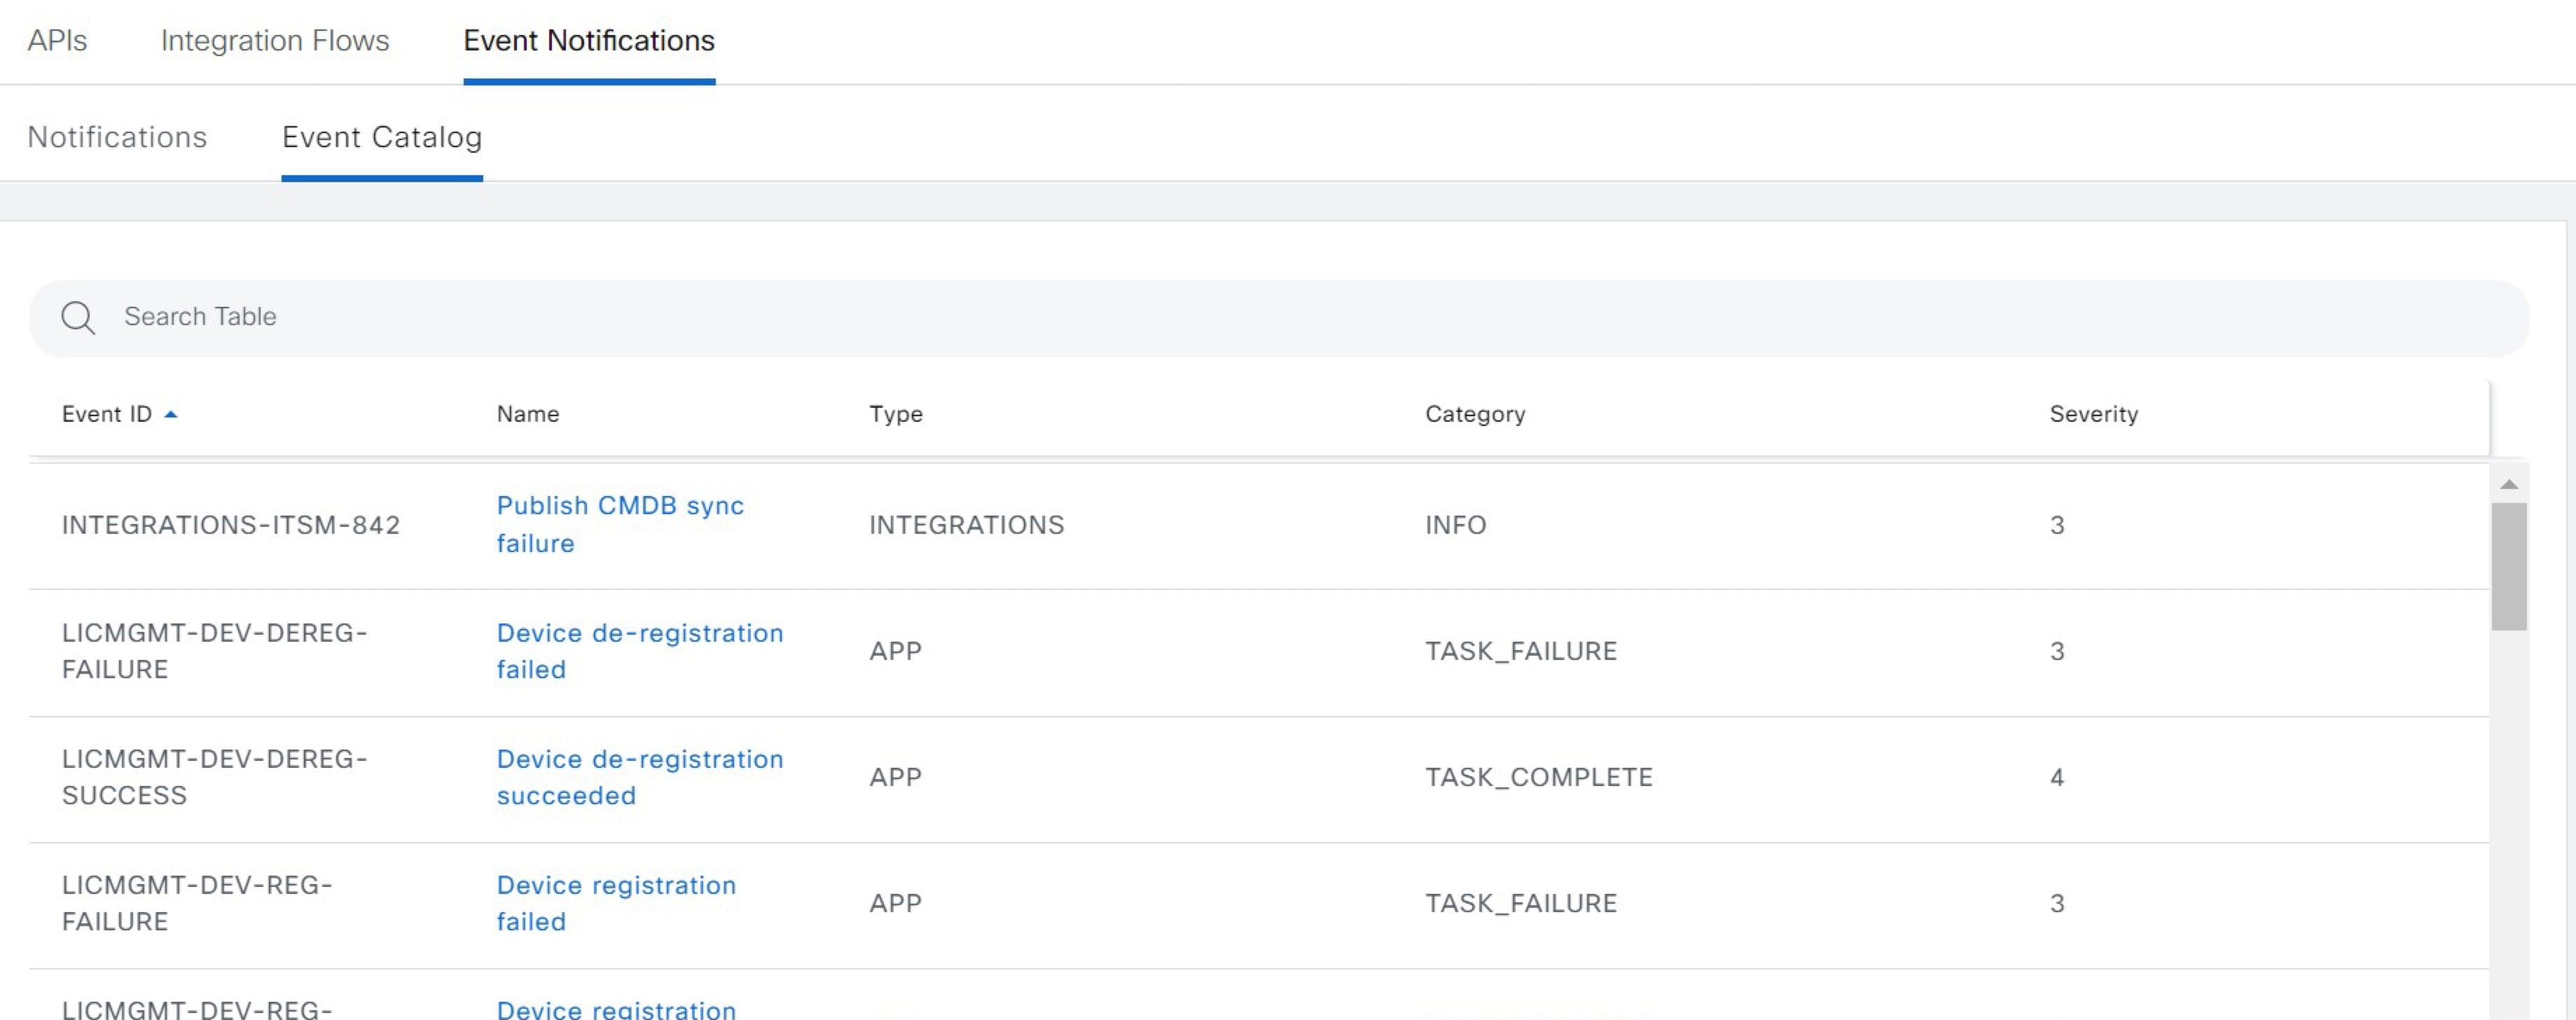
You can subscribe to specific events that may occur in your network. After you subscribe, you receive a notification whenever the network event occurs. You subscribe to an event using the Event Notifications window in the Catalyst Center platform GUI.

Figure 1. Catalyst Center platform Events window
Events Window, showing Event Catalog.

Before you begin

  • To subscribe to network events, you must configure the required destination to deliver event notifications from the Catalyst Center platform. To access the Destinations window, click the menu icon and choose System > Settings > External Services > Destinations.

  • You must have the appropriate permissions to perform the tasks in this procedure. For information about role-based access control for the Catalyst Center platform, see the Cisco Catalyst Center Platform User Guide.

Procedure

1.

From the main menu, choose Platform > Developer Toolkit > Event Notifications.

The Event Notifications window opens.

2.

Click the Notifications tab to view the notification tiles.

Each notification is represented by a tile and contains a link to view notification details. From the CHANNELS area in the left pane, click the radio button next to the notification channels to view the existing tiles with the selected channel.

3.

Follow the steps in the Create a New Notification wizard to create a new notification.

Click Let's Do It to go directly to the workflow.

4.

In the Select Site and Events window, select a site from the drop-down list and select the Network event or events that support the required notification channel.

5.

Click Next.

The Select Channels window opens.

6.

In the Select Channels window, select the notification channel.

Click Next to configure the values in the corresponding Settings window.

7.

Click Next.

The Name and Description window opens.

8.

Click Next.

The Summary window opens.

9.

In the Summary window, review the configuration settings.

To make any changes, click Edit.

10.

Click Finish.

The Done! Your new notification is complete window appears.

For more information, see Work with Event Notifications in the Cisco Catalyst Center Platform User Guide and Create an Event Notification in the Cisco Catalyst Center User Guide.


Configure event settings

Using the Catalyst Center platform and ITSM integration, you can select from a list of possible issues to create or modify the severity of events, incidents, or problems in ServiceNow to match your business priorities. You perform these tasks in the Events Settings window.

Note

For this release, you configure only network assurance events in Event Settings; SWIM events are not available for configuration.

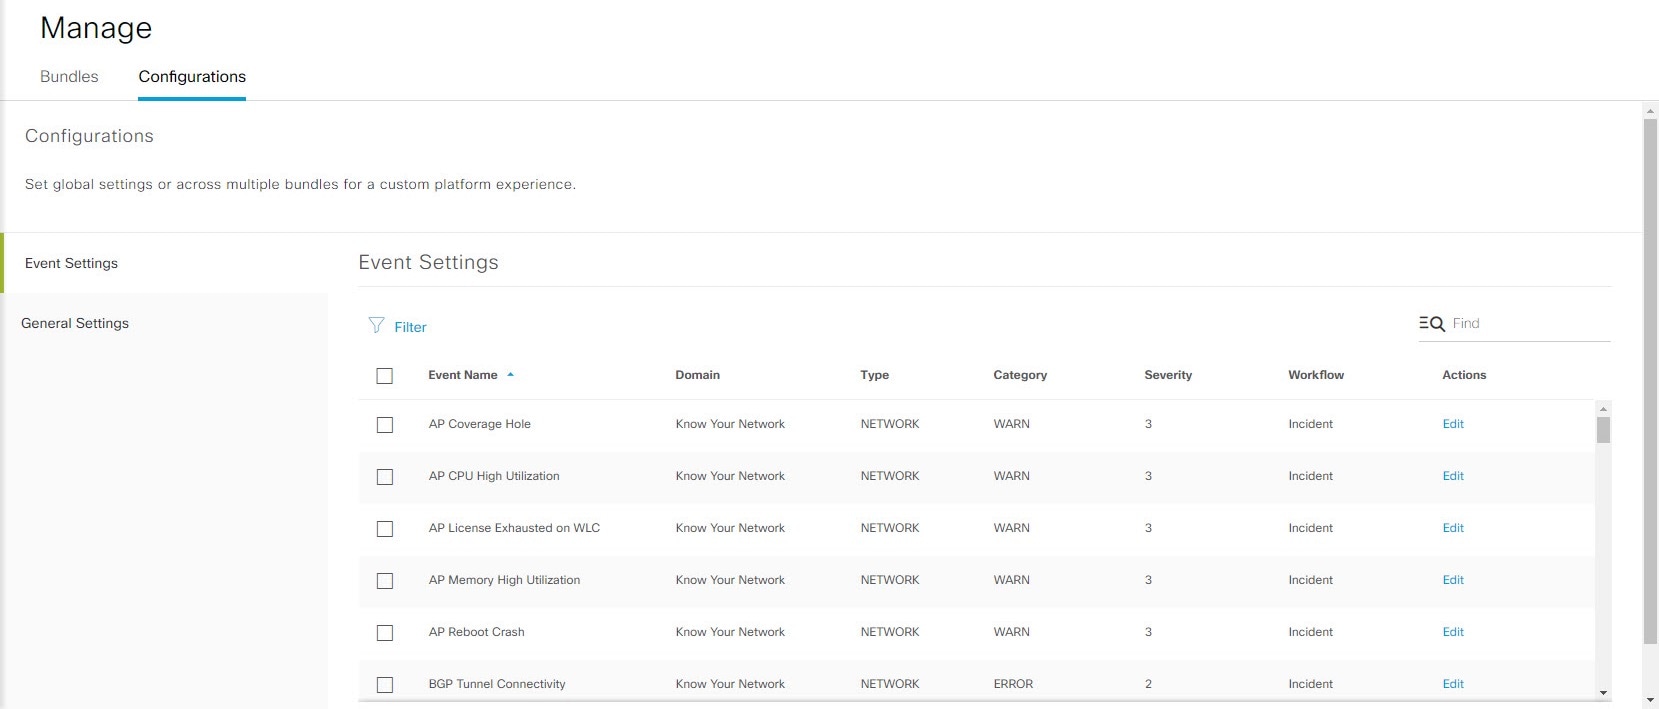
The Event Settings window and its functionality are applicable only to configure events for an ITSM integration and not for events that are configured to other destinations. To configure events to a webhook or other destination, click the link at the top of the columns. Use the Event Notifications window to configure events for an email, webhook, or SNMP trap.

Figure 2. Events Settings window
Event Settings window showing the available options and features

Before you begin

You must have the appropriate permissions to do the tasks as described in this procedure. For information about role-based access control for the Catalyst Center platform, see the Cisco Catalyst Center Platform User Guide.

Procedure

1.

From the main menu, choose Platform > Manage > Configurations.

A Configurations window that contains an Events Settings section opens.

2.

Review the information presented in the Event Settings section:

  • Event Name: Name of the Catalyst Center event.

  • Domain: Domain of the Catalyst Center event.

  • Type: Network, App, System, Security, or Integrations.

  • Category: Error, Warn, Info, Alert, Task Progress, or Task Complete.

  • Severity: 1 to 5.

    Note

    Severity 1 is the most important or critical priority. You can edit the severity level of each event.

  • Workflow: Incident, Problem, Event, or RFC (Request for Change).

  • Actions: Edit.

To change what is displayed in the table, click the Filter icon or enter a keyword in the Find field. For example, to view all network notifications, enter Network in the Find field. To view all severity 1 notifications, enter 1 in the Find field.

3.

To edit an event, click Edit in the Actions column.

To change a setting, click the down-arrow and then select a value from the available options.

4.

Click the box next to the event name to enable notifications.

You must select the events in the Event Settings section to configure events for an ITSM integration. This enables notifications through Catalyst Center when the event occurs in the future.

5.

Click Save.