Cisco Small Business RV Series Routers
| Status |
End of Sale
EOL Details
|
|---|---|
| Series Release Date | 25-NOV-2008 |
| End-of-Sale Date | 28-OCT-2021 |
| End-of-Support Date | 31-OCT-2026 |
|
This product is supported by Cisco, but is no longer being sold.
|
|
- US/Canada 800-553-2447
- Worldwide Support Phone Numbers
- All Tools
 Feedback
 Feedback
-
Top Search Results
Key Information
Customers Also Viewed
Saved Content
-
You can now save documents for easier access and future use. Saved documents for this product will be listed here, or visit the My Saved Content page to view and manage all saved content from across Cisco.com.
Log in to see your Saved Content.
Recent Security Notices
- 11-Jun-2025
- 07-Mar-2025
- 02-Oct-2024
- 02-Oct-2024
- 25-Sep-2024
Document Categories
-
Data Sheets and Product Information
- Cisco RV340, RV345, RV345P, and RV340W Dual WAN Security Router Data Sheet
- Cisco RV260 VPN Routers Data Sheet
- Cisco RV160 VPN Router and RV160W Wireless-AC VPN Router Data Sheet
- Cisco RV340W Dual WAN Gigabit Wireless AC VPN Router Data Sheet
- Cisco RV132W ADSL2+ Wireless-N VPN Router Data Sheet
- Cisco RV134W VDSL2 Wireless-AC VPN Router Data Sheet
- Cisco RV130 VPN Router – Without Web Filtering Data Sheet
- Cisco RV340, RV345, and RV345P Dual WAN Gigabit VPN Routers Data Sheet
- Cisco RV042G Dual Gigabit WAN VPN Router Data Sheet
- Cisco RV215W Wireless-N VPN Router Data Sheet (Chinese) (PDF - 927 KB)
- Cisco RV215W Wireless-N VPN Router Data Sheet (Italian) (PDF - 1 MB)
- Cisco RV215W Wireless-N VPN Router Data Sheet (French) (PDF - 575 KB)
- Cisco RV215W Wireless-N VPN Router Data Sheet (Spanish) (PDF - 1 MB)
- Cisco RV215W Wireless-N VPN Router Data Sheet (German) (PDF - 521 KB)
- Cisco RV215W Wireless-N VPN Router Data Sheet
Data Sheets
- End-of-Sale and End-of-Life Announcement for the Cisco 1-Year Security for RV340 and RV345
- End-of-Sale and End-of-Life Announcement for the Cisco Small Business RV340 and RV345 Series
- End-of-Sale and End-of-Life Announcement for the Cisco RV 160, RV260, RV345P, RV340W, RV260W, RV260P and RV160W VPN Router
- End-of-Sale and End-of-Life Announcement for the Cisco RV132W and RV134W Wireless-N VPN Router
- End-of-Sale and End-of-Life Announcement for the Cisco RV042 and RV042G VPN Router (all models)
- End-of-Sale and End-of-Life Announcement for the Cisco RV320 and RV325 Dual Gigabit WAN VPN Router
- End-of-Sale and End-of-Life Announcement for the Cisco Small Business RV Series Routers (selected models)
- End-of-Sale and End-of-Life Announcement for the Cisco Anyconnect Server License for RV Router
- End-of-Sale and End-of-Life Announcement for the Cisco RV110W Wireless-N VPN Firewall (Specific SKUs)
- End-of-Sale and End-of-Life Announcement for the Cisco RV320 and RV325 Dual Gigabit WAN VPN Router with Web Filtering
- End-of-Sale and End-of-Life Announcement for the Cisco RV320 and RV325 Dual Gigabit WAN VPN Router (China SKUs)
- End-of-Sale and End-of-Life Announcement for the Cisco RV042 Dual WAN VPN Router
- End-of-Sale and End-of-Life Announcement for the Cisco RV042 10/100 4-Port VPN Router
- End-of-Sale and End-of-Life Announcement for the Cisco RV110W Wireless-N VPN Firewall
- End-of-Sale and End-of-Life Announcement for the Cisco RV042 Dual WAN VPN Router (Argentina)
End-of-Life and End-of-Sale Notices
-
Security Notices
- Multiple Cisco Products Unauthenticated Remote Code Execution in Erlang/OTP SSH Server: April 2025
- Cisco Small Business RV016, RV042, RV042G, RV082, RV320, and RV325 Routers Vulnerabilities
- Cisco Small Business RV340, RV340W, RV345, and RV345P Dual WAN Gigabit VPN Routers Privilege Escalation and Remote Command Execution Vulnerabilities
- Cisco Small Business RV042, RV042G, RV320, and RV325 Routers Denial of Service and Remote Code Execution Vulnerabilities
- Multiple Cisco Products Web-Based Management Interface Privilege Escalation Vulnerability
- Cisco RV340 and RV345 Dual WAN Gigabit VPN Routers Authenticated Remote Code Execution Vulnerability
- Cisco Small Business RV016, RV042, RV042G, RV082, RV320, and RV325 Routers Cross-Site Scripting Vulnerability
- Cisco Small Business RV110W, RV130, RV130W, and RV215W Routers Stack Overflow Vulnerability
- Cisco Small Business RV016, RV042, RV042G, RV082, RV320, and RV325 Routers Remote Command Execution Vulnerability
- Cisco Small Business RV320 and RV325 Dual Gigabit WAN VPN Routers Command Injection Vulnerabilities
- Cisco Small Business RV016, RV042, RV042G, RV082 , RV320, and RV325 Routers Cross-Site Scripting Vulnerabilities
- Cisco RV340, RV340W, RV345, and RV345P Dual WAN Gigabit VPN Routers Arbitrary File Upload Vulnerability
- Cisco RV340, RV340W, RV345, and RV345P Dual WAN Gigabit VPN Routers Remote Code Execution and Denial of Service Vulnerability
- Cisco Small Business RV160 and RV260 Series VPN Routers Remote Command Execution Vulnerability
- Cisco RV132W and RV134W Remote Code Execution and Denial of Service Vulnerability
Security Advisories, Responses and Notices
-
Release and Compatibility
-
Applicable to Multiple Models
- Cisco RV34xx USB Compatibility Matrix (PDF - 133 KB)
- Cisco RV26xx USB Compatibility Matrix (PDF - 161 KB)
- Cisco RV130x VPN Router USB Compatibility Matrix (PDF - 523 KB)
- Cisco RV132W/RV134W USB Modem Compatibility Matrix (PDF - 151 KB)
-
Cisco RV215W Wireless-N VPN Router
- Cisco RV215W VPN Router USB Compatibility Matrix (PDF - 636 KB)
Compatibility Information
- Open Source Used In Cisco RV34x Routers 1.0.03.29 (PDF - 6 MB)
- Release Notes for Cisco RV34xx Router up to Firmware Version up to 1.0.03.29 (PDF - 252 KB)
- Open Source Used In Cisco RV16x RV26x Routers 1.0.01.07-10 (PDF - 5 MB)
- Release Notes for Cisco RV160x and RV260x Router Firmware Version up to1.0.01.10 (PDF - 195 KB)
- Open Source Used In Cisco RV34x Routers 1.0.03.26-28 (PDF - 6 MB)
- Open Source Used In Cisco RV16x RV26x Routers 1.0.01.07-09 (PDF - 5 MB)
- Release Notes for Cisco RV34xx Firmware Version (1.0.03.28-1.0.00.33) (PDF - 185 KB)
- Release Notes for Cisco RV160 and RV260 Series Routers up to Firmware V1.0.01.09 (PDF - 126 KB)
- Release Notes for Cisco RV160 and RV260 Series Routers up to Firmware V1.0.01.08 (PDF - 121 KB)
- Release Notes for Cisco RV160 and RV260 Series Routers up to Firmware V1.0.01.07 (PDF - 112 KB)
- Release Notes for Cisco RV160 and RV260 Series Routers up to Firmware V1.0.01.05 (PDF - 94 KB)
- Release Notes for Cisco RV160 and RV260 Series Routers up to Firmware V1.0.01.04 (PDF - 92 KB)
- Release Notes for Cisco RV132W Firmware Version 1.0.1.15 (PDF - 71 KB)
- Open Source Used In Cisco RV16x RV26x Routers 1.0.01.03 (PDF - 5 MB)
- Release Notes for Cisco RV160 and RV260 Series Routers up to Firmware V1.0.01.03 (PDF - 91 KB)
Release Notes
-
-
Reference
-
Applicable to Multiple Models
-
Cisco RV134W VDSL2 Wireless-AC VPN Router
- Open Source Used In Cisco RV134W 1.0.1.x (PDF - 2 MB)
- Open Source Used In Cisco RV134W 1.0.0.x (PDF - 2 MB)
-
Cisco RV132W ADSL2+ Wireless-N VPN Router
- Open Source Used In Cisco RV132W 1.0.1.8 (PDF - 2 MB)
- Open Source Used In Cisco RV132 1.0.0.x (PDF - 2 MB)
Licensing Information
-
Cisco RV042 Dual WAN VPN Router
-
Cisco RV082 Dual WAN VPN Router
-
Cisco RV220W Wireless Network Security Firewall
- Easy and secure remote access with Cisco QuickVPN (PDF - 325 KB)
Technical References
-
-
Design
-
Applicable to Multiple Models
- ACL Best Practices on an RV34x Series Router
- New to Cisco Business: How to Download and Upgrade Firmware on any Device
- Cisco AnyConnect Secure Mobility Client Features, Minimum Release Requirements, License Requirements, and Supported Operating Systems
- Cisco AnyConnect Secure Mobility Client Supported Features for Android Devices
- Cisco AnyConnect Secure Mobility Client Supported Features for Apple iOS Devices
- Cisco AnyConnect Secure Mobility Client Modules, Minimum Release Requirements, License Requirements, and Supported Operating Systems
- Use TheGreenBow VPN Client to Connect with RV34x Series Router
- Dongle Support for the RV130 and RV130W Multifunction VPN Routers
- Get to know the RV130 Multifunction VPN Router with Web Filtering and RV130W Wireless Multifunction VPN Router with Web Filtering
- Get to Know the RV042 and RV042G VPN Routers
-
Cisco RV345P Dual WAN Gigabit POE VPN Router
-
Cisco RV340 Dual WAN Gigabit VPN Router
-
Cisco RV340W Dual WAN Gigabit Wireless-AC VPN Router
- Product Specifications for the RV134W VDSL2 Wireless-AC VPN Router
- Product Specifications for the RV132W ADSL2+ Wireless-N VPN Router
Design TechNotes
-
-
Install and Upgrade
- Regulatory Compliance and Safety Information—Cisco RV260 VPN Router (PDF - 3 MB)
- Cisco RV160W Quick Start Guide (Japanese) (PDF - 338 KB)
- Cisco RV260P Quick Start Guide (Japanese) (PDF - 302 KB)
- Cisco RV260 Quick Start Guide (Italian) (PDF - 226 KB)
- Cisco RV260 Quick Start Guide (French) (PDF - 229 KB)
- Regulatory Compliance and Safety Information—Cisco RV160W VPN Router (PDF - 3 MB)
- Cisco RV260 Quick Start Guide (Japanese) (PDF - 218 KB)
- Cisco RV160 Quick Start Guide (PDF - 262 KB)
- Cisco RV160 Quick Start Guide (Japanese) (PDF - 342 KB)
- Cisco RV260W Quick Start Guide (Japanese) (PDF - 348 KB)
- Cisco RV260 Quick Start Guide (German) (PDF - 226 KB)
- Cisco Smart Software Licensing for the RV340 Series VPN Routers (PDF - 350 KB)
- Cisco RV260W Quick Start Guide (Portuguese) (PDF - 273 KB)
- Cisco RV260W Quick Start Guide (Italian) (PDF - 273 KB)
- Cisco RV260W Quick Start Guide (French) (PDF - 273 KB)
Install and Upgrade Guides
-
Applicable to Multiple Models
- RV34x: Installing and Using AnyConnect on Ubuntu Desktop
- RV34x: Install Cisco AnyConnect Secure Mobility Client on a Mac Computer
- Installing and Using AnyConnect on Ubuntu Desktop using the User Interface
- AnyConnect: Installing a Self-Signed Certificate as a Trusted Source
- RV34x: Install Cisco AnyConnect Secure Mobility Client on a Windows Computer
- Firmware Upgrade on RV016, RV042, RV042G, and RV082 VPN Routers
- Firmware/Language Upgrade on RV130 and RV130W Using the Web Interface
- VLAN Best Practices and Security Tips for Cisco Business Routers
- Smart Account Licensing and Tokens
- SFP Module Support List for RV160x and RV260x Devices (PDF - 521 KB)
- Upgrade firmware on RV160x and RV260x routers
- Configure Access Rules on RV160 and RV260 Series Routers
- Configuring Dynamic DNS on the RV160 and RV260 Routers
- Configuring Initial Setup Wizards on RV160X and RV260X Series Routers
- AnyConnect Client Licensing
- Configure Automatic Updates on the RV34x Series Router
- Add Vonage as a New Service on RV016, RV042, RV042G and RV082 VPN Routers
- Installing Postfix Mail Server on a Raspberry Pi
Install and Upgrade TechNotes
-
Configuration
- Configure Custom Port for RAVPN on FTD Managed by FMC
- Configure Basic Firewall Settings on the RV34x Series Router
- Total Network Configuration: RV345P and Cisco Business Wireless using the Mobile Application
- Total Network Configuration: RV345P and Cisco Business Wireless using the Web UI
- Register a Smart Software License on an RV34x Series Router
- Configure Multiple SSIDs on a Network
- Upgrade Firmware on an RV34x Series Router
- Total Network Configuration: RV260P with Cisco Business Wireless and the Web UI
- Total Network Configuration: RV260P with CBW and the Cisco Business Mobile App
- Internet Access Policy Configuration on RV215W and RV130W
- Configuring Port Settings on the RV160 and RV260 Routers
- Configuring Static Routing on the RV160 and RV260
- Site-to-Site VPN with Amazon Web Services
- Clone the MAC Address of a Third-Party Router to an RV160 or RV260 Router
- Configuring Shrew Soft VPN client to connect to RV34X Series Router
Configuration Examples and TechNotes
-
Applicable to Multiple Models
Configuration Guides
-
Maintain and Operate
-
Applicable to Multiple Models
- Cisco RV132W/RV134W Router Command Line Interface Guide (PDF - 596 KB)
- Cisco RV132W/RV134W Administration Guide (PDF - 1000 KB)
- Cisco RV0xx Series Administration Guide (PDF - 2 MB)
-
Cisco RV215W Wireless-N VPN Router
- Cisco RV215W Administration Guide (PDF - 1 MB)
-
Cisco RV110W Wireless-N VPN Firewall
- Cisco RV110W Administration Guide (PDF - 1 MB)
End-User Guides
-
Applicable to Multiple Models
- Cisco RV160x Administration Guide (PDF - 2 MB)
- Cisco RV260x Administration Guide (PDF - 2 MB)
- Cisco RV340x Administration Guide (English) (PDF - 2 MB)
-
Cisco RV215W Wireless-N VPN Router
- Cisco RV215W Administration Guide (PDF - 1 MB)
-
Cisco RVL200 4-Port SSL/IPsec VPN Router
Maintain and Operate Guides
- FAQ: PCI Compliance for Cisco RV Series Routers
- New to Cisco Business: Some Guidance for Newbies
- Schedule Reboot in RV Series Routers
- Cisco Business: Glossary of New Terms
- Managing URL Access on Cisco Business Gear
- New to Cisco Business: Equipment and Basic Network Glossary
- RV260 Webroot Subscription FAQ
- Webroot Subscription for RV260 Routers
- Cisco Smart Software Licensing Frequently Asked Questions (FAQs)
- Product ID Decoder - Routers
- Best Practices for Setting Static IP Addresses on Cisco Business Hardware
- Inter-VLAN Routing on an RV34x Router with Targeted ACL Restrictions
- How to Purchase and Set Up Web Filter Licensing on the RV34x Series Routers
- Wireless Performance Tips RV160W RV260W Devices
- View Port Statistics on the RV110W
Maintain and Operate TechNotes
-
-
Troubleshooting
- Understand and Troubleshoot Route Control in Secure Firewall SD-WAN Deployments
- Firmware Automatic Fallback Mechanism in RV34x
- Automated Software Distribution for Cisco Business Devices
- RV34x: L2TP/IPsec fails when router is behind NAT device
- Automated Software Updates Not Available for Selected Products
- Configuring Network Booting Via PXE on RV34x Series Routers
- Gather Information for Basic Troubleshooting on Cisco AnyConnect Secure Mobility Client Errors
- Enable WAN Port Packet Capture Capabilities on RV340 series Routers
- Removal of Out of Compliance Anyconnect Licenses on the RV34x
- Ping, Traceroute, and DNS Lookup on the RV160 and RV260
- CSCvo92300 RV34x Inter-VLAN Access Limitation
- Configure Application Control on the RV34x Series Router
- Cisco Small Business RV160x/RV260x Language Selection User Interface Bug
- Troubleshooting on RV160 and RV260 Routers
- View the Routing Table on an RV340 or RV345 Router
Troubleshooting TechNotes
-
Log in to see available downloads.
-
-
Below are the models within the Cisco Small Business RV Series Routers. Unless specified, all Support documentation for the Cisco Small Business RV Series Routers is applicable to all models.
See also: Router Product ID Decoder | Small Business Community
The Cisco Small Business RV Series Routers are divided into several product families:
Cisco RV130 Product Family
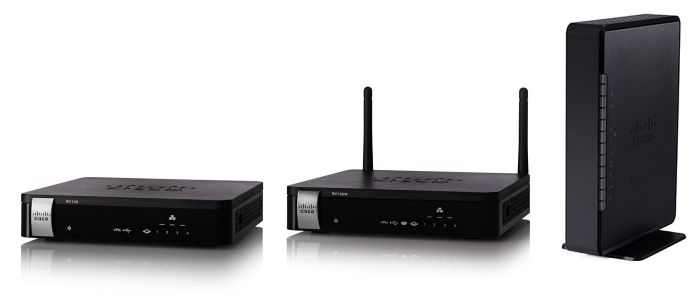
Key Information: RV130 Family Model Comparison | RV130 Family Video Overview
Supported Models: Support Ends: Data Sheet: ○ Cisco RV130 WF VPN Router 30-Nov-2024 RV130 WF Data Sheet ○ Cisco RV130W Wireless-N Multifunction WF VPN Router 30-Nov-2024 RV130W WF Data Sheet ○ Cisco RV132W ADSL2+ Wireless-N VPN Router 31-Oct-2026 RV132 Data Sheet ○ Cisco RV134W VDSL2 Wireless-AC VPN Router 31-Oct-2026 RV134 Data Sheet
Cisco RV160 Product Family
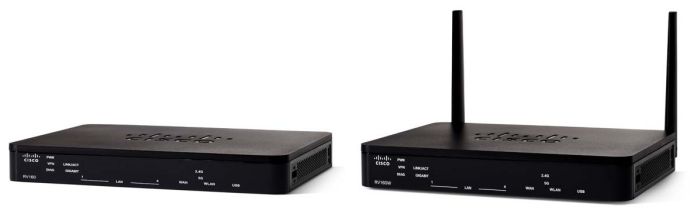
Key Information: RV160 Family Tech Talk Videos | RV160 and RV160W Data Sheet
Supported Models: Support Ends: ○ Cisco RV160 VPN Router 31-Oct-2026 ○ Cisco RV160W Wireless-AC VPN Router 31-Oct-2026
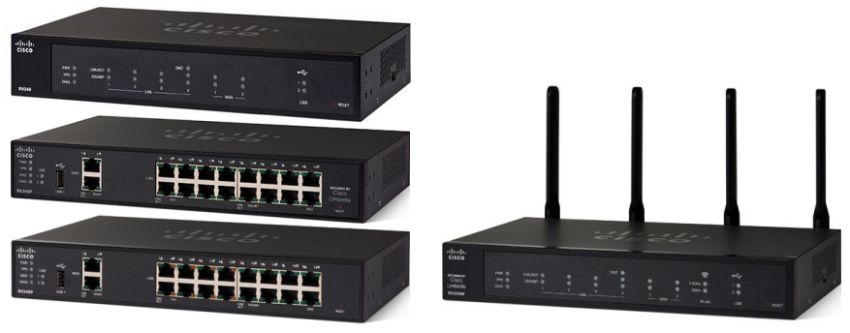
Cisco RV260 Product Family

Key Information: RV260 Family Model Comparison | RV260 Family Tech Talk Videos | RV260 Data Sheet
Supported Models: Support Ends: ○ Cisco RV260 VPN Router 31-Oct-2026 ○ Cisco RV260P VPN Router with PoE 31-Oct-2026 ○ Cisco RV260W Wireless-AC VPN Router 31-Oct-2026
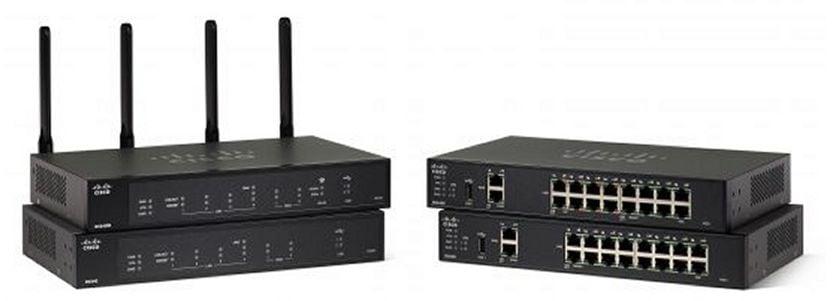
Cisco RV340 Product Family
Key Information: RV340 Family Model Comparison | RV340 Family Tech Talk Videos | RV340 Family Data Sheet
Supported Models: Support Ends: ○ Cisco RV340 Dual WAN Gigabit VPN Router 31-Oct-2026 ○ Cisco RV340W Dual WAN Gigabit Wireless-AC VPN Router 31-Oct-2026 ○ Cisco RV345 Dual WAN Gigabit VPN Router 31-Oct-2026 ○ Cisco RV345P Dual WAN Gigabit POE VPN Router 31-Oct-2026
Additional Cisco Small Business RV Series Routers
Key Information: Other RV Series Model Comparison
Supported Models: Support Ends: Data Sheet: ○ Cisco RV042 Dual WAN VPN Router 31-Jan-2025 RV042 Data Sheet ○ Cisco RV042G Dual Gigabit WAN VPN Router 31-Jan-2025 RV042G Data Sheet ○ Cisco RV110W Wireless-N VPN Firewall 30-Nov-2024 RV110W Data Sheet ○ Cisco RV215W Wireless-N VPN Router 30-Nov-2024 RV215W Data Sheet
Retired Cisco RV Series Routers - No longer supported by Cisco
Retired Models: Support Ended: ○ Cisco CVR100W Wireless-N VPN Router 30-Dec-2021 ○ Cisco RV016 Multi-WAN VPN Router 31-Jan-2021 ○ Cisco RV082 Dual WAN VPN Router 05-May-2021 ○ Cisco RV120W Wireless-N VPN Firewall 31-Jan-2020 ○ Cisco RV130 VPN Router 31-Aug-2022 ○ Cisco RV130W Wireless-N Multifunction VPN Router 30-Nov-2022 ○ Cisco RV180 VPN Router 31-May-2020 ○ Cisco RV180W Wireless-N Multifunction VPN Router 31-May-2020 ○ Cisco RV220W Wireless Network Security Firewall 05-Jan-2020 ○ Cisco RV315W Wireless-N VPN Router 28-Feb-2022 ○ Cisco RV320 Dual Gigabit WAN VPN Router 31-Jul-2021 ○ Cisco RV320 Dual Gigabit WAN WF VPN Router 30-Sep-2021 ○ Cisco RV325 Dual Gigabit WAN VPN Router 31-Jul-2021 ○ Cisco RV325 Dual Gigabit WAN WF VPN Router 30-Sep-2021 ○ Cisco RVL200 4-Port SSL/IPsec VPN Router 01-Jul-2016 ○ Cisco RVS4000 4-port Gigabit Security Router - VPN 30-Nov-2017 ○ Cisco WRV200 Wireless-G VPN Router - RangeBooster 17-May-2014 ○ Cisco WRV210 Wireless-G VPN Router - RangeBooster 01-Dec-2016 ○ Cisco WRVS4400N Wireless-N Gigabit Security Router - VPN V1.0 & V1.1 30-Nov-2017 ○ Cisco WRVS4400N Wireless-N Gigabit Security Router - VPN V2.0 07-Nov-2017
