Hardware Installation Guide for Cisco 8400 Series Secure Routers

PDF

Hardware Installation Guide for Cisco 8400 Series Secure Routers

M.2 storage device

Want to summarize with AI?

Log in

Describes precautions against electrostatic discharge and provides procedures for installing and removing an M.2 storage device to ensure safe storage upgrades and maintenance.


This section describes how to install and replace an an M.2 module on the Cisco 8400 Series Secure Routers.

Prevent electrostatic discharge damage

The M.2 module is sensitive to electrostatic discharge (ESD) damage, which can occur when electronic cards or components are handled improperly. ESD results in complete or intermittent failures.

To prevent ESD damage, follow these guidelines:

  • Always use an ESD wrist or ankle strap and ensure that it makes good skin contact.

  • Connect the equipment end of the strap to an unfinished chassis surface.

  • Place the M.2 storage devices on an anti-static surface or in a static shielding bag. If you have to return the device to the factory, immediately place it in a static shielding bag.

  • Avoid contact between the device and clothing. The wrist strap protects the device from ESD voltages on the body only; ESD voltages on clothing can still cause damage.

  • Do not remove the wrist strap until the installation is complete.

Caution
For safety, periodically check the resistance value of the anti static strap. The measurement should be between 1 and 10 megohms (Mohms).

Remove and replace the M.2 storage device

To remove and install a M.2 storage device, perform the following steps:

Procedure

1.

Disconnect the power supply to the Cisco 8400 Series Secure Routers before you perform any module replacement.

2.

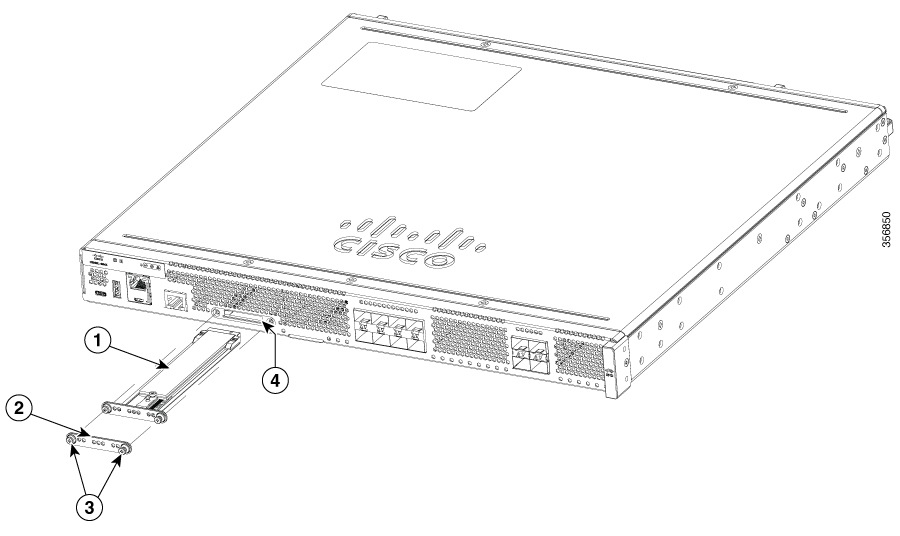
Loosen the two mounting screws using a #1 Phillips screwdriver and then remove the M.2 module or blank.

3.

Install the M.2 memory module into the slot.

Figure 1. Remove the M.2 storage device

Number

Description

1

M.2 Module

2

M.2 Blank

3

Mounting Screws

4 Chassis Cutout (key to prevent installation of M.2 with incorrect orientation)
Note

When the M.2 module is not installed, install a blank in the slot.

4.

Secure the 2 mounting screws using a #1 Phillips screwdriver. Torque to 4-6 in-lbs.