- About this Guide
- ASR 5000 Hardware Platform Overview
- Installation Procedure Overview
- Chassis Installation
- Application Card Installation
- Line Card Installation
- Cabling the Switch Processor Input/Output Line Card
- Cabling the Fast Ethernet (10/100) Line Card
- Cabling the Gigabit Ethernet Line Cards
- Cabling the Optical (ATM) Line Cards
- Cabling the Channelized Line Cards
- Cabling the Power Filter Units
- Applying Power and Verifying the Installation
- System Monitoring
- Adding Application and Line Cards to an Existing Installation
- Removing and Installing SMC PC Cards
- Replacing the Chassis Air Filter
- Replacing a Power Filter Unit
- Replacing Upper or Lower Fan Tray
- Replacing Application Cards
- Replacing Line Cards
- Technical Specifications
- Safety, Electrical and EMC Certifications
- Environmental Specifications
- Hardware Product Support Matrix
- Preparing a Full-Height Line Card Slot
- RMA Shipping Procedures
- Spare Component Recommendations
RMA Shipping Procedures
This appendix describes the procedures for packaging and returning ASR 5000 chassis components via the Cisco Return Material Authorization (RMA) process.
For detailed information on Cisco RMA policies (including detailed shipping instructions), go to the Product Online Web Returns (POWR) link on www.cisco.com.
To ensure warranty coverage, these procedures also apply to shipments between customer sites or parts depots.
This appendix includes the following sections:
RMA Overview
This section describes general requirements when packaging ASR 5000 components for shipment.
All components must be properly packaged to prevent damage in transit. Items should never be shipped without packaging foam, bubble wrap and a static bag. Crushed or damaged boxes/pallets should never be used for returning items.
It is best to use the original Cisco box and packaging in which your equipment was sent and received. You can use a shipping carton saved when the system and its components were installed. You can also use the packaging for a replacement component to repackage the original component.
If the original box is missing or damaged, you can request that Cisco send a suitable shipping carton when requesting an RMA.
Items should be securely sealed and, if necessary, fixed onto pallets.
Detailed ship-to instructions will be provided when you apply for the RMA from Cisco.
- Re-packaging Your RMA
- Shipping Multiple Components
- Sealing the Shipment
- Labeling the Shipment
- Cisco Return Locations
Re-packaging Your RMA
If using the original Cisco box and packaging, properly place the item within the packaging material.
If using a non-Cisco shipping carton and packing material, be sure the item is properly surrounded with bubble wrap or packaging foam to ensure restriction in movement during transport.
The use of anti-static packaging materials is highly recommended. At the very least, the item must be enclosed in a sealed anti-static envelope or bag to prevent damage to ESD sensitive devices.
Shipping Multiple Components
The preferred method for RMA shipping requires that each component be properly packed in an individual box.
If you must ship multiple items within the same box, be sure each part is protected in its own anti-static bag and padded carton, and is separated from other cartons with packing foam or bubble wrap. The shipping carton must be sturdy enough to handle the weight and size of the items within it.
Items should never be returned loosely packed and unprotected from ESD.
Sealing the Shipment
The box or shipping container must be securely sealed using appropriately reinforced packaging tape. Do not use masking or transparent (light duty) tape to secure or seal packaging.
Chassis or other large units must be covered and securely strapped down to a pallet. An unstrapped or loosely strapped item can easily tip during transit, resulting in expensive damage and repair costs.
Labeling the Shipment
All returned items must include the RMA number (and Quote Number for Trade-In Returns) on every box being returned. The RMA number can be obtained from the POWR link on www.cisco.com or your Cisco TAC advisor.
For Trade-In Returns, a POWR tool label must be placed on the outside of each box.
These reference numbers should also be listed on the shipper's air bill.
Mislabeled or unlabeled RMAs delay the receiving and crediting processes.
Cisco Return Locations
For a list of authorized Cisco return centers, go to the Authorized Return Locations link on www.cisco.com.
Packaging ASR 5000 Cards
This section provides detailed instructions for packaging ASR 5000 cards using Cisco shipping cartons.
Application Cards
Application Card Types
ASR5K-SMC-K9 – System Management Card (SMC)
ASR5K-PSC-64G-K9 – Packet Services Card 3 (PSC3)
ASR5K-PSC-32G-K9 – Packet Services Card 2 (PSC2)
ASR5K-PSC-16G-K9 – Packet Services Card Type A (PSCA)
ASR5K-PPC-K9 – Packet Processing Card 3 (PPC)
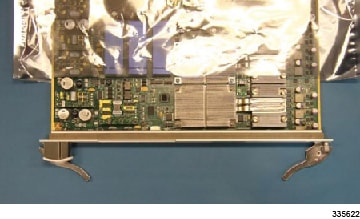
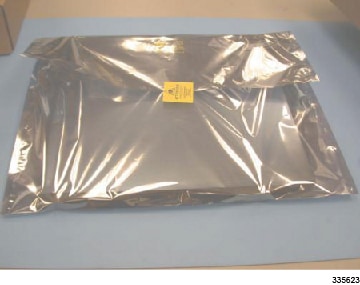
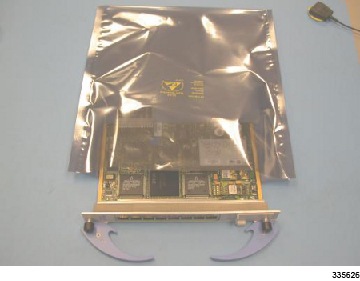
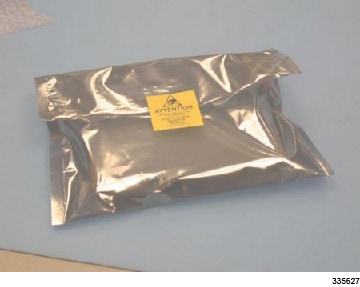
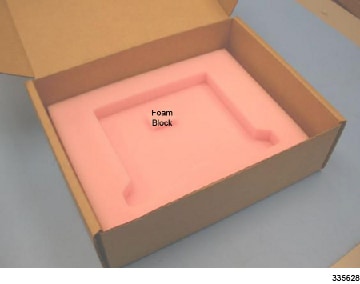
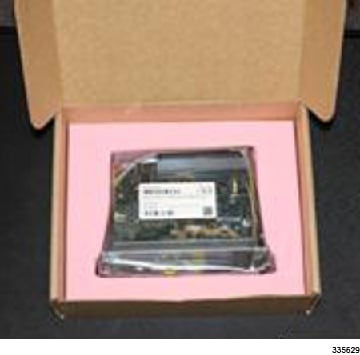
Packaging an Application Card
The packaging sequence is as follows:
| Step 1 | Place the card
inside the ESD bag; fold over and seal the bag with an ESD Label or tape as
shown in the photos.
|
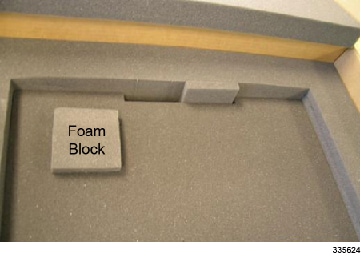
| Step 2 | If packing an
SMC, a foam block must be removed from the bottom foam near the connector cut
outs.
|
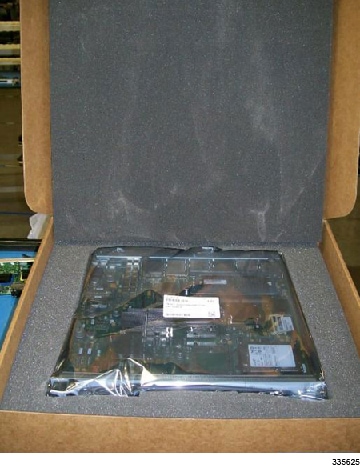
| Step 3 | Place the card
in the carton as shown in the photos.
|
| Step 4 | Place the top piece of foam over the card. |
| Step 5 | Close the carton and seal it with packaging tape. See Sealing the Shipment for additional information. |
| Step 6 | Place the shipping label on the outside of the carton. See Labeling the Shipment for additional information. |
Line Cards (except XGLC)
Half-Height Line Card Types
ASR5K-C4OC3-MM-K9 – Channelized Line Card 2 (CLC2) [MM SFP]
ASR5K-C4OC3-SM-K9 – Channelized Line Card 2 (CLC2) [SM SFP]
ASR5K-01100E-K9 – Fast Ethernet Line Card (FELC)
ASR5K-08100E-K9 – Fast Ethernet Line Card 2 (FLC2)
ASR5K-4OC3C-MM-K9 – Optical Line Card 2 (OLC2) [MM SFP]
ASR5K-4OC3C-SM-K9 – Optical Line Card 2 (OLC2) [SM SFP]
ASR5K-041GE-SX-K9 – 4-Port Ethernet 1000 Line Card (QGLC) [SX MM SFP]
ASR5K-041GE-LX-K9 – 4-Port Ethernet 1000 Line Card (QGLC) [LX SM SFP]
ASR5K-041GE-T-K9 – 4-Port Ethernet 1000 Line Card (QGLC) [copper SFP]
ASR5K-042GE-SX-K9 – Rev2 4-Port Ethernet 1000 Line Card (QGLC) [SX MM SFP]
ASR5K-042GE-LX-K9 – Rev2 4-Port Ethernet 1000 Line Card (QGLC) [LX SM SFP]
ASR5K-042GE-T-K9 – Rev2 4-Port Ethernet 1000 Line Card (QGLC) [copper SFP]
ASR5K-011GE-SX-K9 – Gigabit Ethernet 1000 Line Card (GLC) [SX MM SFP]
ASR5K-011GE-LX-K9 – Gigabit Ethernet 1000 Line Card (GLC) [LX SM SFP]
ASR5K-011GE-T-K9 – Gigabit Ethernet 1000 Line Card (GLC) [copper SFP]
ASR5K-011G2-SX-K9 – Gigabit Ethernet 1000 Line Card (GLC2) [SX MM SFP]
ASR5K-011G2-LX-K9 – Gigabit Ethernet 1000 Line Card (GLC2) [LX SM SFP]
ASR5K-011G2-T-K9 – Gigabit Ethernet 1000 Line Card (GLC2) [copper SFP]
ASR5K-RCC-K9 – Redundancy Crossbar Card (RCC)
ASR5K-SPIO-BNC-K9 – Switch Processor I/O, BNC BITS
ASR5K-SPIO-3PN-K9 – Switch Processor I/O, 3-Pin BITS
ASR5K-SPS3-BNC-K9 – Switch Processor I/O, BNC BITS with Stratum 3 module
ASR5K-SPS3-3PN-K9 – Switch Processor I/O, 3-Pin BITS with Stratum 3 module
Packaging a Half-height Line Card
The packaging sequence is as follows:
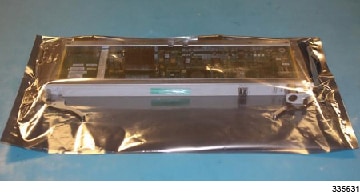
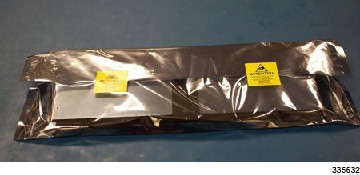
| Step 1 | Place the card
inside the ESD bag; fold over and seal the bag with an ESD Label or tape as
shown in the photos.
|
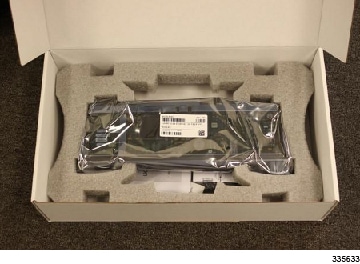
| Step 2 | Place the card
within the bottom piece of foam as shown in the photos. If packing an RCC or
SPIO, a foam block must be removed from the bottom foam near the connector cut
outs.
|
| Step 3 | Place the top piece of foam over the card. |
| Step 4 | If you are
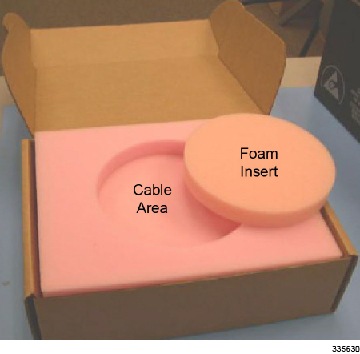
returning the cable assembly with a SPIO, remove the round insert from the top
piece of foam and place the cable assembly in the cutout.
|
| Step 5 | Close the carton and seal it with packaging tape. See Sealing the Shipment for additional information. |
| Step 6 | Place the shipping label on the outside of the carton. See Labeling the Shipment for additional information. |
10 Gigabit Ethernet Card (XGL)
XGLC Card Types
ASR5K-0110G-MM-K9 – 1-Port 10 Gigabit Ethernet Line Card (XGLC) [MM SFP+]
ASR5K-0110G-SM-K9 – 1-Port 10 Gigabit Ethernet Line Card (XGLC) [SM SFP+]
Packaging a Full Height XGLC
The packaging sequence is as follows:
| Step 1 | Place the card
inside the ESD bag; fold over and seal the bag with an ESD Label or tape as
shown in the photos.
|
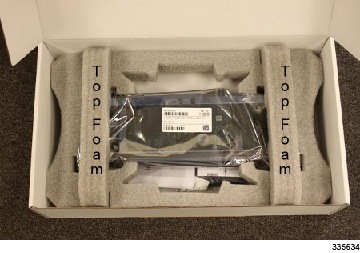
| Step 2 | The XGLC
shipping carton includes a bottom foam piece and two top foam pieces. Insert
the XGLC in the bottom foam piece and place the two top pieces in the slots at
either ends of the card as shown in the photos:
|
| Step 3 | Close the carton and seal it with packaging tape. See Sealing the Shipment for additional information. |
| Step 4 | Place the shipping label on the outside of the carton. See Labeling the Shipment for additional information. |
 Feedback