Cisco Optical Automation Solution for NCS 2000 Networks, Release 26.1.1

PDF

Cisco Optical Automation Solution for NCS 2000 Networks, Release 26.1.1

Prepare NCS 2000 nodes for transition

Want to summarize with AI?

Log in

Prepare the existing NCS 2000 nodes before transition by checking network readiness, SOCKS proxy behavior, rack settings, and CTC-visible node conditions.


Use this topic to prepare existing NCS 2000 nodes before you transition the network from release 11.x to 26.x. Confirm CTC access, configure SOCKS proxy behavior where required, verify rack settings for remote or standalone transponder nodes, and validate that the nodes are ready for Cisco Optical Site Manager onboarding.

This workflow includes the preparation tasks that must be completed on NCS 2000 nodes before starting the network transition. These activities are performed through CTC and are not traffic-affecting.

Perform these tasks to prepare the NCS 2000 nodes:

After you complete these tasks, the NCS 2000 nodes are ready to support Cisco Optical Site Manager onboarding in the later workflows.
Configure SOCKS proxy

Enable the SOCKS proxy on NCS 2000 nodes to allow communication between Cisco Optical Site Manager and network devices.

This procedure applies to all NCS 2000 nodes, including ROADM, OLA, and remote transponder nodes.

For NCS 2000 nodes that are already provisioned as GNE or ENE, convert the nodes to SOCKS proxy only. If the network must keep GNE or ENE mode, contact engineering to manage the deviation.

Note

This configuration is required even if the node, such as an OLA node, is reachable only through OSC.

Follow these steps to configure SOCKS proxy.

Procedure

  1. Open CTC.

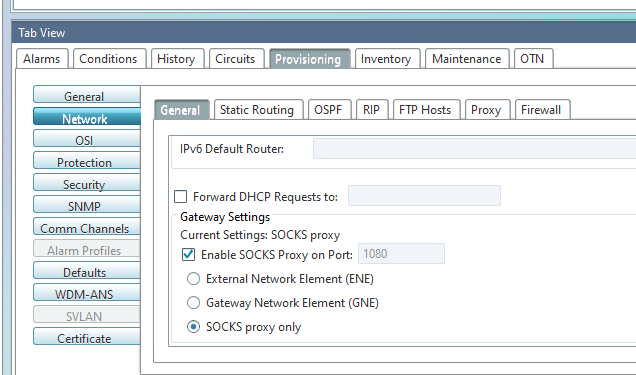
  2. Choose Node View > Provisioning > Network > General.

  3. Select the Enable SOCKS-proxy only option.

  4. Apply the configuration.

The SOCKS proxy is enabled and visible in the Node View -> Provisioning -> Network -> General panel.

Figure 1. CTC network setting: SOCKS proxy only

Configure remote or standalone transponder node rack settings

Ensure in ROADM and Remote (or standalone transponder) node, the correct Rack Number assignment to allow proper device grouping and visualization in Cisco Optical Site Manager.

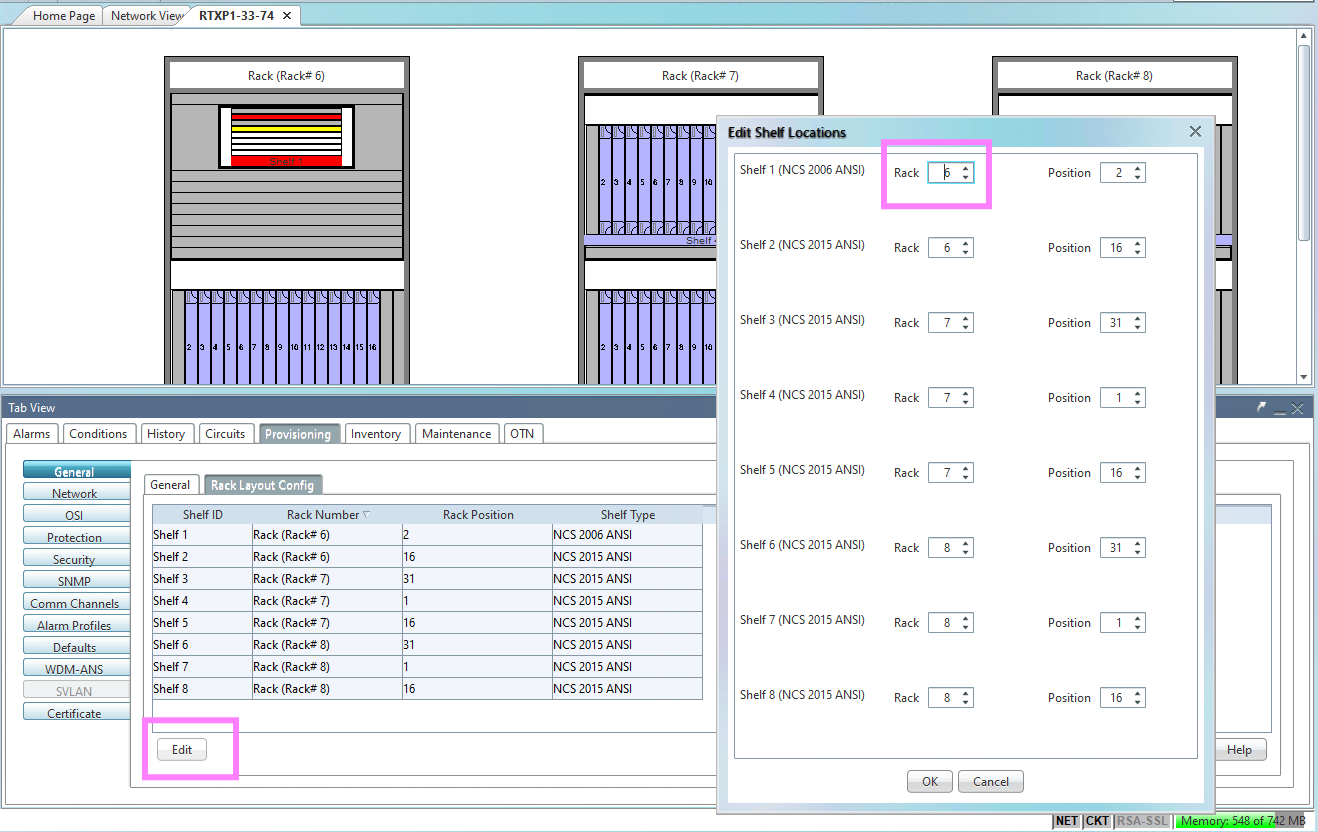
This procedure applies when a ROADM connects to a remote transponder node or a standalone transponder node. Each node must have a unique rack number to avoid overlap.

Follow these steps to configure remote or standalone transponder node rack settings.

Procedure

  1. Open CTC.

  2. Select Remote TXP (or Standalone TXP).

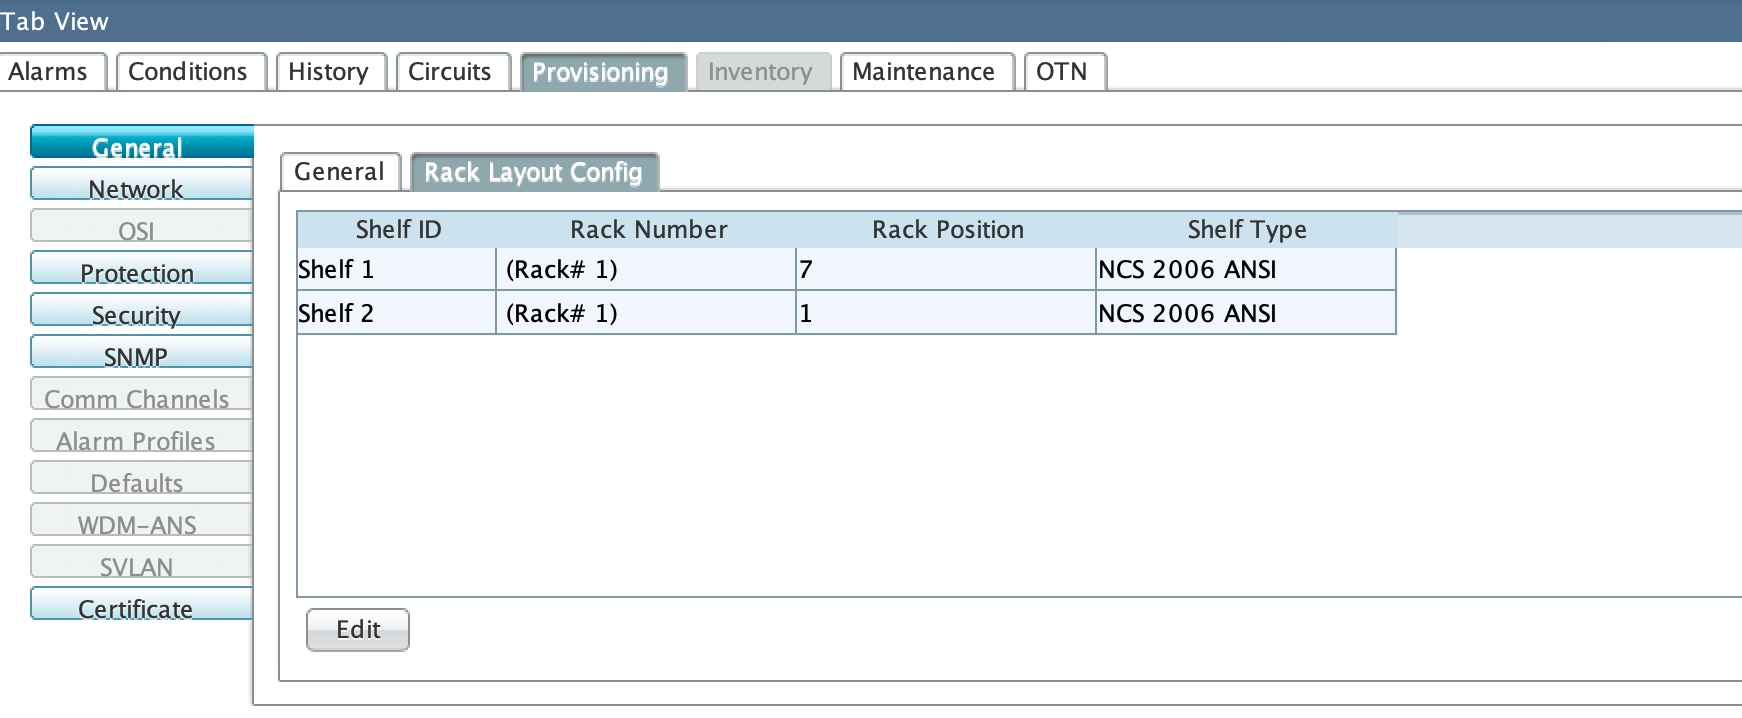
  3. Choose Node View > Provisioning > General > Rack Layout Config.

  4. Click Edit.

  5. Verify the current Rack Number.

  6. Modify the Rack Number if required to ensure uniqueness.

  7. Apply the configuration.

Each node is assigned a unique Rack Number, and no overlap is present in the Cisco Optical Site Manager site view.

Note

If the remote node or standalone transponder uses a single-shelf configuration, Cisco Optical Site Manager allocates it to a rack with sufficient space for the chassis type.

Figure 2. CTC rack ID check and change (on a remote TXP)

What to do next

Move the chassis from the Cisco Optical Site Manager web UI later if rack placement must change.


Verify NCS 2000 preparation

Before proceeding to the next workflow, verify that all NCS 2000 nodes are ready for Cisco Optical Site Manager onboarding.

Follow these steps to verify NCS 2000 preparation.

Procedure

  1. All nodes are reachable and accessible via CTC.

  2. No connectivity issues are present between nodes.

  3. Rack layout is consistent and does not show overlapping nodes in the site view.

  4. Network configuration changes have been successfully applied on all nodes.

  5. No pending or unapplied configuration changes are present in CTC.