This section describes how to modify an NCS 2000 network already managed by Cisco Optical Site Manager, including degree addition and node expansion.
Use this topic to modify an NCS 2000 network that is already managed by Cisco Optical Site Manager. Use the related tasks to add degrees, add nodes, and keep the management view synchronized after the change.
Add a degree in a 26.x device managed by Cisco Optical Site Manager
Configure a new optical degree (side) on an existing NCS 2000 node using the Cisco Optical Site Manager web UI.
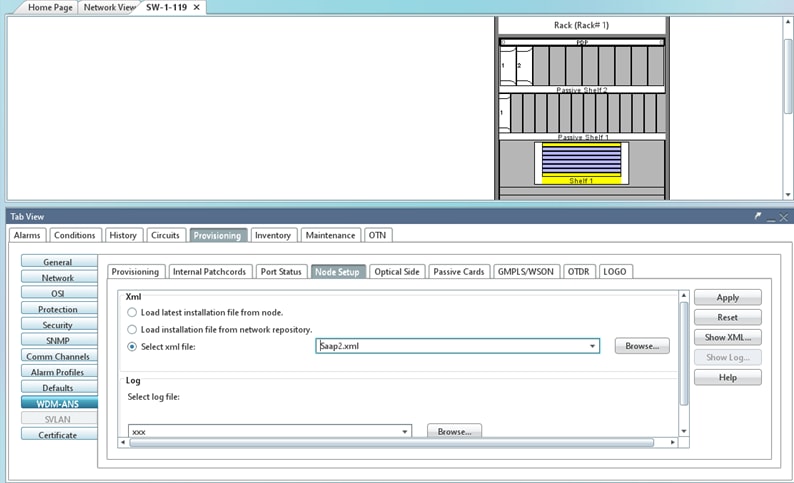
If a CTP design file (.mpz) is available, import it into Cisco Optical Network Planner to define the new degree and generate the corresponding Per-SideANS XML file. Starting from release 25.1.1, the Provisioning > WDM-ANS panel is no longer available in CTC, and the XML file cannot be uploaded directly to the node.
Before you begin
Required design parameters, such as degree configuration, fiber type, and span loss, are available from the Cisco Optical Network Planner design.
The node is already onboarded and in the sync-completed state.
Follow these steps to add a degree in a 26.x device managed by Cisco Optical Site Manager.
Procedure
Create the new degree and configure fiber attributes.
Choose Optical Configuration > Optical Degrees.
Add the new degree.
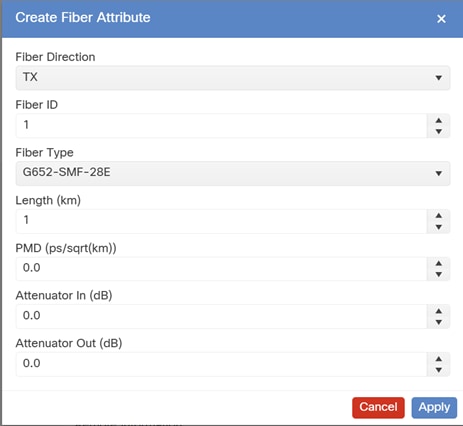
Configure the specific fiber type and characteristics.
Figure 1. Optical degrees panel - add new degree
Configure internal patch cords.
Create internal patch cords between the TNC OSC pluggable and the SMR-20 OSC-RX/TX ports.
Create internal patch cords between the SMR-20 MPO and the MF-DEG-5 MPO #4.
Configure SMR-20 amplifier PSD and gain values.
Choose Optical Setup > Amplifiers > Amplifier.
Set PSD Setpoint on COM-TX and COM-RX.
Set Gain Range on LINE-RX.
Configure interface parameters.
Choose Optical Setup > Amplifiers > Interface.
Set Optical PSD Setpoint on COM-TX and all relevant expansion ports, such as 2/4/[EXP 1-8]-1-TX and 2/4/[EXP 1-8]-2-TX.
Set OSC Power Threshold on LINE-RX.
Set Optical Power Threshold Low on LINE-RX.
Configure span loss.
Choose Optical Setup > Span Loss.
Configure the Min Expected Span Loss and Max Expected Span Loss values to define the operational window for the new degree.
Create OSC termination.
Choose Optical Setup > OSC.
Create the OSC termination.
The new degree is visible in the Optical Degrees list and on NFV.
No critical alarms are present.
Note
Incorrect ANS configuration can impact optical performance. Additional tuning might be required depending on network conditions.
What to do next
Align the ANS configuration with the optical design.
Use the Cisco NCS 2000 configuration guide for detailed parameter configuration if additional tuning is required.
Add a new NCS 2000 node to an existing network
Add a new NCS 2000 node to an existing network that is already managed by Cisco Optical Site Manager. Use this procedure when Cisco Optical Site Manager is already deployed and operational, and a new NCS 2000 node must be integrated into the existing network.
Note
Starting with release 25.1.1, the Provisioning > WDM-ANS panel is no longer available in CTC. Perform the initial node configuration in release 11.x.
Before you begin
The new NCS 2000 node is physically installed according to the Cisco NCS 2000 Series Hardware Installation Guide.
Follow these steps to add a new NCS 2000 node to an existing network.
Procedure
Initial node configuration (Release 11.x).
Configure the new node using standard NCS 2000 procedures as described in Cisco NCS 2000 Configuration Guide(NTP-G129 Add a DWDM Node).