Troubleshoot the Dynamic Attributes Connector

How to troubleshoot issues with the dynamic attributes connector.

Troubleshoot error messages

This reference provides error messages and troubleshooting solutions for dynamic attributes connectors and adapters in the dynamic attributes connector.

Problem: name or service not known error

This error is displayed as a tooltip when you hover the mouse over an error condition on an adapter or connector. An example follows; yours might look different.
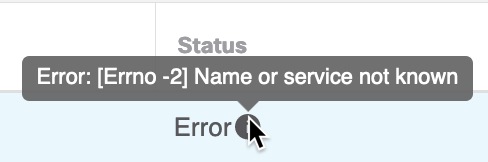
The name or service unknown error can indicate a configuration issue with a dynamic attributes connector adapter or connector

Solution: Edit the connector or adapter and check for:

  • A trailing slash on a host name

  • Verify the password is correct

Problem: incorrect username or password

This error is displayed as a tooltip when you hover the mouse over an error condition on a connector.
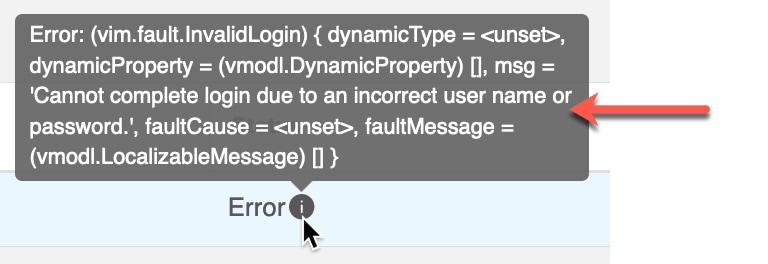
An incorrect username or password error indicates you entered the wrong password for a connector

Solution: Edit the connector and change the user name or password.
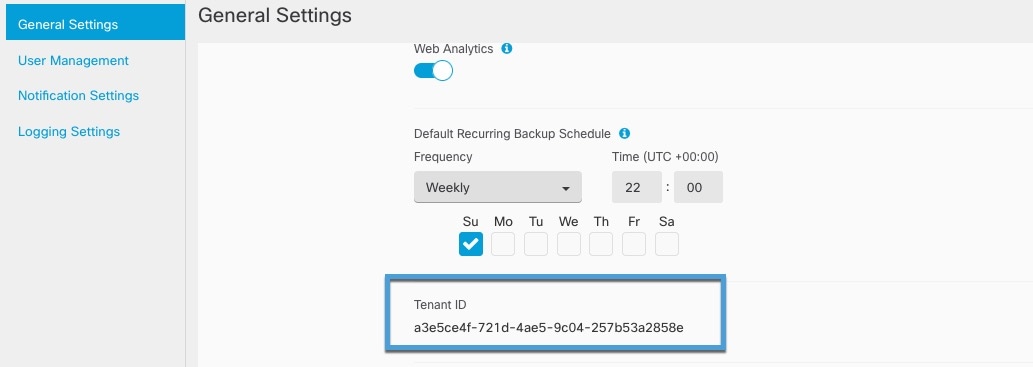
Get your tenant ID

This task provides your tenant ID to Cisco TAC for troubleshooting assistance with the dynamic attributes connector.

If you require assistance with the dynamic attributes connector, you must provide your tenant ID to Cisco TAC so we can look at your logs.

Procedure


Step 1

Click Administration > General Settings.

Step 2

Copy your tenant ID to the clipboard to provide to Cisco TAC.

A sample follows.

The image displays a sample tenant ID that can be provided to Cisco TAC for troubleshooting assistance.


Manually get a certificate authority (CA) chain

If the certificate authority chain is not fetched automatically, use one of these browser-specific procedures to get a certificate chain to securely connect to vCenter or Firewall Management Center .

The certificate chain is the root certificate and all subordinate certificates.

Procedure

  Command or Action Purpose

Step 1

Get a Certificate Chain—Mac (Chrome and Firefox)

  1. Open a Terminal window.

  2. Enter this command:

    
              security verify-cert -P 
              url[:port]
    

    where url is the URL (including scheme) to vCenter or Firewall Management Center . For example:

    security verify-cert -P https://myvcenter.example.com

    If you access vCenter or Firewall Management Center using NAT or PAT, you can add a port as follows:

    security verify-cert -P https://myvcenter.example.com:12345
  3. Save the entire certificate chain to a plaintext file.

    • Include all -----BEGIN CERTIFICATE----- and -----END CERTIFICATE----- delimiters.

    • Exclude any extraneous text (for example, the name of the certificate and any text contained in angle brackets ( < and > ) as well as the angle brackets themselves.

  4. Repeat these tasks for vCenter Firewall Management Center .

Step 2

Get a Certificate Chain—Windows Chrome

  1. Log in to vCenter or Firewall Management Center using Chrome.

  2. In the browser address bar, click the lock to the left of the host name.

  3. Click Certificate.

  4. Click the Certification Path tab.

  5. Click the top (that is, first) certificate in the chain.

  6. Click View Certificate.

  7. Click the Details tab.

  8. Click Copy to File.

  9. Follow the prompts to create a CER-formatted certificate file that includes the entire certificate chain.

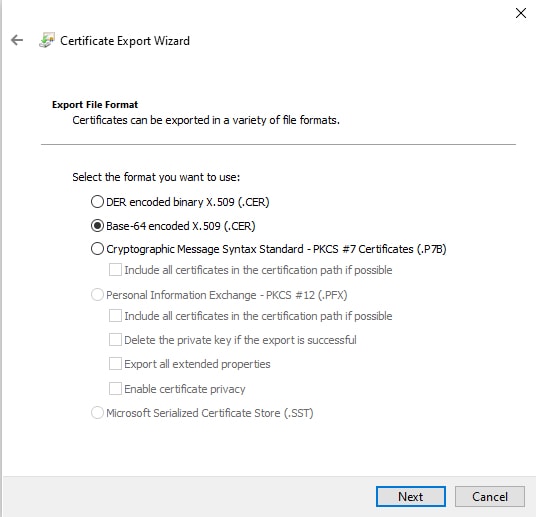
    When you're prompted to choose an export file format, click Base 64-Encoded X.509 (.CER).

    In the Certificate Export Wizard, select Base 64 encoded X.509 and export the certificate

    Follow the prompts to complete the export.

    Open the certificate in a text editor.

    Repeat the process for all certificates in the chain.

    You must paste each certificate in the text editor in order, first to last.

    Repeat these tasks for vCenter or Firewall Management Center .

Step 3

Get a Certificate Chain—Windows Firefox

  1. Log in to vCenter or Firewall Management Center using Firefox.

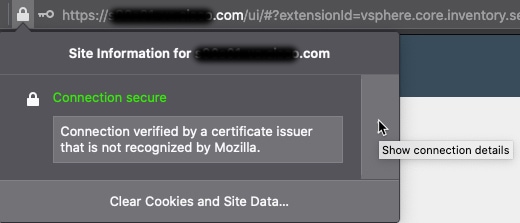
  2. Click the lock to the left of the host name.

  3. Click the right arrow (Show connection details).

    In Firefox, show the connection details to see the certificate being used to connect to the FMC
  4. Click More Information.

  5. Click View Certificate.

  6. If the resulting dialog box has tab pages, click the tab page corresponding to the top-level CA.

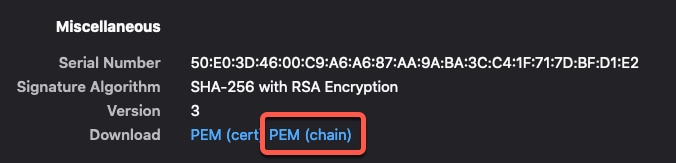
  7. Scroll to the Miscellaneous section.

  8. Click PEM (chain) in the Download row.

    Get the PEM chain to configure the FMC adapter
  9. Save the file.

    Repeat these tasks for vCenter or Firewall Management Center .