|
Step 1
|
Log on to Security Cloud Control.
|
|
Step 2
|
From the left pane, .
|
|
Step 3
|
Click the  icon and then click Secure Event Connector. icon and then click Secure Event Connector.
|
|
Step 4
|
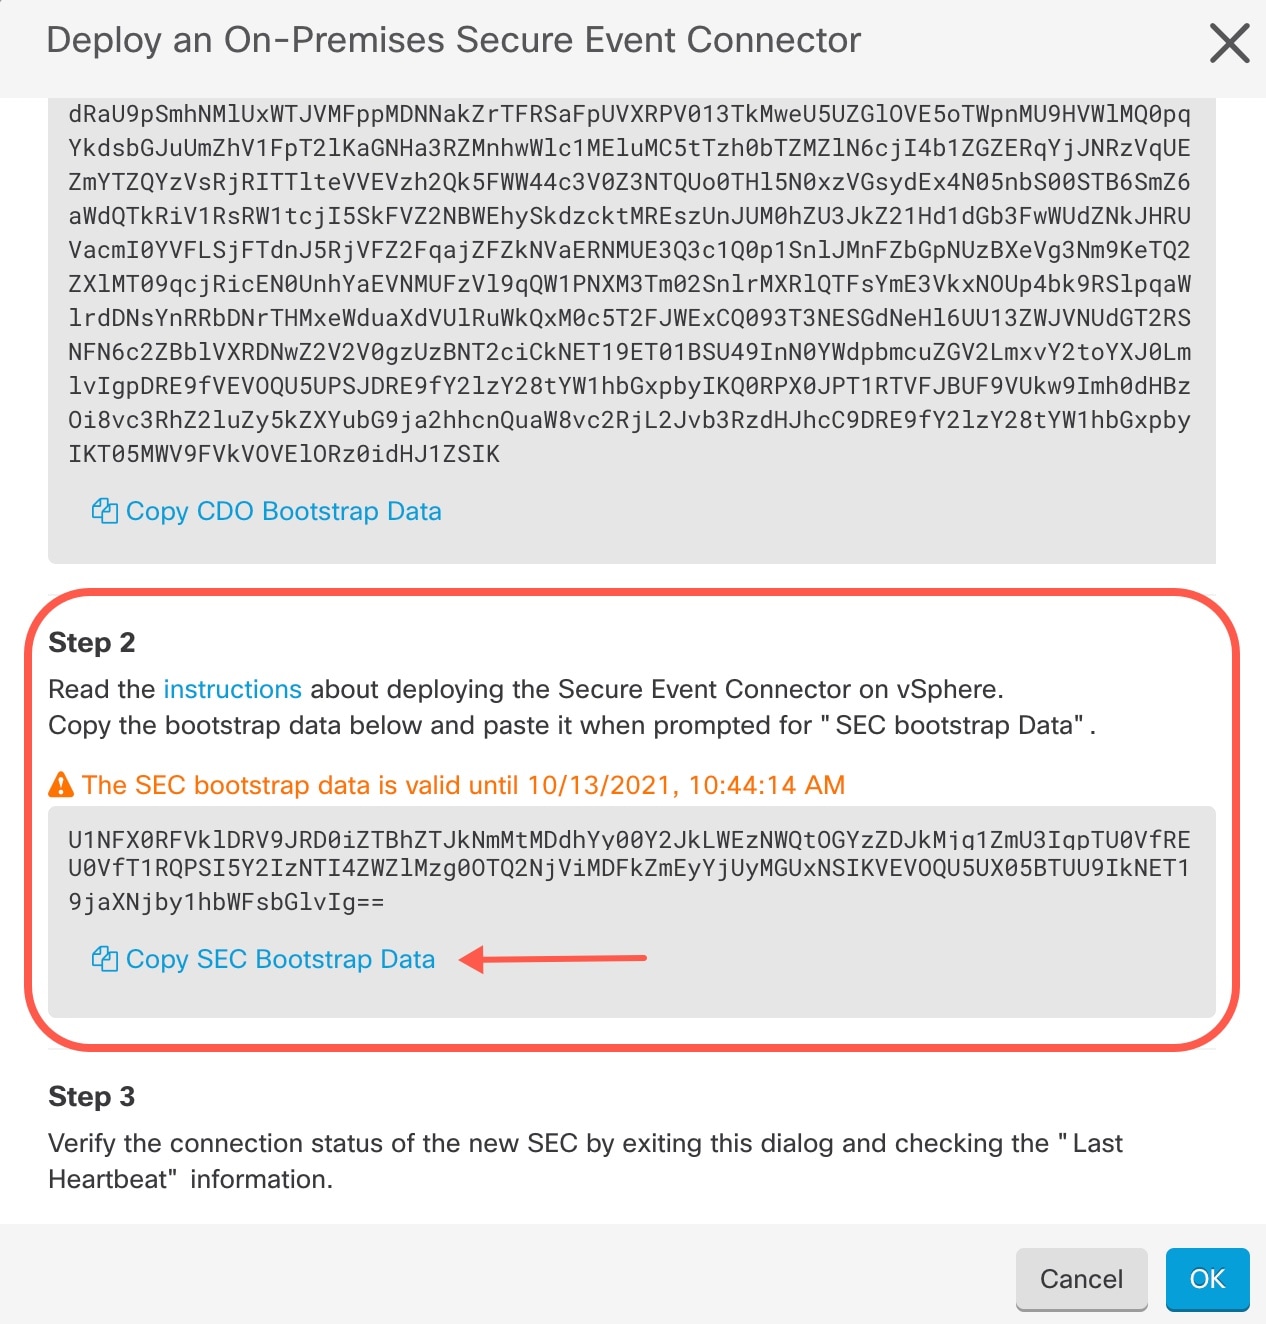
Using the link provided, copy the SEC Bootstrap Data in step 2 of the "Deploy
an On-Premises Secure Event Connector" window.
|
|
Step 5
|
Once installed, configure basic networking such as specifying the IP address for the Security Cloud Control Connector, the subnet mask, and gateway.
|
|
Step 6
|
Configure a DNS (Domain Name Server) server.
|
|
Step 7
|
Configure a NTP (Network Time Protocol) server.
|
|
Step 8
|
Install an SSH server for easy interaction with Security Cloud Control Connector's CLI.
|
|
Step 9
|
Install the AWS CLI package (https://docs.aws.amazon.com/cli/latest/userguide/awscli-install-linux.html)
|
Note
|
Do not use the --user flag.
|
|
|
Step 10
|
Install the Docker CE packages (https://docs.docker.com/install/linux/docker-ce/centos/#install-docker-ce)
|
Note
|
Use the "Install using the repository" method.
|
|
|
Step 11
|
Start the Docker service and enable it to start on boot:
[root@sdc-vm ~]# systemctl start docker
 [root@sdc-vm ~]# systemctl enable docker
Created symlink from /etc/systemd/system/multiuser.target.wants/docker.service to /usr/lib/systemd/system/docker.service.
|
|
Step 12
|
Create two users: Security Cloud Control and sdc. The Security Cloud Control user will be the one you log-into to run administrative functions (so you don't need to use the root user directly), and
the sdc user will be the user to run the Security Cloud Control Connector docker container.
[root@sdc-vm ~]# useraddSecurity Cloud Control
 [root@sdc-vm ~]# useradd sdc –d /usr/local/Security Cloud Control
|
|
Step 13
|
Configure the sdc user to use crontab:
[root@sdc-vm ~]# touch /etc/cron.allow
[root@sdc-vm ~]# echo "sdc" >> /etc/cron.allow
|
|
Step 14
|
Set a password for the Security Cloud Control user.
[root@sdc-vm ~]# passwd Security Cloud Control
Changing password for user Security Cloud Control.
New password: <type password>
Retype new password: <type password>
passwd: all authentication tokens updated successfully.
|
|
Step 15
|
Add the Security Cloud Control user to the "wheel" group to give it administrative (sudo) privileges.
[root@sdc-vm ~]# usermod -aG wheelSecurity Cloud Control
 [root@sdc-vm ~]#
|
|
Step 16
|
When Docker is installed, there is a user group created. Depending on the
version of CentOS/Docker, this may be called either "docker" or "dockerroot".
Check the /etc/group file to see which group was created, and then add the sdc
user to this group.
 [root@sdc-vm ~]# grep docker /etc/group
docker:x:993:
[root@sdc-vm ~]#
[root@sdc-vm ~]# usermod -aG docker sdc
[root@sdc-vm ~]#
|
|
Step 17
|
If the /etc/docker/daemon.json file does not exist, create
it, and populate with the contents below. Once created, restart the docker
daemon.
 [root@sdc-vm ~]# cat /etc/docker/daemon.json
{
 "live-restore": true,
 "group": "docker"
}
[root@sdc-vm ~]# systemctl restart docker
[root@sdc-vm ~]#
|
|
Step 18
|
If you are currently using a vSphere console session, switch over to SSH and log in as the Security Cloud Control user. Once logged in, change to the sdc user. When prompted for a password, enter the password for the Security Cloud Control user.
[Security Cloud Control@sdc-vm ~]$ sudo su sdc
[sudo] password for Security Cloud Control: <type password for Security Cloud Control user >
[sdc@sdc-vm ~]$
|
|
Step 19
|
Change directories to /usr/local/Security Cloud Control.
|
|
Step 20
|
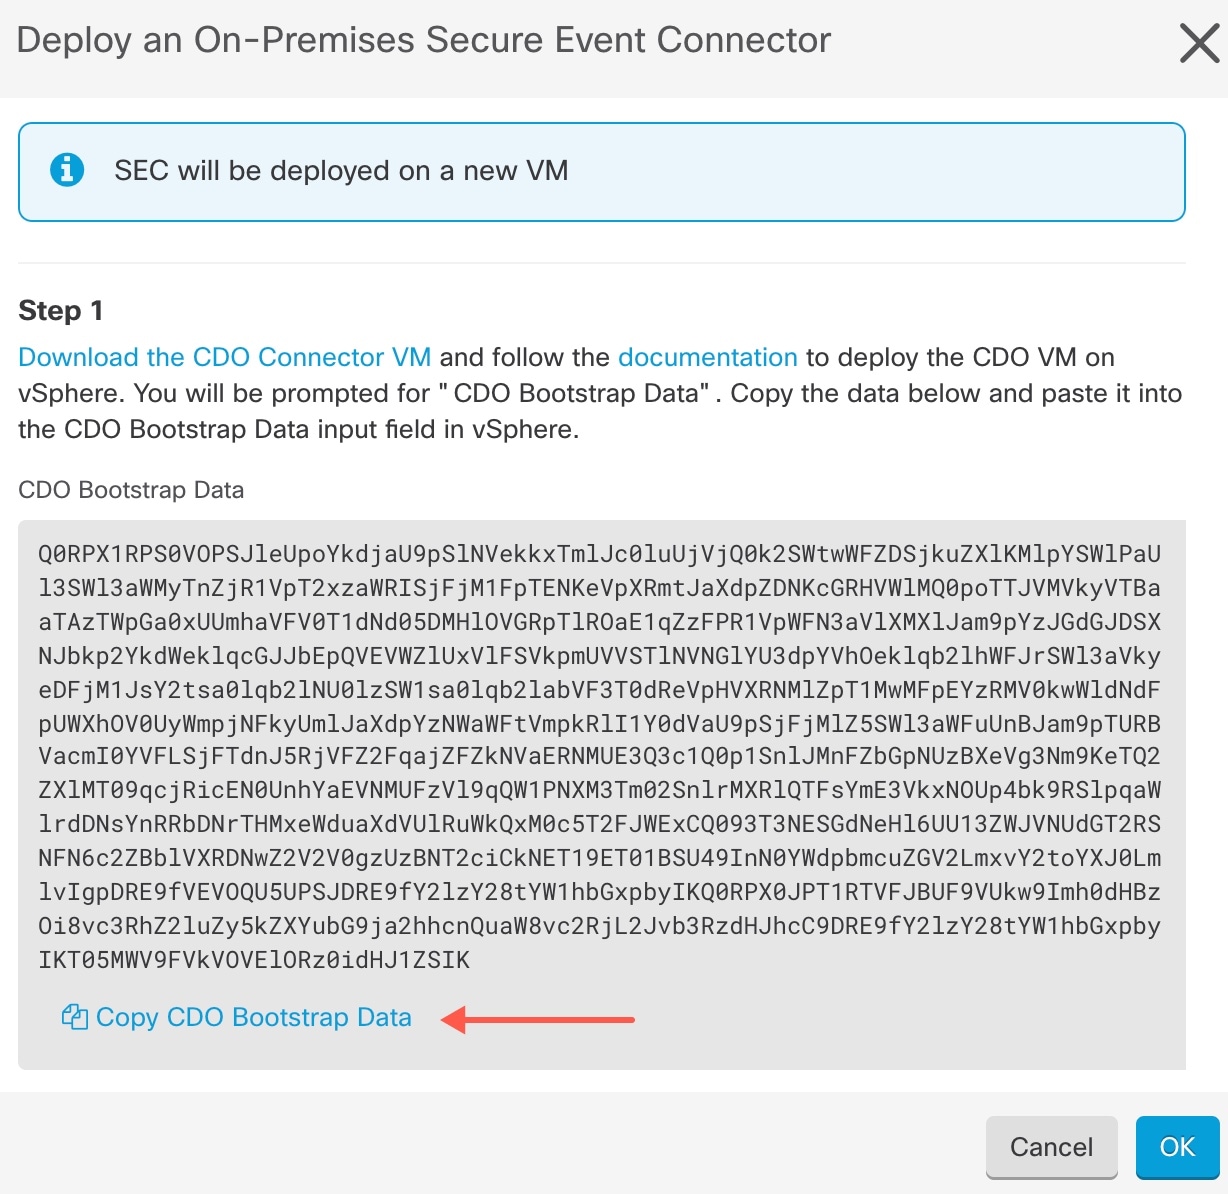
Create a new file called bootstrapdata and paste the
bootstrap data from Step 1 of the deployment wizrd into this file.
Save the file. You can use vi
or nano to create the file.
|
|
Step 21
|
The bootstrap data comes encoded in base64. Decode it and export it to a file
called extractedbootstrapdata
 [sdc@sdc-vm ~]$ base64 -d /usr/local/Security Cloud Control/bootstrapdata > /usr/local/Security Cloud Control/extractedbootstrapdata
[sdc@sdc-vm ~]$
Run the cat command to view the decoded data. The command and decoded data
should look similar to this:
[sdc@sdc-vm ~]$ cat /usr/local/Security Cloud Control/extractedbootstrapdata
Security Cloud Control_TOKEN="<token string>"
Security Cloud Control_DOMAIN="www.defenseorchestrator.com"
Security Cloud Control_TENANT="<tenant-name>"
<Security Cloud Control_URL>/sdc/bootstrap/Security Cloud Control_acm="https://www.defenseorchestrator.com/sdc/bootstrap/tenant-name/<tenant-name-SDC>"
ONLY_EVENTING="true"
|
|
Step 22
|
Run the following command to export the sections of the decoded bootstrap data
to environment variables.
[sdc@sdc-vm ~]$ sed -e 's/^/export /g' extractedbootstrapdata > secenv && source secenv
[sdc@sdc-vm ~]$
|
|
Step 23
|
Download the bootstrap bundle from Security Cloud Control.
 [sdc@sdc-vm ~]$ curl -H "Authorization: Bearer $Security Cloud Control_TOKEN" "$Security Cloud Control_BOOTSTRAP_URL" -o $Security Cloud Control_TENANT.tar.gz
100 10314 100 10314 0 0 10656 0 --:--:-- --:--:-- --:--:-- 10654
[sdc@sdc-vm ~]$ ls -l /usr/local/Security Cloud Control/*SDC
-rw-rw-r--. 1 sdc sdc 10314 Jul 23 13:48 /usr/local/Security Cloud Control/Security Cloud Control_<tenant_name>
|
|
Step 24
|
Extract the Security Cloud Control Connector tarball, and run the bootstrap_sec_only.sh file to install the Security Cloud Control Connector package.
[sdc@sdc-vm ~]$ tar xzvf /usr/local/Security Cloud Control/tenant-name-SDC
<snipped – extracted files>
[sdc@sdc-vm ~]$
[sdc@sdc-vm ~]$ /usr/local/Security Cloud Control/bootstrap/bootstrap_sec_only.sh
[2018-07-23 13:54:02] environment properly configured
download: s3://onprem-sdc/toolkit/prod/toolkit.tar to toolkit/toolkit.tar
toolkit.sh
common.sh
es_toolkit.sh
sec.sh
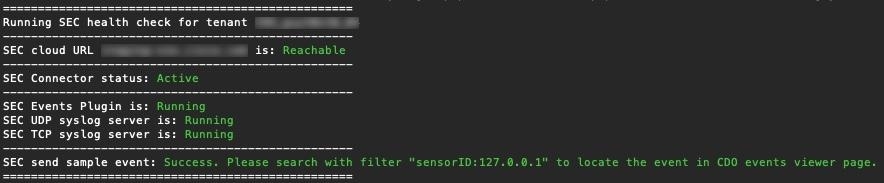
healthcheck.sh
troubleshoot.sh
no crontab for sdc
-bash-4.2$ crontab -l
*/5 * * * * /usr/local/Security Cloud Control/toolkit/es_toolkit.sh upgradeEventing 2>&1 >> /usr/local/Security Cloud Control/toolkit/toolkit.log
0 2 * * * sleep 30 && /usr/local/Security Cloud Control/toolkit/es_toolkit.sh es_maintenance 2>&1 >> /usr/local/Security Cloud Control/toolkit/toolkit.log
You have new mail in /var/spool/mail/sdc
|

 Feedback