Configuring Connectors as VIP Paired
Cisco Spaces: Connector high availability uses Virtual Router Redundancy Protocol (VRRP) protocol to determine the state of the instance in the high availability pair. When using VIP pairing with connector 3 and deploying firewalls between the connectors, it's crucial to enable the Virtual Router Redundancy Protocol (VRRP) IP protocol 112.
Ensure that both the source and destination IP addresses match the physical IPs of the connectors. Additionally, to enable proper VRRP functionality, ensure that both connectors reside within the same layer 2 or VLAN segment.
This task shows you how to configure two connectors and pair them with a virtual IP address (VIP).
 Note |
|
Before you begin
Install two different Cisco Spaces: Connectors. Configure each connector with a unique IP address.
Note |
Cisco Spaces: Connector High Availability utilizes HTTPS to assess the status of its peer. When implementing VIP pairing with connector 3 and deploying firewalls between the connectors, ensure that HTTPS TCP port 443 is permitted in both directions.
|
Procedure
|
Step 1 |
Login to Cisco Spaces > Setup > Wireless Networks and in the Configure Spaces Connector area, click Create Connector. 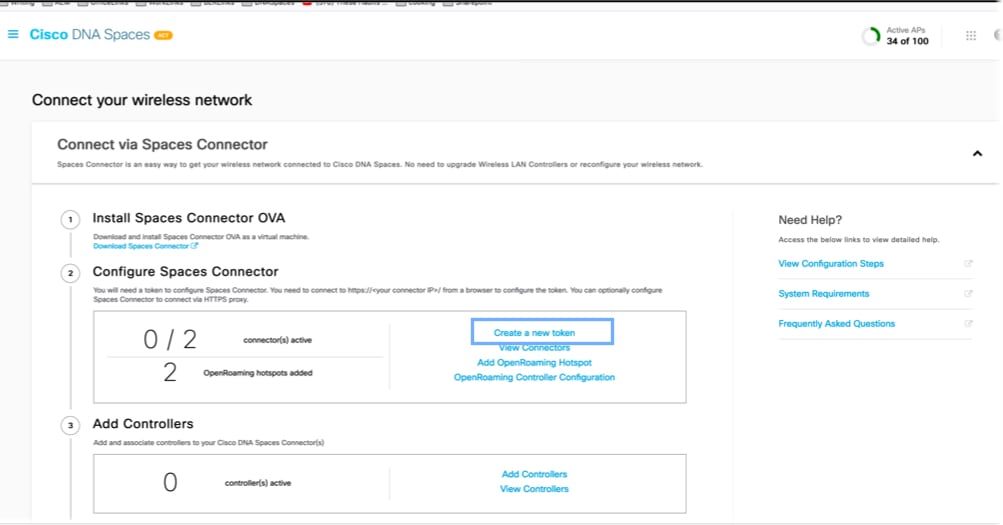
|
||
|
Step 2 |
Enter a name for the connector and choose the version. |
||
|
Step 3 |
In the connector details page, click Generate Token in the top-right corner. 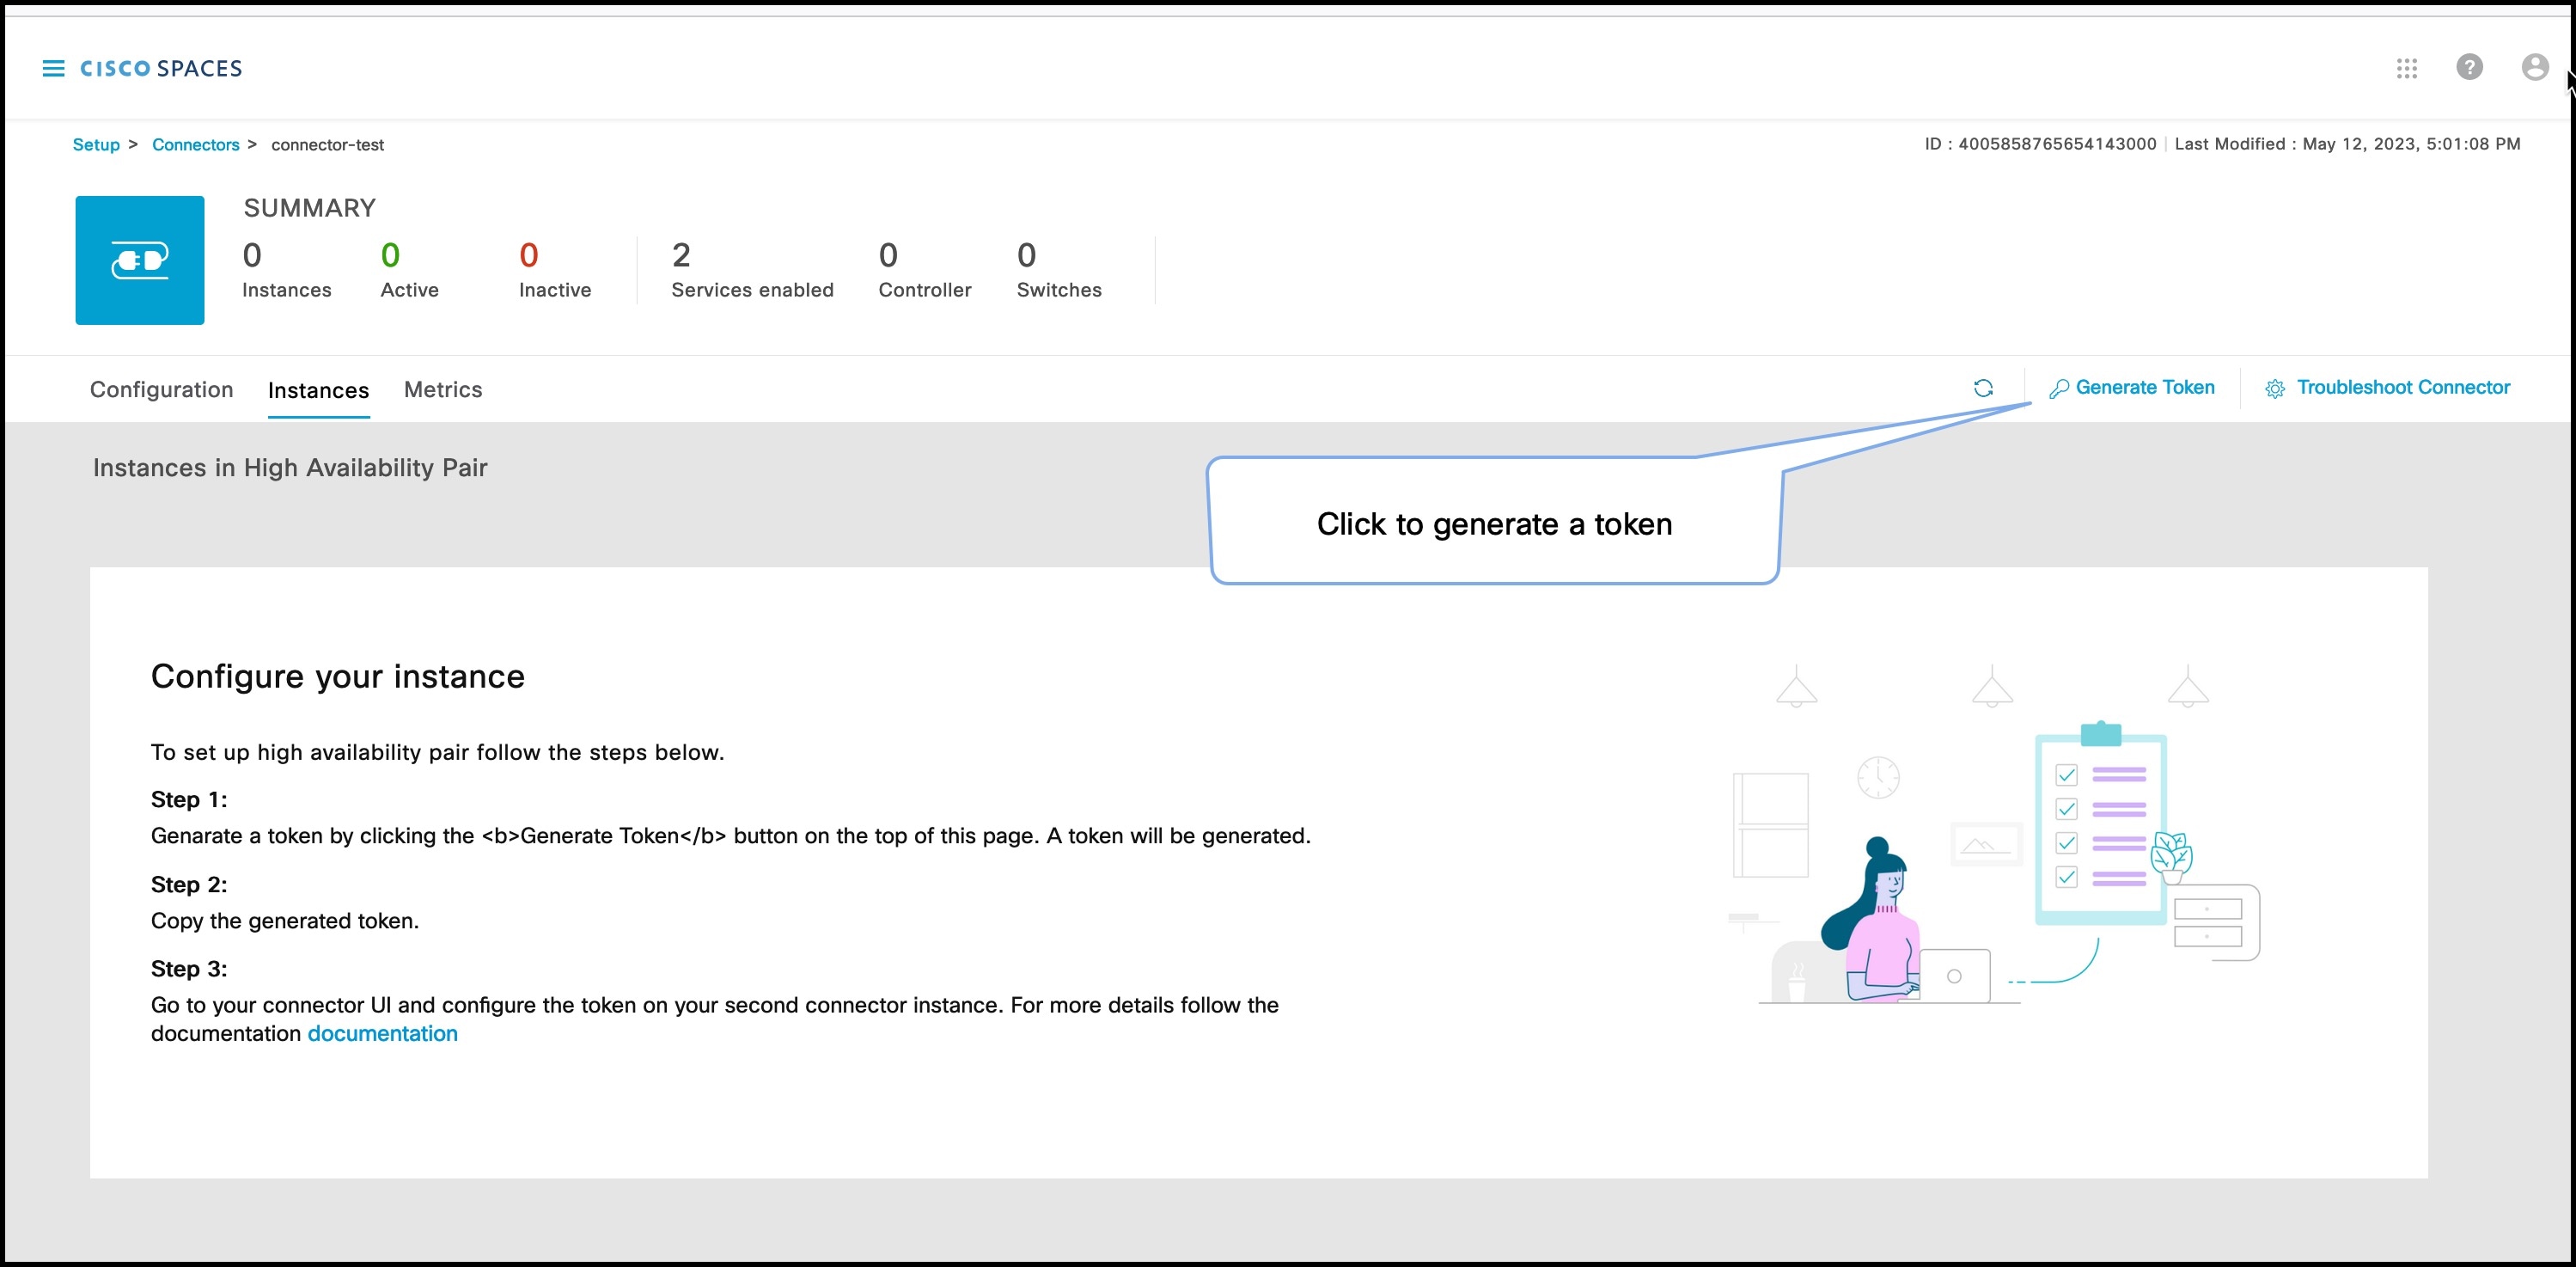
|
||
|
Step 4 |
Log in to the GUI of the first instance of connector and click Configure Token in the top-right corner to provision the first copied token there. 
|
||
|
Step 5 |
Log in to the GUI of the second instance of connector, and click Configure Token in the top-right corner to provision the second copied token there as well.
Two tokens have been configured on two connector instances. You can observe that the connector ID on each instance of the connector is the same |
||
|
Step 6 |
On each instance of the connector, observe that the value of the connector ID is the same. 
|
||
|
Step 7 |
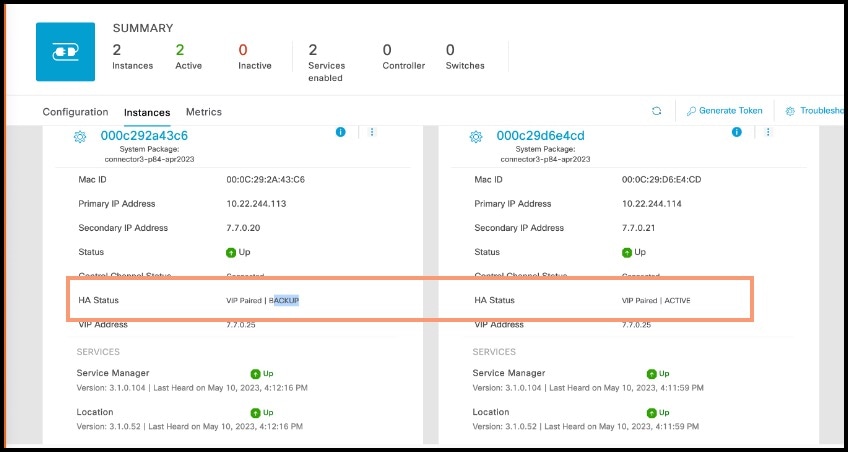
On the Cisco Spaces dashboard, go back to the connector details page, and click the Instances tab. Here, you can see both the connectors that you configured. Observe that the connector IP addresses are reflected here. 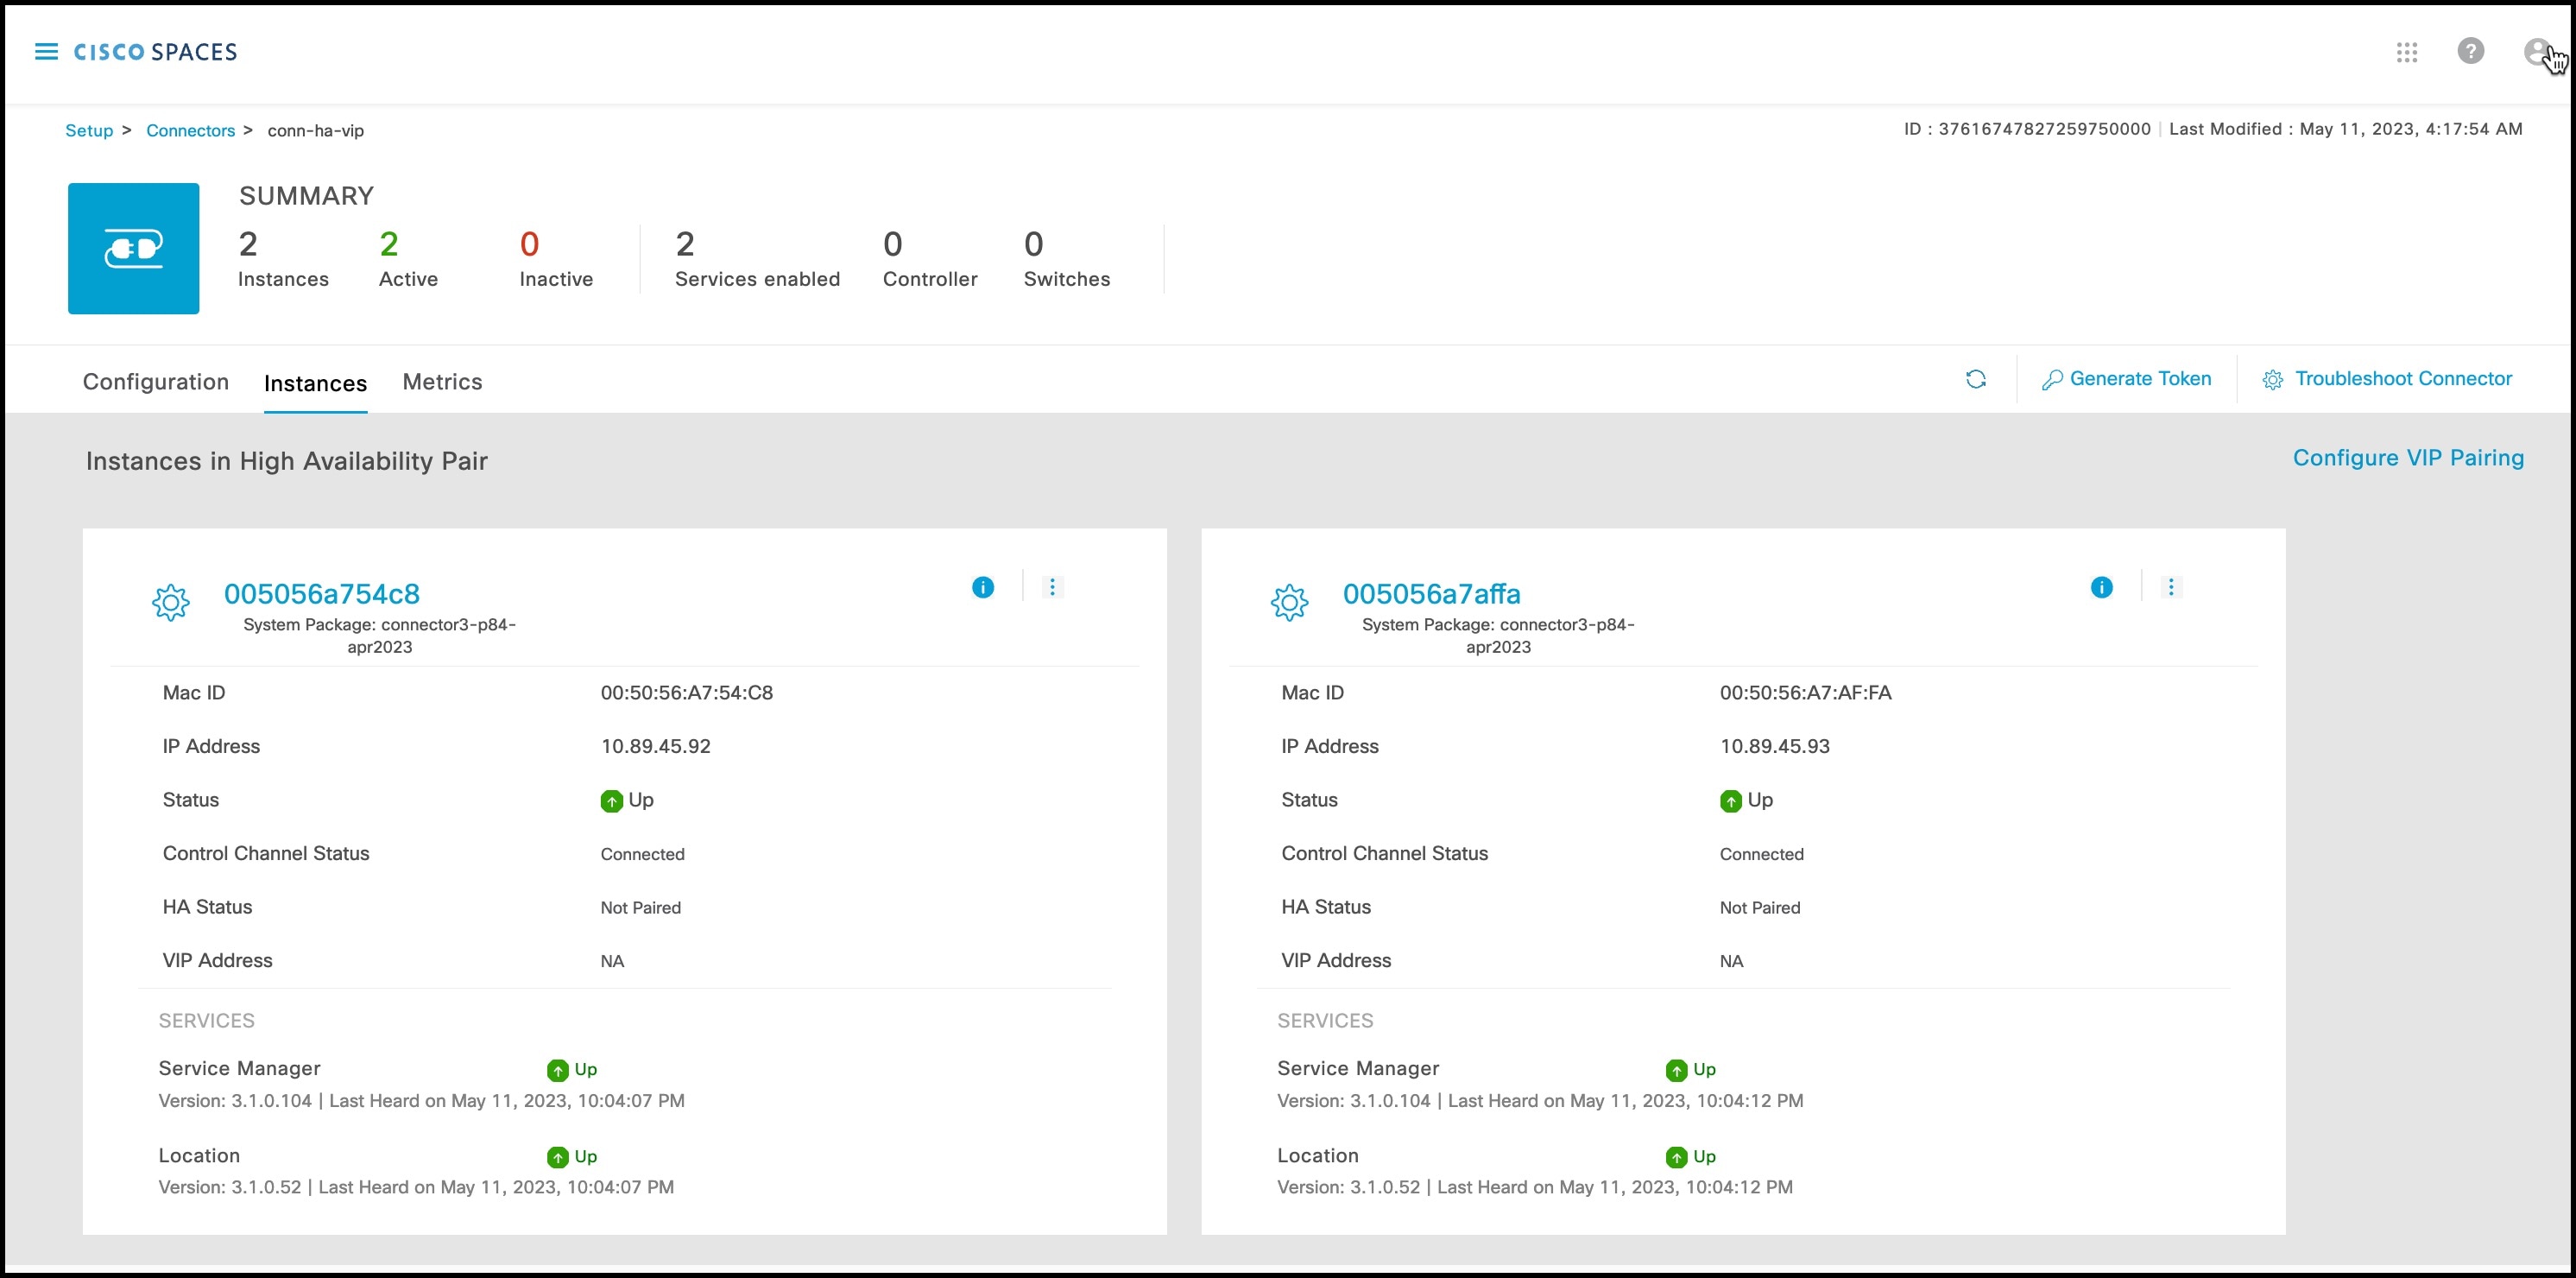
|
||
|
Step 8 |
To configure the two connector instances as VIP-Paired, click Configure VIP Pairing in the top-right corner. 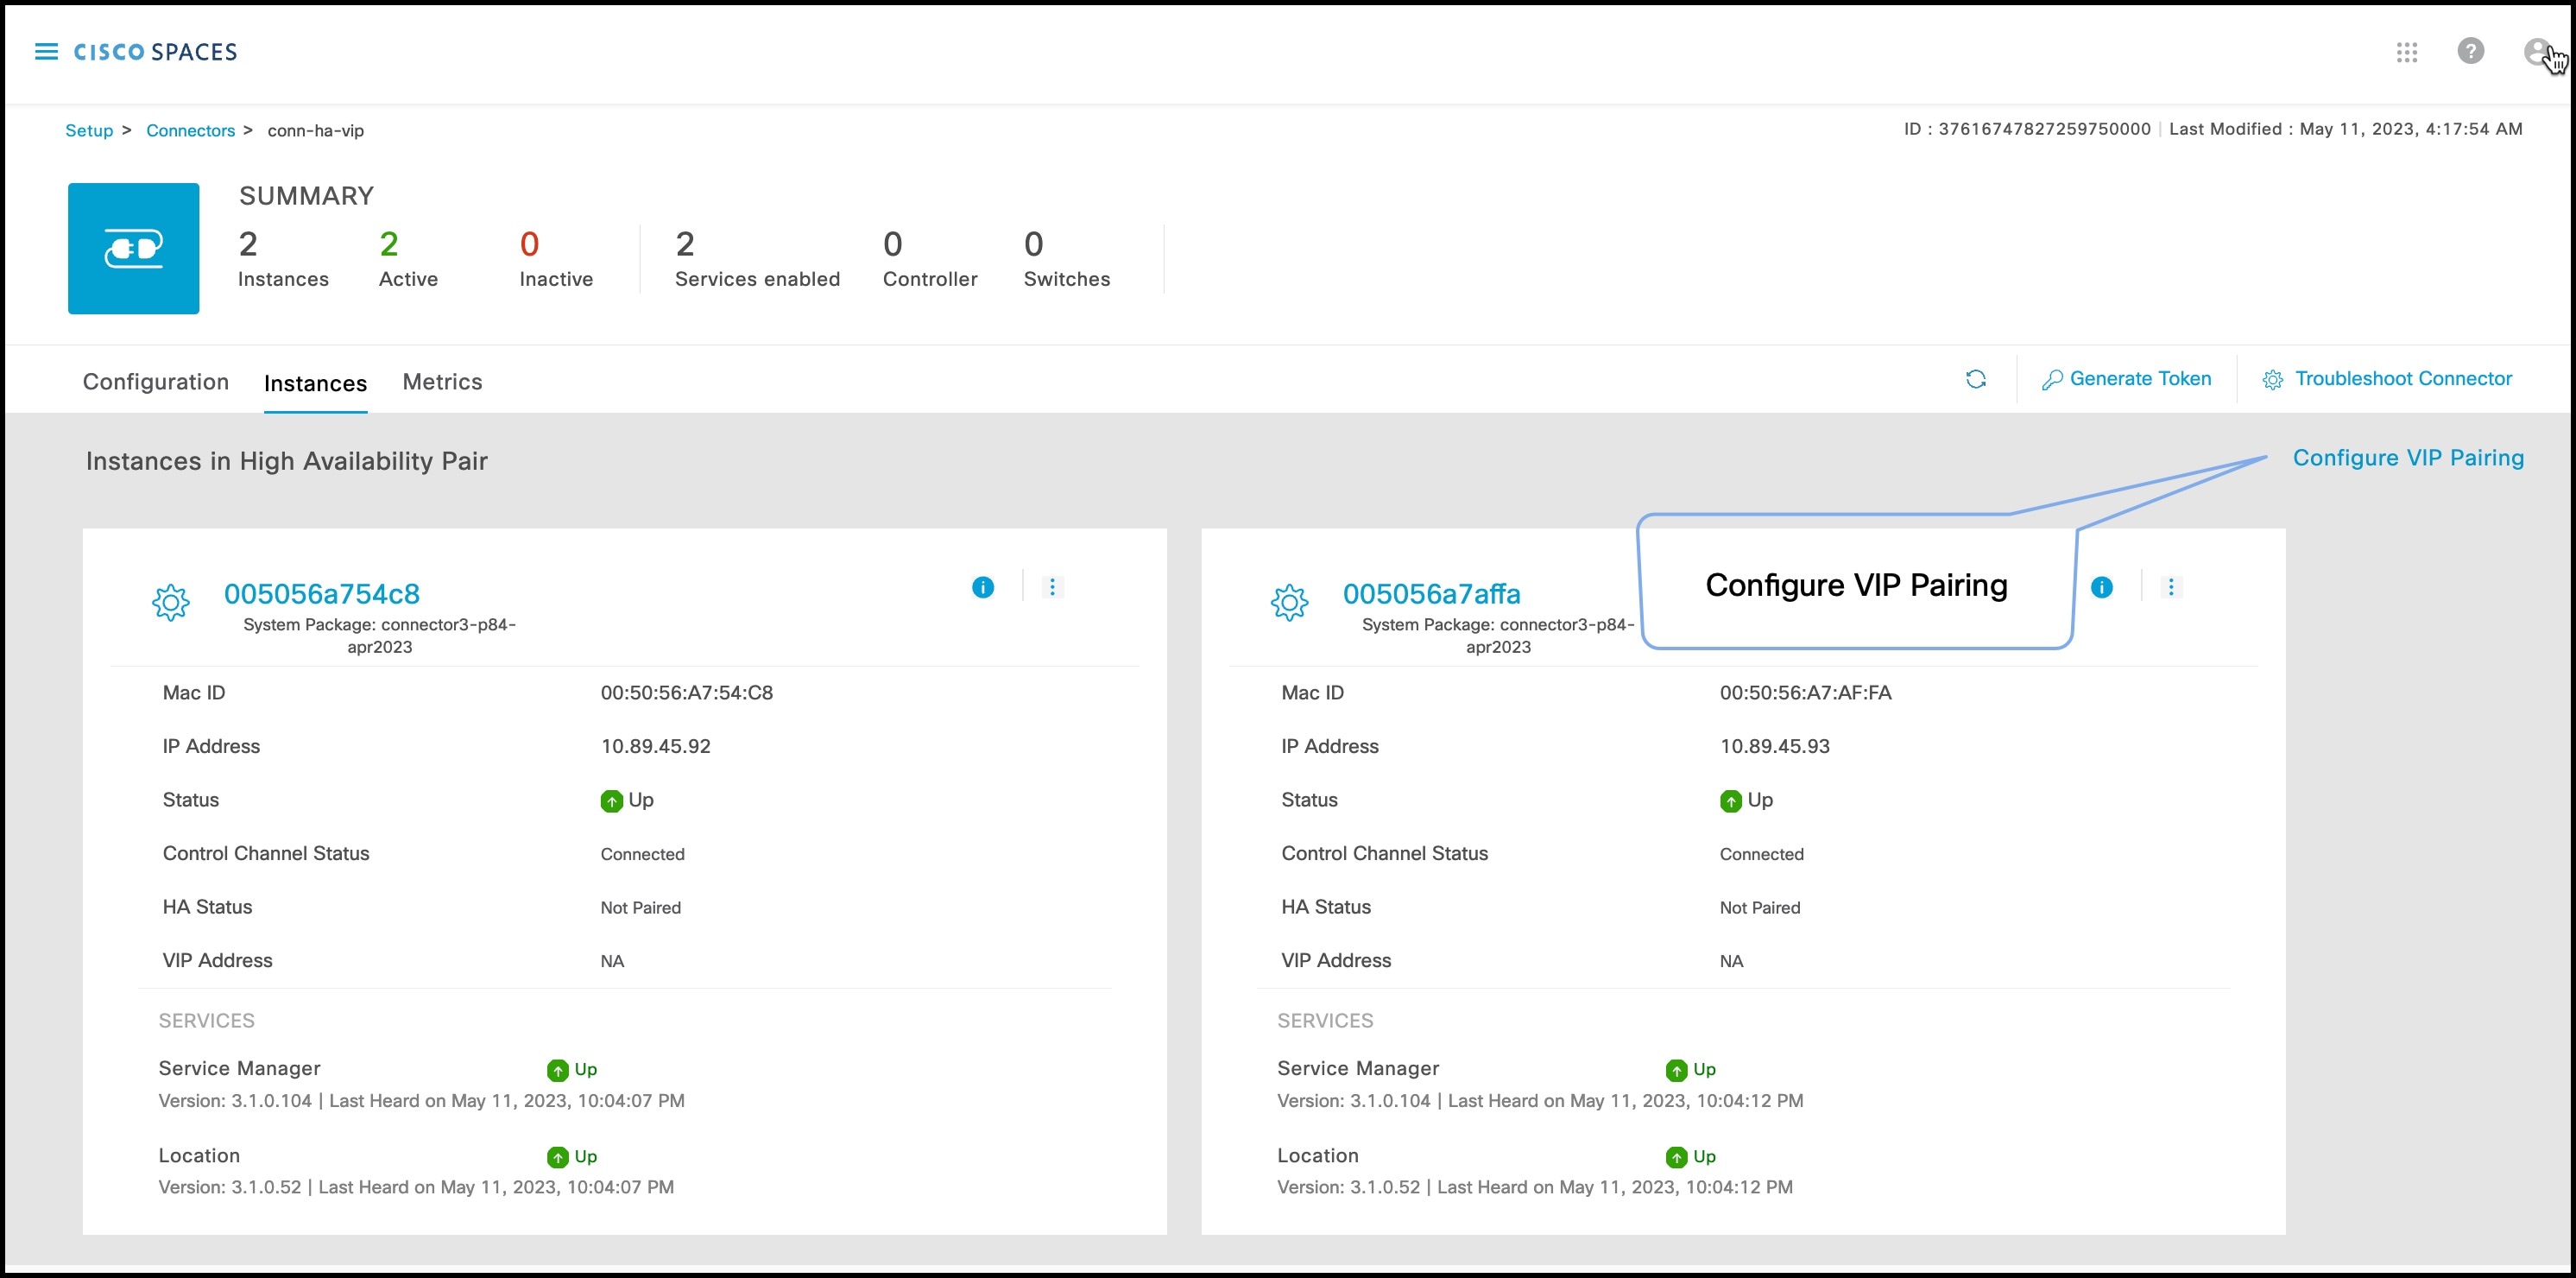
|
||
|
Step 9 |
In the Configure Virtual IP popup that is displayed, enter the Virtual IP address (VIP). If the connector has dual interface enabled, you have to chose which interface would be used VIP pairing. 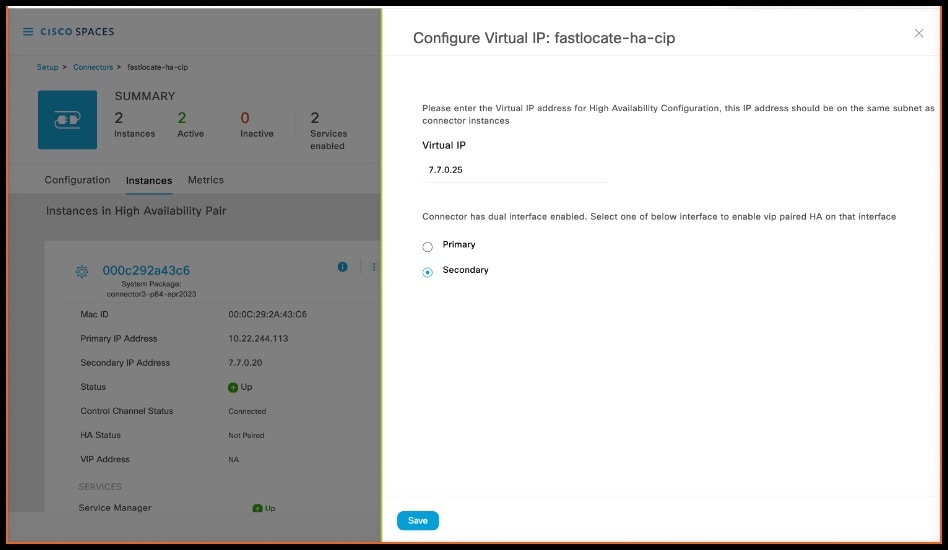
|
 Feedback