Outlines procedures for installing and removing SSDs, providing step-by-step instructions for both tasks to ensure correct handling and replacement within supported hardware.
Installing an SSD
Before you begin
Perform the following steps before you begin the process of removing and replacing an SSD from a Cisco 8500 Series Secure Router:
-
Use an ESD-preventive wrist strap.
-
Back up the data that you want to save. To back up the data follow these steps.
-
Back up the data from the SSD to an external device (USB drive or remote file server).
-
Replace the SSD.
-
Install the required software on the new SSD.
-
Restore configurations and user data back to the new SSD.
-
-
Remove the power supplies before you remove the chassis top cover.
Procedure
| 1. | Ensure the router is powered off and all the power supplies are removed from the chassis. |
|||
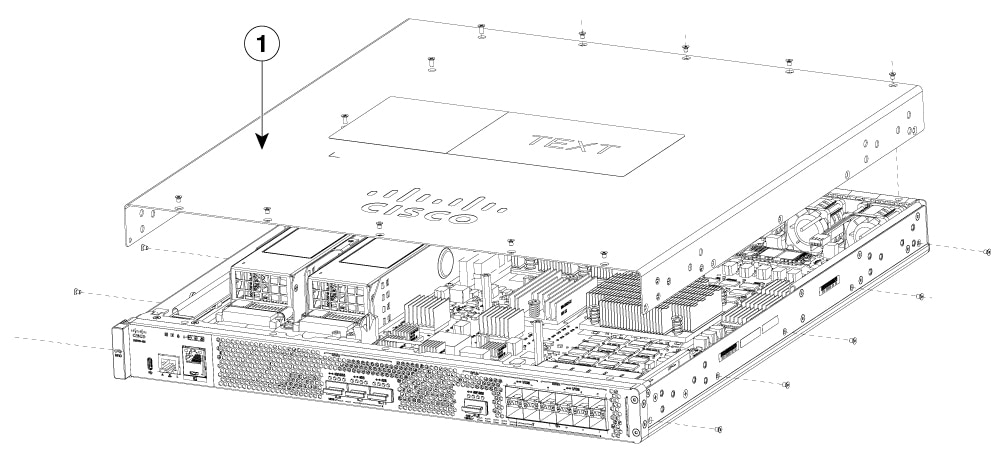
| 2. | If the unit is mounted on a rack, remove the unit from the rack. Then remove rack mount brackets from the side of the chassis. Remove the nine Torx screws on the top surface of the cover, along with the five Torx screws on each side of the cover, using a Torx T8 driver. Then, remove the remaining three screws on the top surface of the cover with a small Phillips screwdriver.
|
|||
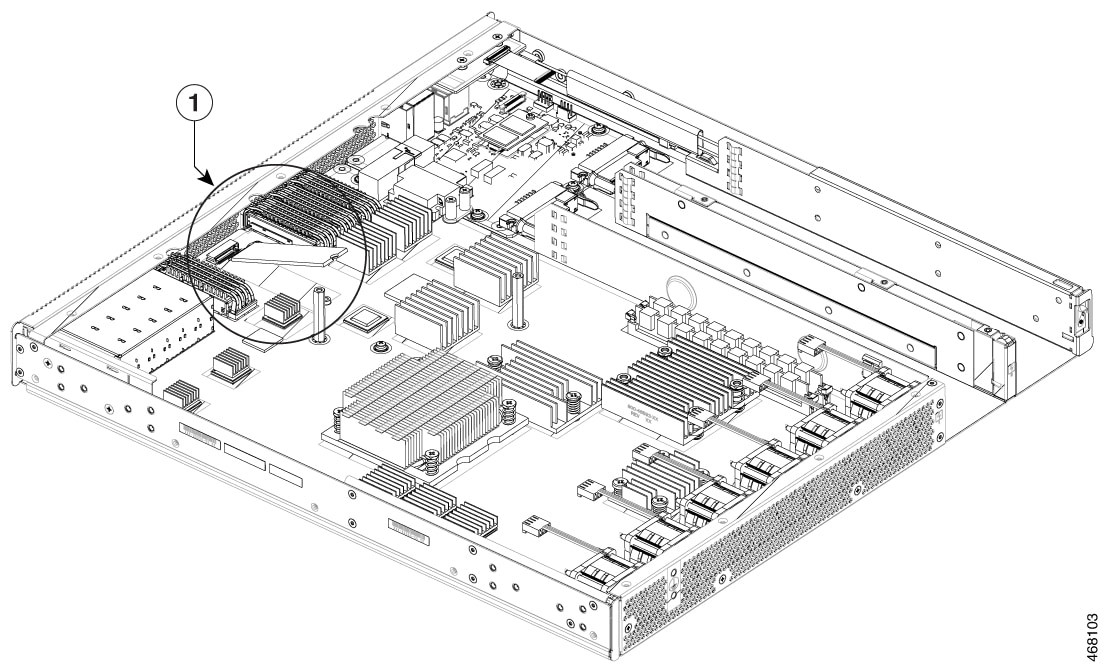
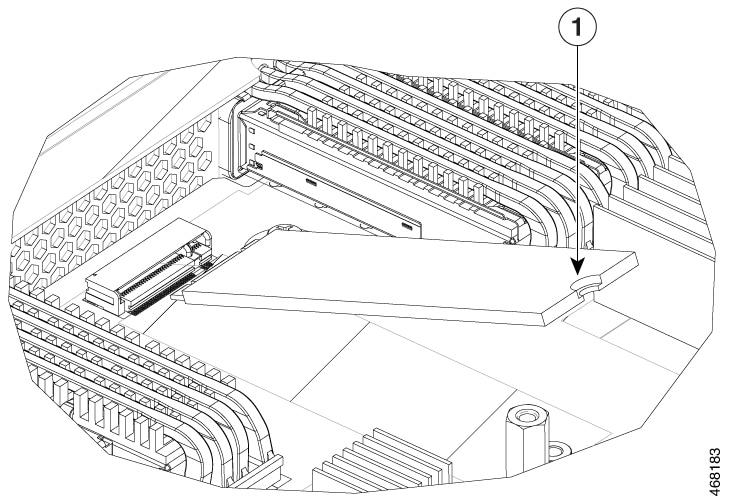
| 3. | Locate the SSD slot. Carefully insert the SSD at approximately a 30 degree angle to seat the card in the connector. Rotate the card downward until it rests on the small notch in the printed circuit board(PCB).
|
|||
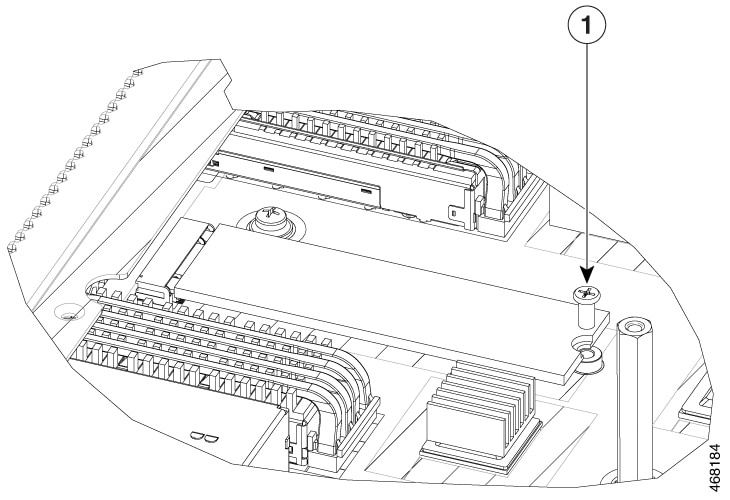
| 4. | Install the retention screw in the hole in the SSD and gently tighten to a torque to no greater than 5 in-lbs |
|||
| 5. | Re-install the cover and replace all screws that were removed in step 1. |
Removing an SSD
Before you begin
Perform the following steps before you begin the process of removing and replacing an SSD from a Cisco 8500 Series Secure Routers:
-
Use an ESD-preventive wrist strap.
-
Back up the data that you want to save.
-
Remove the power supplies before you remove the chassis top cover.
Procedure
| 1. | Ensure the router is powered off and all the power supplies are removed from the chassis. |
|||
| 2. | If the unit is mounted on a rack, remove the unit from the rack. Then remove rack mount brackets from the side of the chassis. Remove the nine Torx screws on the top surface of the cover, along with the five Torx screws on each side of the cover, using a Torx T8 driver. Then, remove the remaining three screws on the top surface of the cover with a small Phillips screwdriver. |
|||
| 3. | Remove the screw retaining the SSD. Keep the screw for inserting a new SSD module.
|
|||
| 4. | After the screw is removed, the SSD module will automatically spring up. |
|||
| 5. | Remove the SSD from the socket. |