Cisco Umbrella SIG Upgrade Guide to Cisco Secure Access

PDF

Cisco Umbrella SIG Upgrade Guide to Cisco Secure Access

Overview to Update SAML Metadata XML

Want to summarize with AI?

Log in

This is the last step in the prerequisites – to update the end-user SAML configuration in your IdP.


If you have SAML integrations set up in Umbrella, you must update your IdPs to include Secure Access endpoints to prevent user lockouts. Any changes made to your SAML configuration in Umbrella will also appear in Secure Access. If you delete SAML in Secure Access, the configurations will be deleted in the Umbrella dashboard.

Updated Service Provider SAML Metadata

  • Entity ID—saml.fg.id.sse.cisco.com

  • Entity URL—fg.id.sse.cisco.com/gw/auth/acs/response

Manual Import

If your identity provider (IdP) does not allow you to upload the Secure Access Metadata XML file and instead requires you to manually enter the information, then review these topics:

For Umbrella, see Provision Identities Through Manual Import.

For Secure Access, see SAML Certificate Renewal Options.
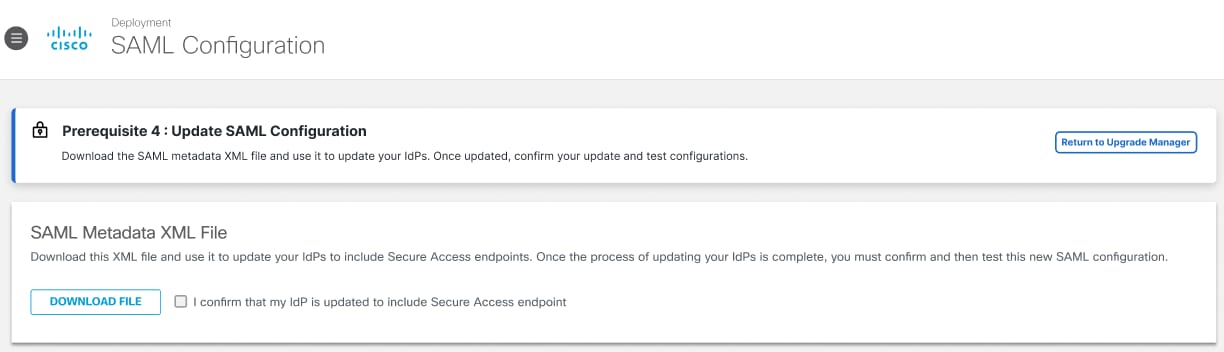

Download SAML Metadata XML

To update your identity providers (IdPs) for Secure Access, download the Secure Access metadata XML file located in your Umbrella dashboard. This file contains important metadata, including the service provider Issuer ID, assertion consumer endpoint URL, and Secure Access SAML signing certificate. Once the configuration is successful, your Entity ID will change to saml.fg.id.sse.cisco.com. After updating your IdPs with this information, be sure to test the new SAML configuration before marking this step as complete. If you mark this step as complete before integrating Secure Access XML file to your IdPs, may result in your users getting locked out of Umbrella.

We recommend performing these actions during a scheduled maintenance window to minimize disruption to end users, as changing the Entity ID may temporarily affect user access.

Before you begin

This prerequisite step only appears if you have SAML configured.

Procedure

  1. In the Umbrella dashboard navigate to Upgrade Manager > 4. Update SAML Configuration > Click Start.

  2. Click Download File to download the Secure Access SAML metadata XML File.


    This is an image to show the Download File button to download your IdP SAML metadata file in XML format.
    1. For more information on configuring your IdP and exporting your IdP metadata refer to your vendor's documentation.
  3. Check the box I Confirm that my IdP is updated to include Secure Access endpoint after you configured Secure Access metadata files with your IdPs.


    This is a screenshot of where to check the check box once you updated your IdP to include Secure Access Endpoint.
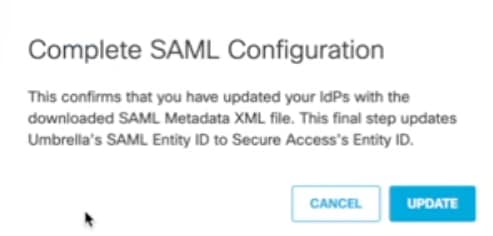
  4. Another pop-up message appears to confirm that your IdP is updated. Click Update.


    This is a screenshot of the Complete SAML Configuration pop-up window where you click on the Update button.
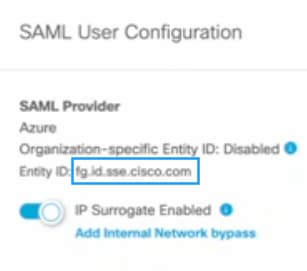
  5. Umbrella's Entity ID changes to Secure Access' Entity ID.


    This screenshot shows the updated Secure Access Entity ID.
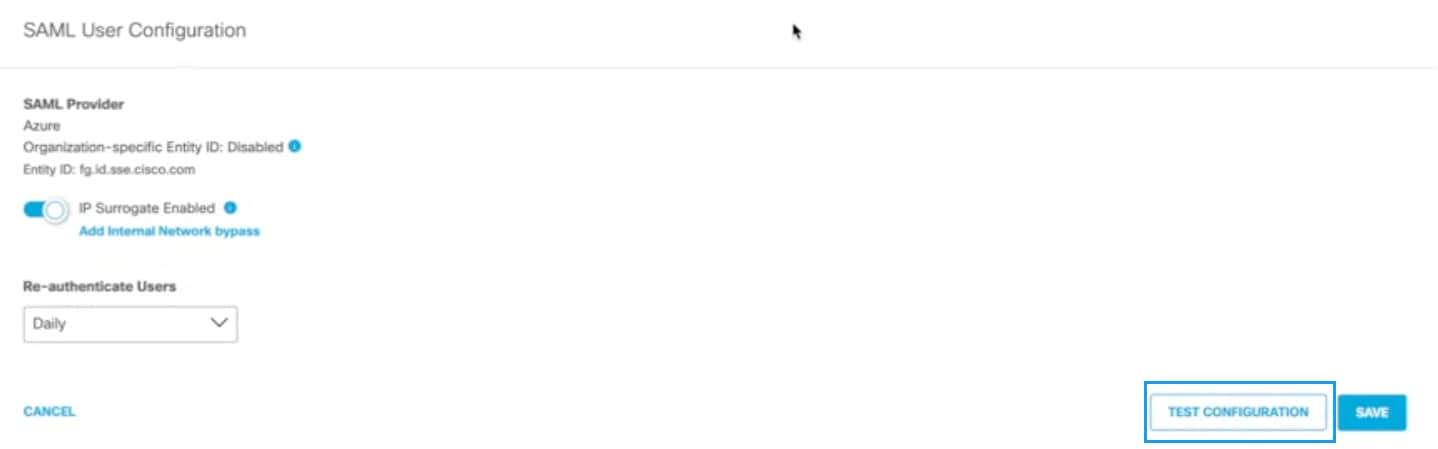
  6. Click Test Configuration to test whether a user can authenticate with the configured IdP.


    This is a screenshot to show the Test Configuration button to click on to confirm a user can authenticate with the integrated IdP.
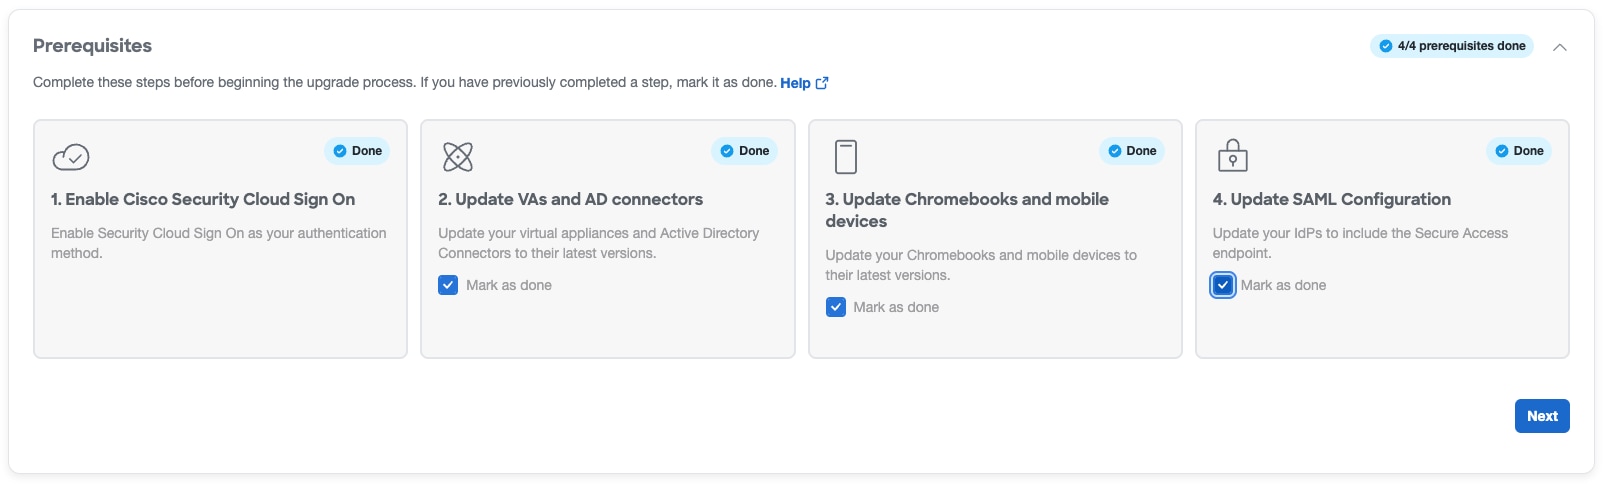
  7. Navigate to Upgrade Manager > 4. Download SAML Metadata XML and check the box next to Mark as done.


What to do next

SAML Integrations in Secure Access are found by navigating to Connect > Users and User Groups, and Endpoint Devices > click Configuration management > SSO authentication. To learn more about SAML configurations in Secure Access see, Configure Integrations with SAML Identity Providers.
Deleting your default SAML configuration in Secure Access will also remove the configuration from the Umbrella dashboard—unless you set up OpenID Connect (OIDC) in Secure Access. Umbrella does not support OIDC. If you integrate an OIDC identity provider (IdP) in Secure Access, it will not appear in Umbrella, and all SAML configuration changes must be managed through Secure Access. For more information about OIDC, see Configure Integrations with OIDC Identity Providers.