Hardware Installation Guide for the Cisco 8100 Series Secure Routers

PDF

Hardware Installation Guide for the Cisco 8100 Series Secure Routers

Power supply

Want to summarize with AI?

Log in

Explains the power supply configurations for the routers and provides instructions for installing the router with a PSU on a rack tray, ensuring reliable and safe hardware operation.


The product power specifications are as follows:

  • AC input voltage: Universal 100 to 240 VAC

  • Frequency: 50 to 60 Hz

  • Maximum output power: Up to 30W/66W for non-PoE supply and up to 150W for PoE supply.

  • PoE and PoE+ (only for C8161-G2)

  • Output voltage: +12V for system power and -53.5V for PoE power.

Table 1. Power requirements for Cisco 8100 Series Secure Routers

Device supported

Power source

Input rated

Output rated

C8130-G2

C8131-G2

30W AC Power Adapter (PWR-CC1-30W)

100-240VAC, 1A

12V, 2.5A

C8130-G2

C8131-G2

C8140-G2

C8151-G2

C8130-VAI-G2

C8130-VAP-G2

C8151-CVAI-G2

C8151-CVAP-G2

66W AC Power Adapter (PWR-CC1-66W)

100-240VAC, 2A

12V, 5.5A

C8161-G2

150W AC Power Adapter (PWR-CC1-150W-AC)

100-240 VAC, 2.5A

12V 6.0A, -53.5V 1.55A


Install the router with a PSU on a rack tray

This section explains how to install the router with a PSU (Power Supply Unit) on a rack-tray.

Procedure

1.

Obtain the rack-tray.

2.

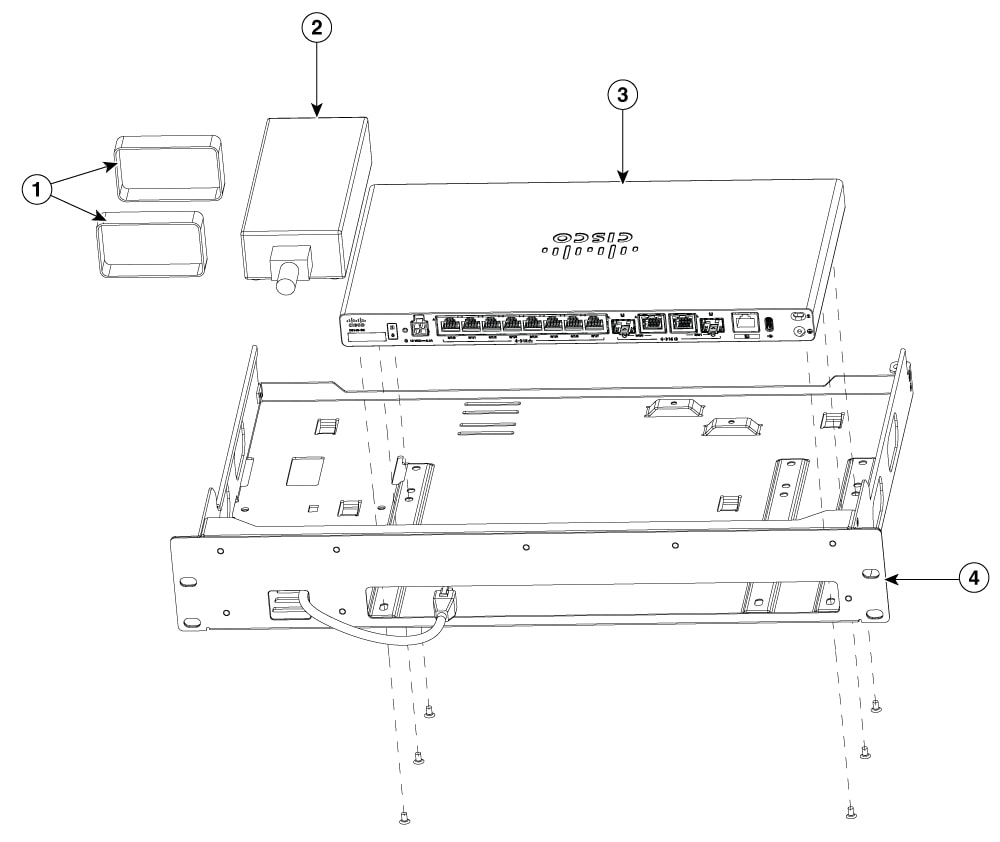
Align the router with the mounting holes on the rack-tray as shown in the figure (after step 6).

3.

Secure the router to the tray using the provided screws.

4.

Attach the velcro straps to the Power Supply Unit (PSU).

5.

Secure the PSU alongside the router using the velcro straps.

6.

Connect the PSU to the router using the power cable.

Figure 1. Rack-tray installation with PSU for Cisco 8100 Series Secure Routers

1

Velcro straps

2

PSU

3

Router

4

Rack-tray

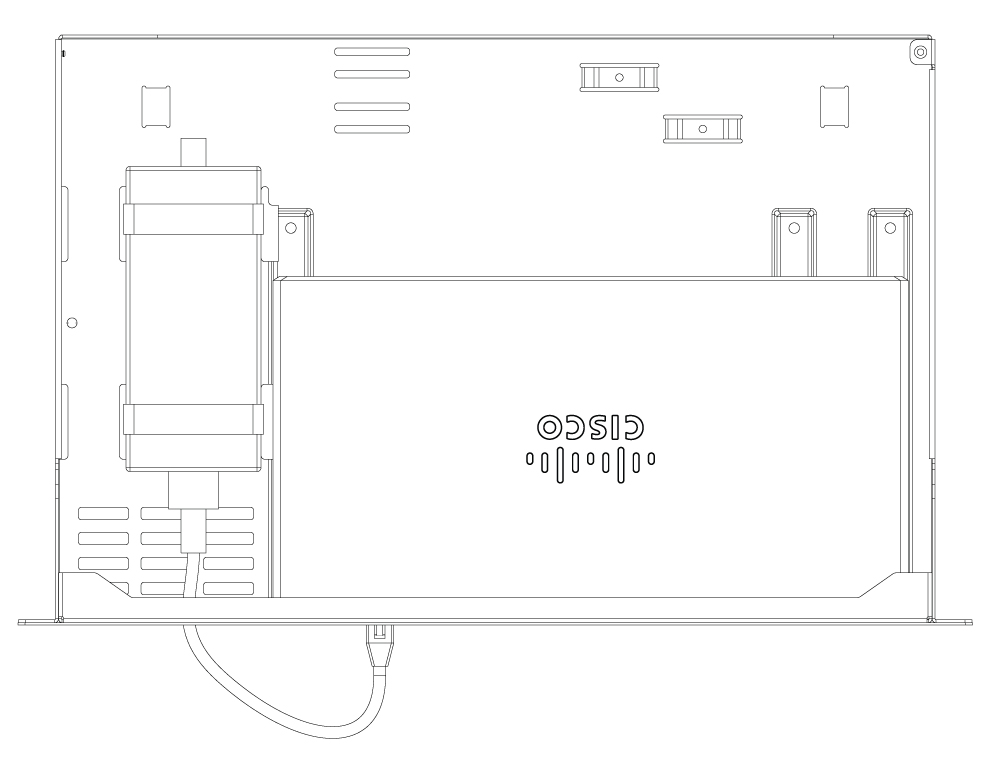
Figure 2. Rack-tray attached with PSU to Cisco 8100 Series Secure Router