Getting Started

Activate IoT Service (Wireless)

This task shows you how to activate IoT service (wireless) on some or all your devices, from the Cisco Spaces dashboard.

Before you begin

To activate IoT service (wireless), your network must meet the below prerequisites:


Note


  • This workflow is applicable only for Connector Release 3. We recommend you upgrade from Connector 2.x for smooth functioning of your services. If it is essential to enable IoT service (wireless) on Connector 2.x, refer to Enable IoT service on Connector2.

  • The workflow initiated by this procedure automatically checks for prerequisites necessary to complete this task.

  • With split licensing, accounts without a full tenant-level Advantage license see a limited About IoT Services page. A banner directs users to activate IoT services from the Manage page, where activation must be done in bulk because one-click activation and the activation wizard are unavailable. The Activate button and Activation Status section are hidden, and users can view only the prerequisites. Only accounts with a full Advantage license can begin the IoT services journey from the About page.


Procedure


Step 1

Login to Cisco Spaces.

Step 2

From the left navigation pane, click IoT Services > About IoT Services.

You can see the number of connectors activated with the IoT service (wireless) service. You can also see the number of APs deployed as an IoT service (wireless) gateway.
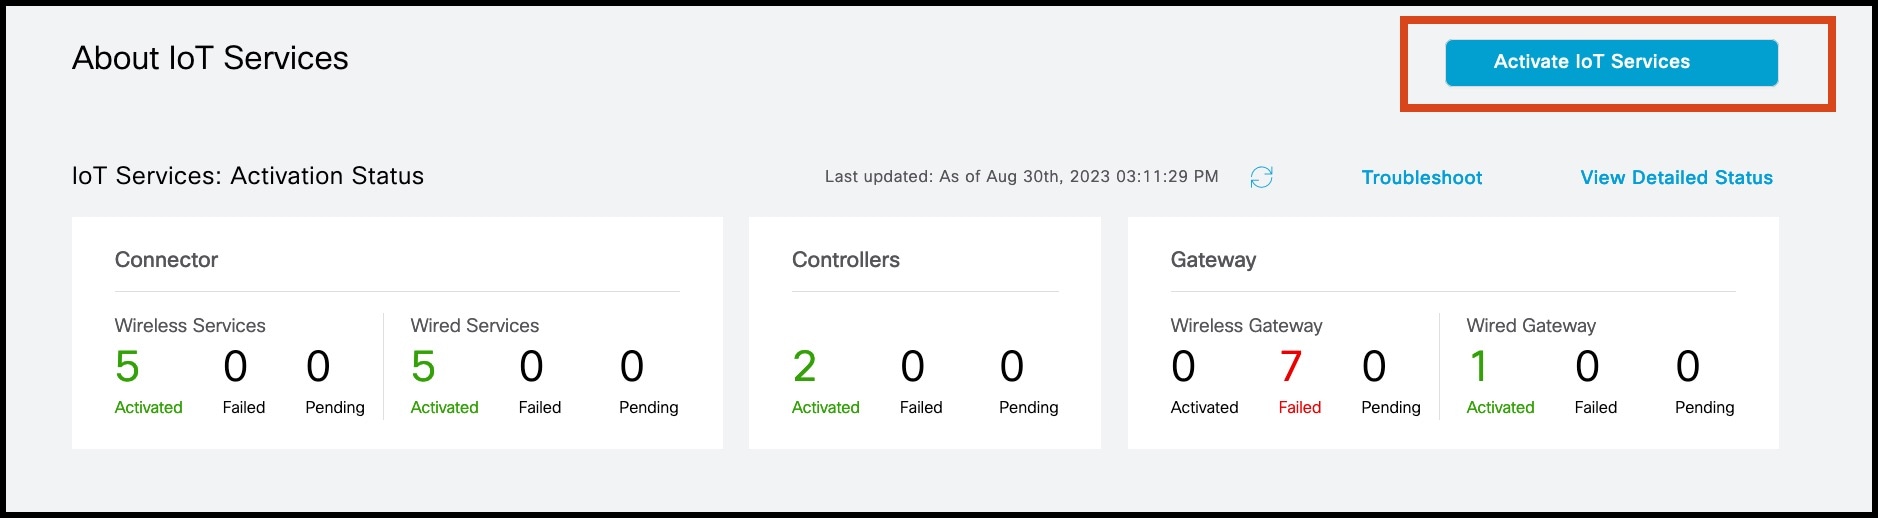
Figure 1. About IoT Services

Click View Detailed Status to see the breakdown of the activation status of various individual devices.
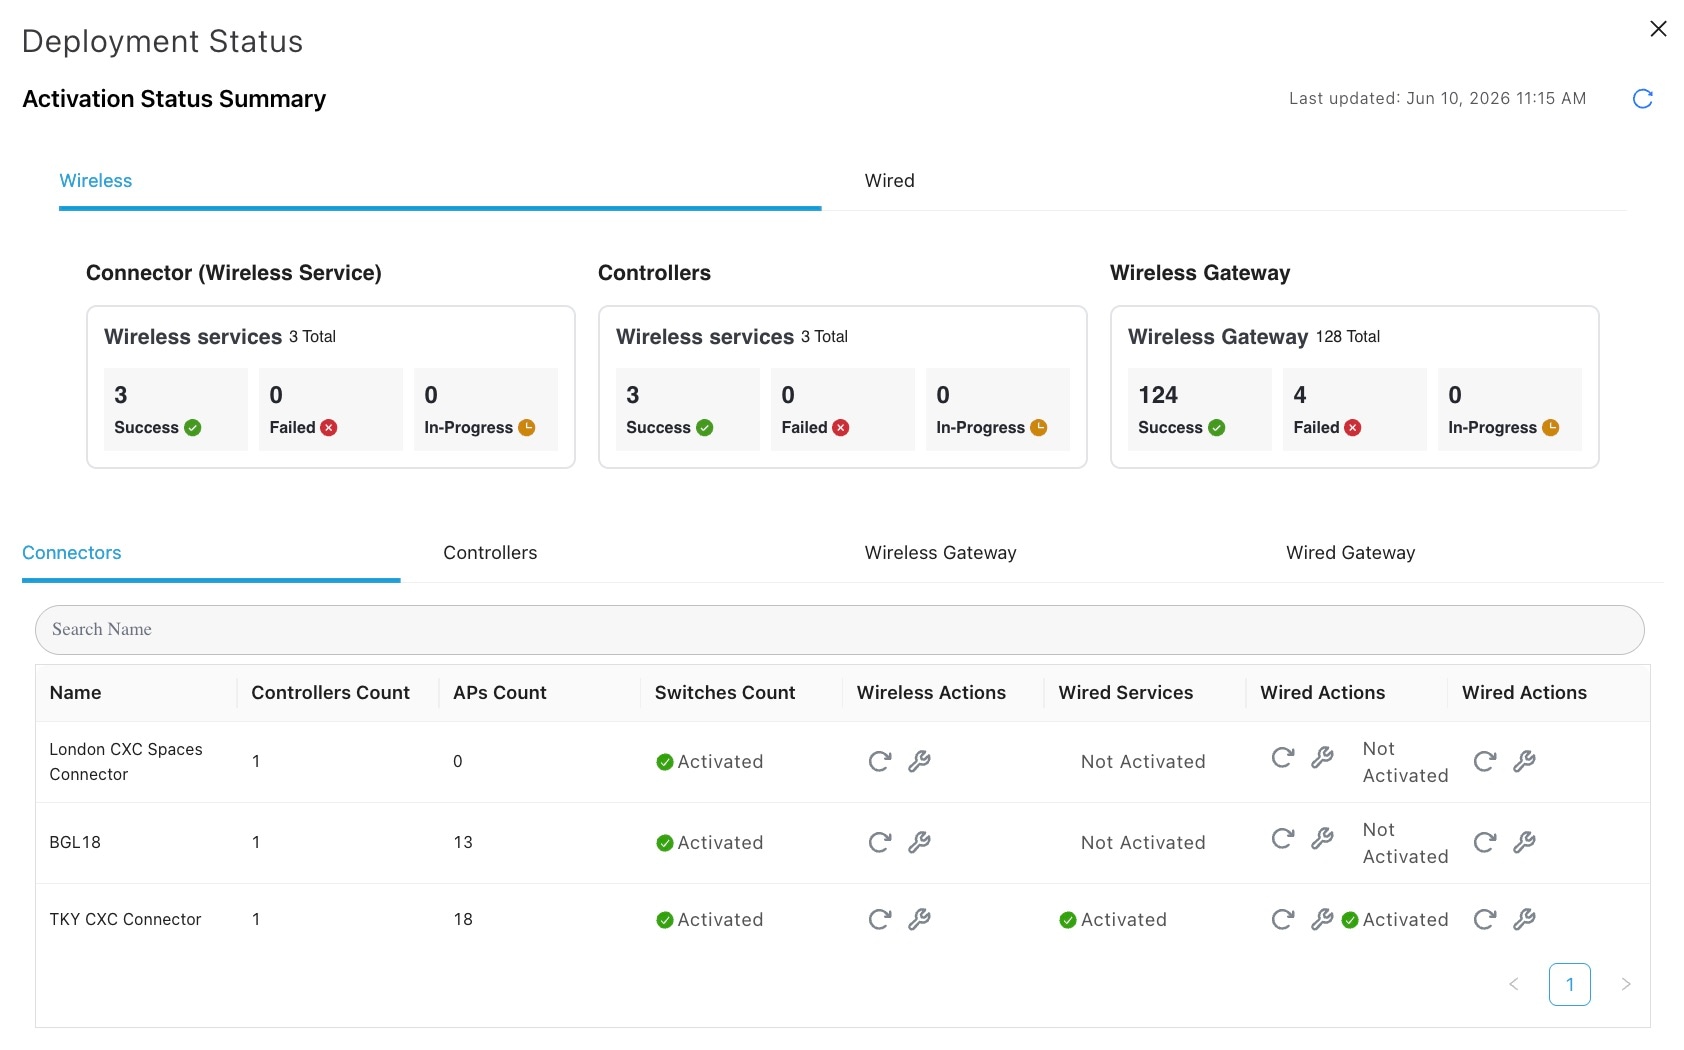
Figure 2. Detailed Status of Devices Activated With IoT Service (Wireless)

Step 3

In the About IoT Services window top-left corner, click Activate and choose Wireless.
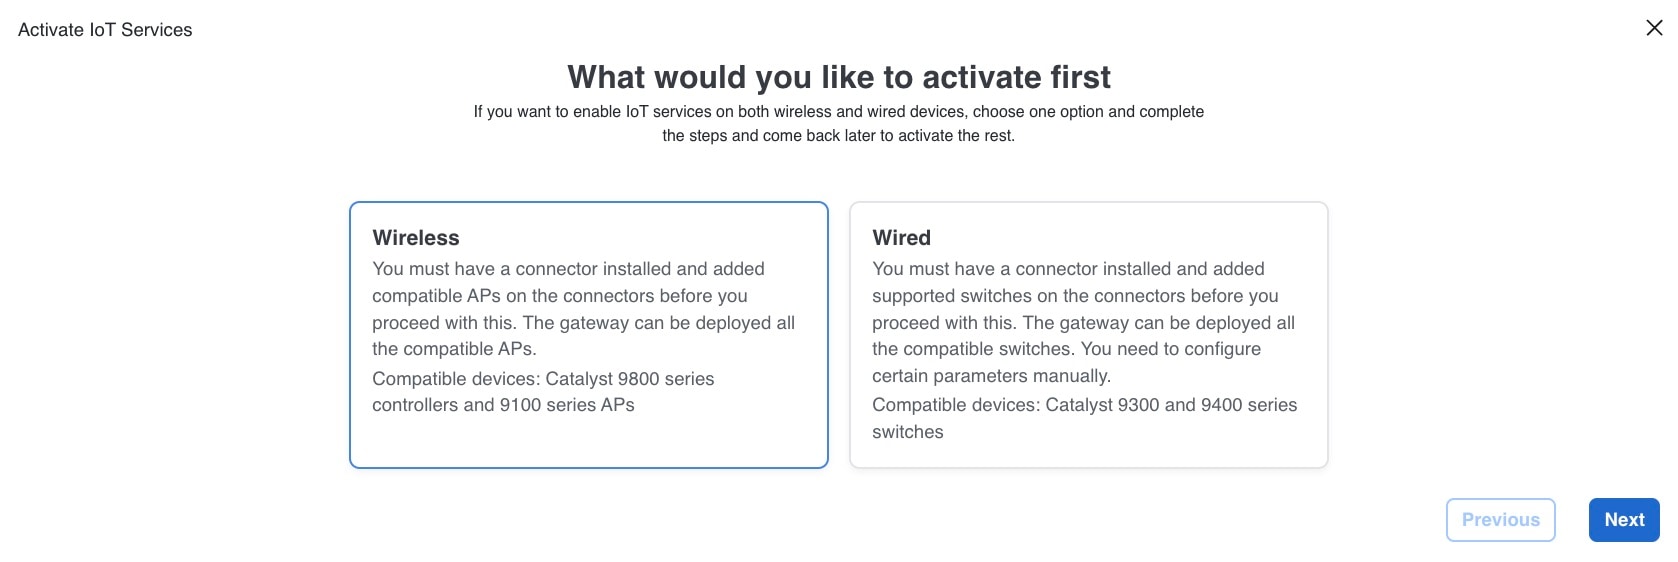
Figure 3. What would you like to activate first

Step 4

The Checking the prerequisites tab appears.

Figure 4. Prerequisites check
You can see the list of all devices on which IoT service (wireless) can be activated, along with the activation time.
Figure 5. List of Supported Devices

Step 5

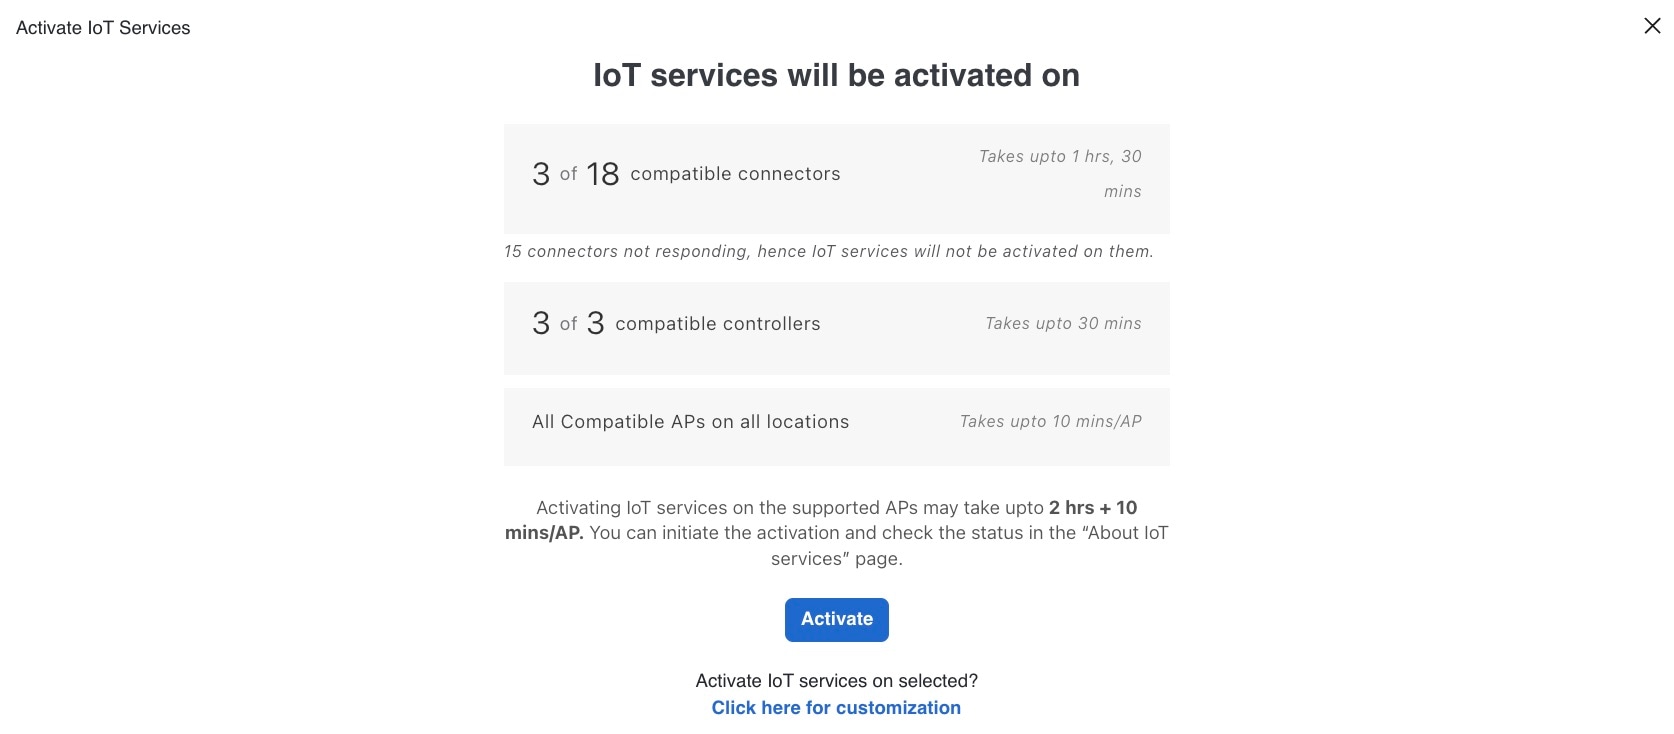
To activate IoT service (wireless) on all devices on your network, in the IoT services activation initiated window, click Activate.

This activation of IoT service (wireless) automates these tasks:
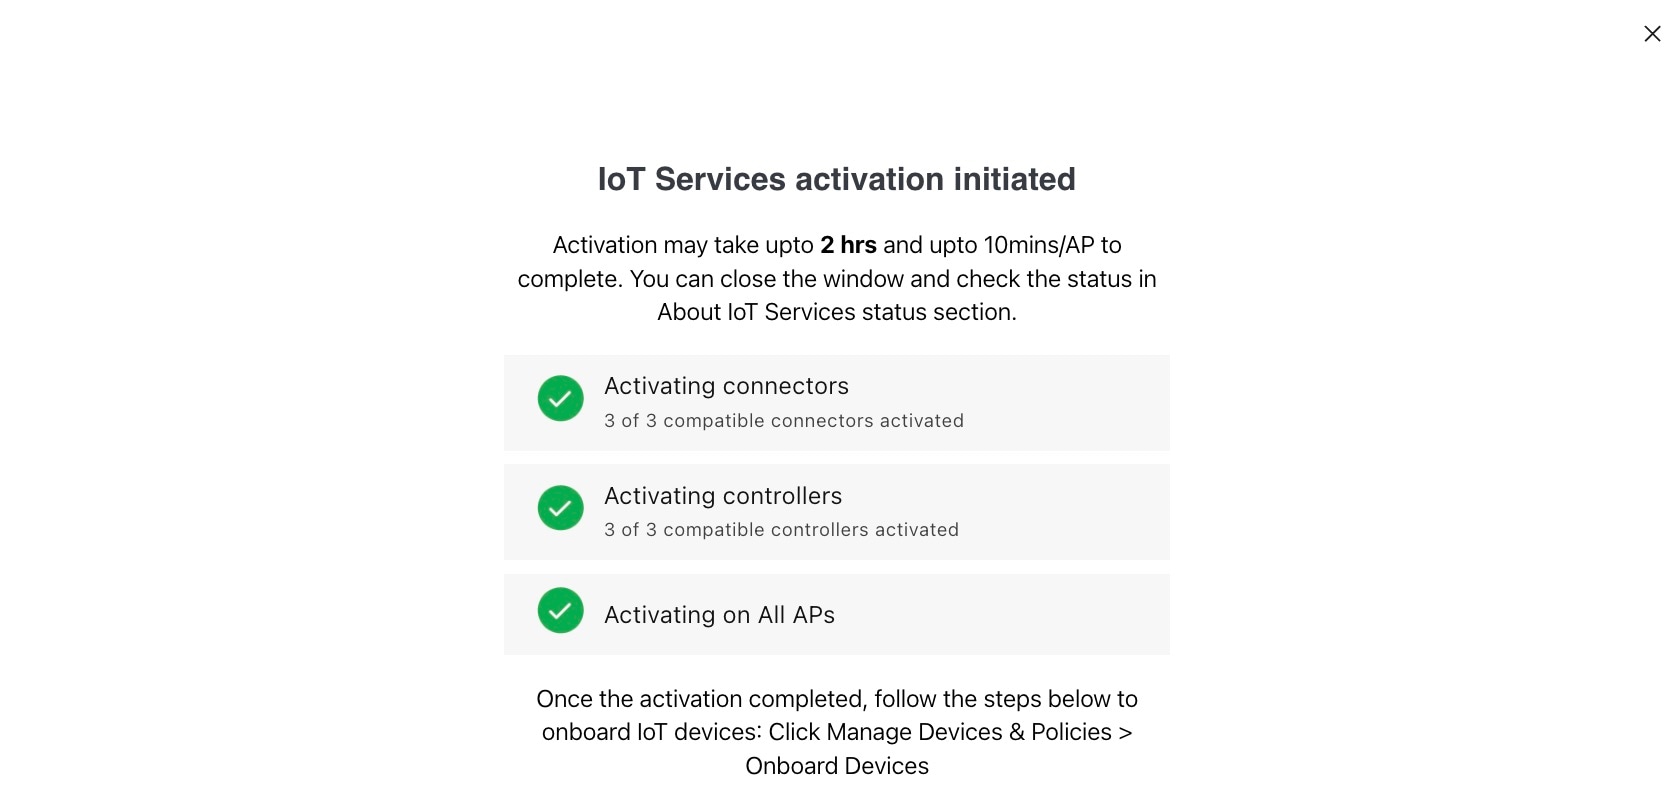
  • Enables IoT streams on the connector

  • Enables the wireless controller stream

  • Configures APs as a Bluetooth Low Energy (BLE) gateway (this includes turning on the BLE radio, BLE scanning, and deploying the BLE gateway app)

Figure 6.

Step 6

To activate IoT service (wireless) only on specific devices of your network, do these:
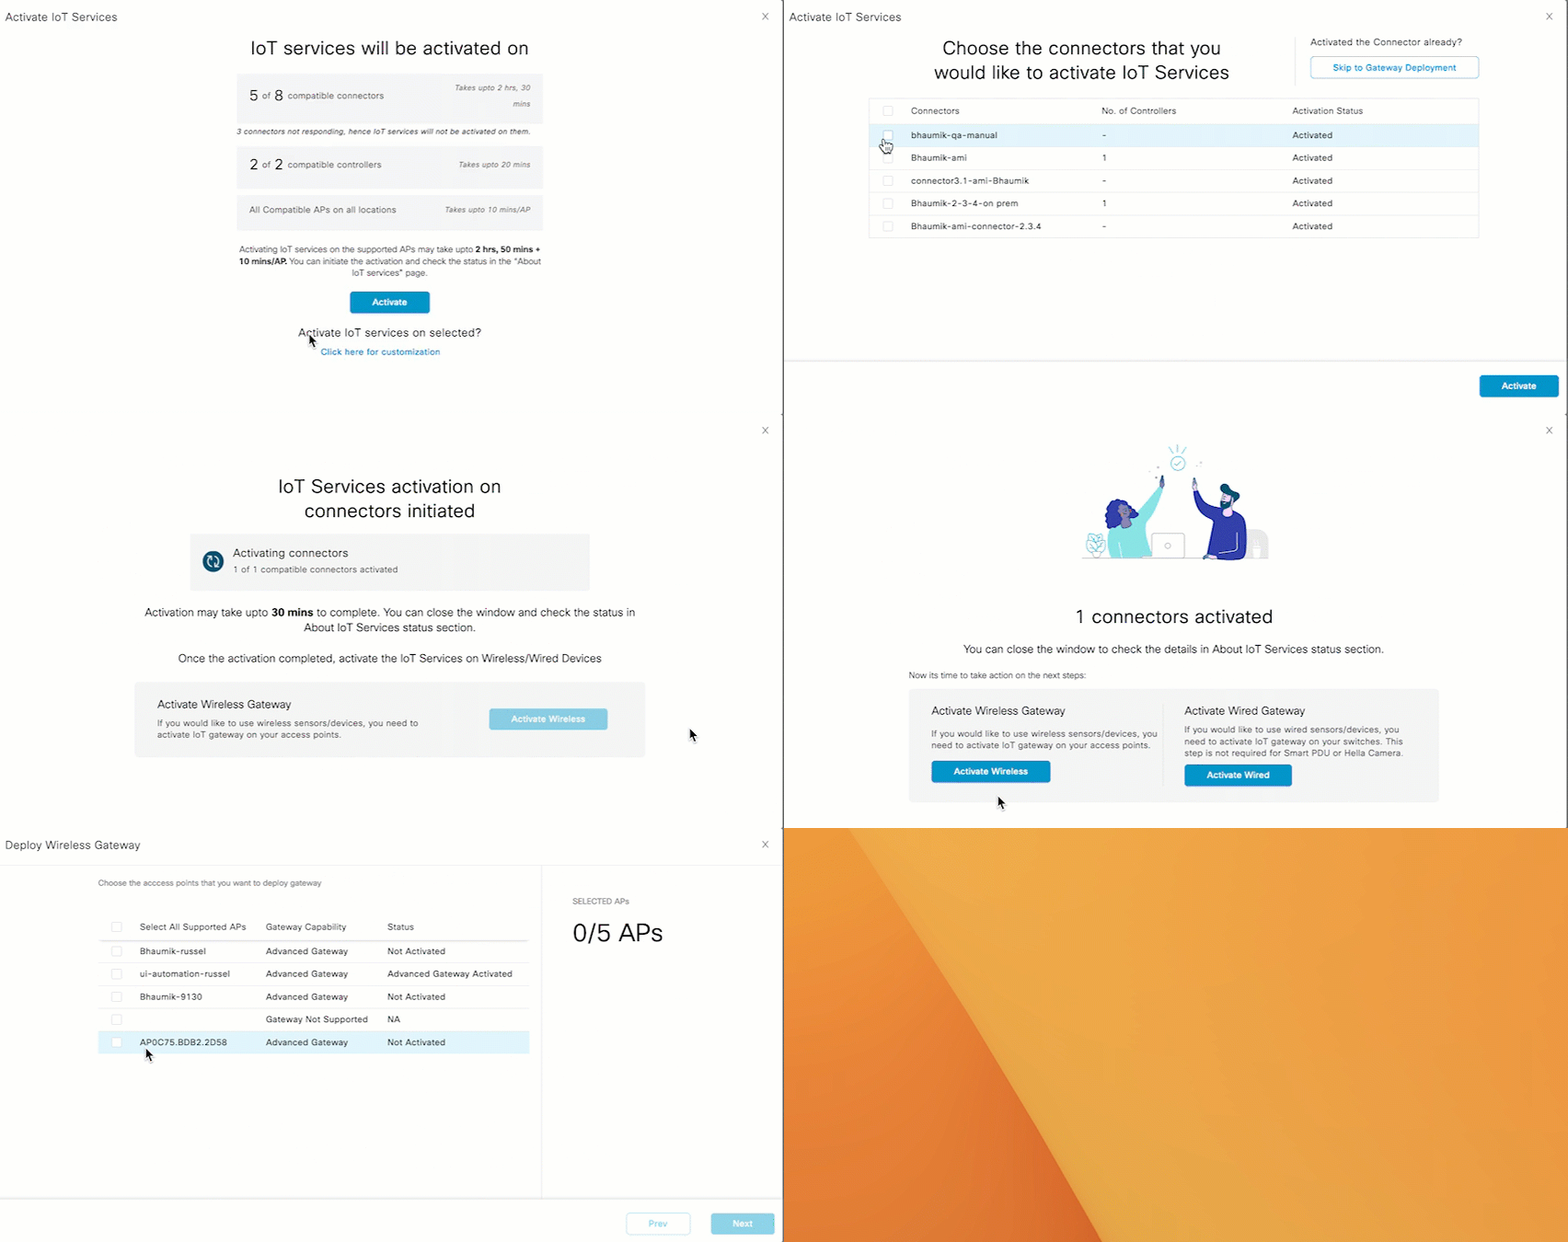
  1. Choose one or more connectors to activate IoT service (wireless).

  2. To activate the wireless gateway, click Activate Wireless.

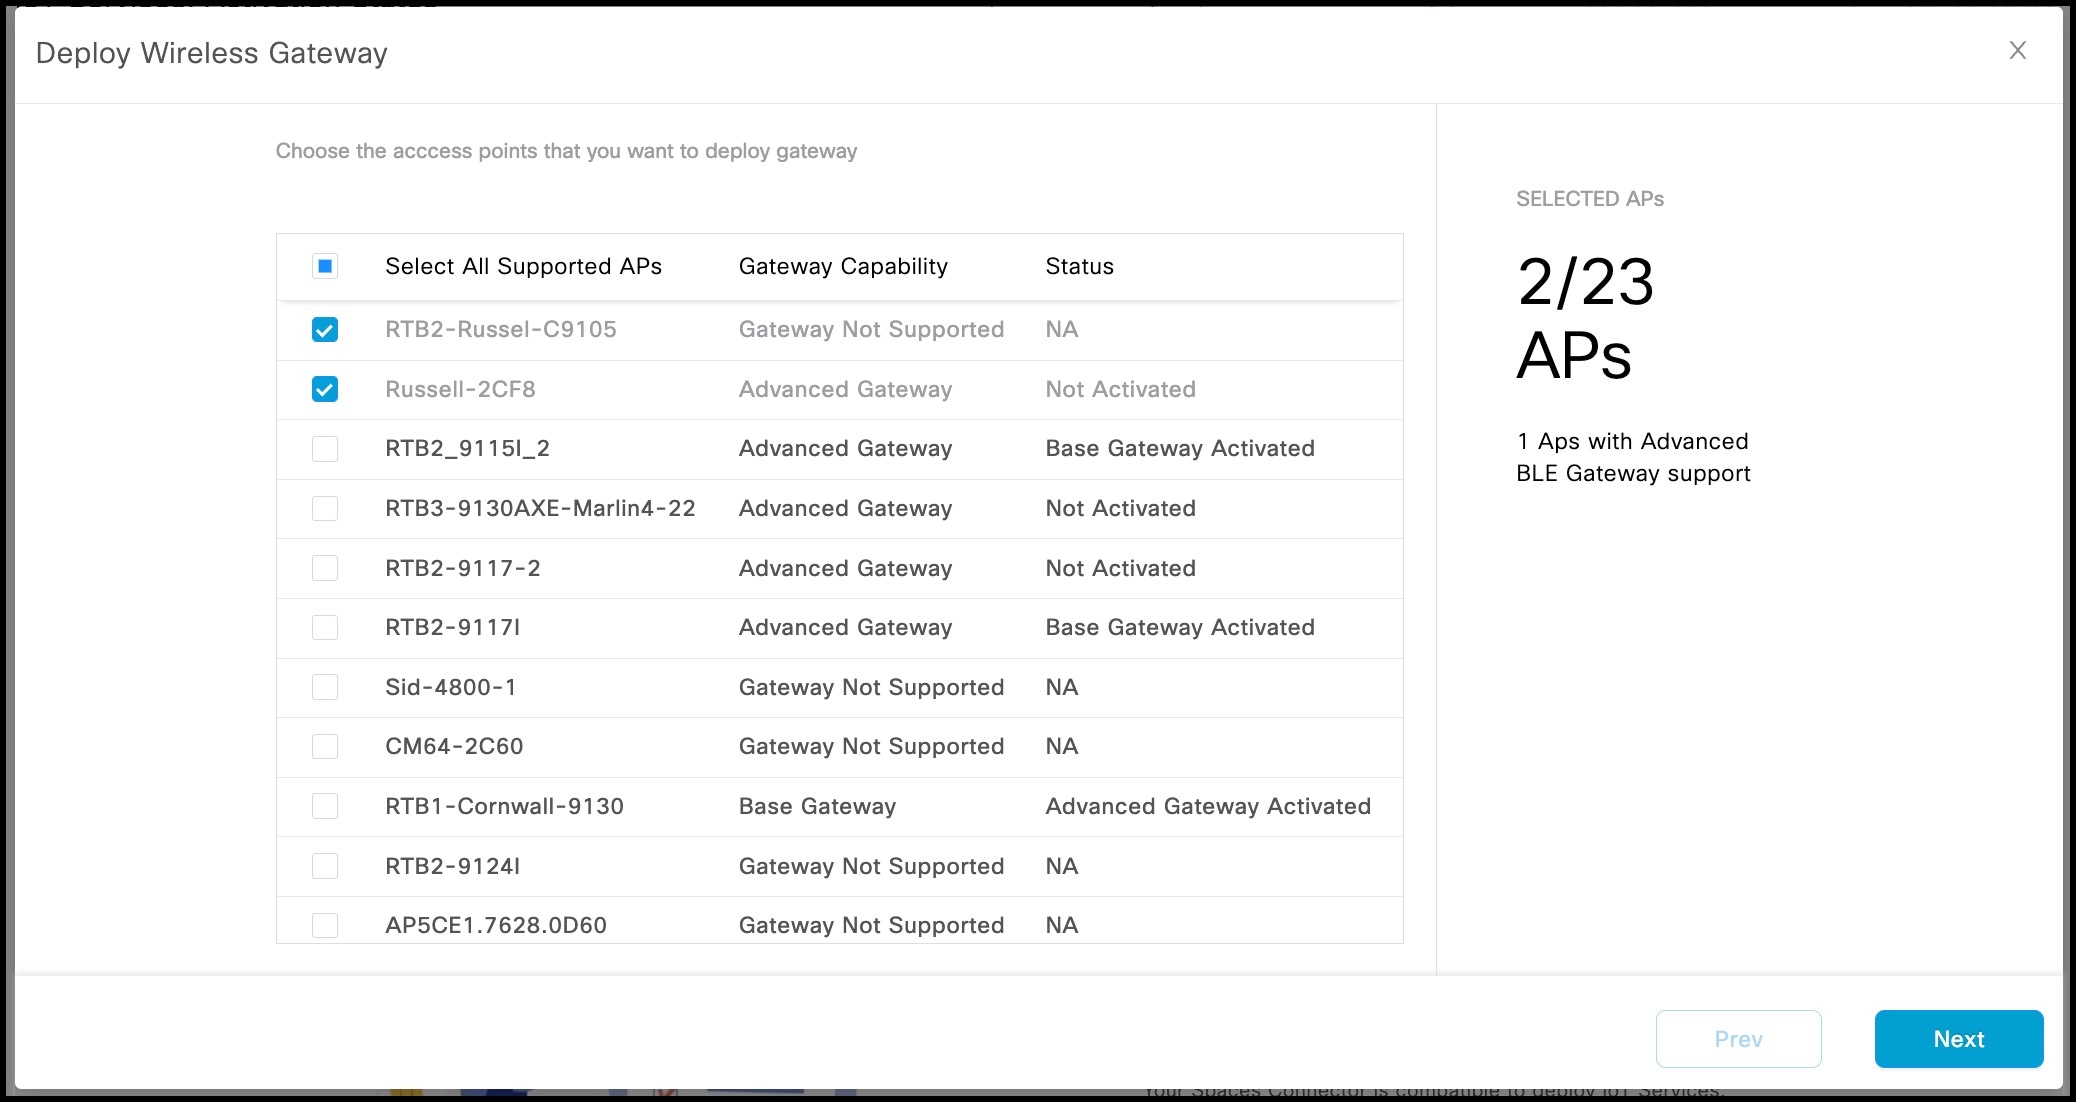
  3. In the Deploy Wireless Gateway window, select the APs on which you want to activate IoT service (wireless).

Figure 7. Activate IoT Service (Wireless) on Preferred Devices
Figure 8. Activate IoT Service (Wireless) on Preferred Devices

What to do next

Once the activation completed, you can onboard the IoT Service (Wireless) devices. Click Manage Devices & Policies > Onboard Devices.

Enable IoT service on Connector2

Verify Cisco Spaces: Connector is Added and Active

This procedure helps you verify if a Cisco Spaces: Connector is deployed and active.

Procedure


Step 1

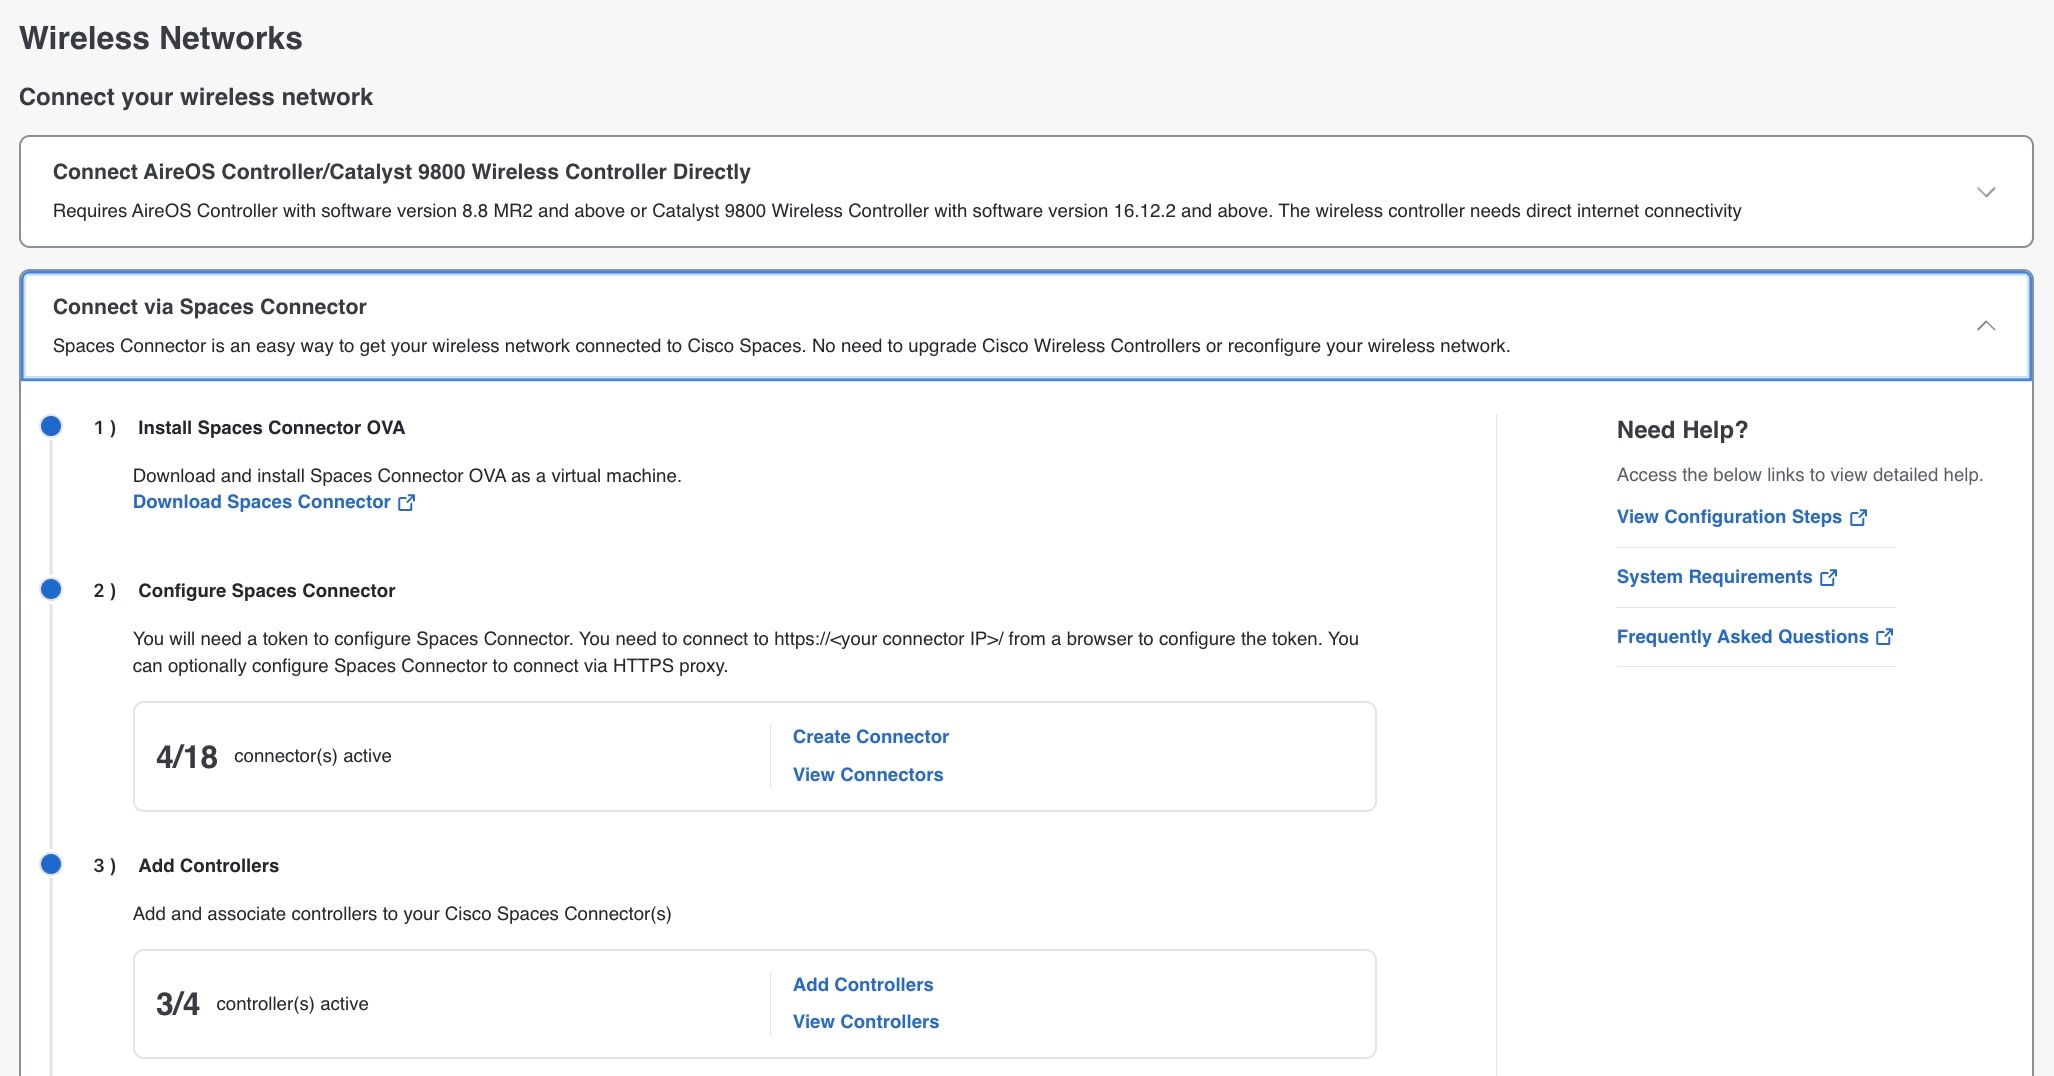
From the Cisco Spaces dashboard left-navigation pane, choose Setup > Wireless.

Step 2

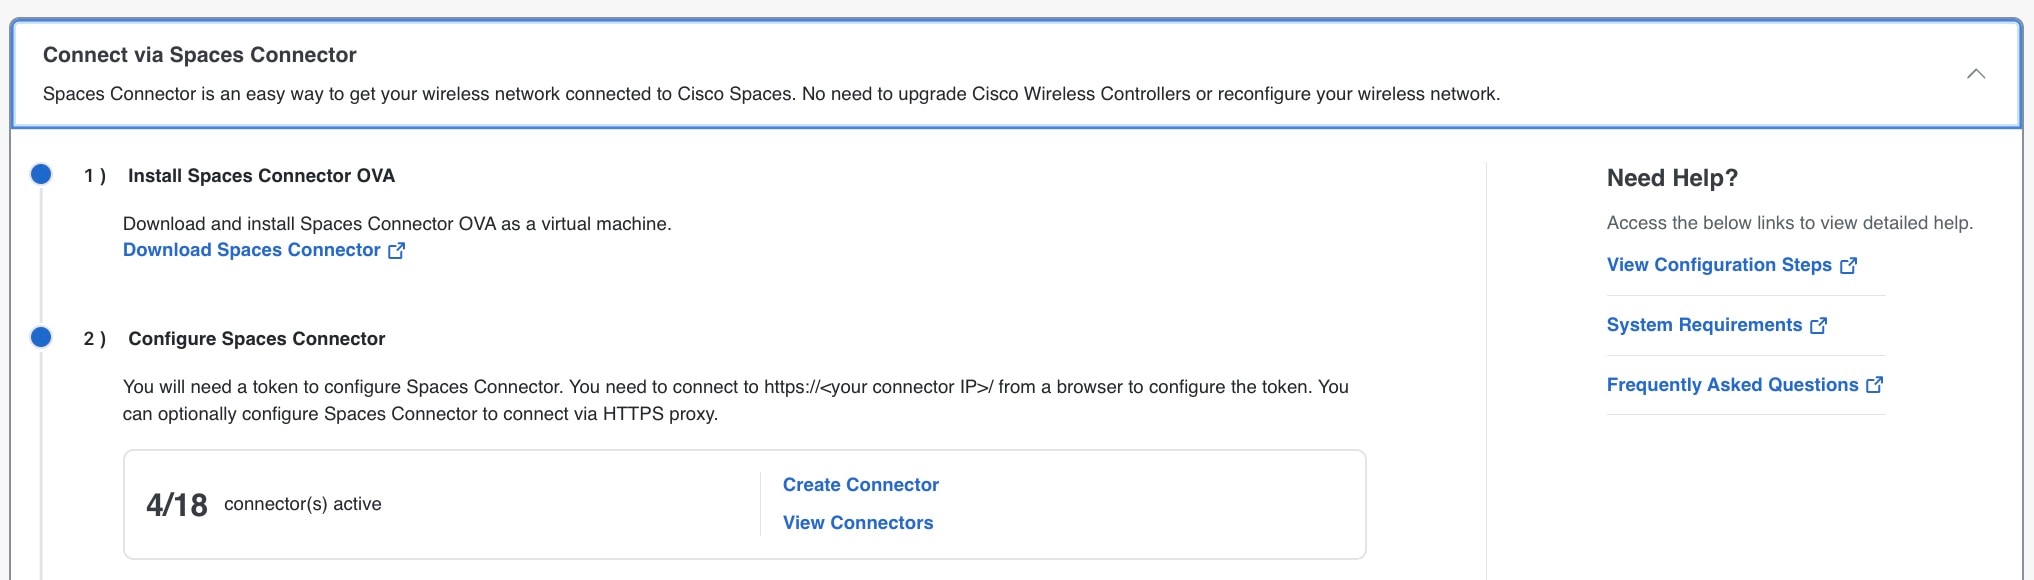
From the Connect via Spaces Connector area, click View Connectors.

Figure 9. View Connectors

Step 3

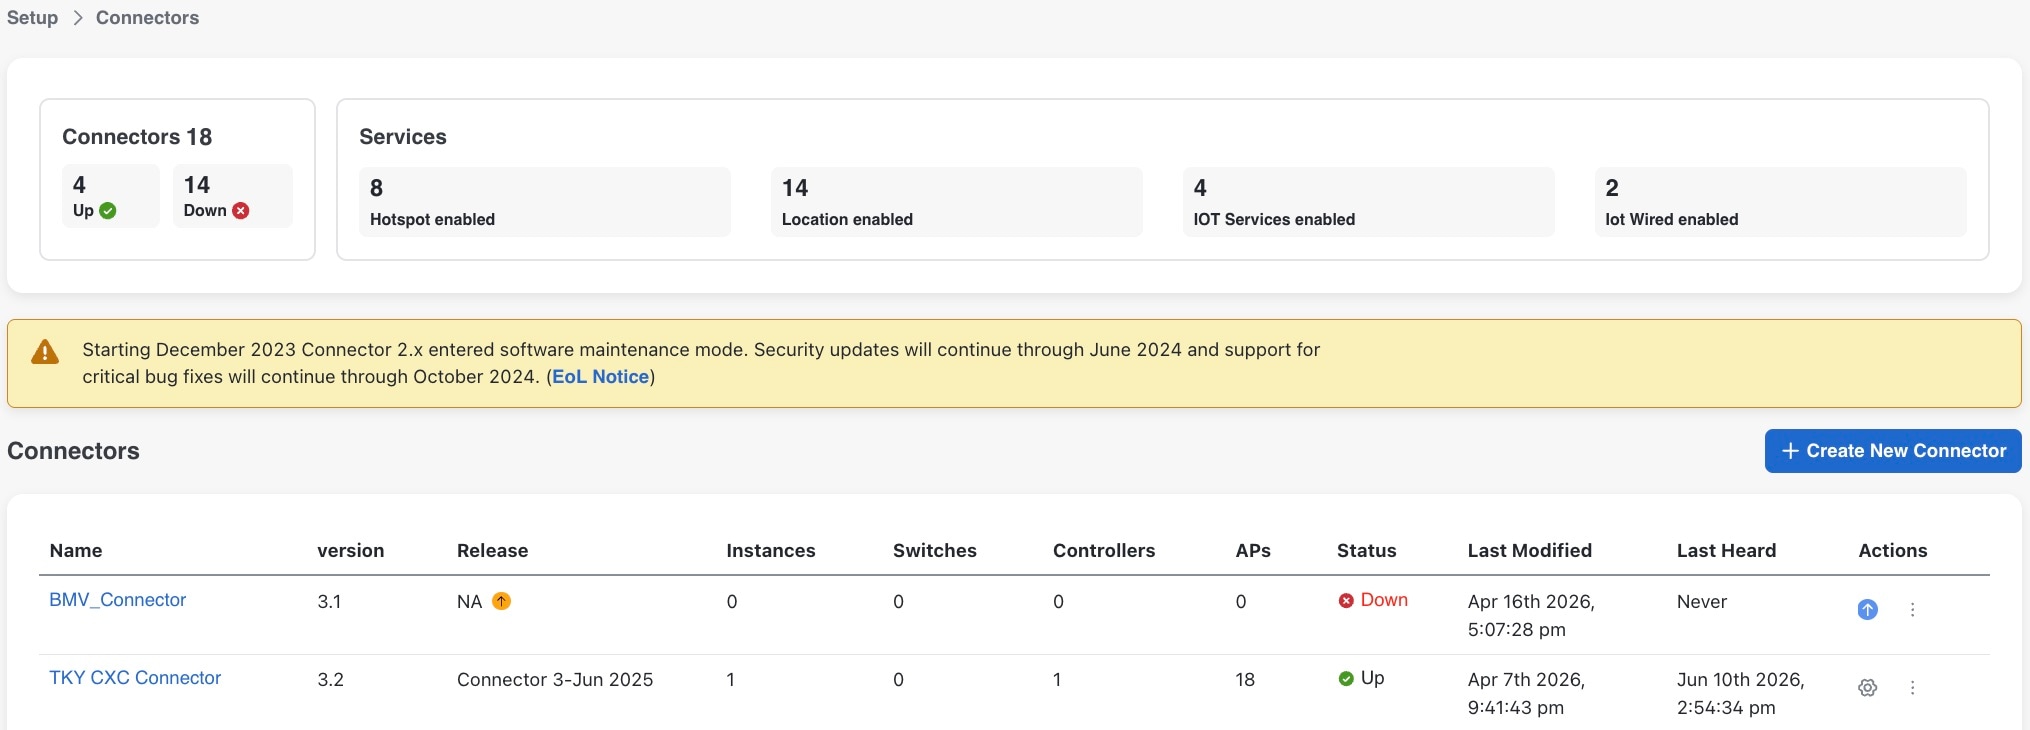
Ensure that a connector is listed and its status is Up.

Figure 10. Connector Status Up

Verify Cisco Catalyst 9800 Series Wireless Controllers is Added and Active

This procedure helps you verify if the Cisco Catalyst 9800 Series Wireless Controller is deployed and active.

Procedure


Step 1

From the Cisco Spaces dashboard left-navigation pane, choose Setup > Wireless Networks.

Step 2

From the Add Controllers area, click View Controllers.

Figure 11. View Controllers

Step 3

Ensure that a controller is listed here, and the corresponding status is Active.

Figure 12. Active Controller

Configure connector for gRPC and certificate services

This procedure enables IoT streams. This procedure ensures that your APs visible on Cisco Spaces: IoT Service. In this procedure you:

  • Enable the Cisco Spaces: Connector to listen for gRPC Remote Procedure Call (gRPC) and certificate services.

  • Activate these IoT streams on the wireless controller.

Procedure


Step 1

From the Cisco Spaces dashboard left-navigation pane, click Setup > Wireless Networks.

Step 2

From the Connect via Spaces Connector area, click View Connectors.

Figure 13. View Connectors

Step 3

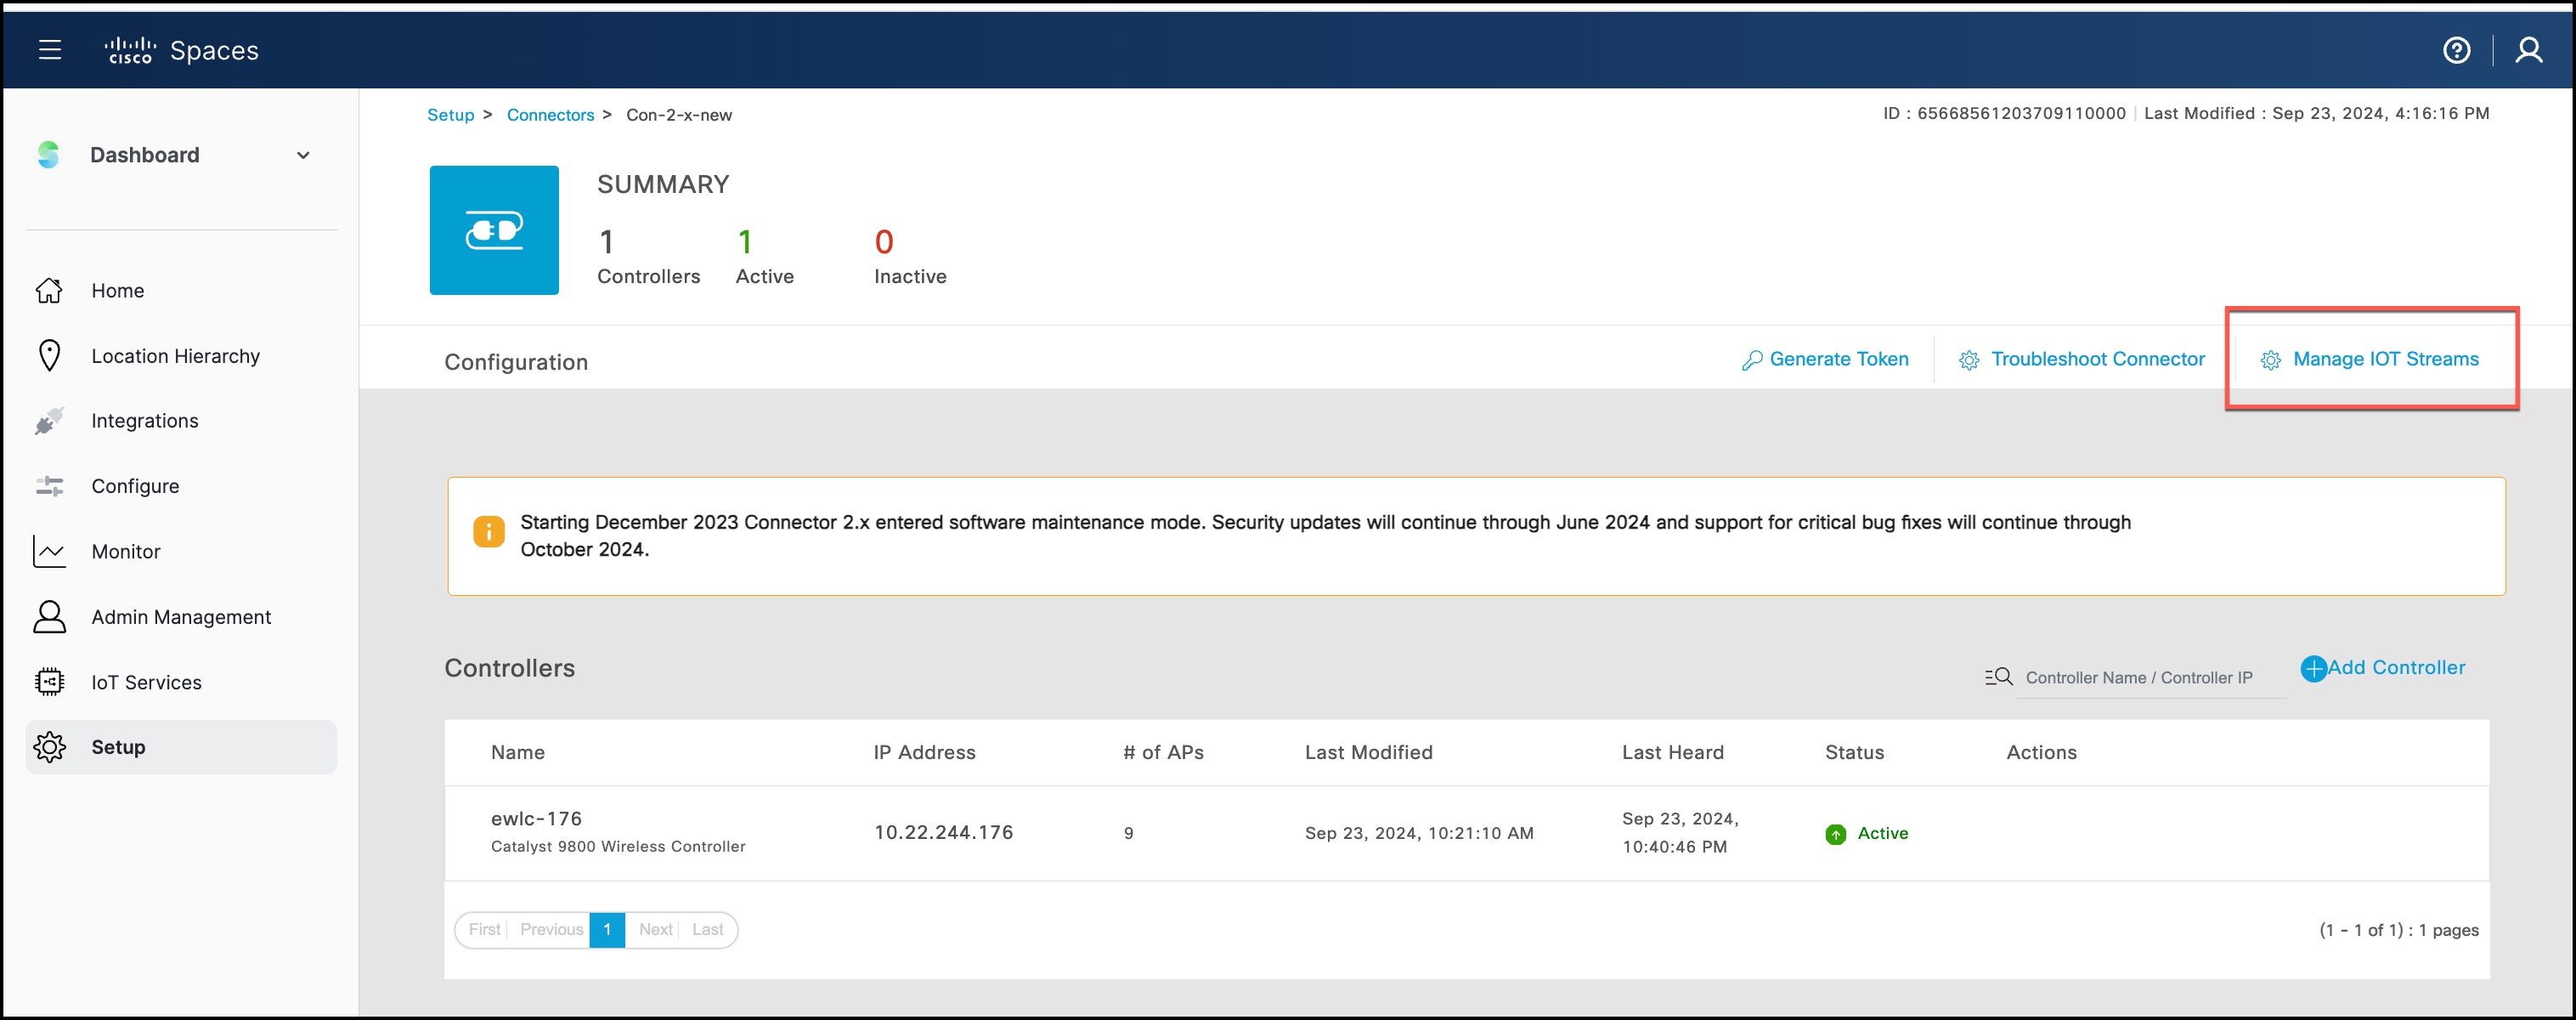
From the list of connectors displayed, choose your connector, and then click Manage IoT Streams.

Step 4

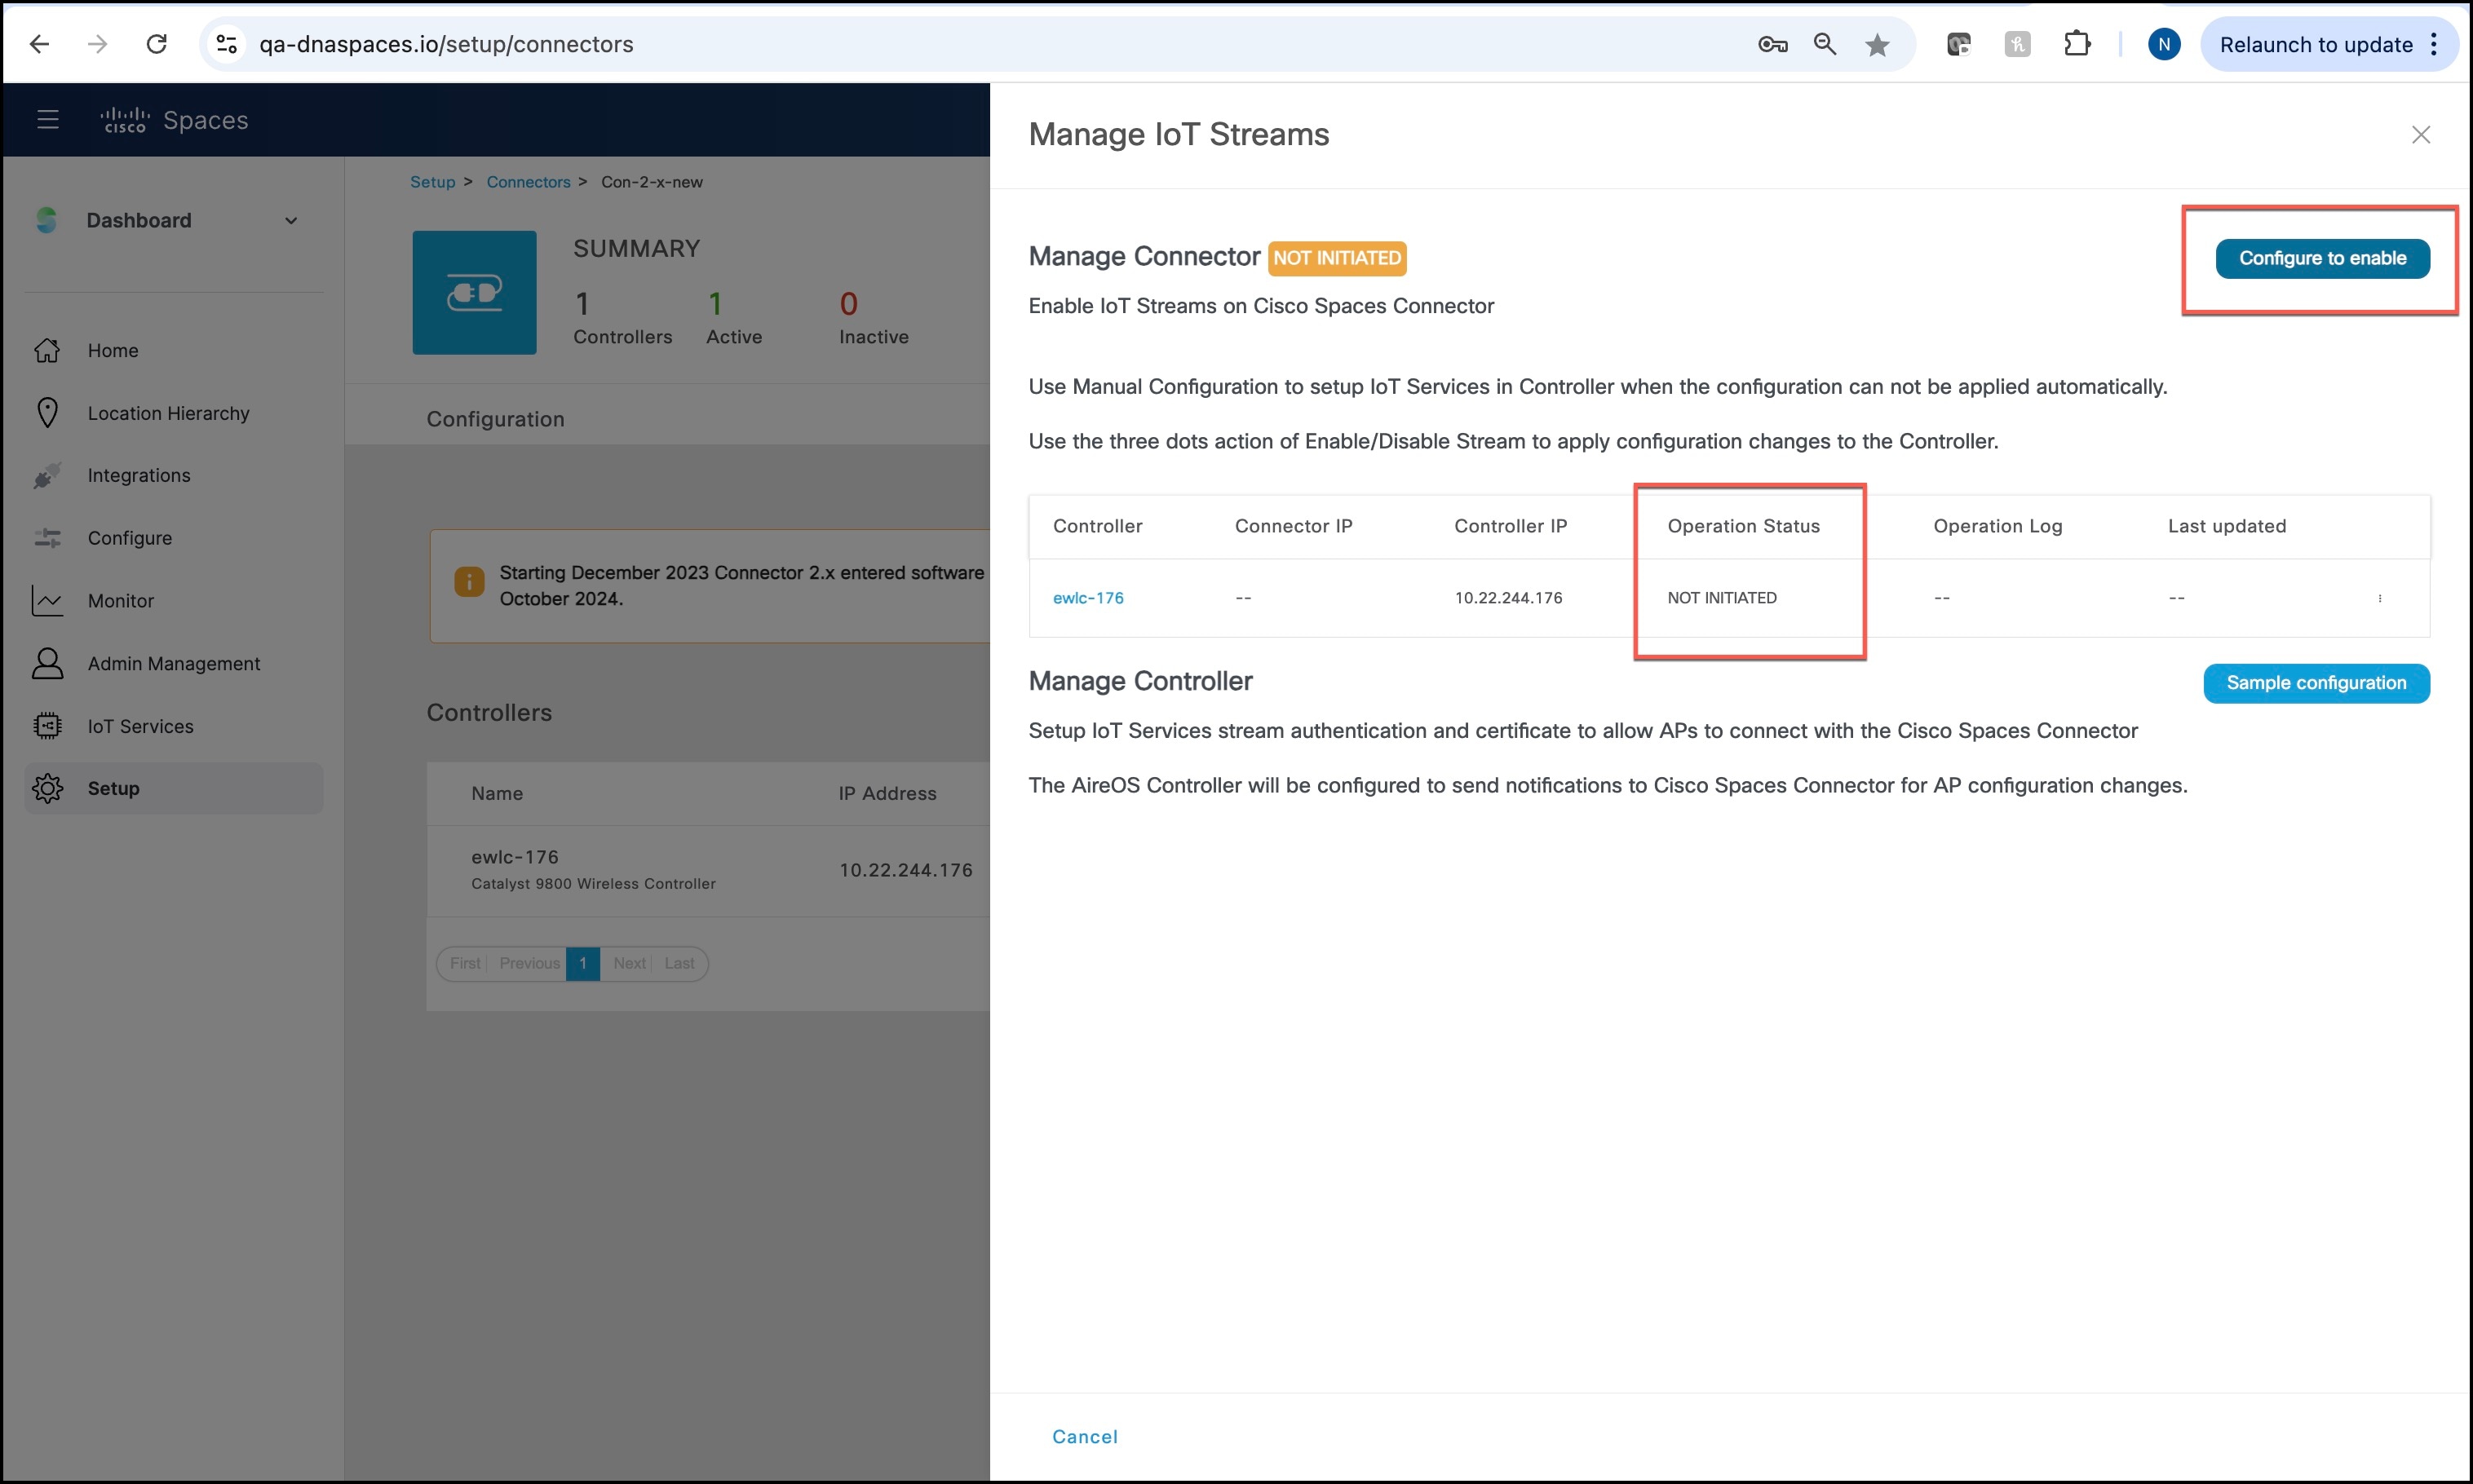
In the Manage IoT Streams page that is displayed,

Figure 14. Manage IoT Streams
  1. Click Configure to Enable to enable the connector stream.

    Figure 15. Configure to Enable
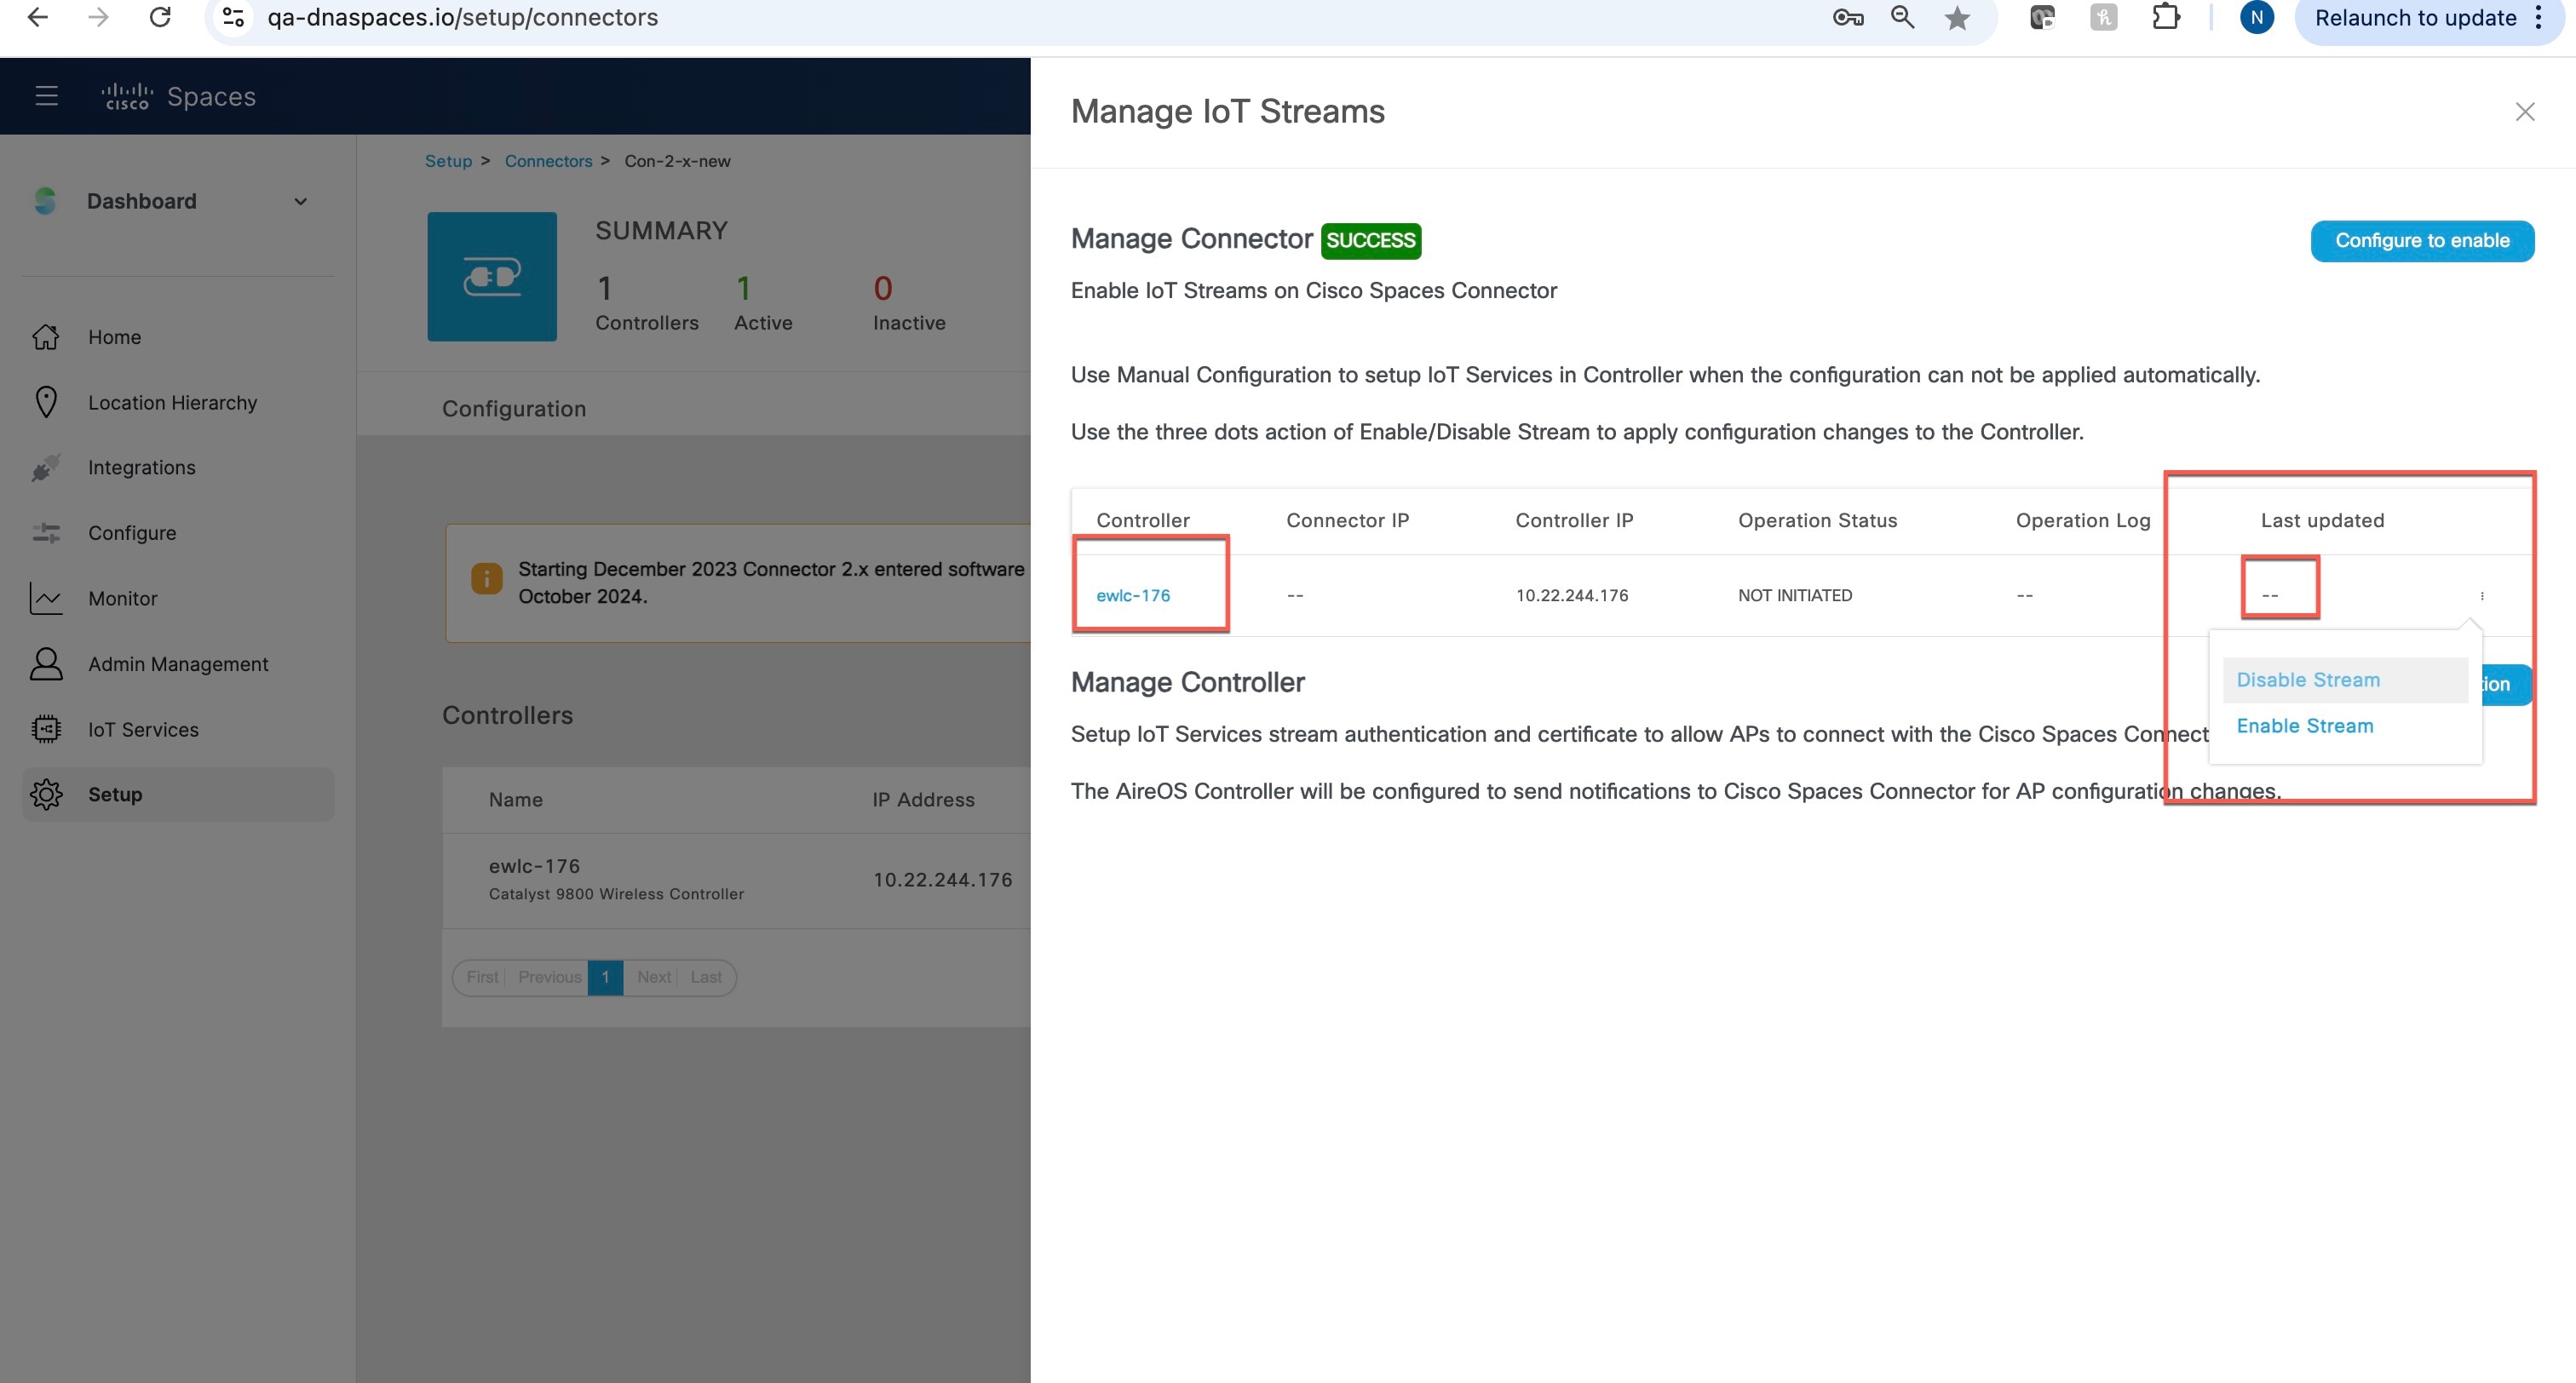
  2. For each wireless controller displayed, click the three-dot icon to display a menu. Choose Enable Stream to enable the wireless controller stream.

    Figure 16. Enabling IoT Streams for the Connector and for each associated Wireless Controller
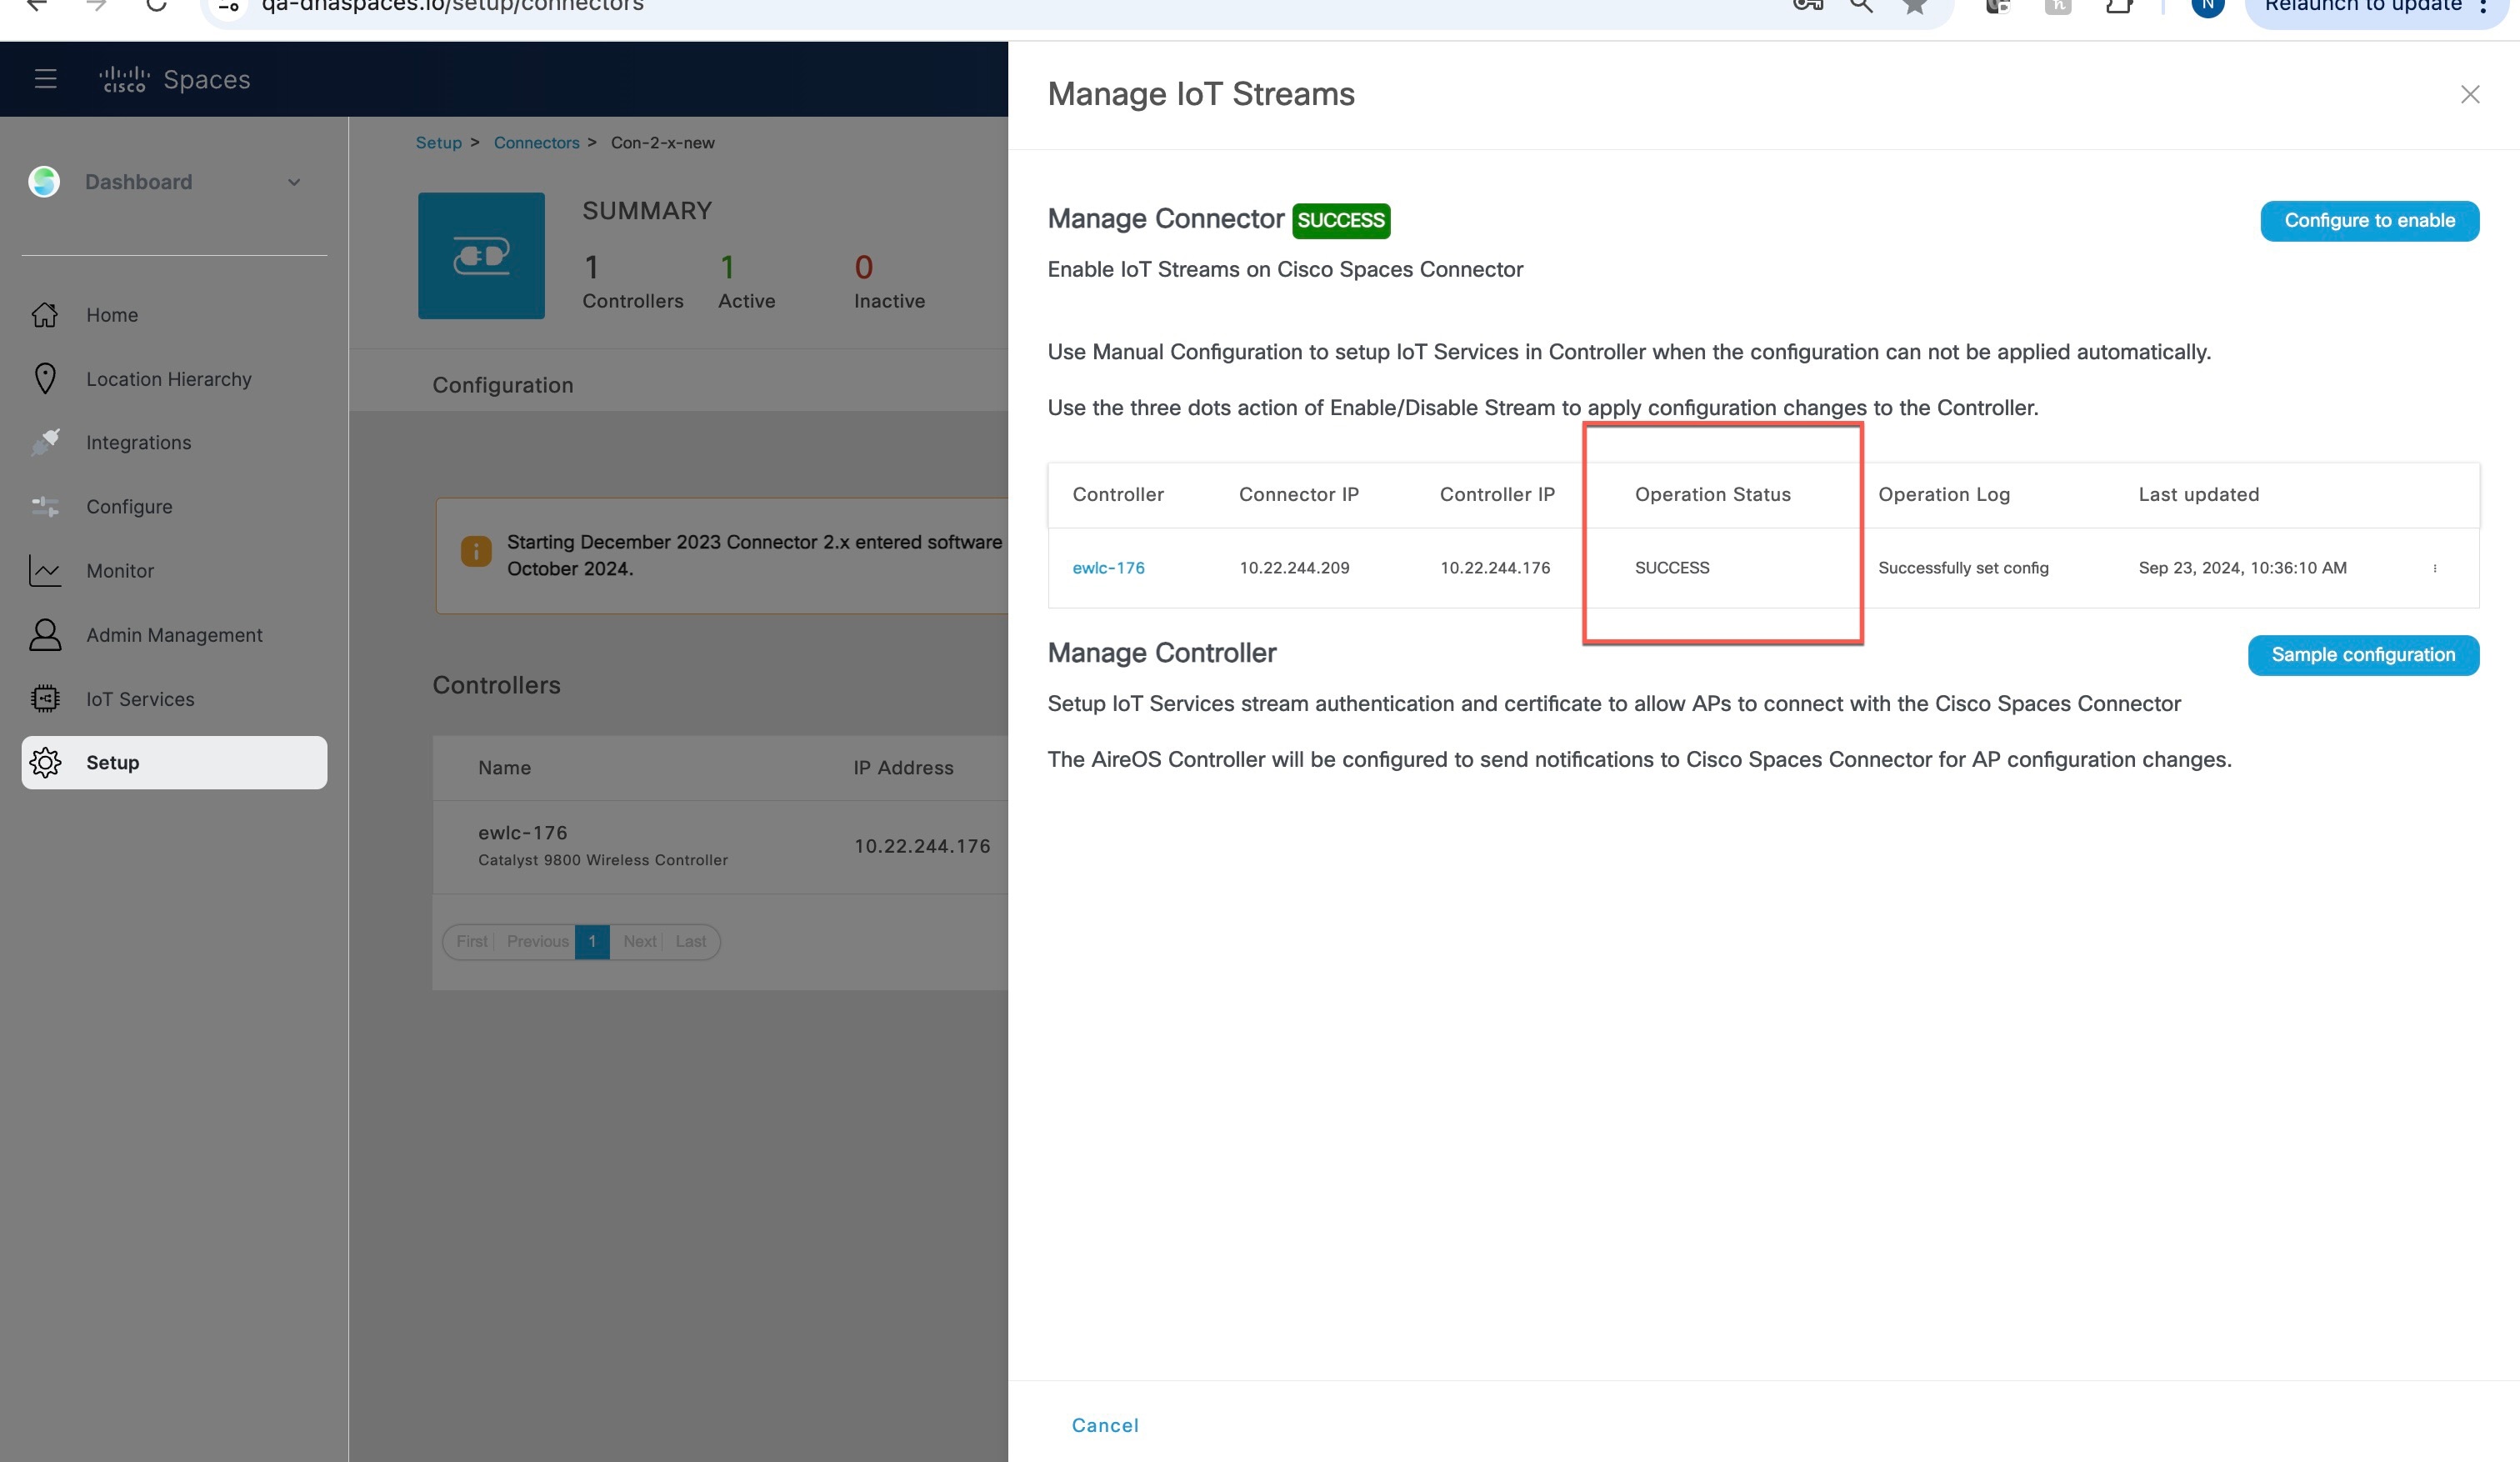
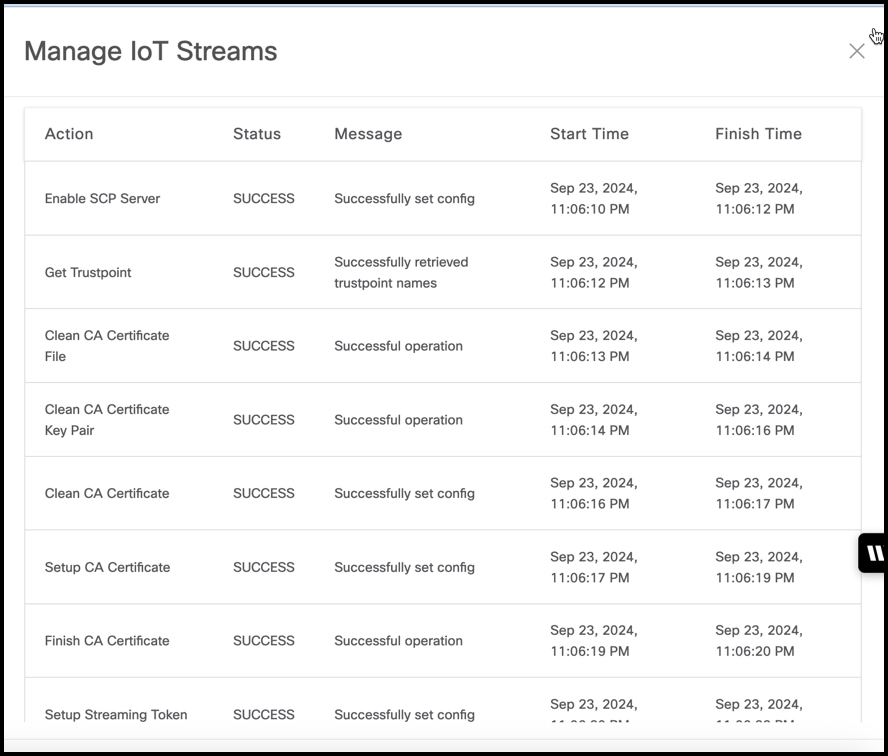
  3. Verify if the Operation Status of the connector is SUCCESS. Click the wireless controller in the list to check for any errors.

    Figure 17. Operation Status of Wireless Controller is SUCCESS
    Figure 18. Check for Errors

    Reconfigure this step if you move APs to a new AP profile.

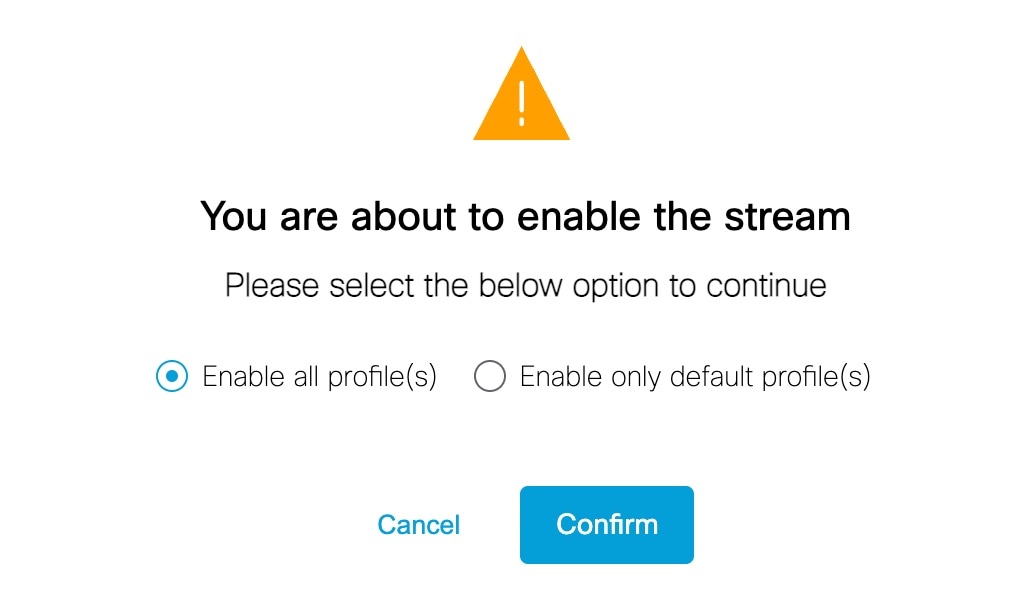
  4. In the displayed popup, choose the AP profiles to push the IoT configuration. You can choose to push the IoT configuration to one or more default AP profiles on the wireless controller. Or you can also choose to push the IoT configuration to all the AP join profiles on the wireless controller.

    Figure 19. Enabling IoT Streams for the Connector and for Each Associated Wireless Controller

    Reconfigure this step if you move APs to a new AP profile.


Enable BLE on AP

This procedure turns on Bluetooth Low Energy (BLE) on an AP, and puts selected APs in the Admin state and in the base scan mode.

Procedure


Step 1

In the Cisco Spaces dashboard left-navigation pane, choose IoT Services > Manage > Wireless APs > All Gateways.

Step 2

Check the checkboxes of specific APs, then click on the Action drop-down button.

Step 3

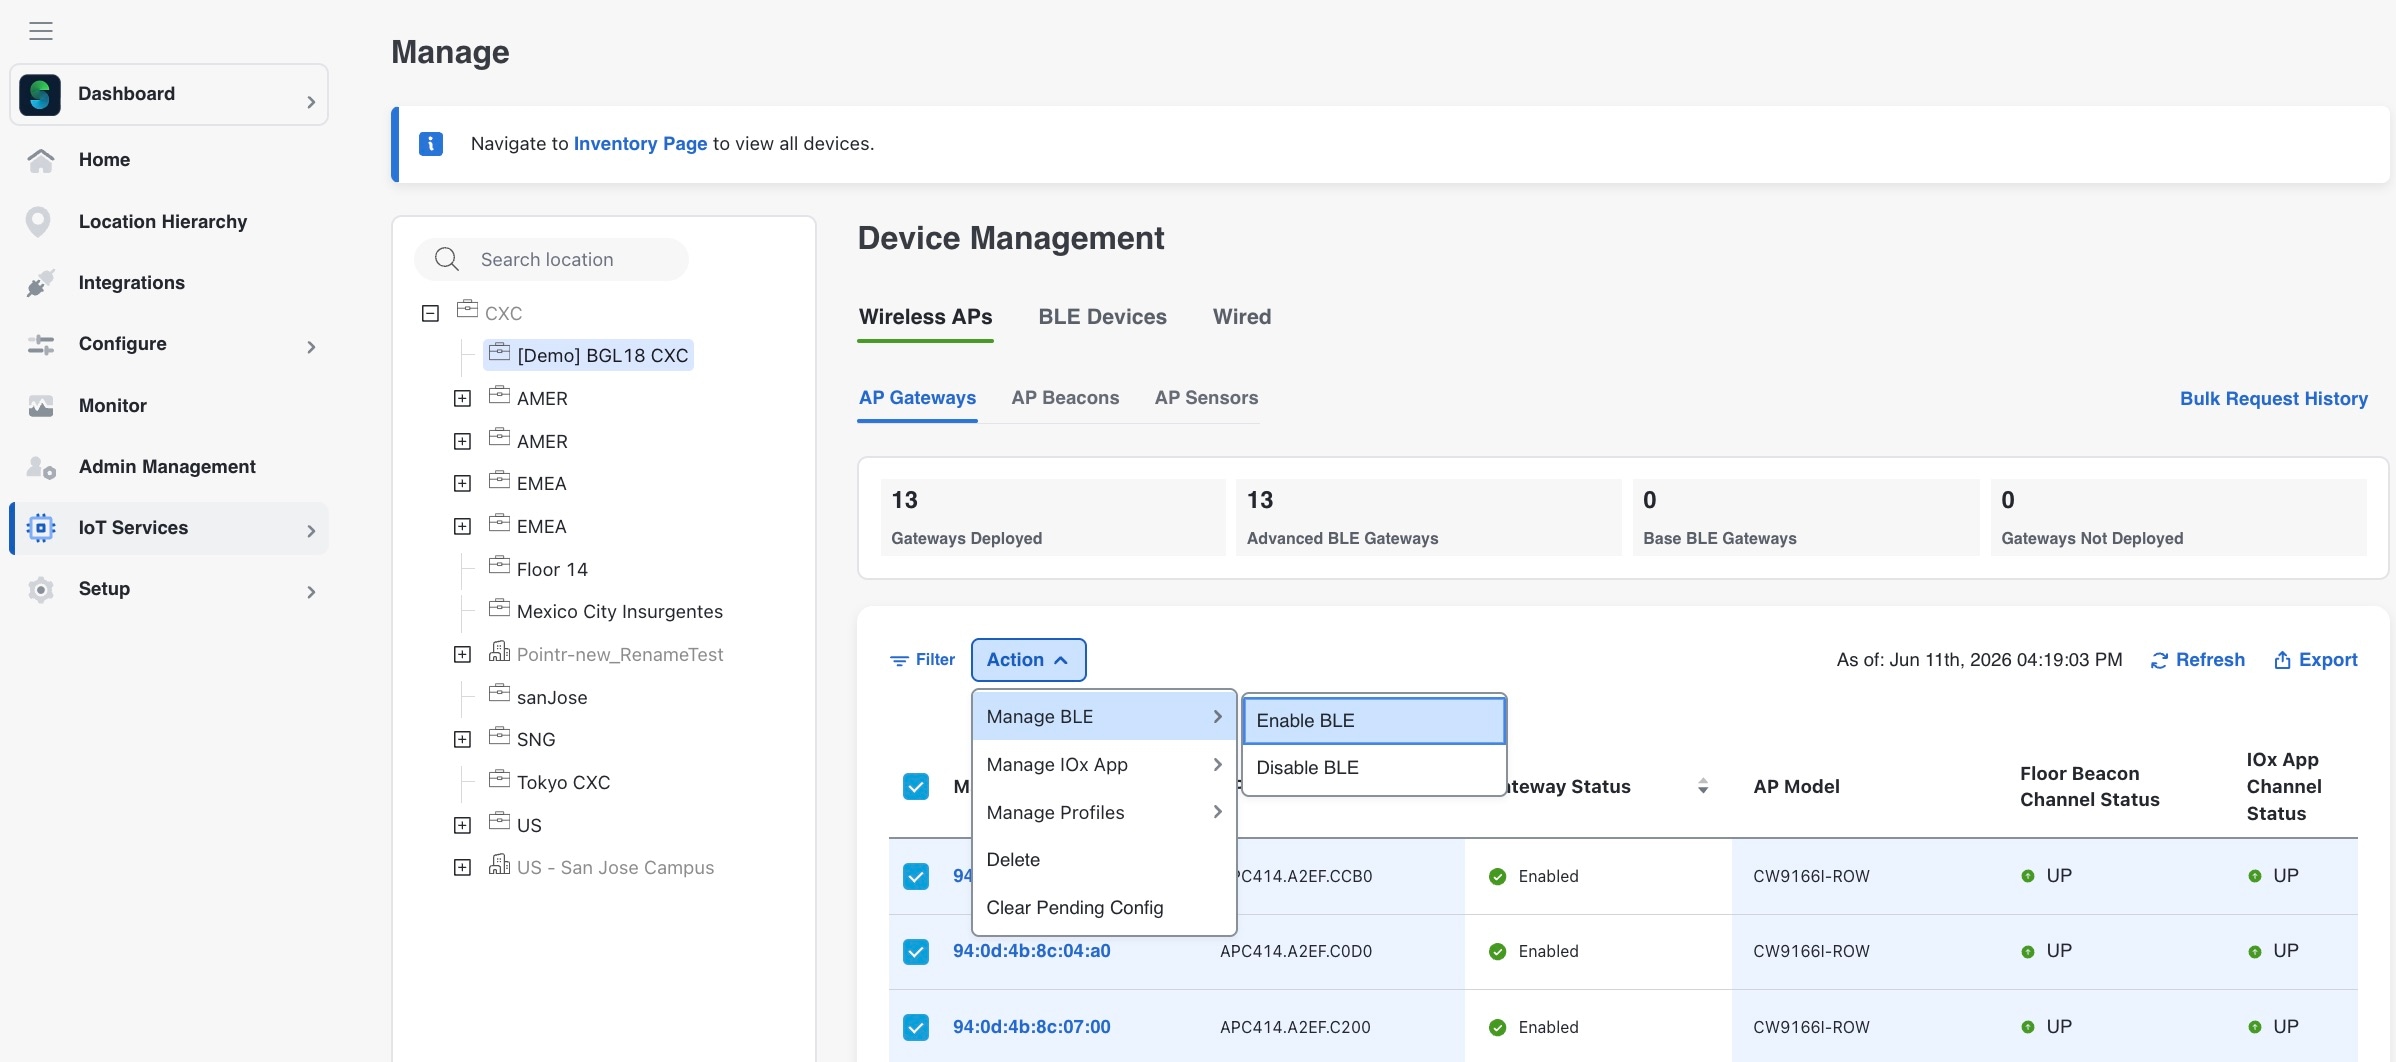
To turn on BLE Admin state and base scan mode, from the drop-down that opens, choose Manage BLE > Enable BLE.

Figure 20. Enable BLE

Set AP in advanced mode

This procedure sets an AP on the Bluetooth Low Energy (BLE) advanced mode.

Procedure


Step 1

In the Cisco Spaces dashboard left-navigation pane, choose IoT Services > Manage > Wireless APs > AP Gateways.

Step 2

Check the boxes of specific APs, and then click on the Action drop-down button.

Step 3

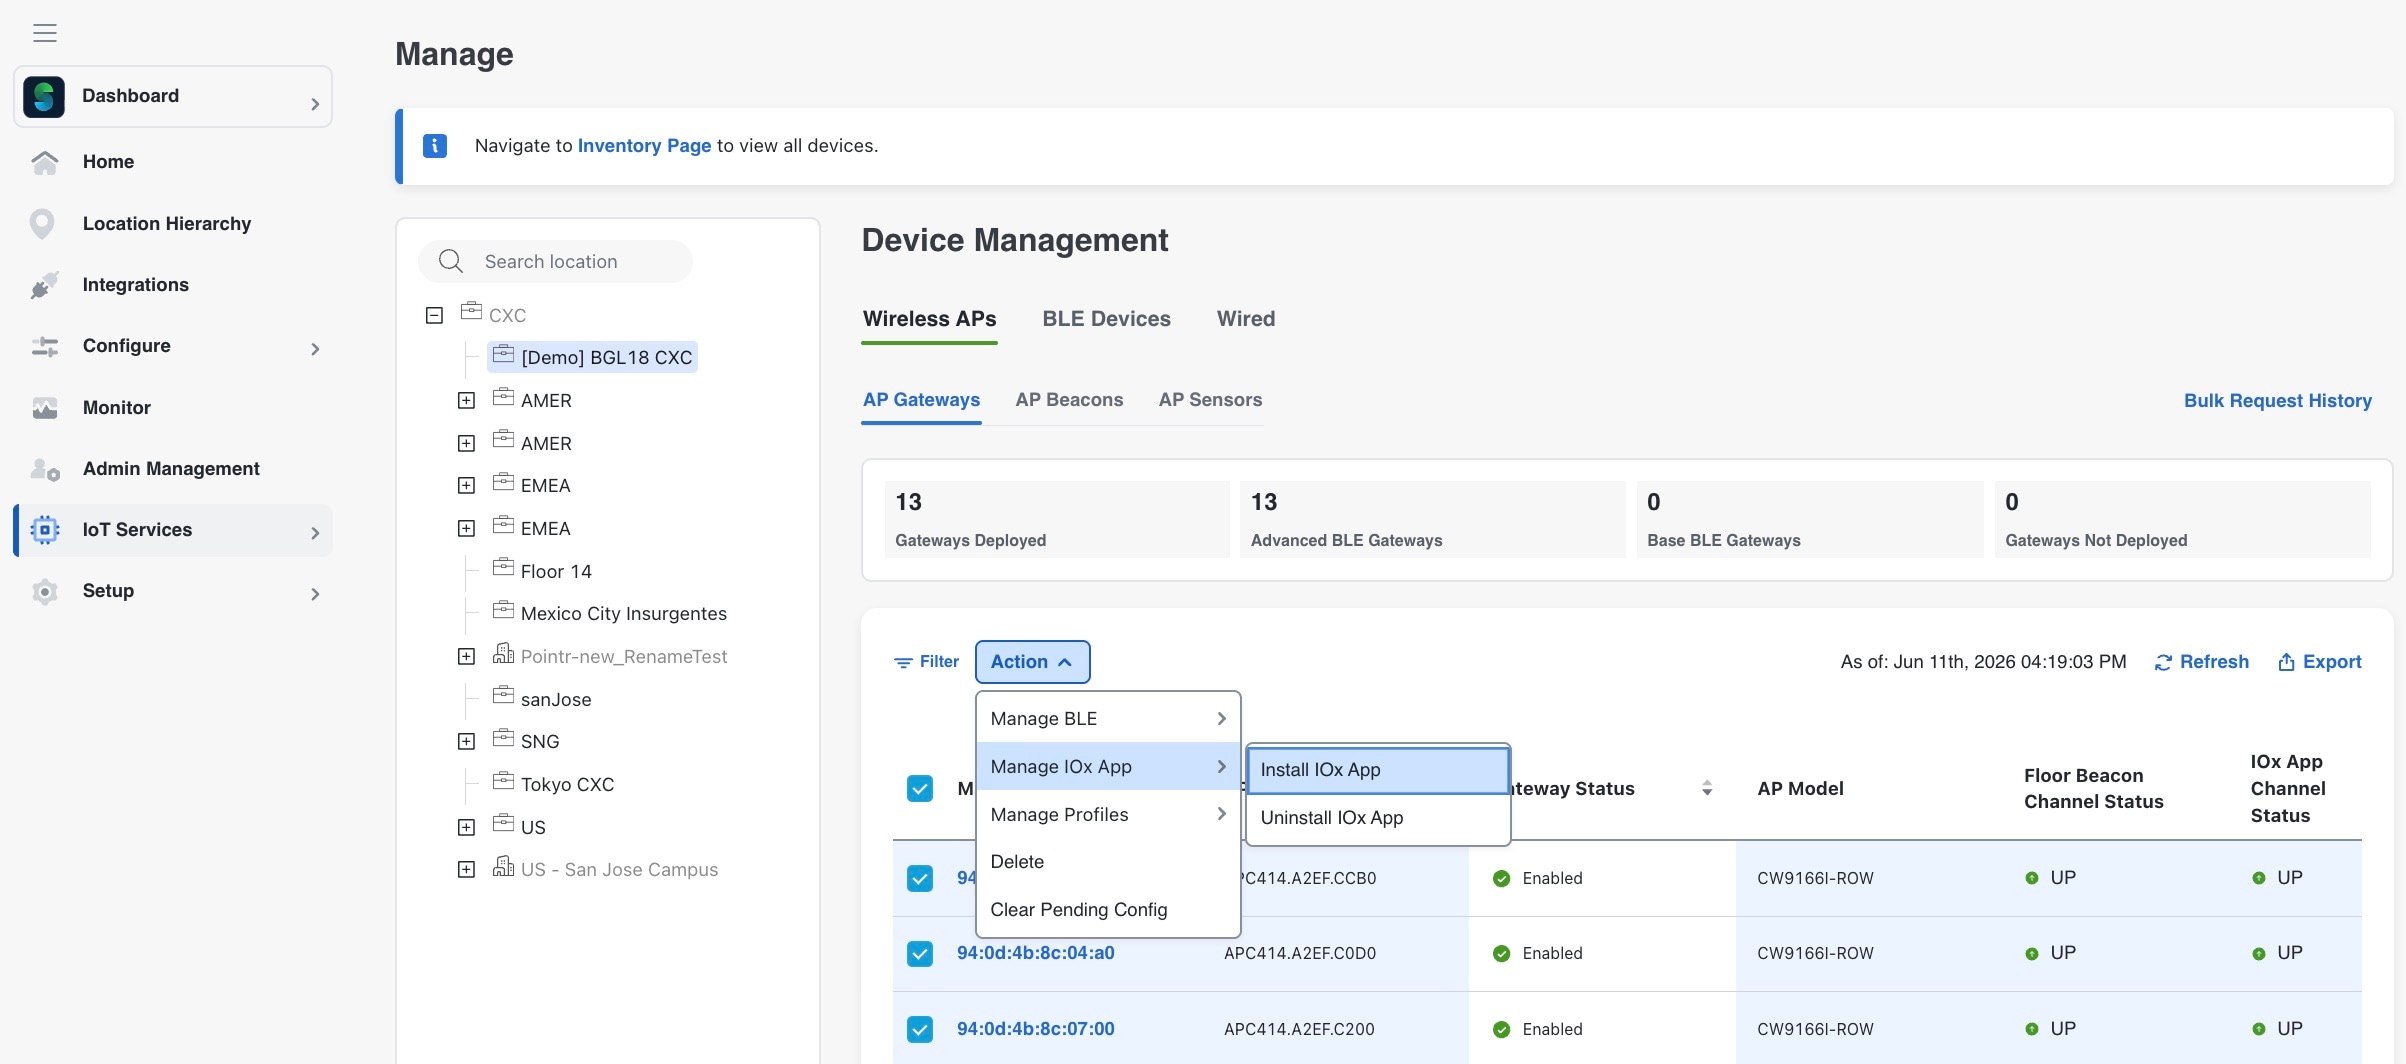
To set the AP on BLE advanced mode, from the drop-down that opens, choose Manage IOx App > Install IOx App.

Figure 21. Install IOX App

Verify access points

This procedure helps you verify if IoT service (wireless) has synchronized and listed the APs in your network on the GUI.

Procedure


Step 1

In the Cisco Spaces dashboard left-navigation pane, choose IoT Services > Manage > Wireless APs > AP Gateways.

Step 2

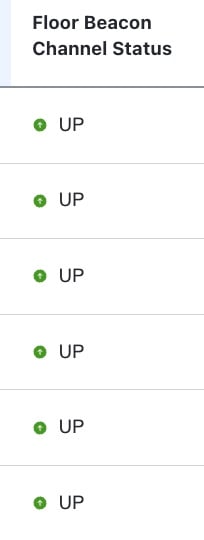
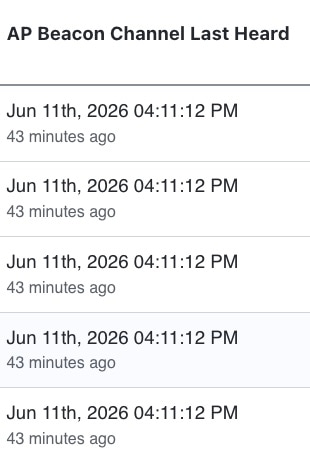
Verify if IoT service (wireless) has synchronized and listed the APs in your network. Check the Floor Beacon Channel Status and AP Beacon Channel Last Heard columns.

Figure 22. Floor Beacon Channel Status
Figure 23. AP Beacon Channel Last Heard