Wireless APs

AP Gateways

Depending on the type of Cisco access points (AP), you can configure an AP as one of these types of gateways:

  • Gateways deployed: Gateways that are configured and actively deployed in your network. These gateways can connect to IoT sensors and transmit their data to the IoT Sensor Connect application.

  • Advanced BLE Gateway: The advanced BLE gateway is an AP that is installed with an IoX Application. Using the installed IoX Application, you can configure floor beacons on the Cisco-partnered Device Manager website.

  • Base BLE Gateway: The Base BLE gateway is a type of AP that you can configure in different modes such as Transmit, Scan, or Dual.

  • Gateways not deployed: Gateways that are available in the application but have not yet been configured or deployed. Deploy these gateways to begin connecting and monitoring IoT sensors.

You can configure this AP which is now a base or advanced gateway in Scan mode, Transmit mode, or Dual mode. In the Transmit mode or Dual, mode the AP can broadcast iBeacon, Eddystone URL, and Eddystone UID profiles.

In the Scan mode, the AP can scan the vicinity for other BLE devices. Using gRPC on the AP, the AP sends the scanned data to Cisco Spaces: Connector. The AP can also receive telemetry data from floor beacons. The IoT Service dashboard decodes and displays this information.

To configure and add an AP as a BLE gateway, refer to Activate IoT services (Wireless).

Configure AP gateways

Set up and manage physical gateways on access points for IoT services, BLE functions, and application deployment.

In Cisco Spaces, configuring wireless AP gateways allows you to manage IoT services on access points, control BLE settings, deploy and maintain IOx applications, and upload diagnostic files for support.

Before you begin

Ensure that you have configured an AP as a base gateway or as an advanced gateway.

Procedure


Step 1

From the Cisco Spaces dashboard, navigate to IoT Services > Manage > Wireless APs > AP Gateways.

Step 2

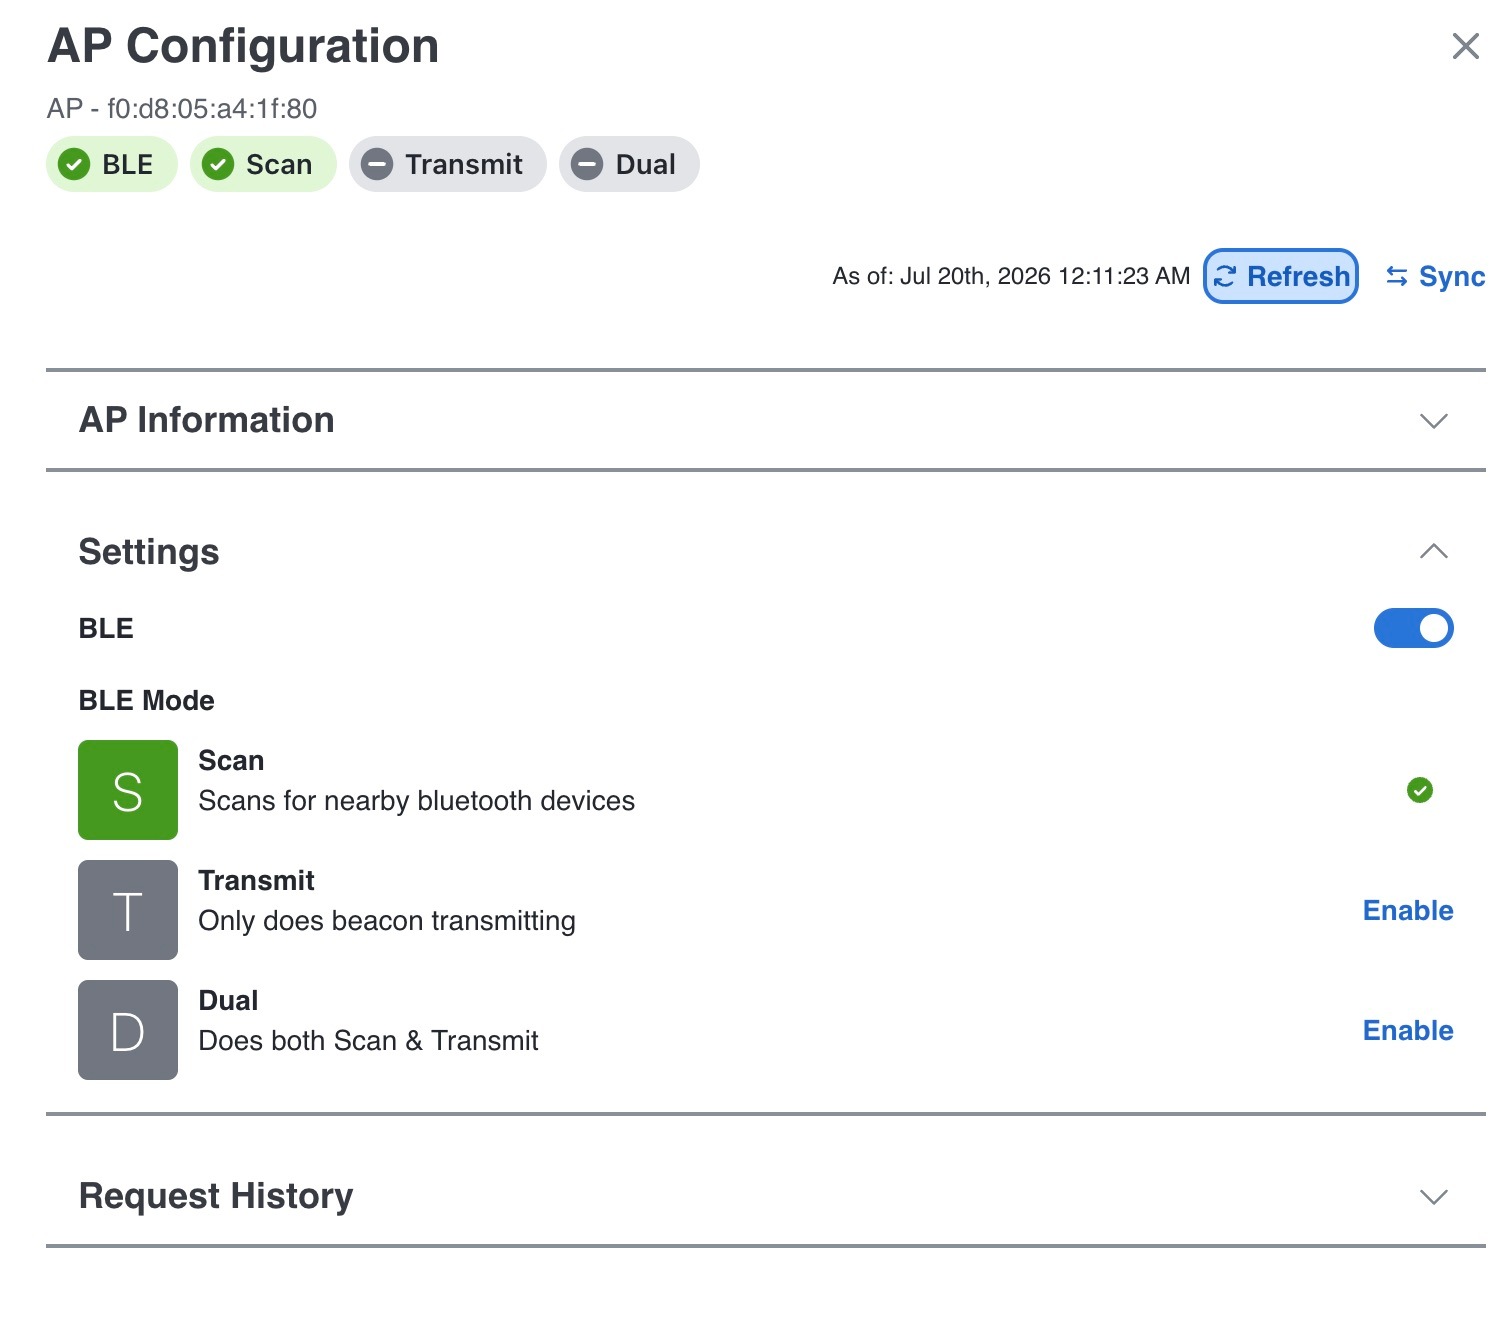
Click the MAC address of the AP to open the detailed AP page. The AP Configuration tab appears.
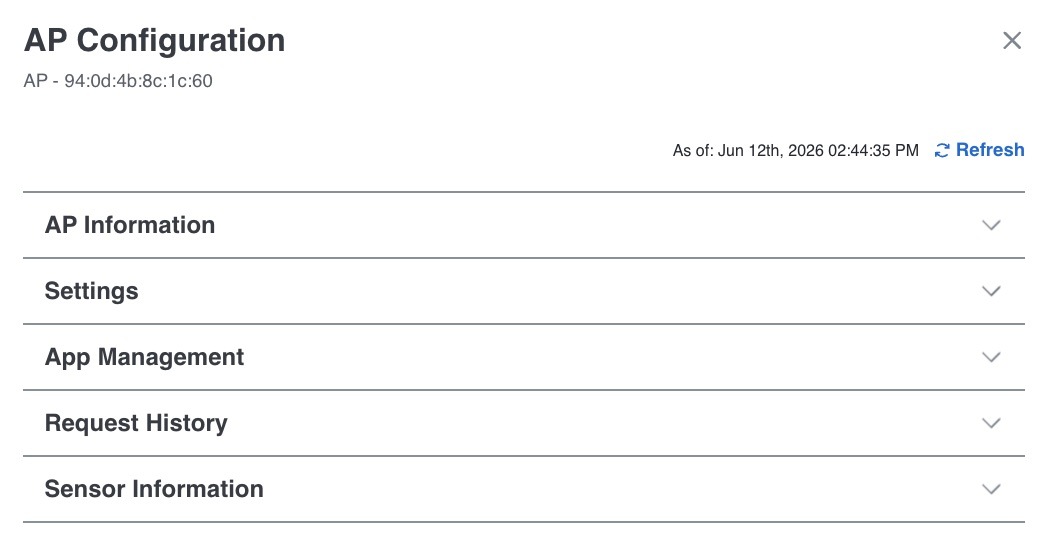
Figure 1. AP Configuration tab

Step 3

Click the AP Information panel to view details such as MAC Address, AP Name, Gateway Status, AP Status, Floor Beacon Channel Status, IOx App Channel Status etc.
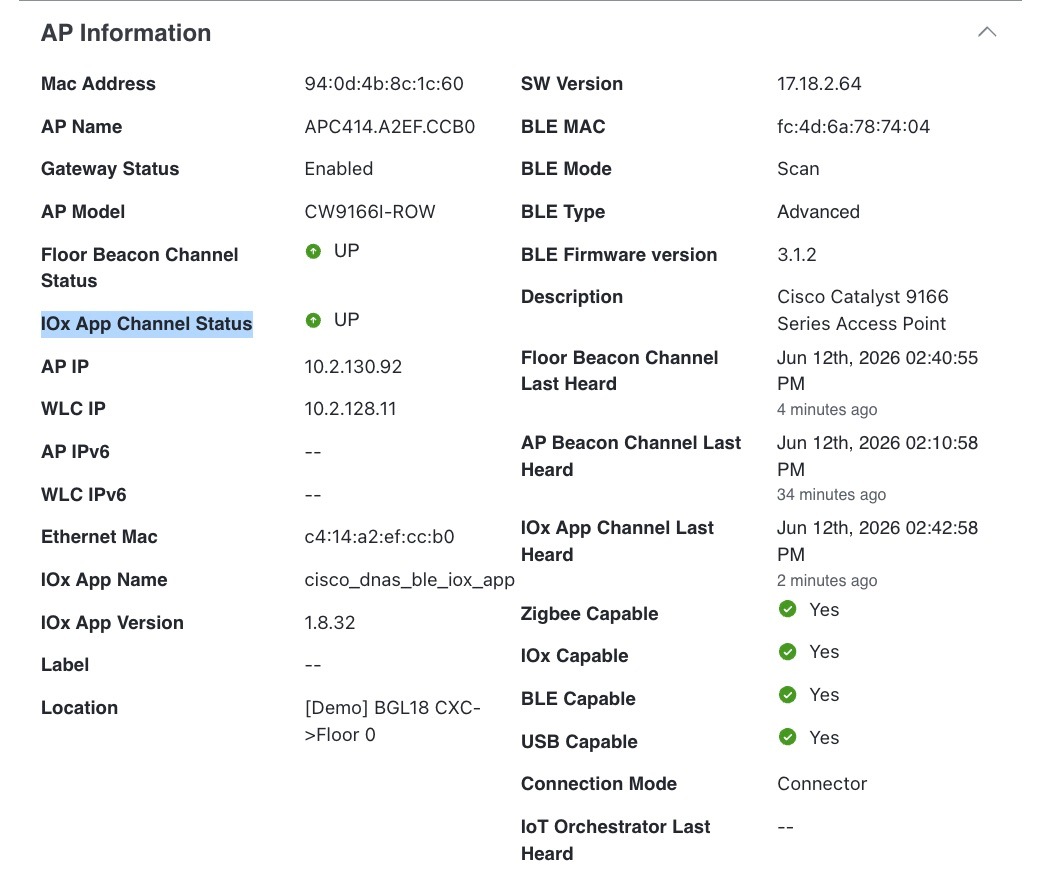
Figure 2. AP Information tab

Step 4

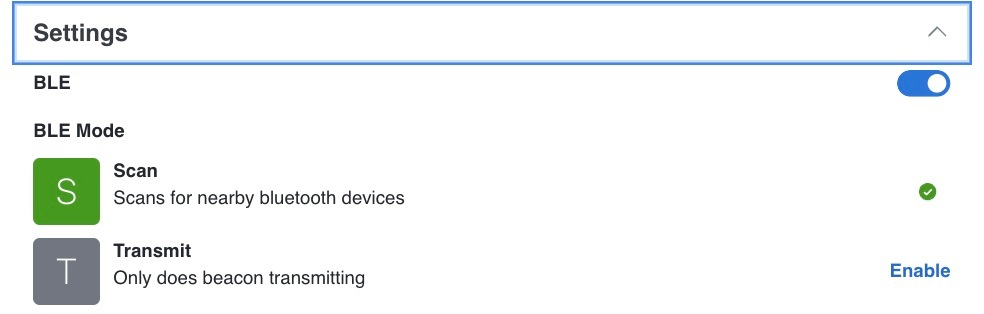
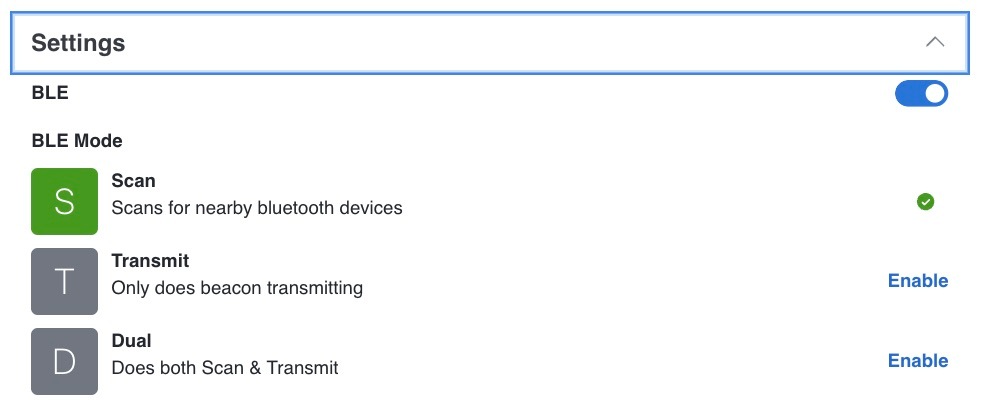
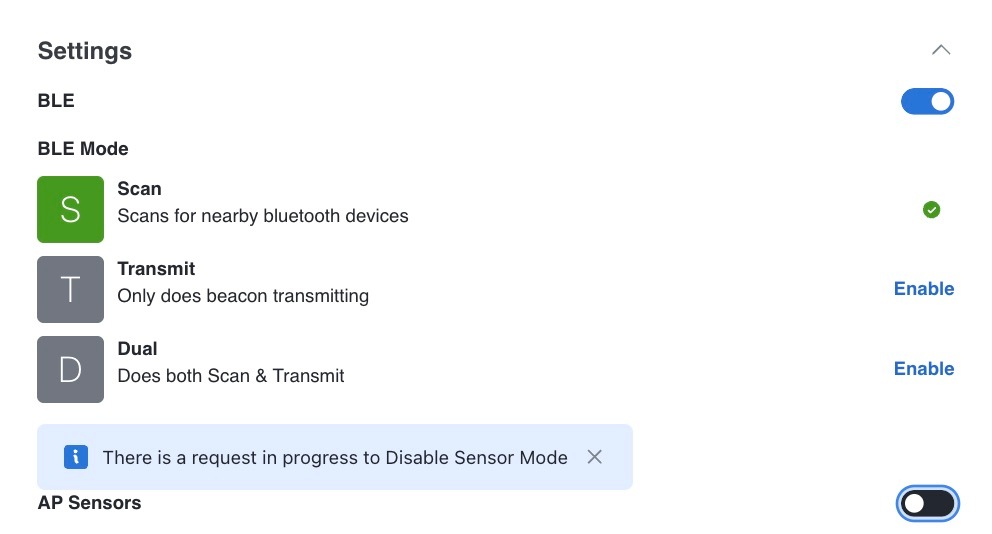
Click the Settings panel to configure the BLE details. Toggle the BLE option to turn on the different BLE modes such Scan, Transmit and Dual.
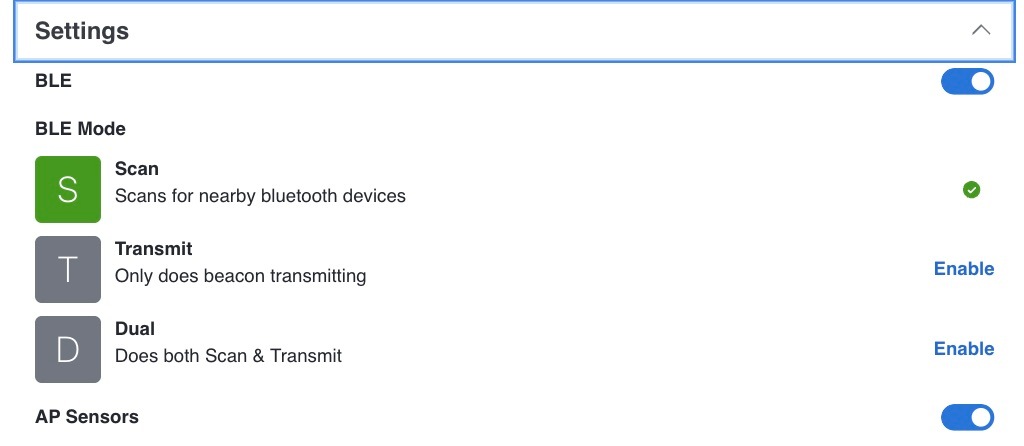
  1. Toggle the AP Sensors button to turn it on.

Figure 3. Settings tab

Step 5

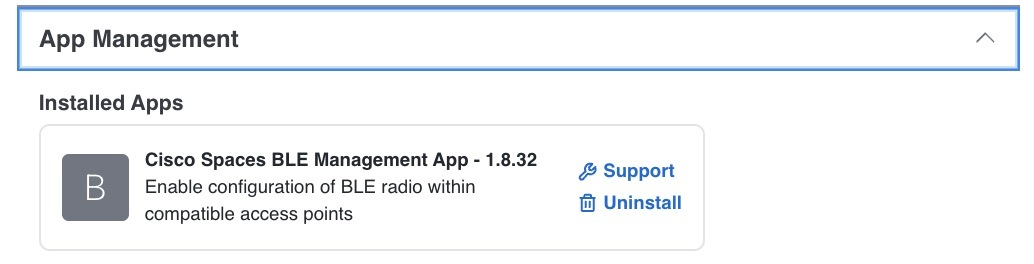
Click the AP Management panel to install, uninstall or upgrade an IOx Application on a gateway. Do one of these:

  • To uninstall, click the uninstall icon near Cisco Spaces: BLE Management App.
  • To upgrade, check whether an upgrade version is available near Cisco Spaces: BLE Management App and click it.
  • To upload tech-support files to the connector, click the gear icon.
    Figure 4. App Management tab
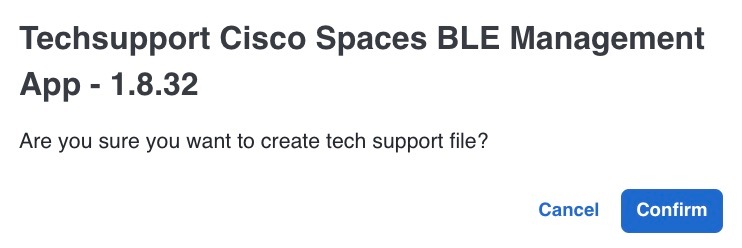
  1. The support gear icon allows you to upload log files to connector. You can also download these files to assist a technical support team.

    Figure 5. Techsupport window
  2. Enter the credentials needed for authentication on the AP.

    Note


    The authentication request to the APs includes these credentials. After authentication, IoT Service does not retain the credentials.

    The AP designated as the advanced gateway receives these change requests. You can observe the progress on the displayed page.

Step 6

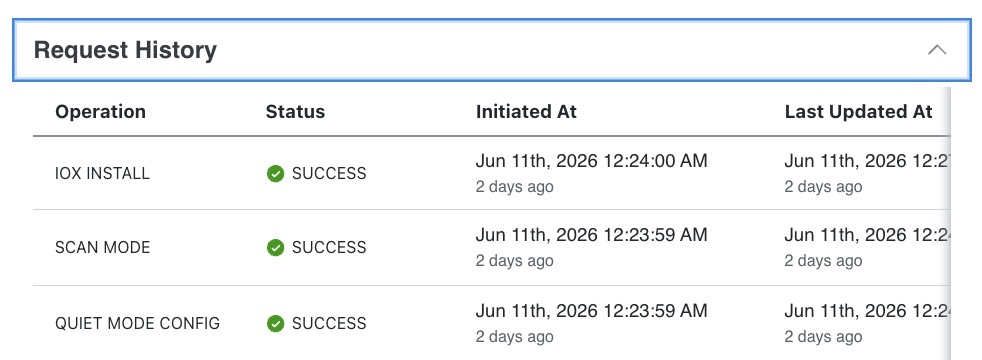
Click on the Request History panel to check the status of deployment. The Status column shows the status of install, uninstall or upgrade on each AP.
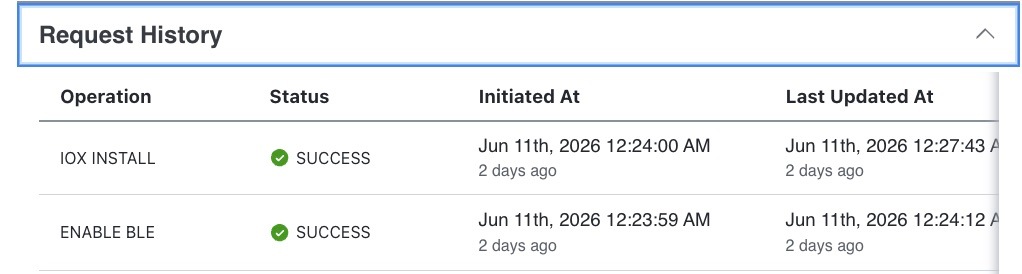
  1. SUCCESS: The application was uninstalled or upgraded successfully on the AP.

  2. FAILURE: The application uninstall or upgrade on the AP failed.

  3. IN PROGRESS: The application is currently being uninstalled or upgraded on the AP.

Figure 6. Request History tab

Step 7

Click the MAC address of the AP and click on the Action drop down button to Manage BLE, Manage IOx app, Manage Profiles, Delete and Clear Pending Config. The options for the first three choices are:

  • Manage BLE: Enable BLE and Disable BLE
  • Manage IOx app: Install IOx app and uninstall IOx app
  • Manage Profiles: Scan mode, dual mode profile and sync

Step 8

Click the MAC address of the desired AP in the tab and then click the Export button. The details are downloaded as a .csv file to your local system.


AP Beacons

You can configure your access point (AP) to act as a beacon (AP beacons) by enabling BLE on it.

IoT Service categorizes APs according to their configurations as these:

  • Disabled: APs with BLE disabled. These APs are not scanning or transmitting.

  • Scan Mode: AP beacons that are only scanning.

  • Transmit Mode: AP beacons configured in one of the beacon transmit profiles. You can configure up to five iBeacons in this mode.

    • The MAC address advertised in the iBeacon payload is derived from the radio MAC address of the AP. (iBeacon MAC address).

  • Dual Mode: AP beacons that are transmitting and scanning. You can configure only one iBeacon in this mode.

    • The MAC address advertised in this mode is the default MAC address of the AP's BLE chip, which is preset by the chip vendor (For both Eddystone and iBeacon single advertisement profiles)

  • Needs Config Change: AP's that have an error in configuration. You can configure these APs in Scan Mode, Dual Mode, or the Transmit Mode.

You can configure an AP Beacon in one of these transmit modes.

  • iBeacon

You can also see all the APs irrespective of their configurations under All Profiles.

Figure 7. Various Profiles of AP Beacons

You can also enable telemetry on the AP beacon and collect sensor information.

iBeacon transmit mode

A single AP can support up to five iBeacons in the transmit mode. Each iBeacon has a unique address derived from the base radio MAC address of the AP.

Use Cisco Spaces to configure an iBeacon's payload.

These are some terms related to iBeacons:

  • Transmit mode: Mode that allows nearby devices to pick up an iBeacon's broadcasting or advertising signals.

  • Advertisement payload: Data broadcast by an iBeacon. The advertisement payload contains information relevant to the iBeacon's purpose, such as the iBeacon's location. Use Cisco Spaces to configure this payload.

  • iBeacon MAC address: Unique identifier of an iBeacon on the network that helps other devices recognize and differentiate one iBeacon from another. This address is part of the iBeacons' advertisement payload. The AP uses the AP's own base radio MAC address to derive this unique address. The address is derived by adding a predefined address block value to the last byte of the base radio MAC address and decrementing this value by the beacon ID.

Configure AP as a beacon in scan mode

You can configure an AP as a beacon in the scan mode.

Procedure


Step 1

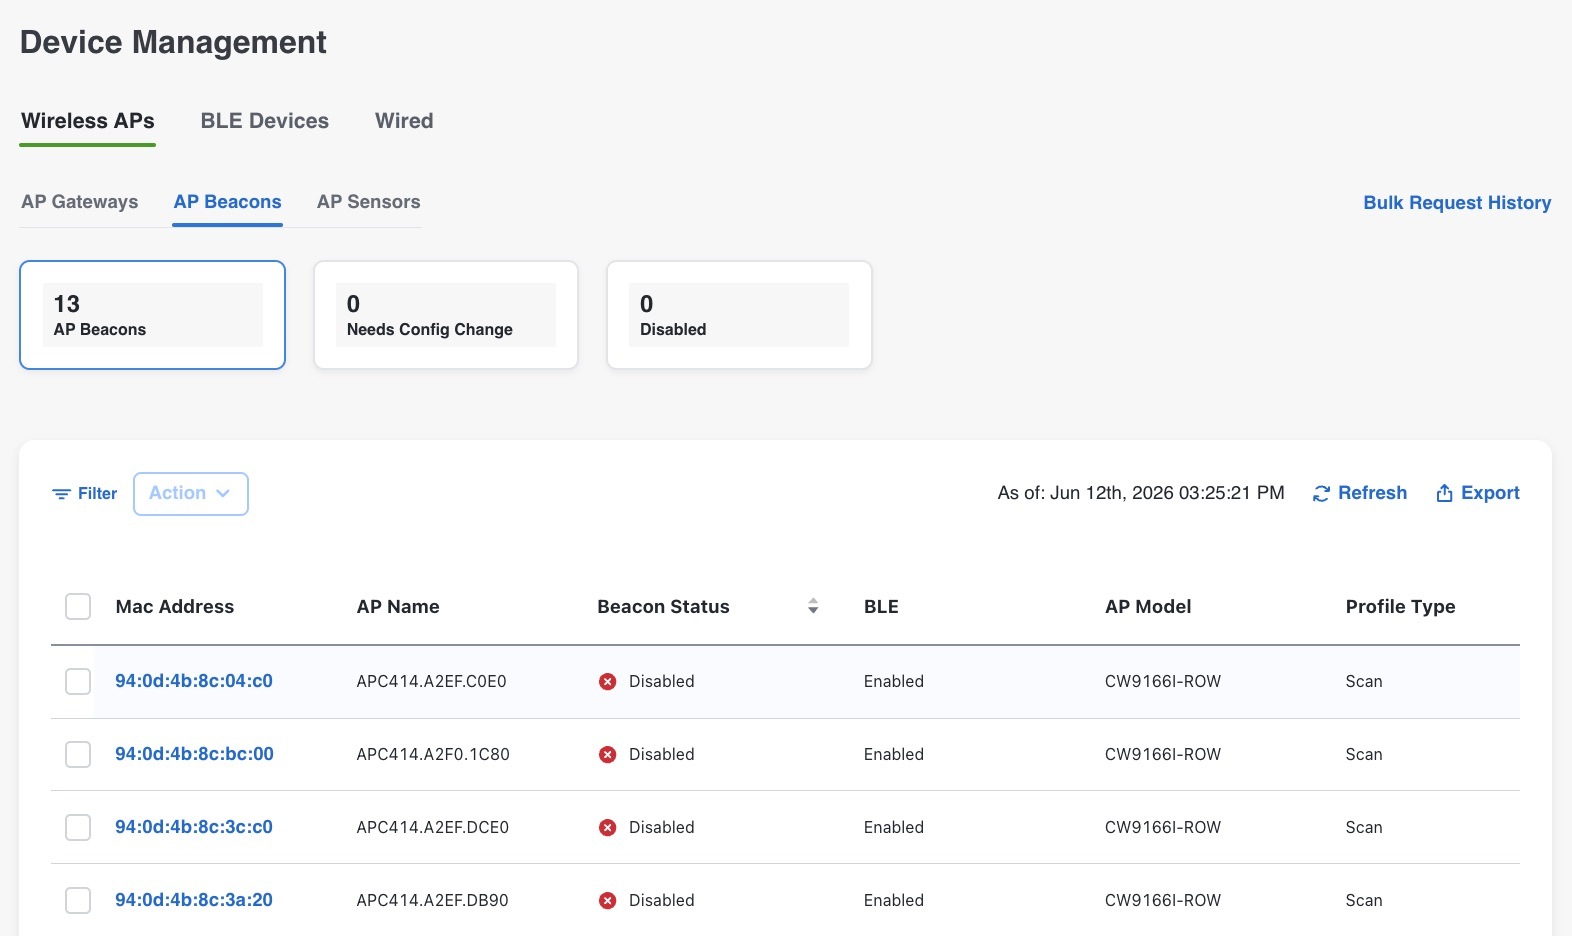
In the Cisco Spaces dashboard left-navigation pane, click IoT Services > Manage > AP Beacons, and then click AP Beacons.

Figure 8. List of AP Beacons

Step 2

Click the Disabled tab, if the count is greater than zero. Click the MAC address of one of the listed APs to open a detailed view.

Step 3

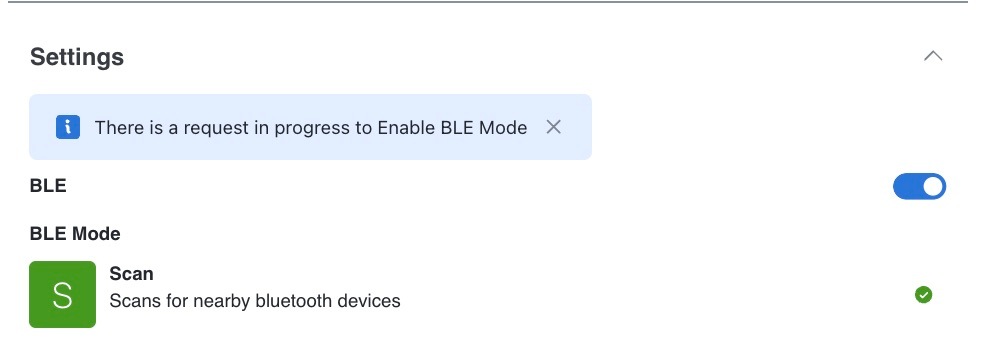
Click BLE in the Settings panel.

Figure 9. Enable BLE panel

AP is enabled as a beacon in Scan mode. You can observe the AP under the Scan tab.

Step 4

From the Request History panel, observe the status of the configuration change you requested.

Figure 10. Request History panel

Step 5

Click the Refresh button. The settings will update and display the configuration status.

Figure 11. Configuration Status

Configure AP as a beacon in transmit mode

You can configure an AP as a beacon in transmit mode.

Procedure


Step 1

In the Cisco Spaces dashboard left-navigation pane, click IoT Services > Manage > AP Beacons, and then click AP Beacons.

Figure 12. List of AP Beacons

Step 2

Click the MAC address of one of the listed APs to open a detailed view.

Step 3

In the BLE mode area under the BLE panel, click Enable for the Transmit option.

Figure 13. Enable BLE

Step 4

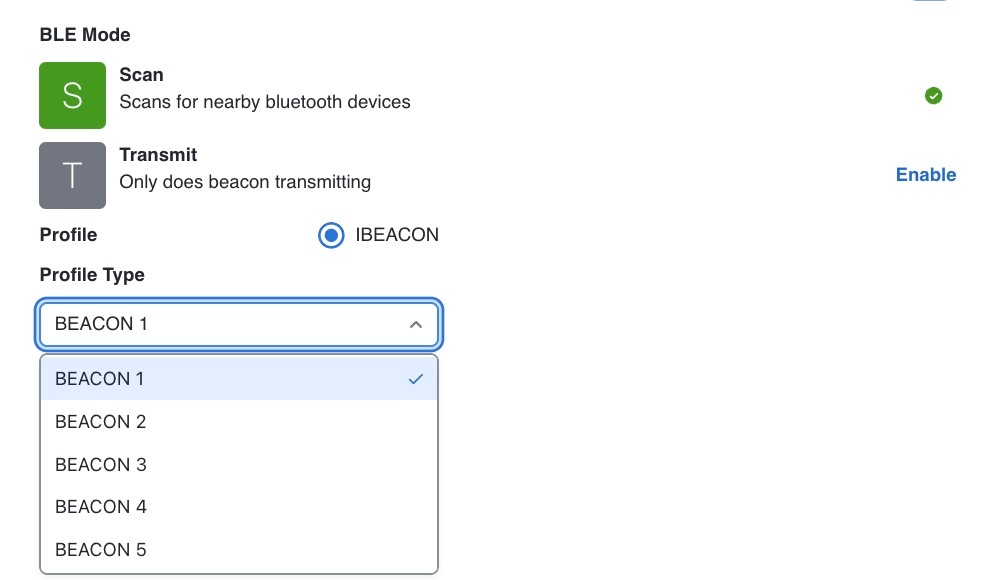
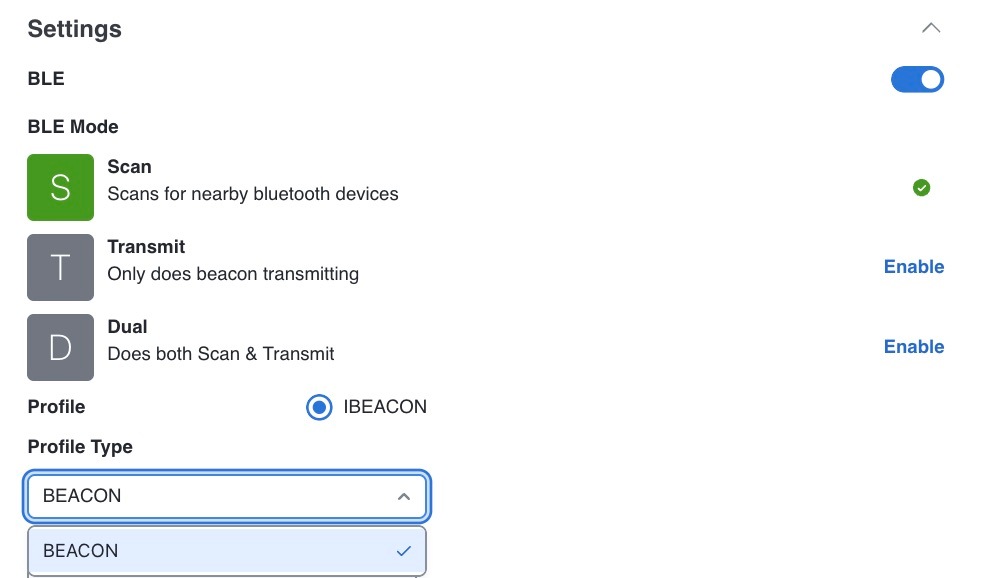
Configure this beacon in the Enable Transmit Profile area. .

  • Check the checkbox to enable iBeacon. From the Profile Type drop-down, select one of the beacons.
    Figure 14. Configuring an AP as an iBeacon

    Note


    APs can support up to five iBeacons in the Transmit mode. For more information, refer to iBeacon transmit mode.

AP is enabled as a beacon in Transmit mode. You can observe the AP under the Transmit tab.

Step 5

Set the Minor and Major parameters. By default, it is zero. The valid range is between zero and 65535.

Figure 15. Minor and Major config

Step 6

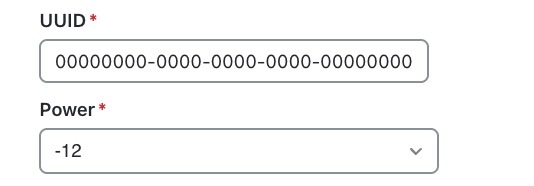
Set the UUID value and select a Power value from the drop-down list.

Figure 16. UUID and Power config

Step 7

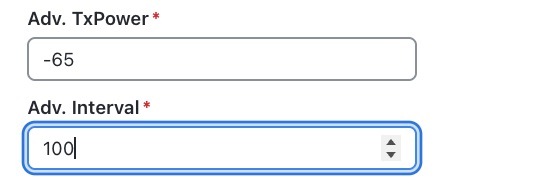
Set the Adv. TxPower and Adv. Interval by selecting the value.

Figure 17. Adv. TxPower and Adv. Interval

Step 8

Click Save.

Step 9

From the Request History panel, observe the status of the configuration change you requested.

Figure 18. Request History panel

Configure AP as a beacon in dual mode

You can configure an AP as a beacon in dual mode.

Procedure


Step 1

In the Cisco Spaces dashboard left-navigation pane, click IoT Services > Manage > AP Beacons, and then click AP Beacons.

Figure 19. List of AP Beacons

Step 2

Click the MAC address of one of the listed APs to open a detailed view.

Step 3

In the BLE mode area under the BLE panel, click Enable for the Dual option.

Figure 20.

Step 4

Configure this beacon in the Enable Transmit Profile area.

  • Check the checkbox to enable iBeacon.
    Figure 21. Configuring an AP as an iBeacon

    Note


    APs can support only one iBeacon in the Dual mode. For more information, refer to iBeacon transmit mode.

AP is enabled as a beacon in Dual mode. You can observe the AP under the Dual tab.

Step 5

Set the Minor and Major parameters. The valid range is between zero and 65535.

Figure 22. Minor and Major config

Step 6

Set the UUID value and select a Power value from the drop-down list.

Figure 23. UUID and Power config

Step 7

Set the Adv. TxPower and Adv. Interval by selecting the value.

Figure 24. Adv. TxPower and Adv. Interval

Step 8

Click Save.

Step 9

From the Request History panel, observe the status of the configuration change you requested.

Figure 25. Request History panel

AP Sensors

You can now configure these access points as sensors:

  • Cisco Catalyst 9136 Series Access Points

  • Cisco Catalyst Wireless 9166I Series Access Points

Once configured as a sensor, you can collect telemetry data using this AP. These sensor values can be configured:

  • Temperature

  • Relative humidity

  • Total volatile organic compound (TVOC), and

  • Indoor air quality

Enable or disable an AP sensor

Procedure


Step 1

In the Cisco Spaces dashboard left-navigation pane, click IoT Services > Manage > AP Beacons, and then click AP Beacons.

Figure 26. List of AP Beacons

Step 2

Click the AP that you want to configure as a sensor.

The AP Beacons details page opens.

Step 3

In the Settings panel, toggle Sensor to enable or disable the AP as a sensor.

Figure 27. Enable or disable AP as a sensor

Step 4

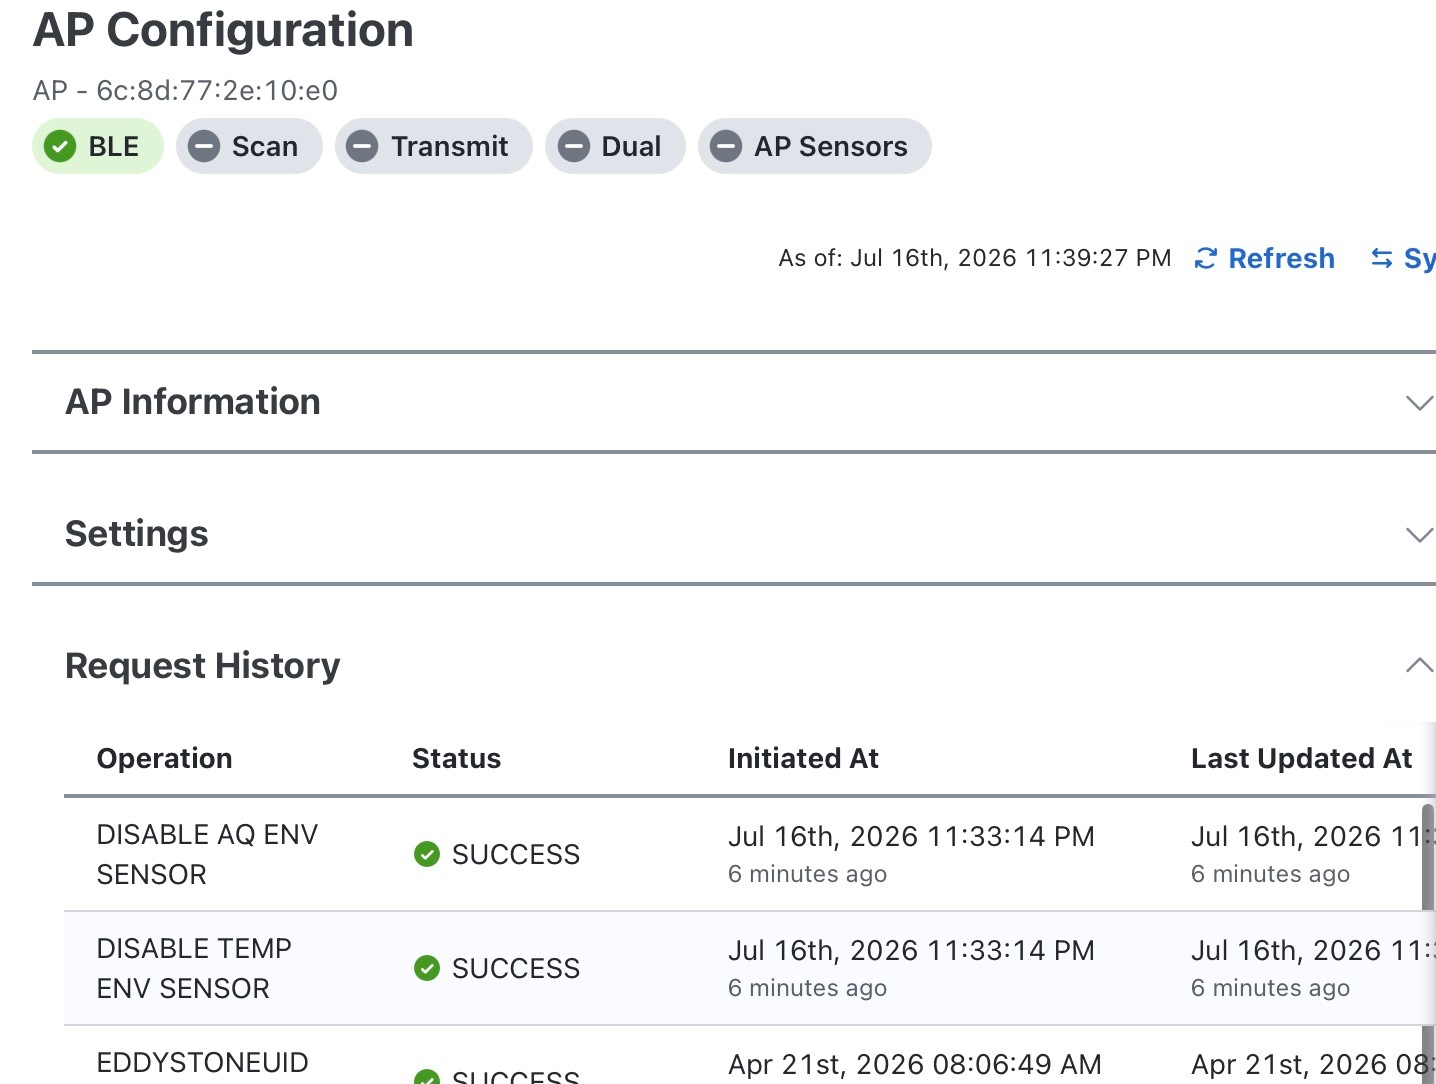
After you enable or disable the sensor, the request history shows success for AQ ENV SENSOR and TEMP ENV SENSOR.

Figure 28. Request History tab

Step 5

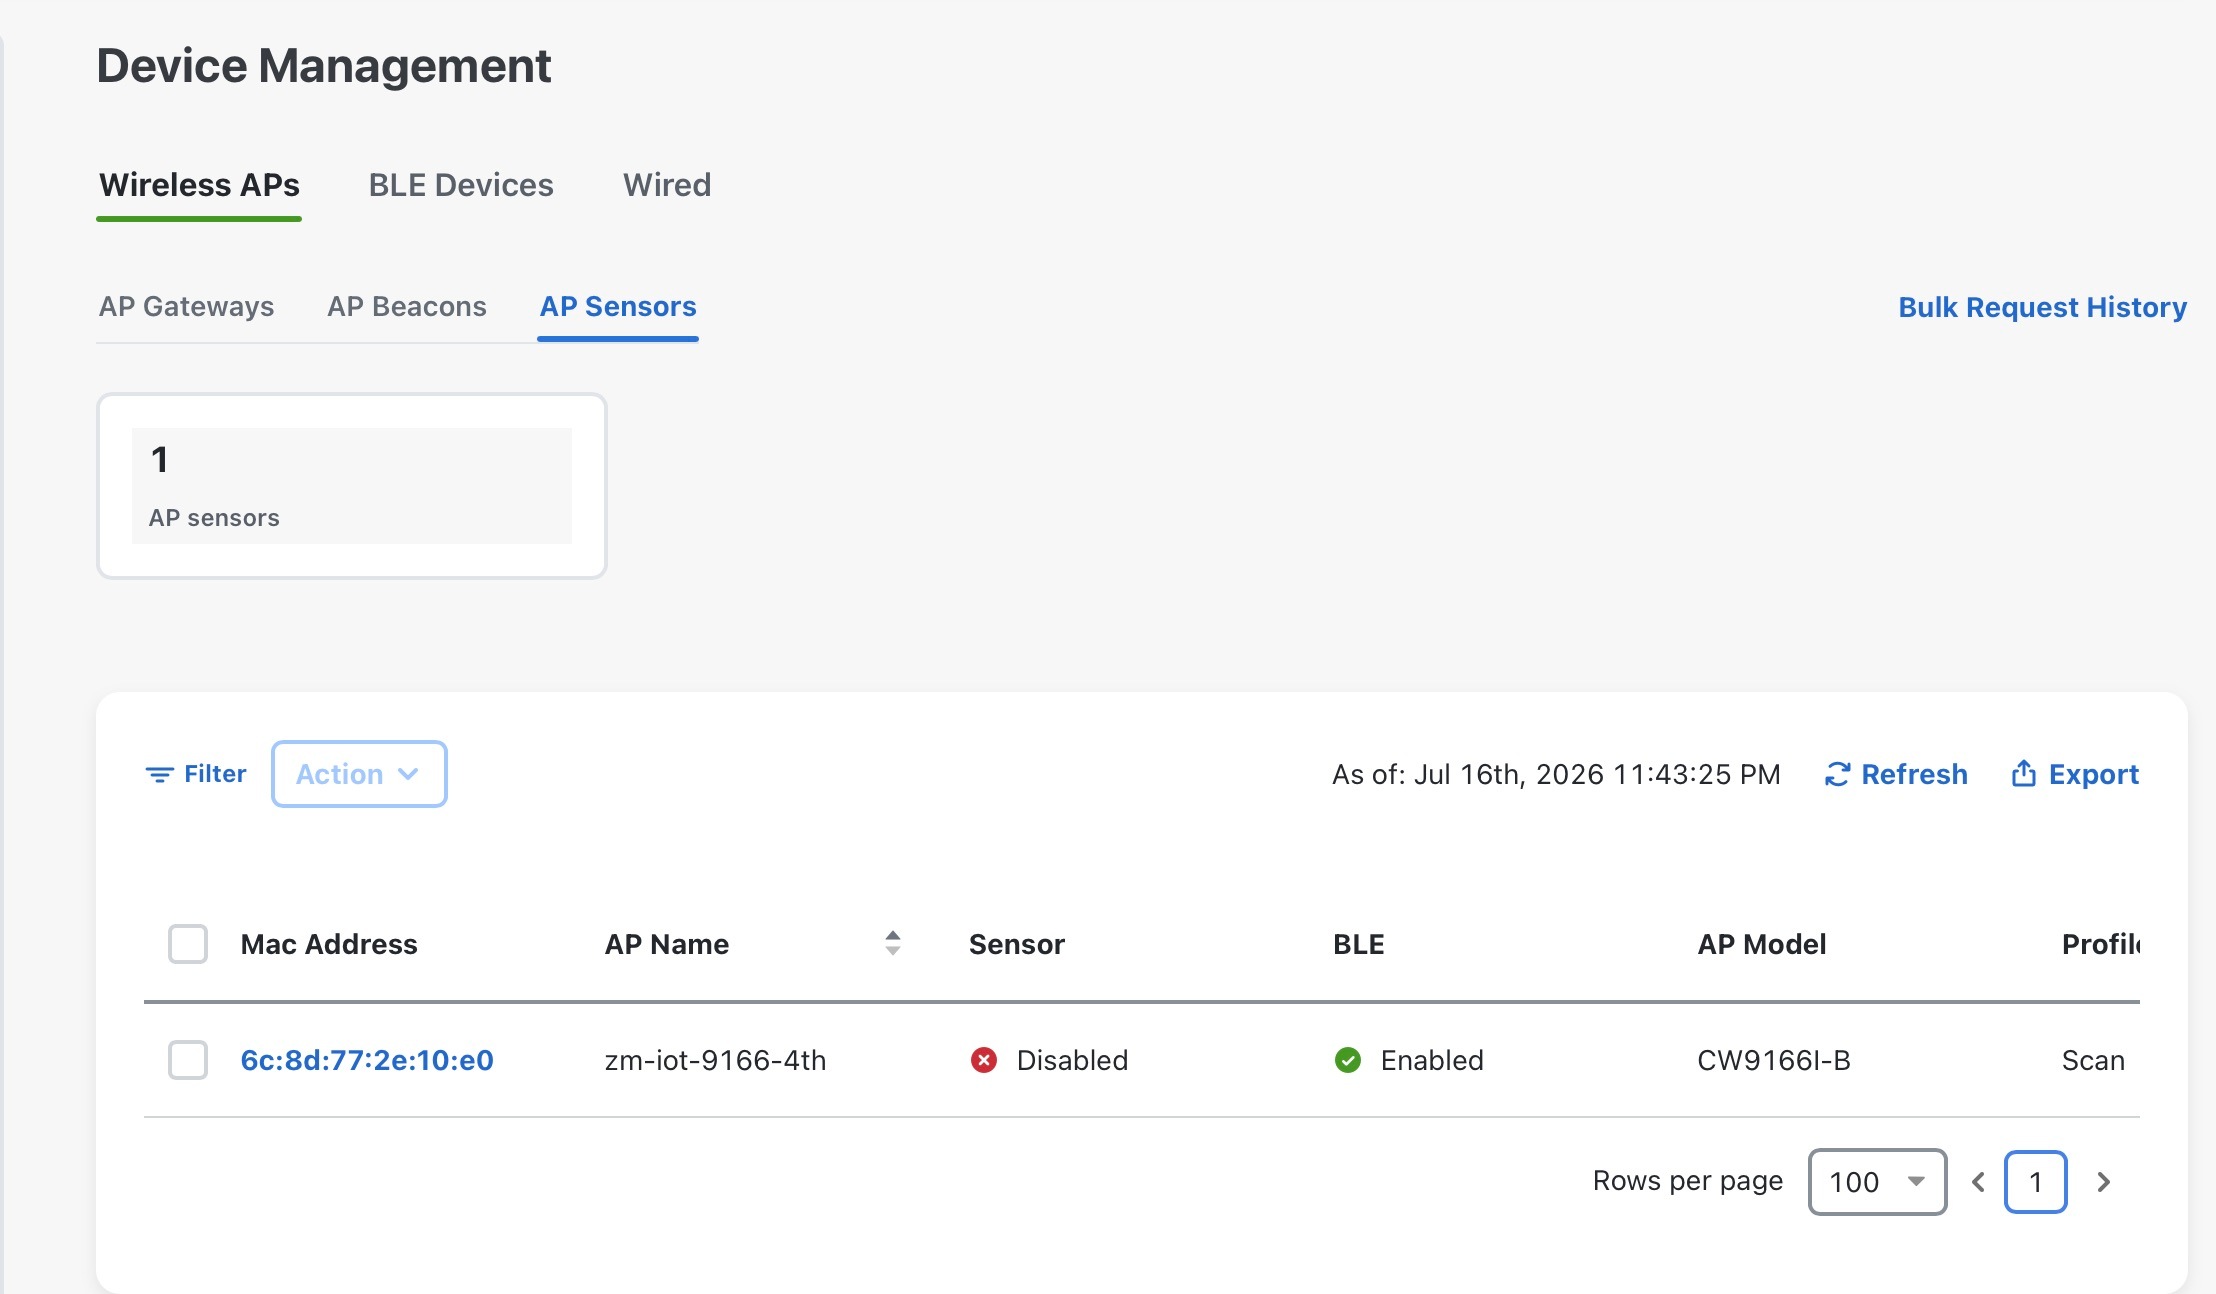
The AP sensor tab displays whether the sensor column is enabled or disabled for each AP.

Figure 29. AP Sensor tab

View sensor information

You can view sensor information from the Sensor Information area.

Figure 30. View sensor information