BLE Devices

Discover beacons

This section shows you how to view the beacons scanned by IoT Service.

Procedure


Step 1

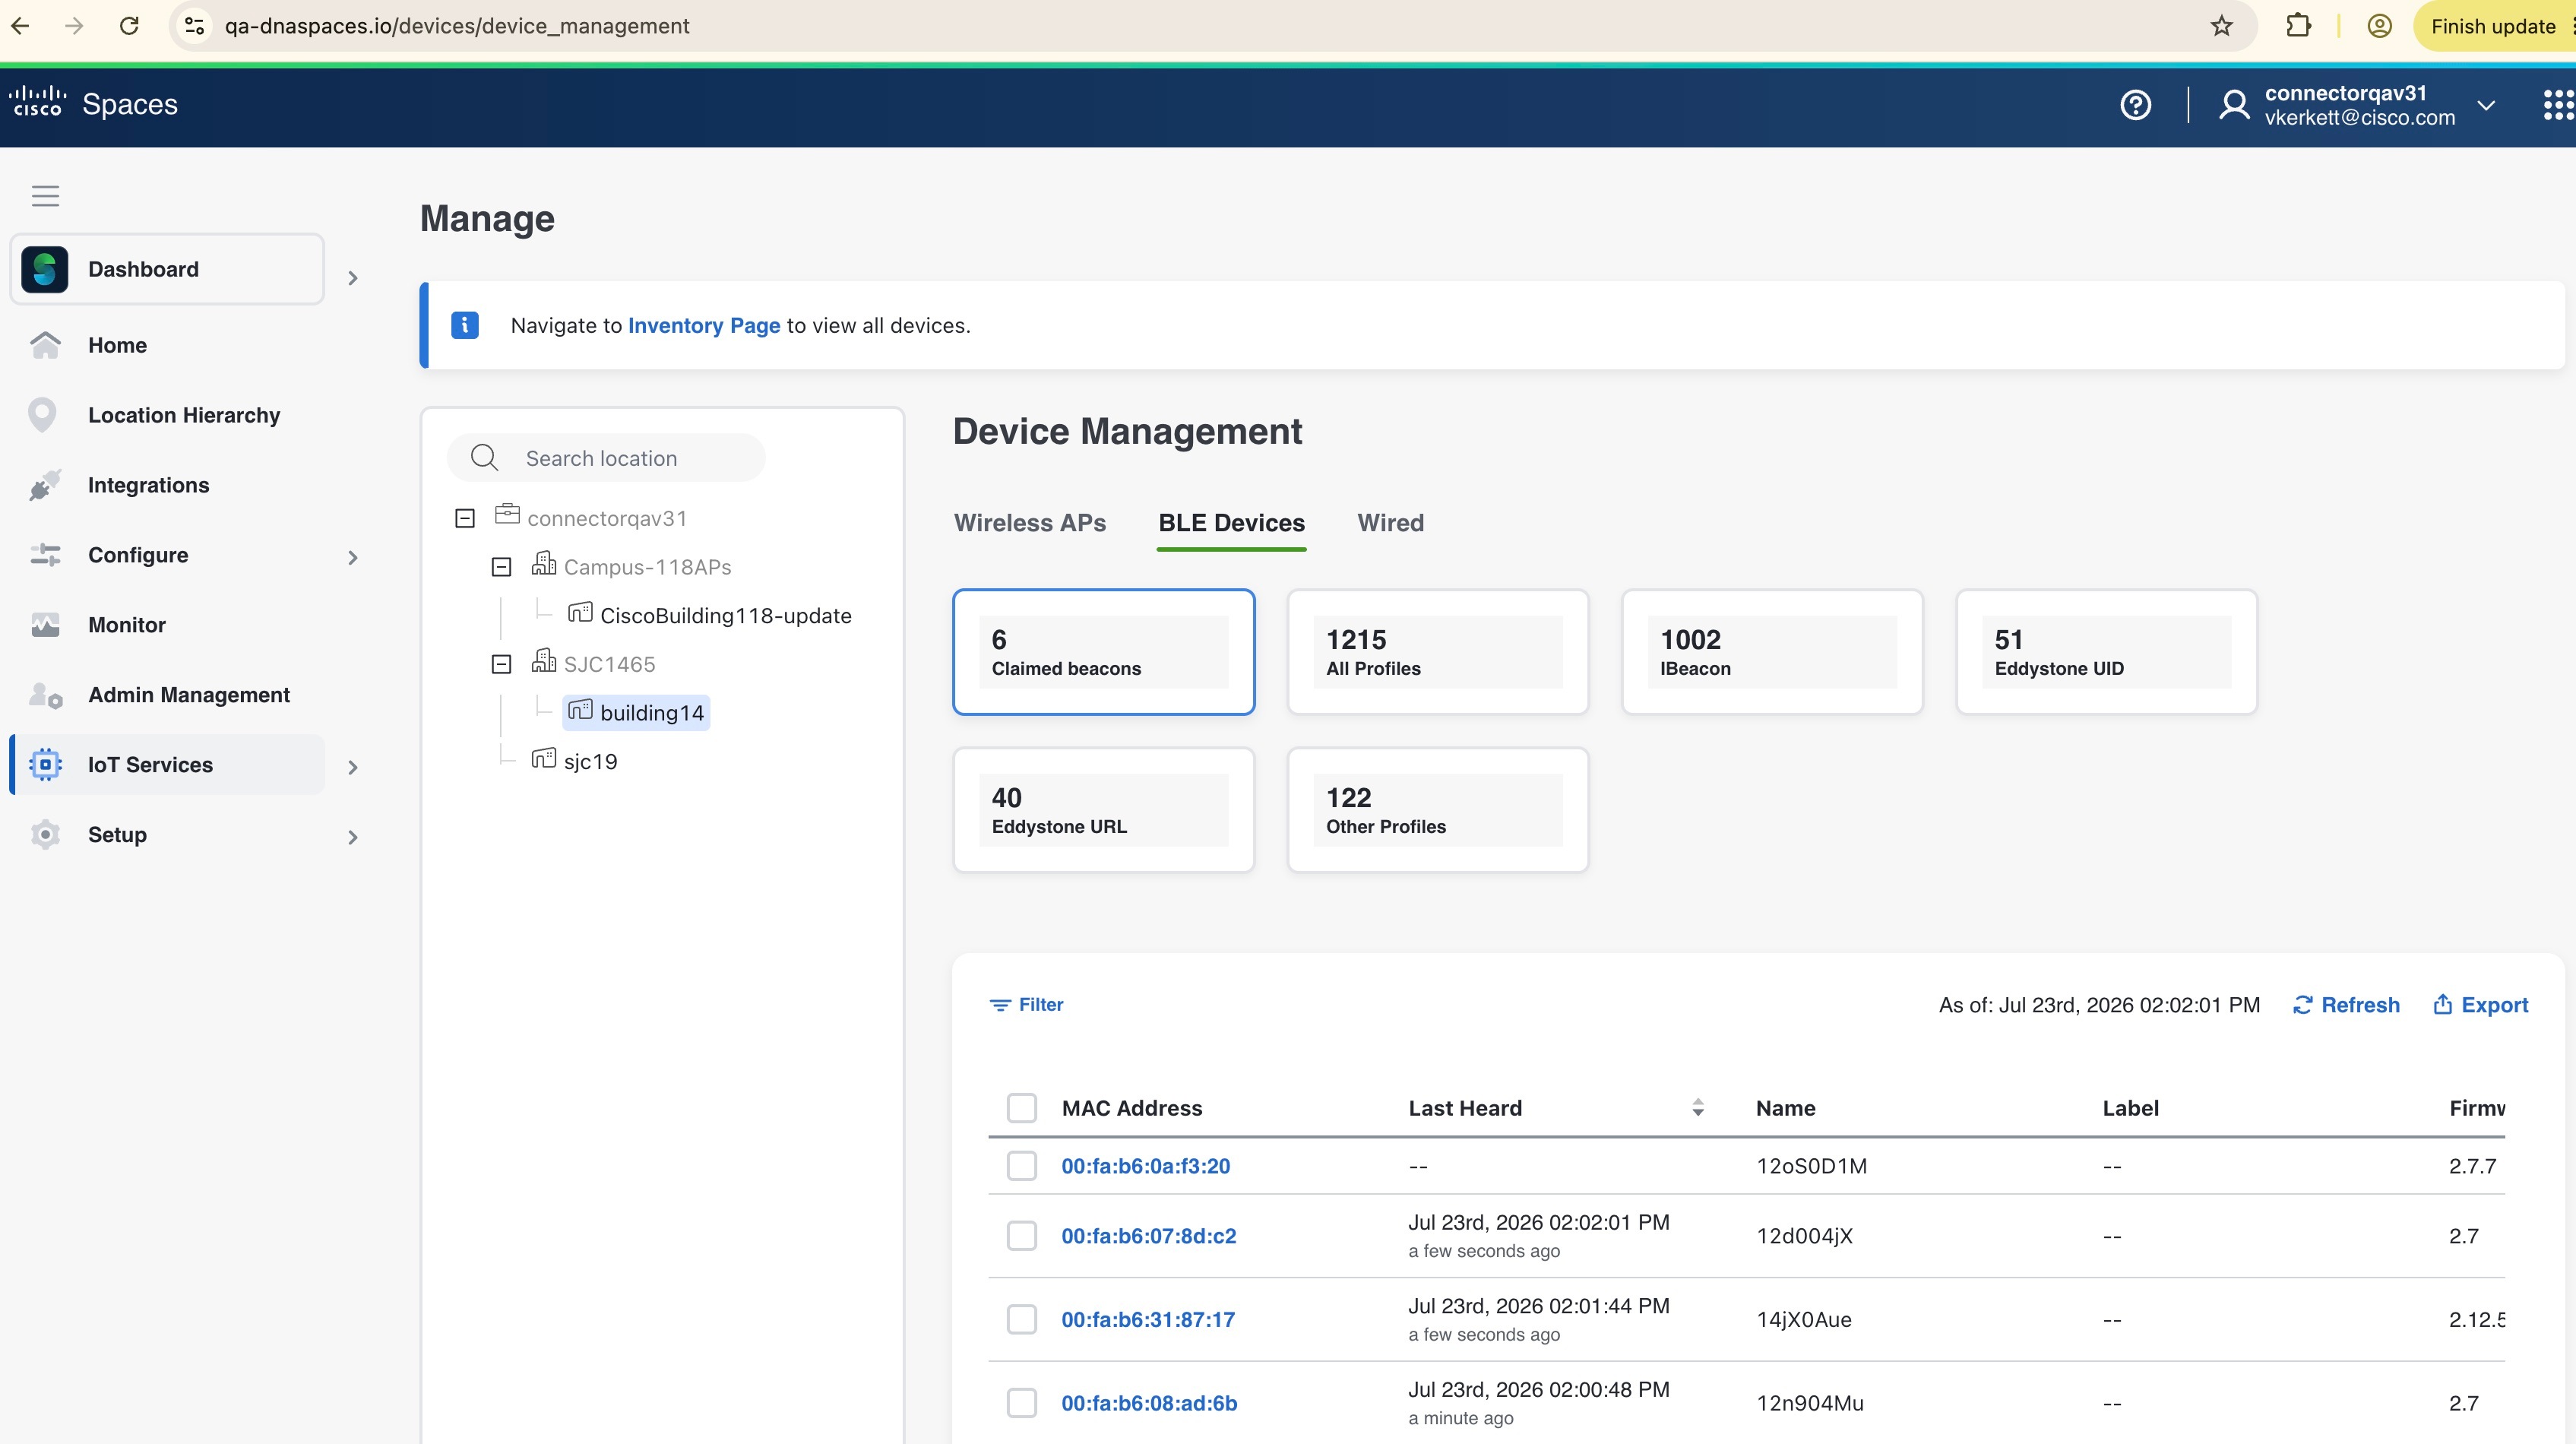
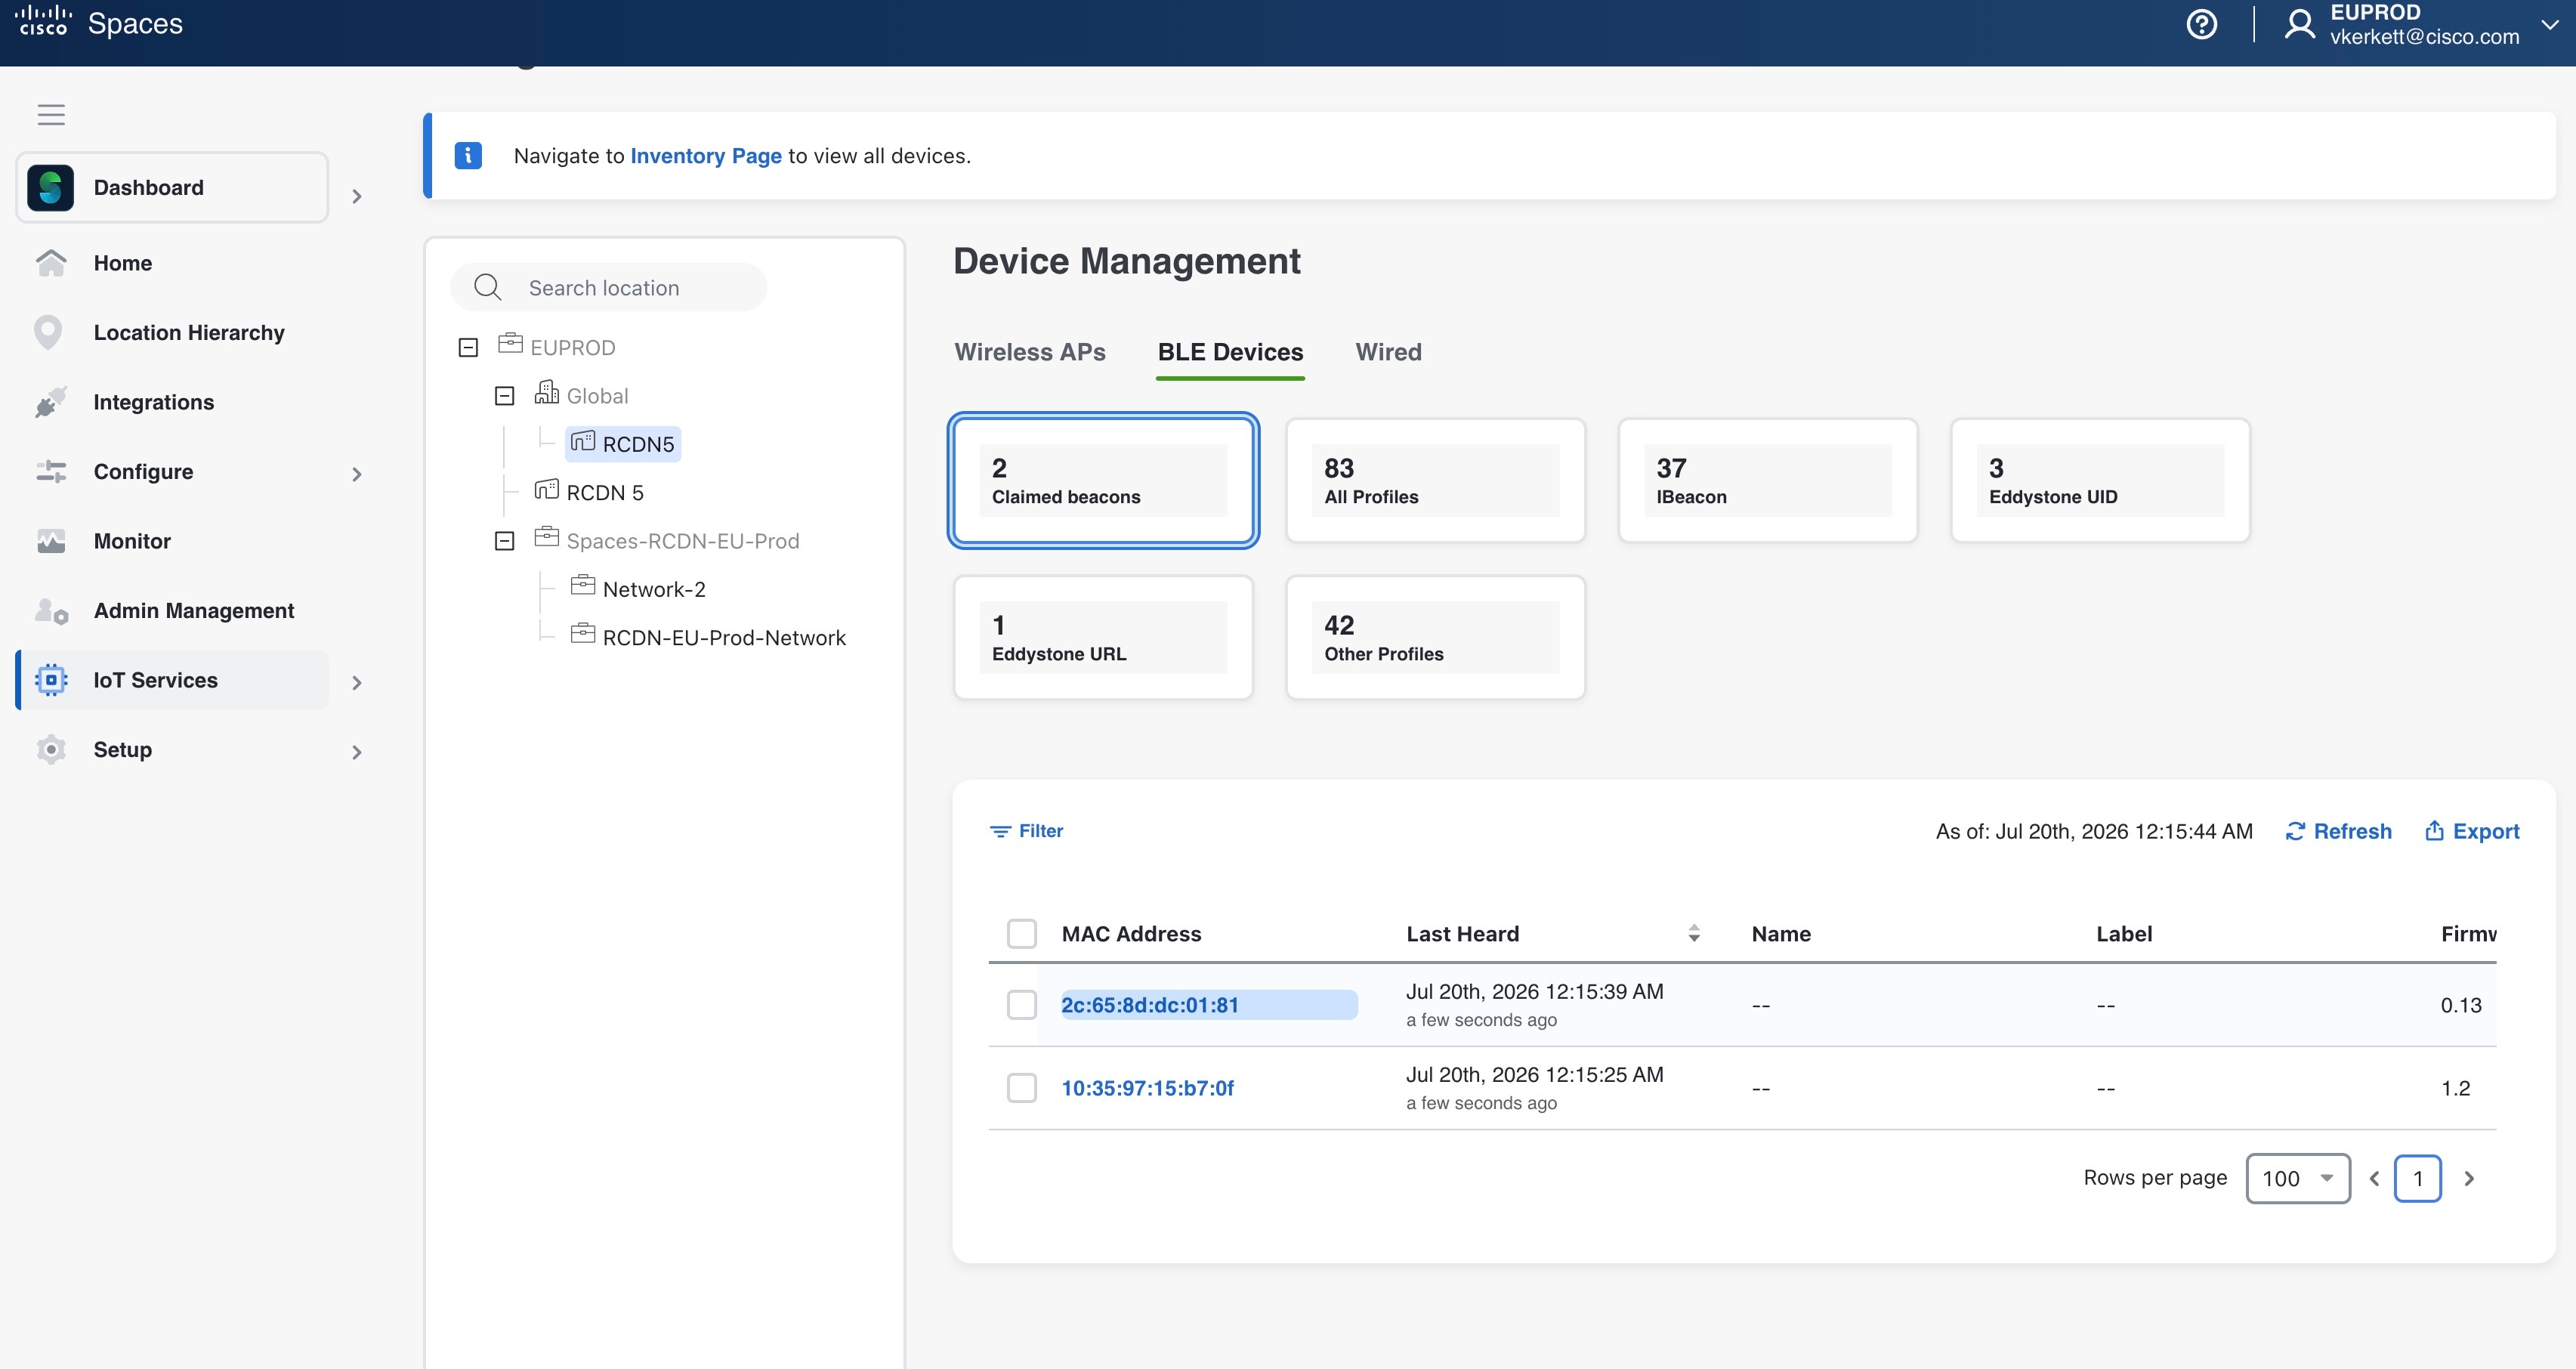
Navigate to IoT Services > Manage > BLE Devices from the Cisco Spaces dashboard.

Step 2

Click on one of these: All Profiles, iBeacon, Eddystone UID, Eddystone URL, Other Profiles.

This list is sorted by Last Heard by default. You can sort the table by other fields by clicking the arrow beside the column header.
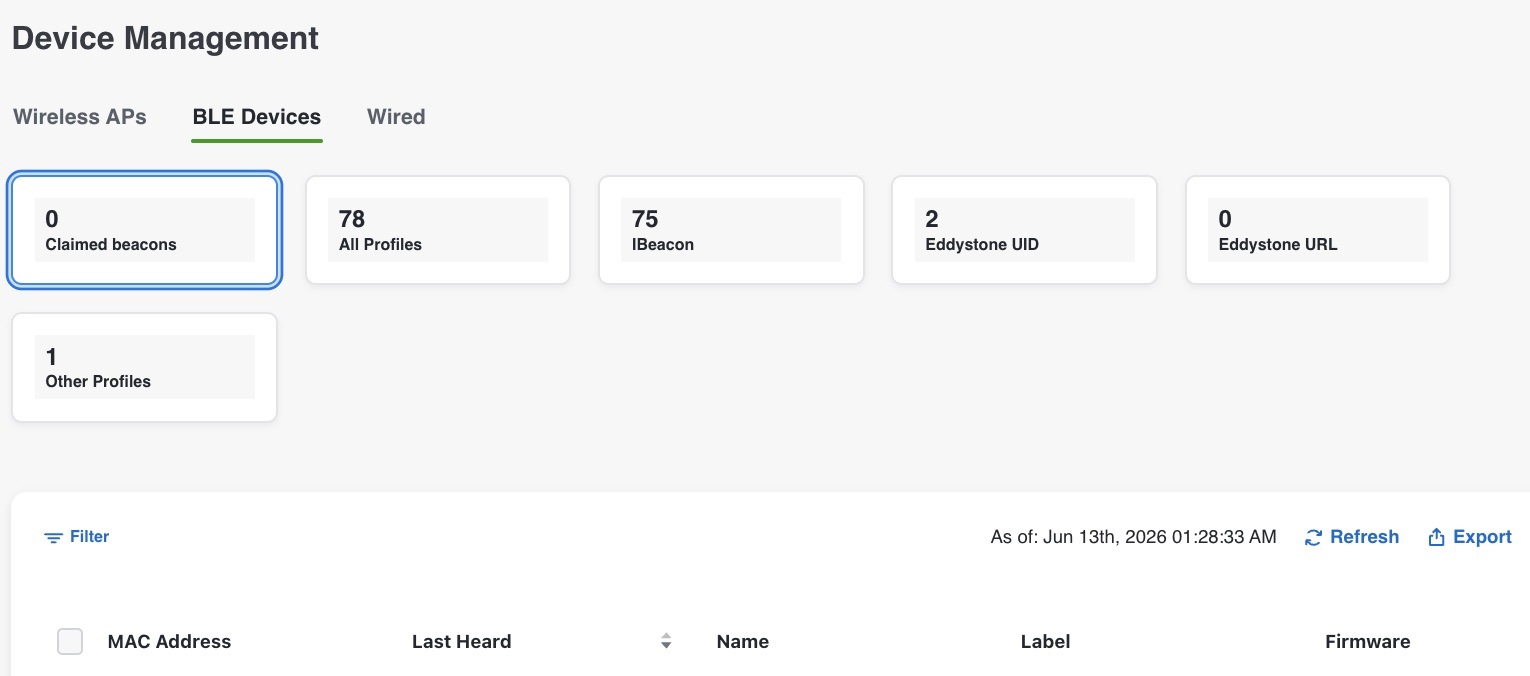
Figure 1. Beacon Details

Step 3

Click on the MAC address of the beacon to view further details.

What to do next

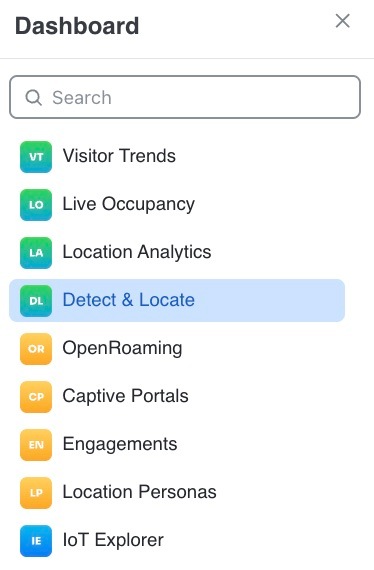
You can view location details of the beacon on Cisco Spaces: Detect and Locate.

For more information, refer to Cisco DNA Spaces: Detect and Locate Configuration Guide.
Claim a beacon

Register a beacon device with Cisco Spaces by claiming it using its unique order ID.

Before you begin

Keep the order ID of the beacon ready. You have received the order ID through an e-mail and physically along with the packaging of the beacon.

Procedure


Step 1

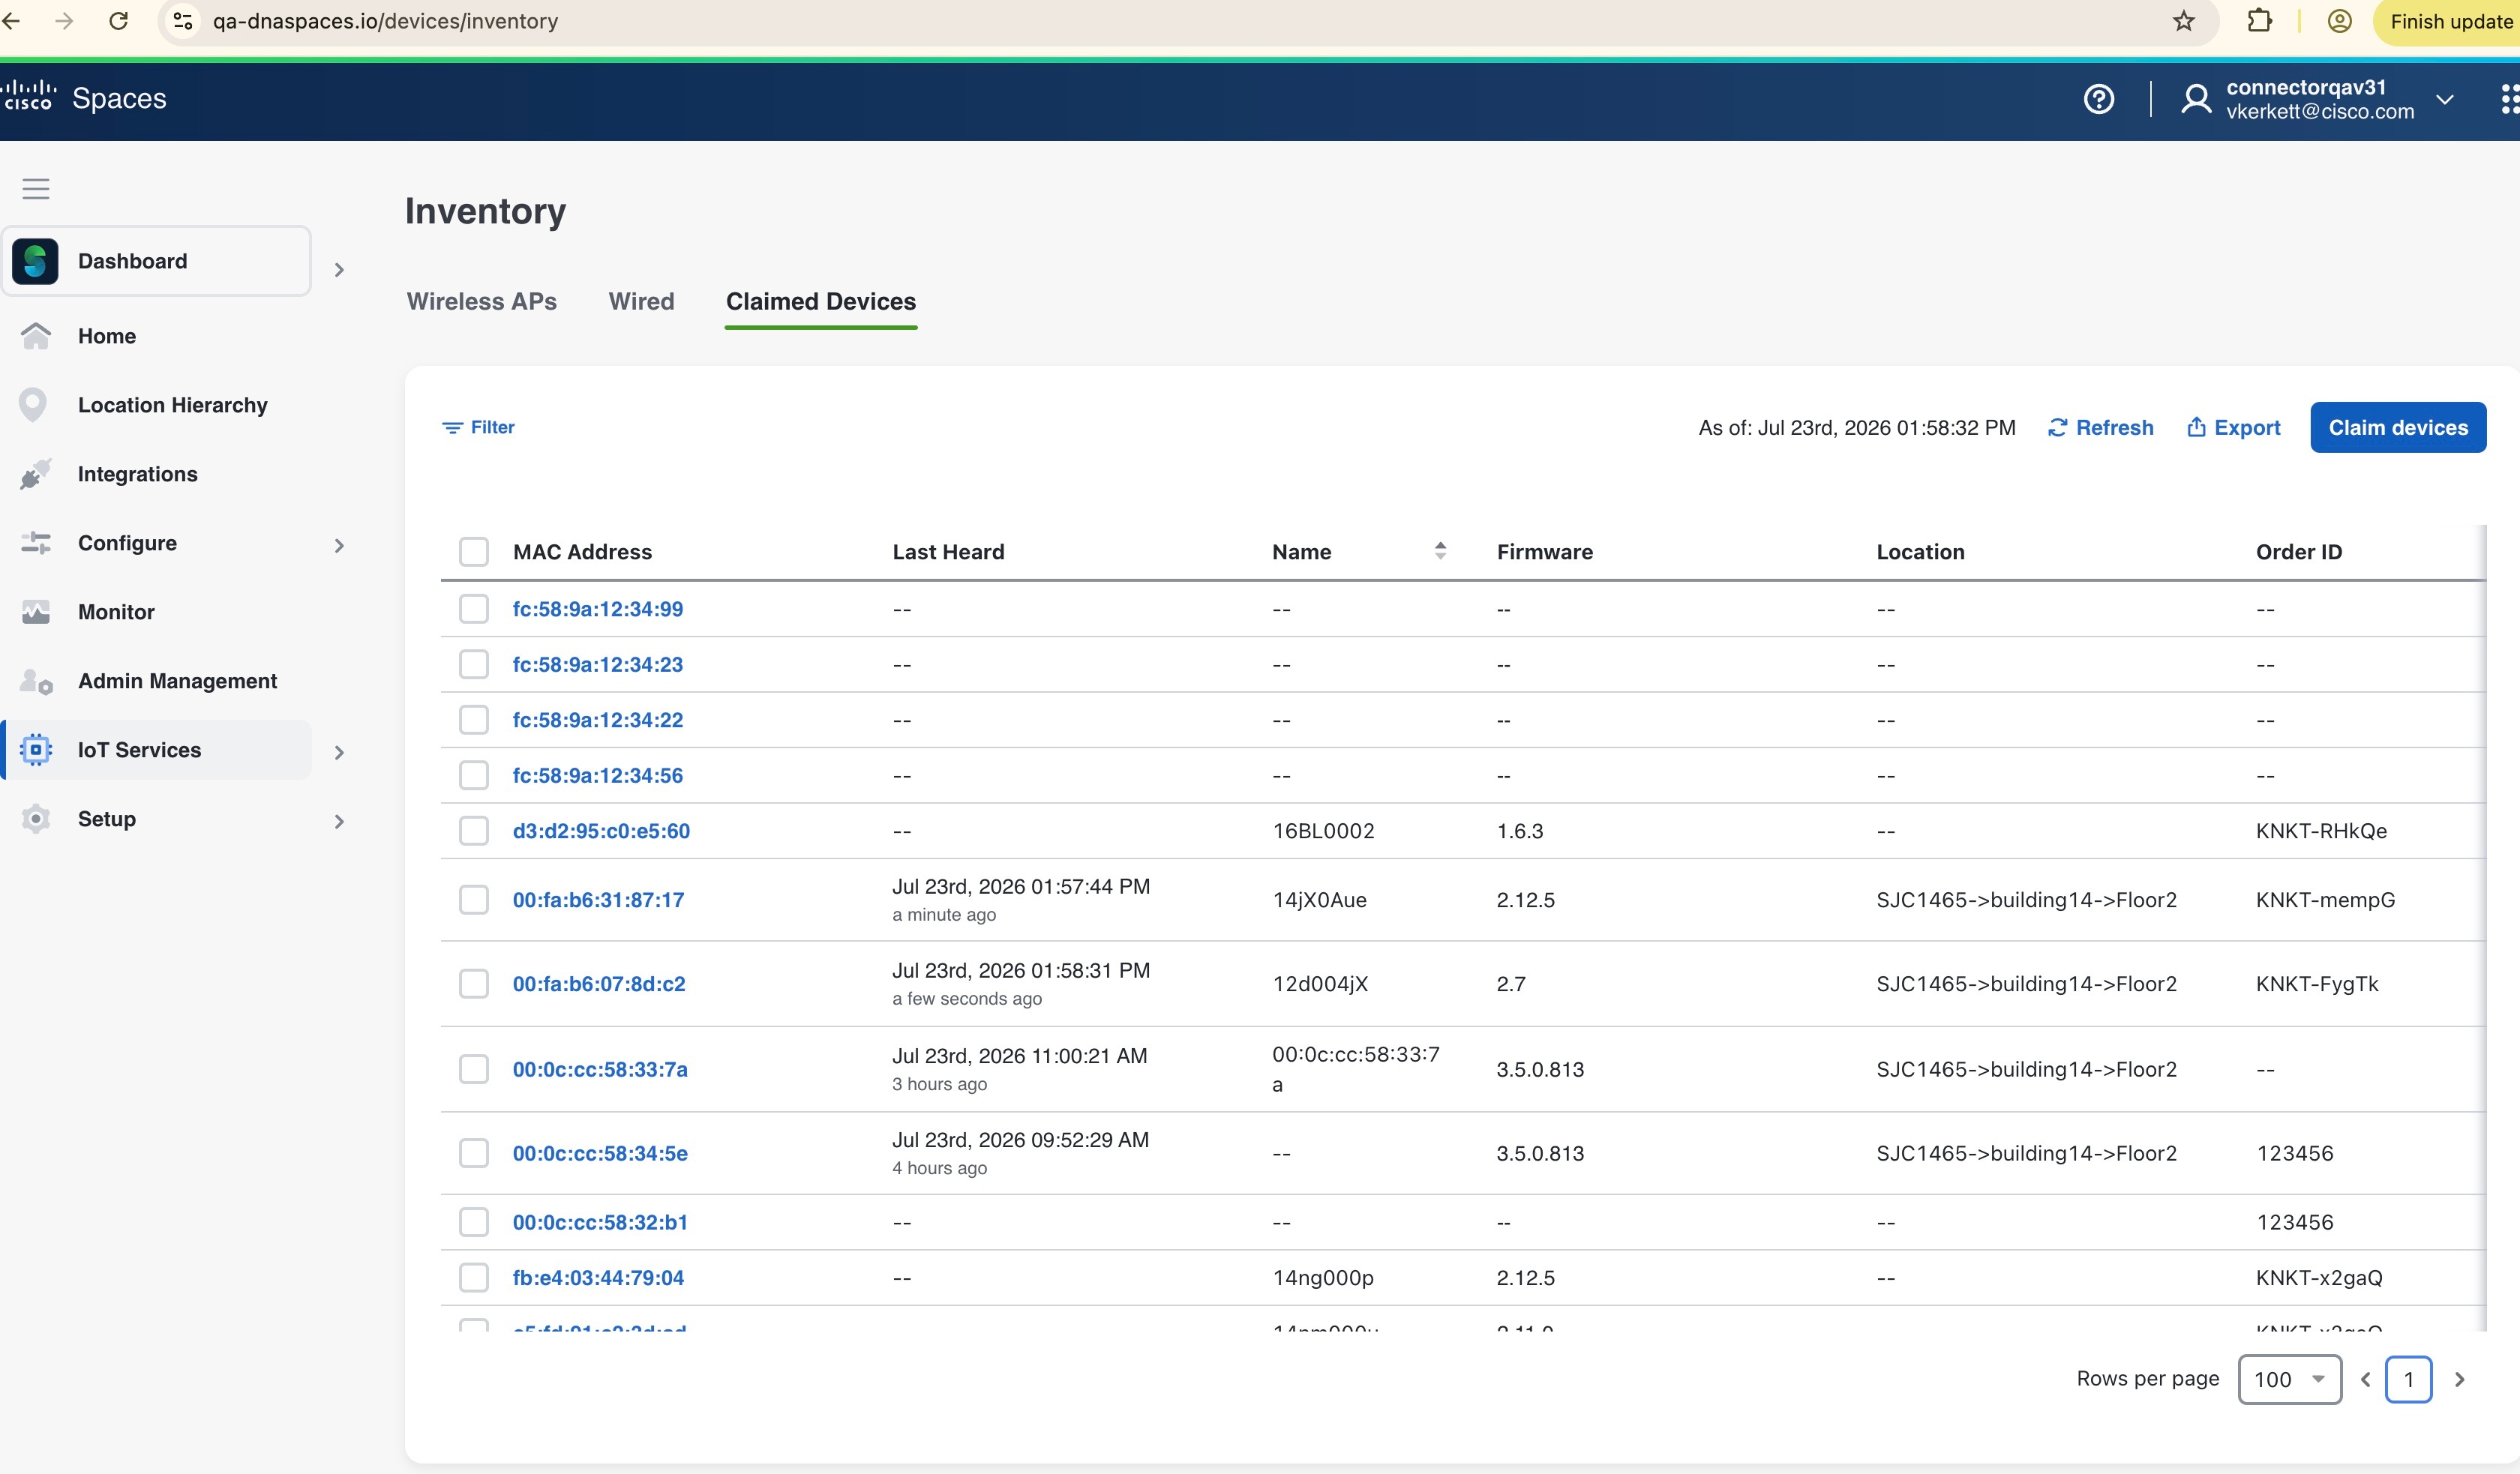
From the Cisco Spaces dashboard, choose IoT Services > Inventory > Claimed Devices.

Figure 2. Claimed Devices tab

Step 2

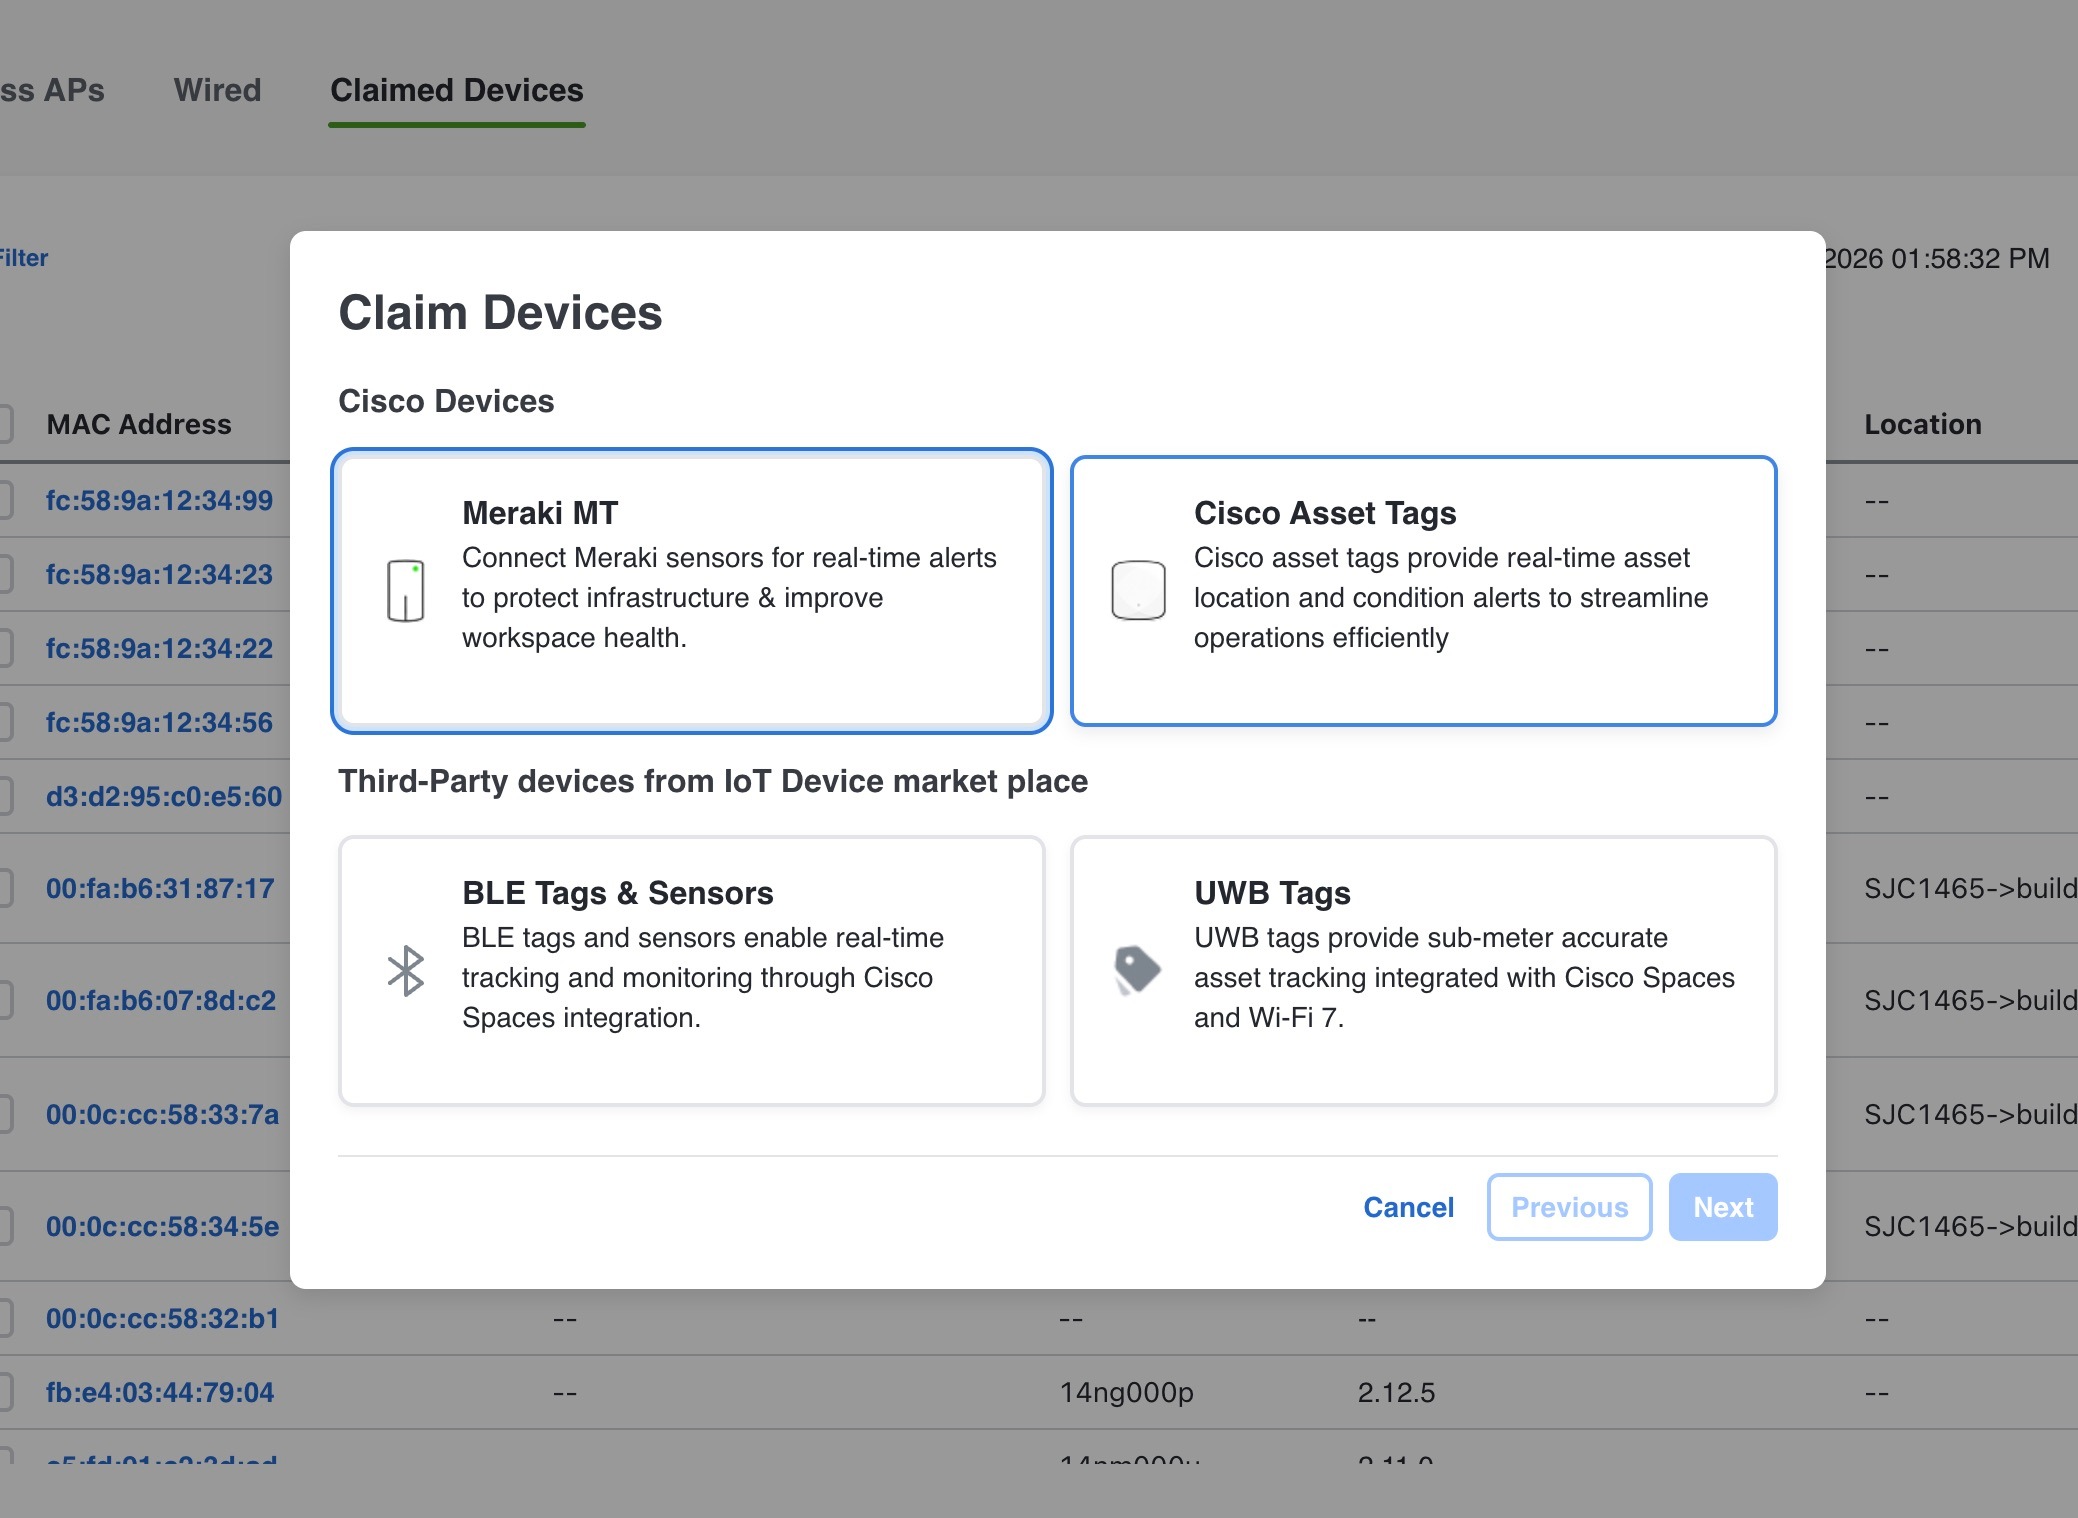
Click Claim devices.

Figure 3. Claim Devices tab

Step 3

Click BLE Tags & Sensors within the Third-Party devices from IoT Device market place section. Click Next.

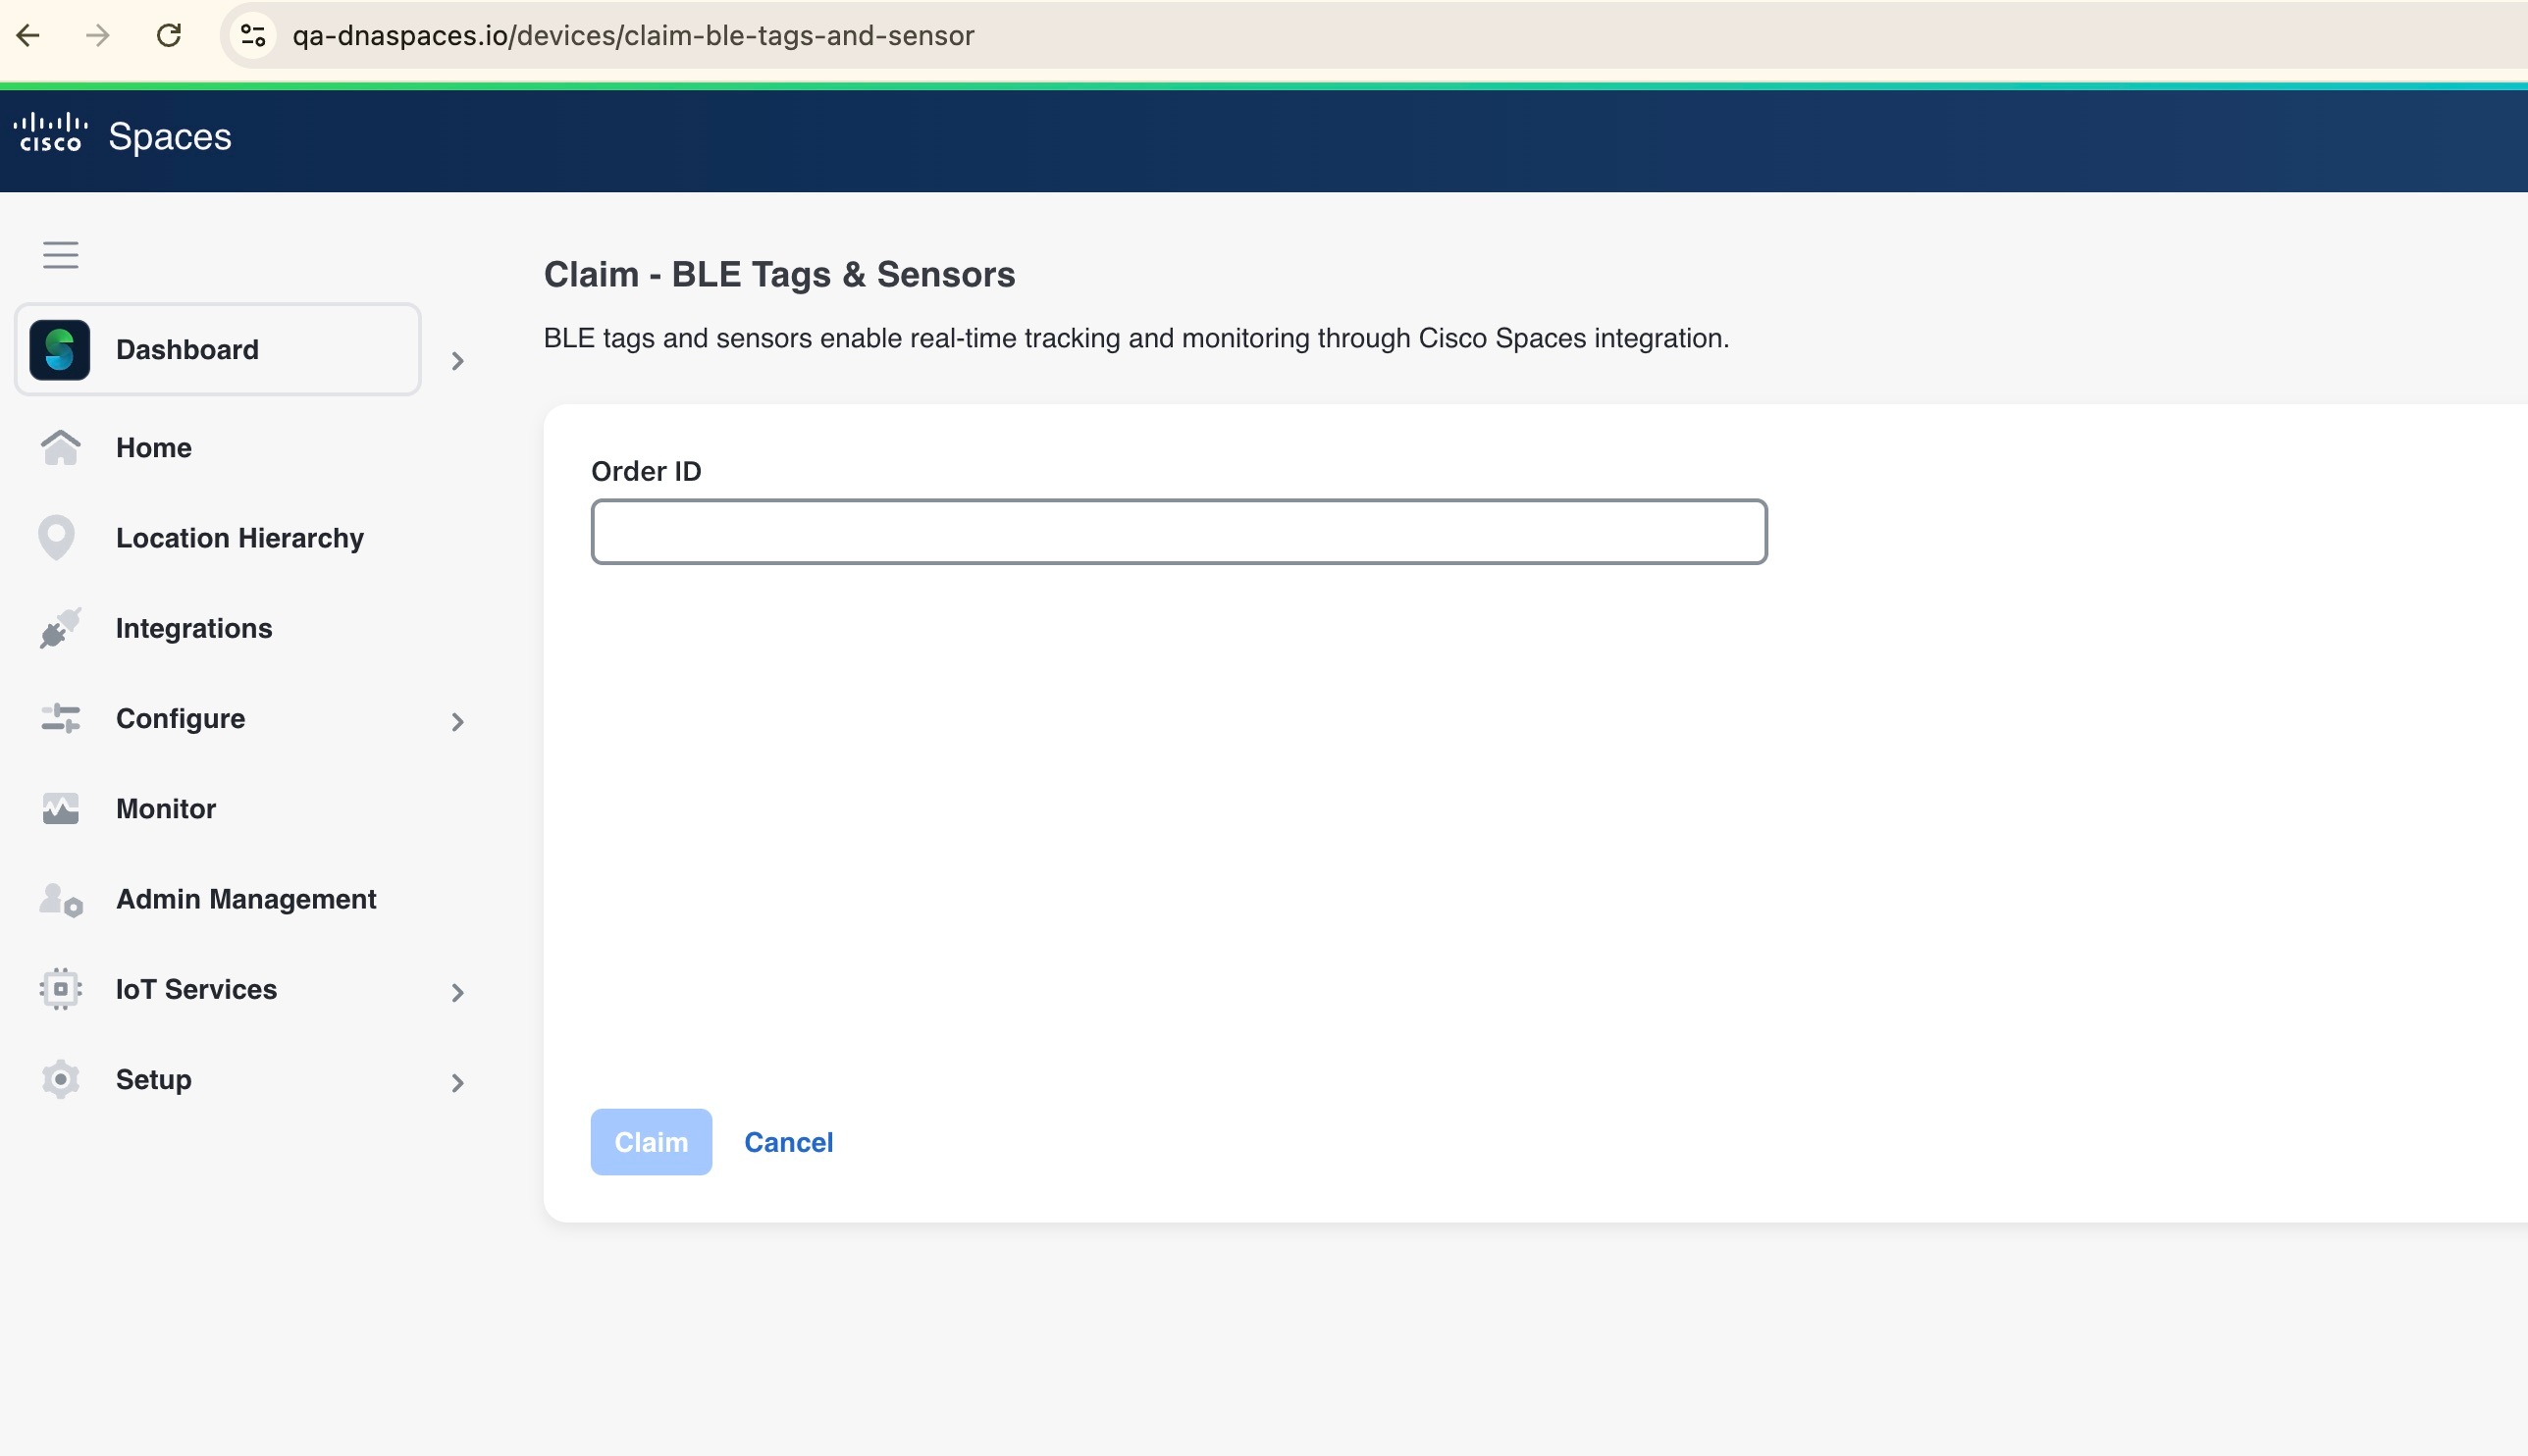
The Claim - BLE Tags & Sensors tab is displayed.
Figure 4. Claim - BLE Tags & Sensors tab

Step 4

Enter the Order ID.

Step 5

Click Claim.


Configure a beacon on IoT Service

Configure beacon types and view their details as scanned by the IoT Service.

Procedure


Step 1

Choose IoT Services > Manage > BLE Devices.

Step 2

Click on Claimed beacons to view the scanned beacons.

This list is sorted by Beacon Type.

Step 3

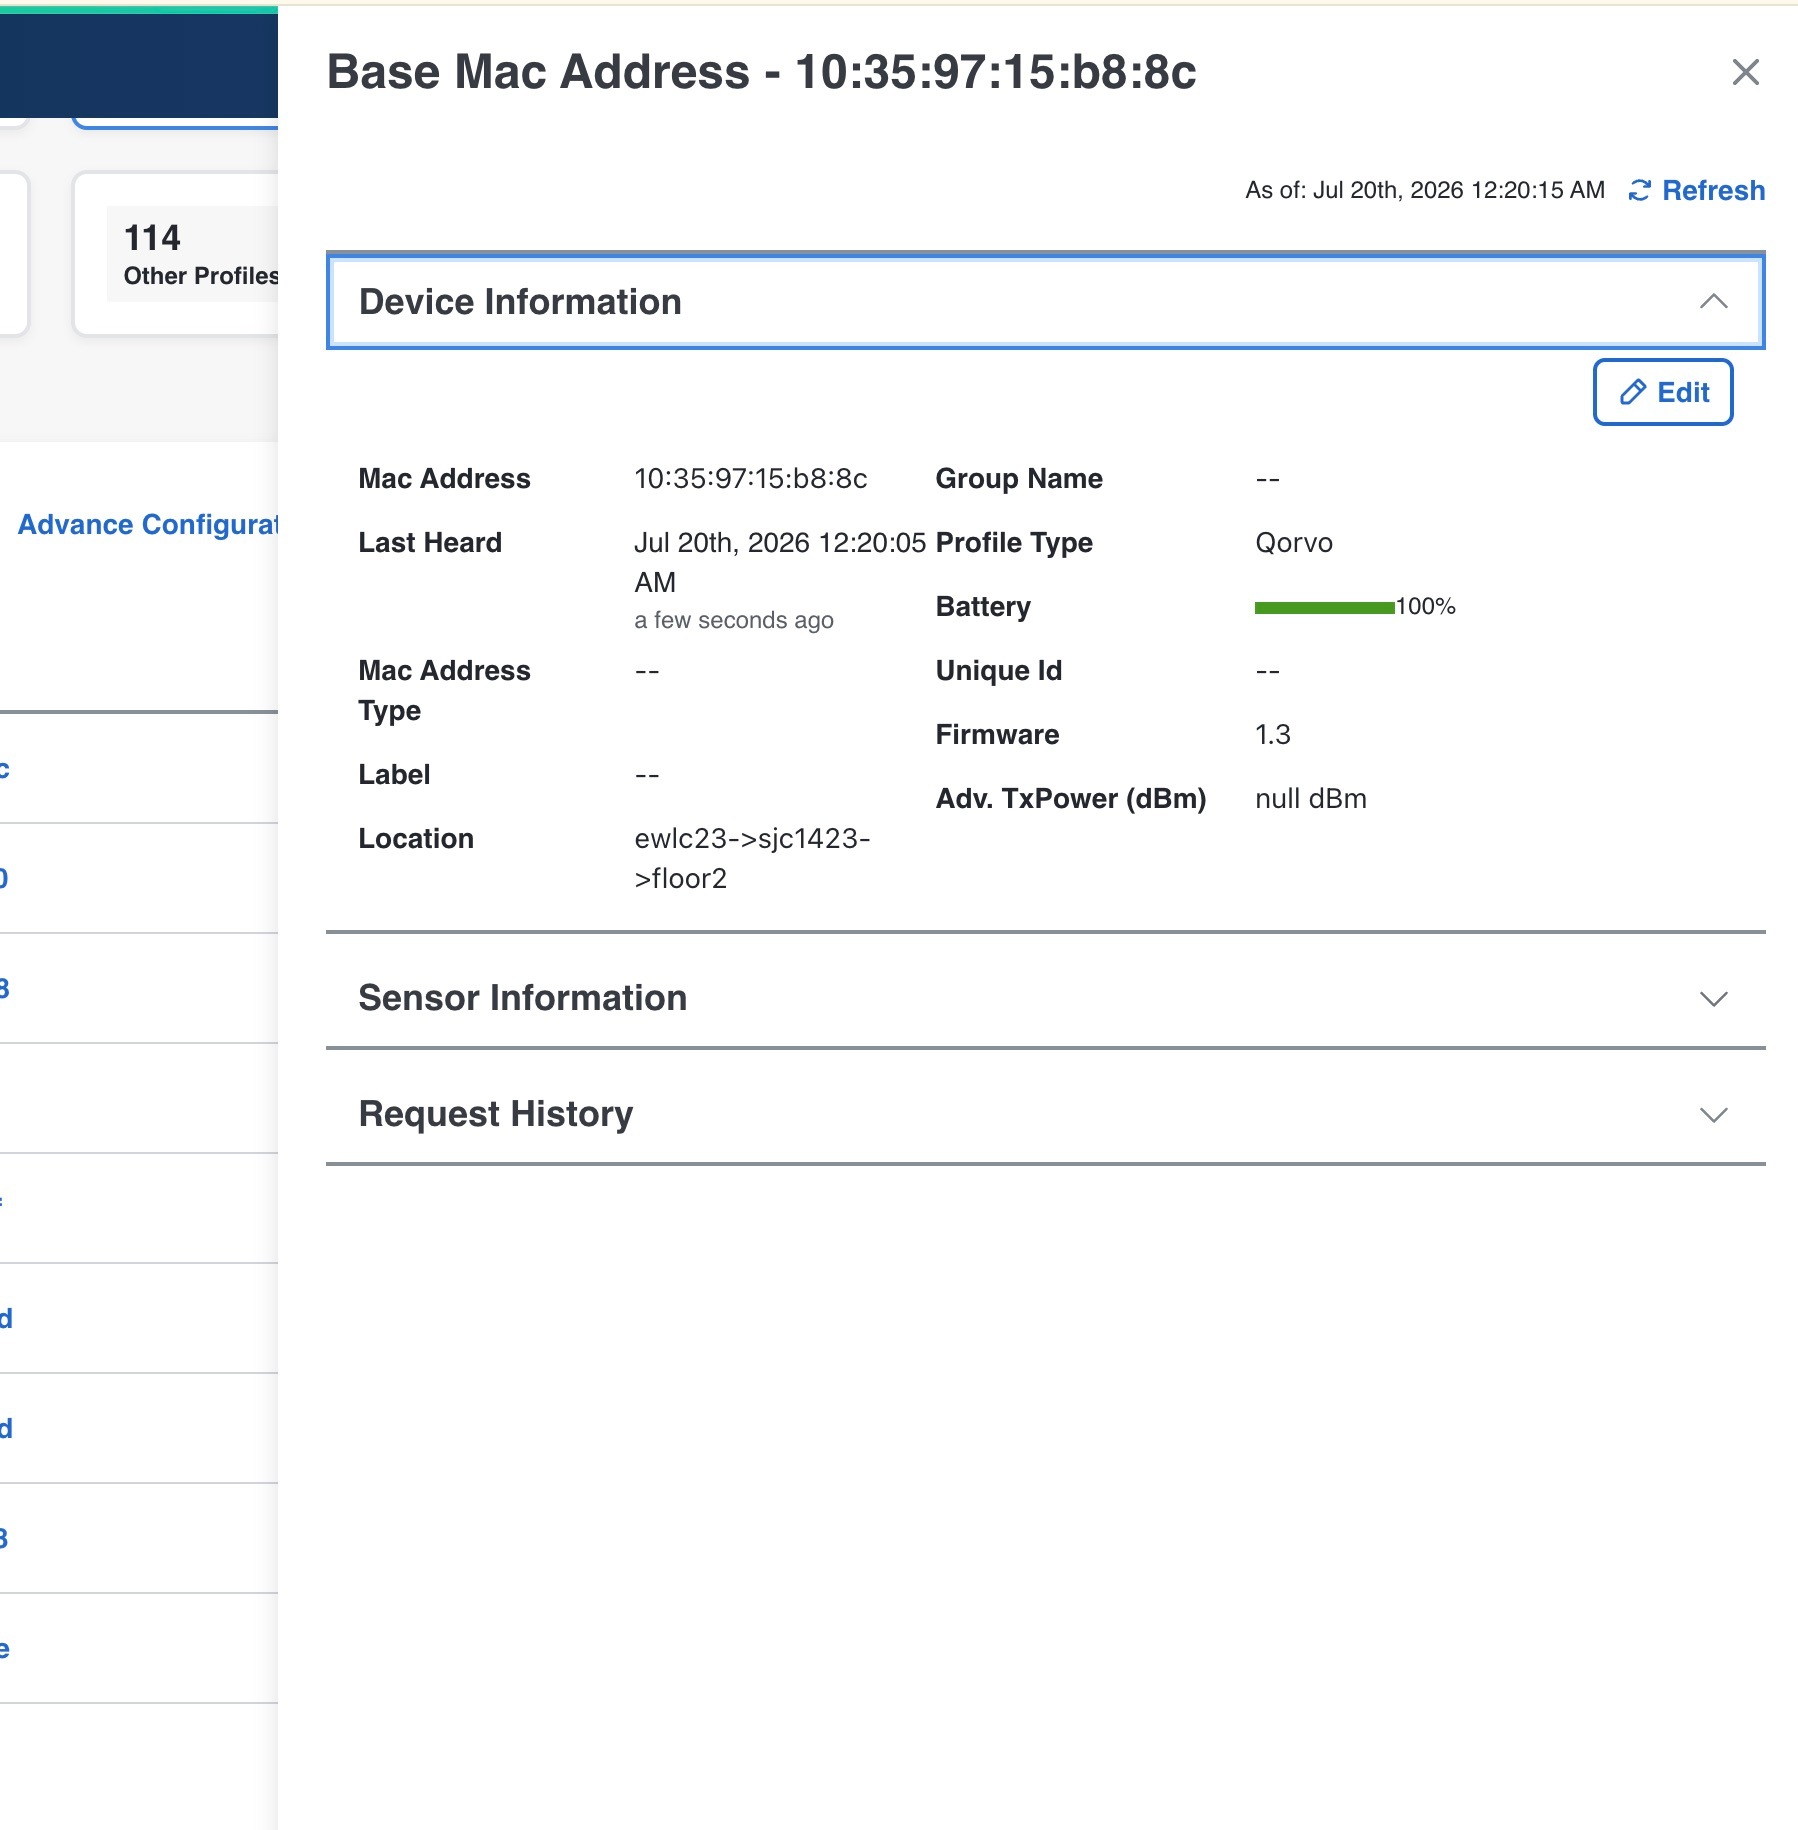
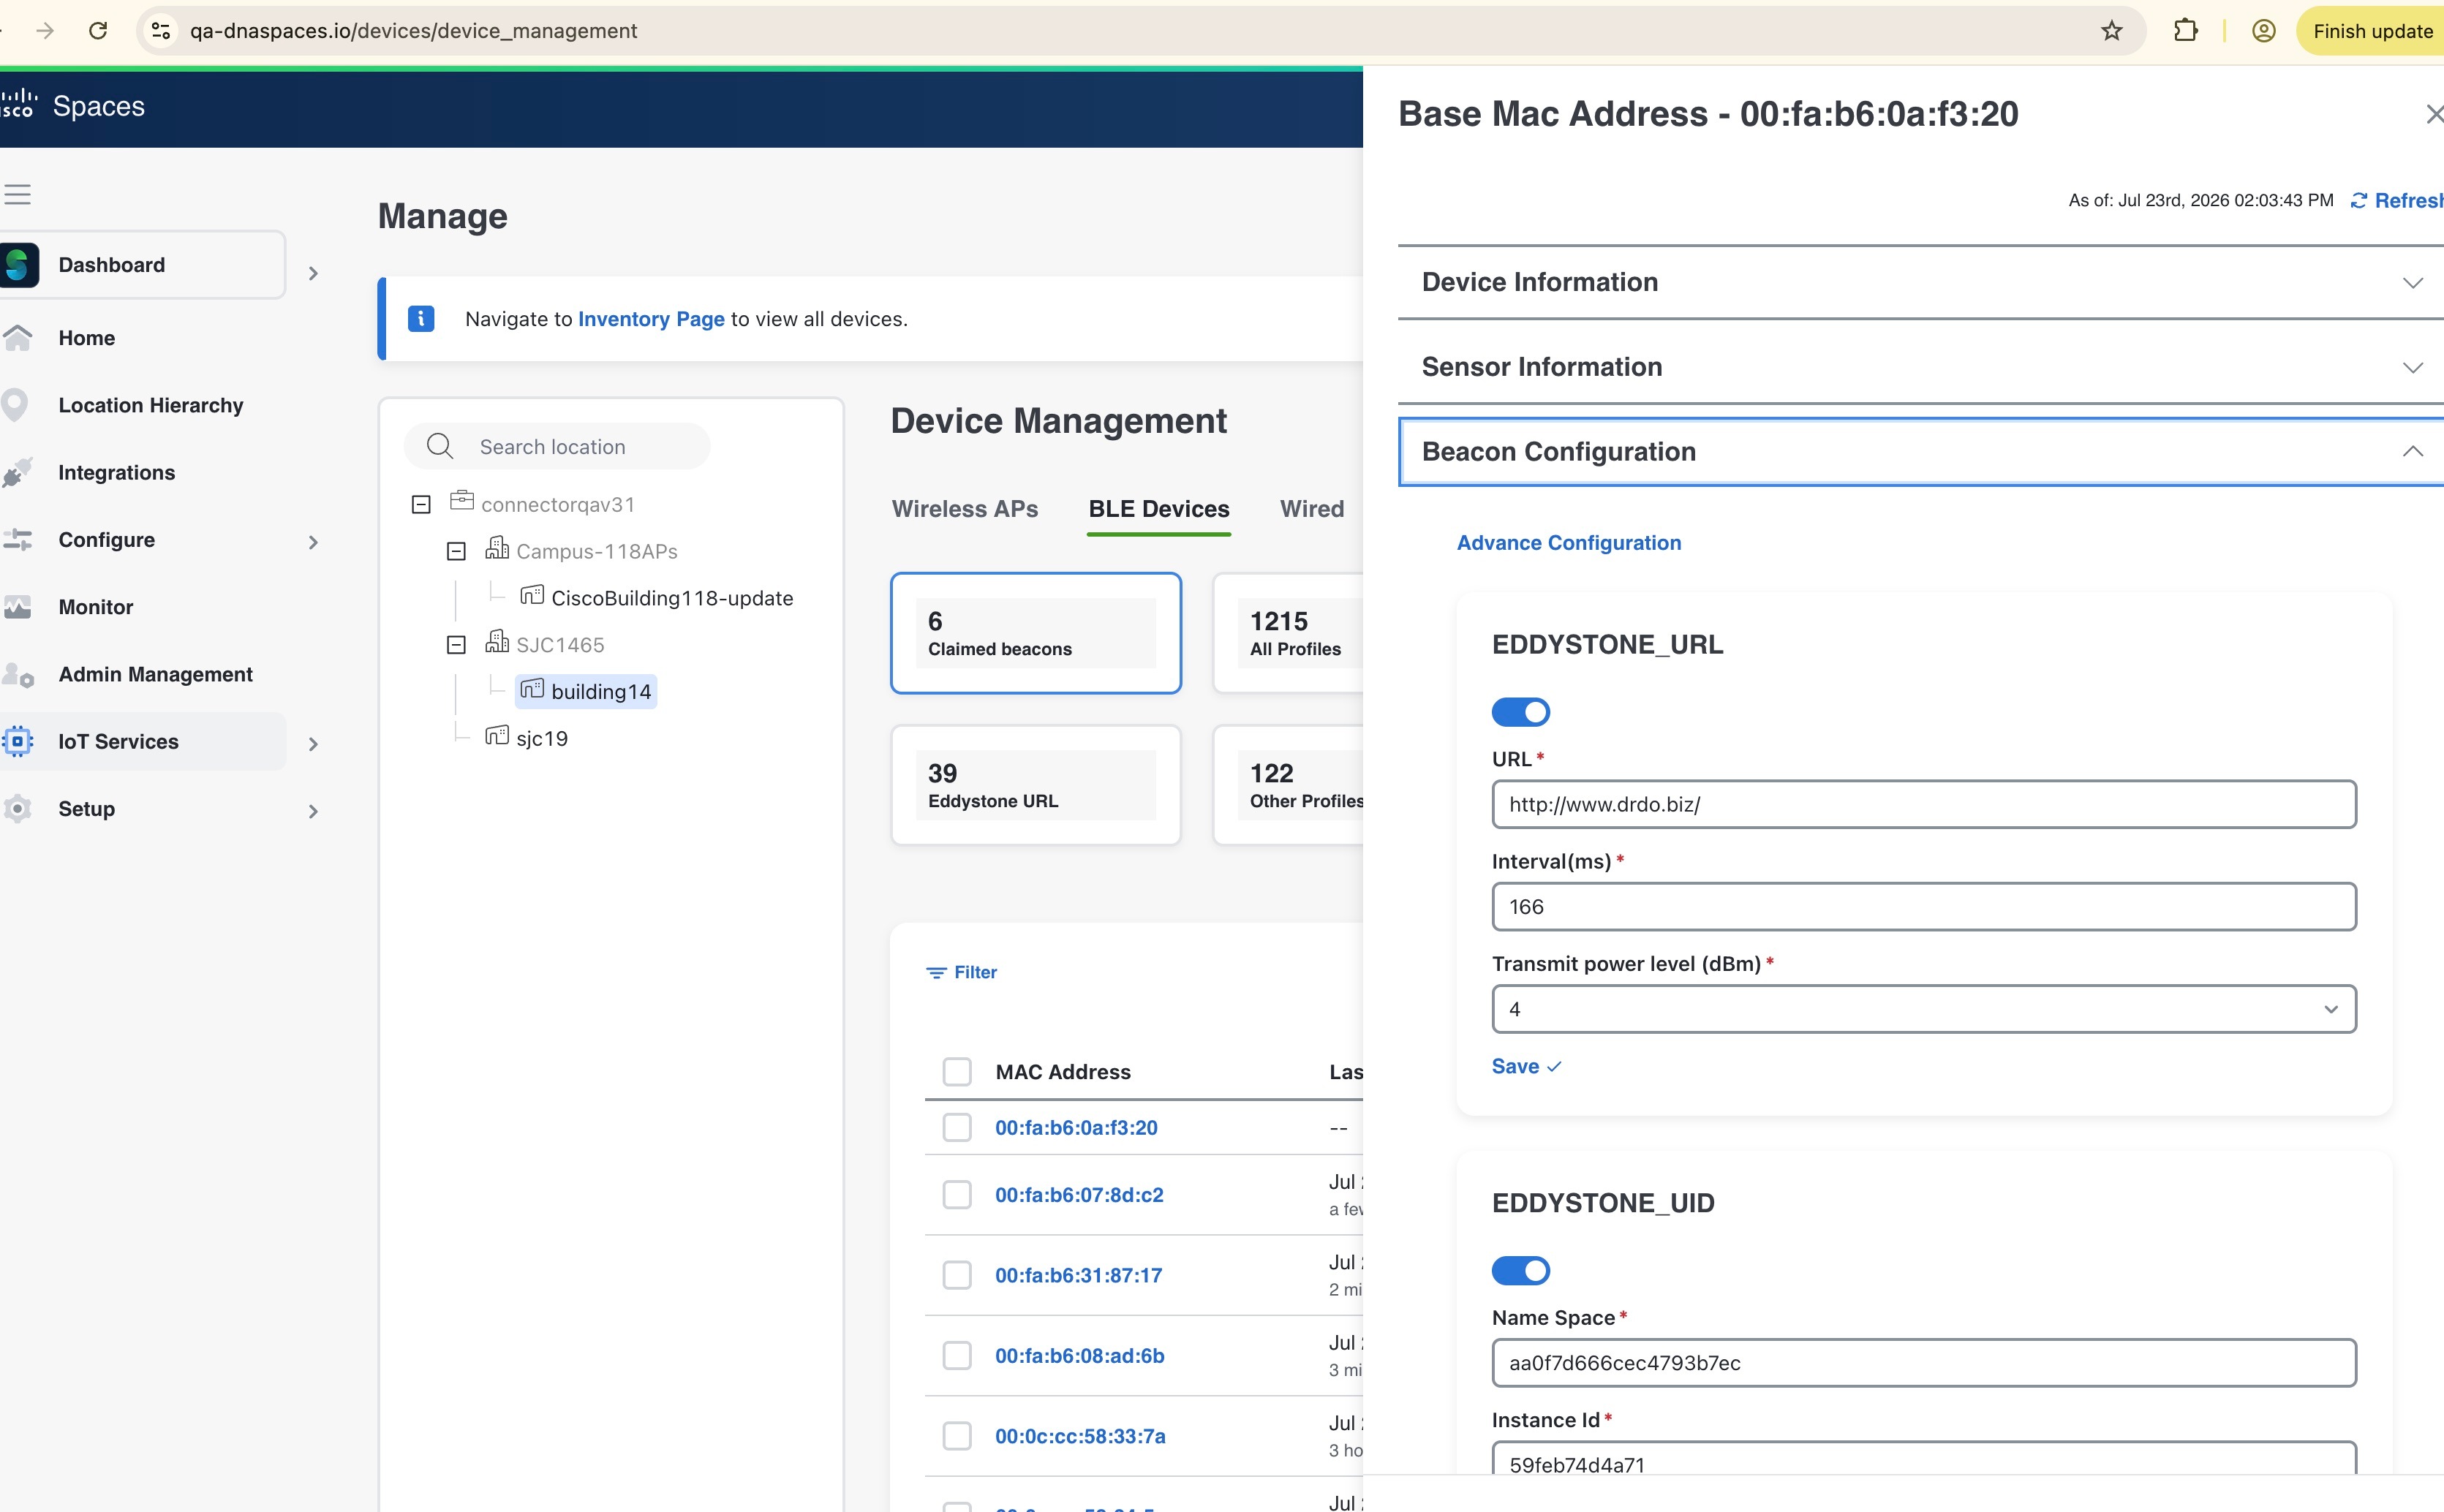
Click the MAC address to open the detailed Base MAC Address page.

Figure 5. Base MAC address tab

Step 4

In the Beacon Configuration area, you can see the configuration pararmeters for the beacon these:

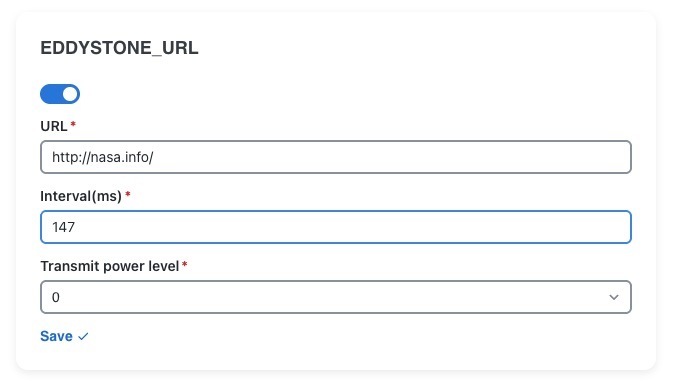
  1. EDDYSTONE_URL: Add the URL in the URL section. Add a interval value in the Interval (ms) section. Select a transmit power level in the Transmit power level (dBm) from the drop-down list. Click Save.

    Figure 6. Eddystone_URL tab
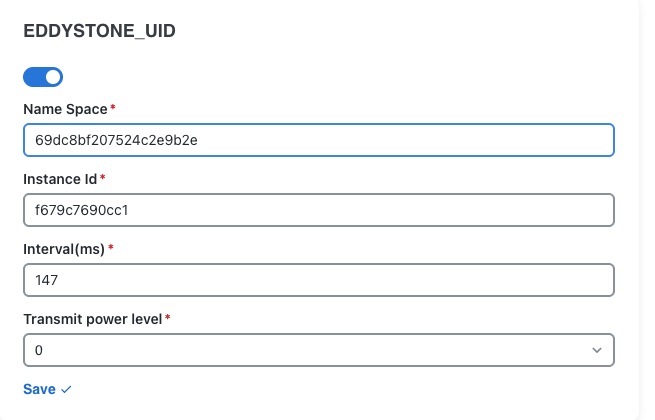
  2. EDDYSTONE_UID: Add the name in the Name Space section. Add a instance ID in the Instance Id section. Add a interval value in the Interval (ms) section. Select a transmit power level in the Transmit power level from the drop-down list. Click Save.

    Figure 7. Eddystone_UID tab
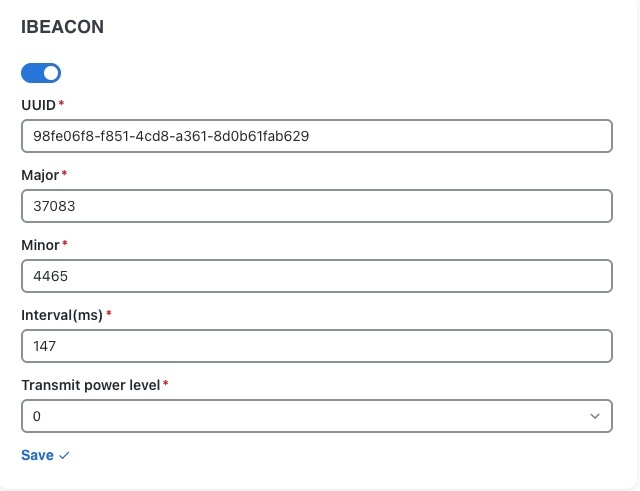
  3. IBEACON: Add the UUID value in the UUID section. Add the major and minor values in the Major and Minor sections. Add a interval value in the Interval (ms) section. Select a transmit power level in the Transmit power level from the drop-down list. Click Save.

    Figure 8. Ibeacon tab
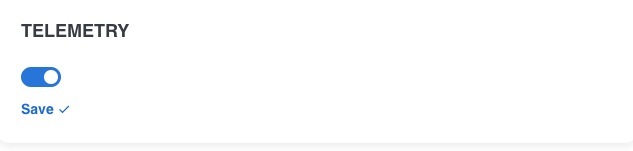
  4. TELEMETRY: Toggle the Save button to activate telemetry.

    Figure 9. Telemetry tab

View sensor information

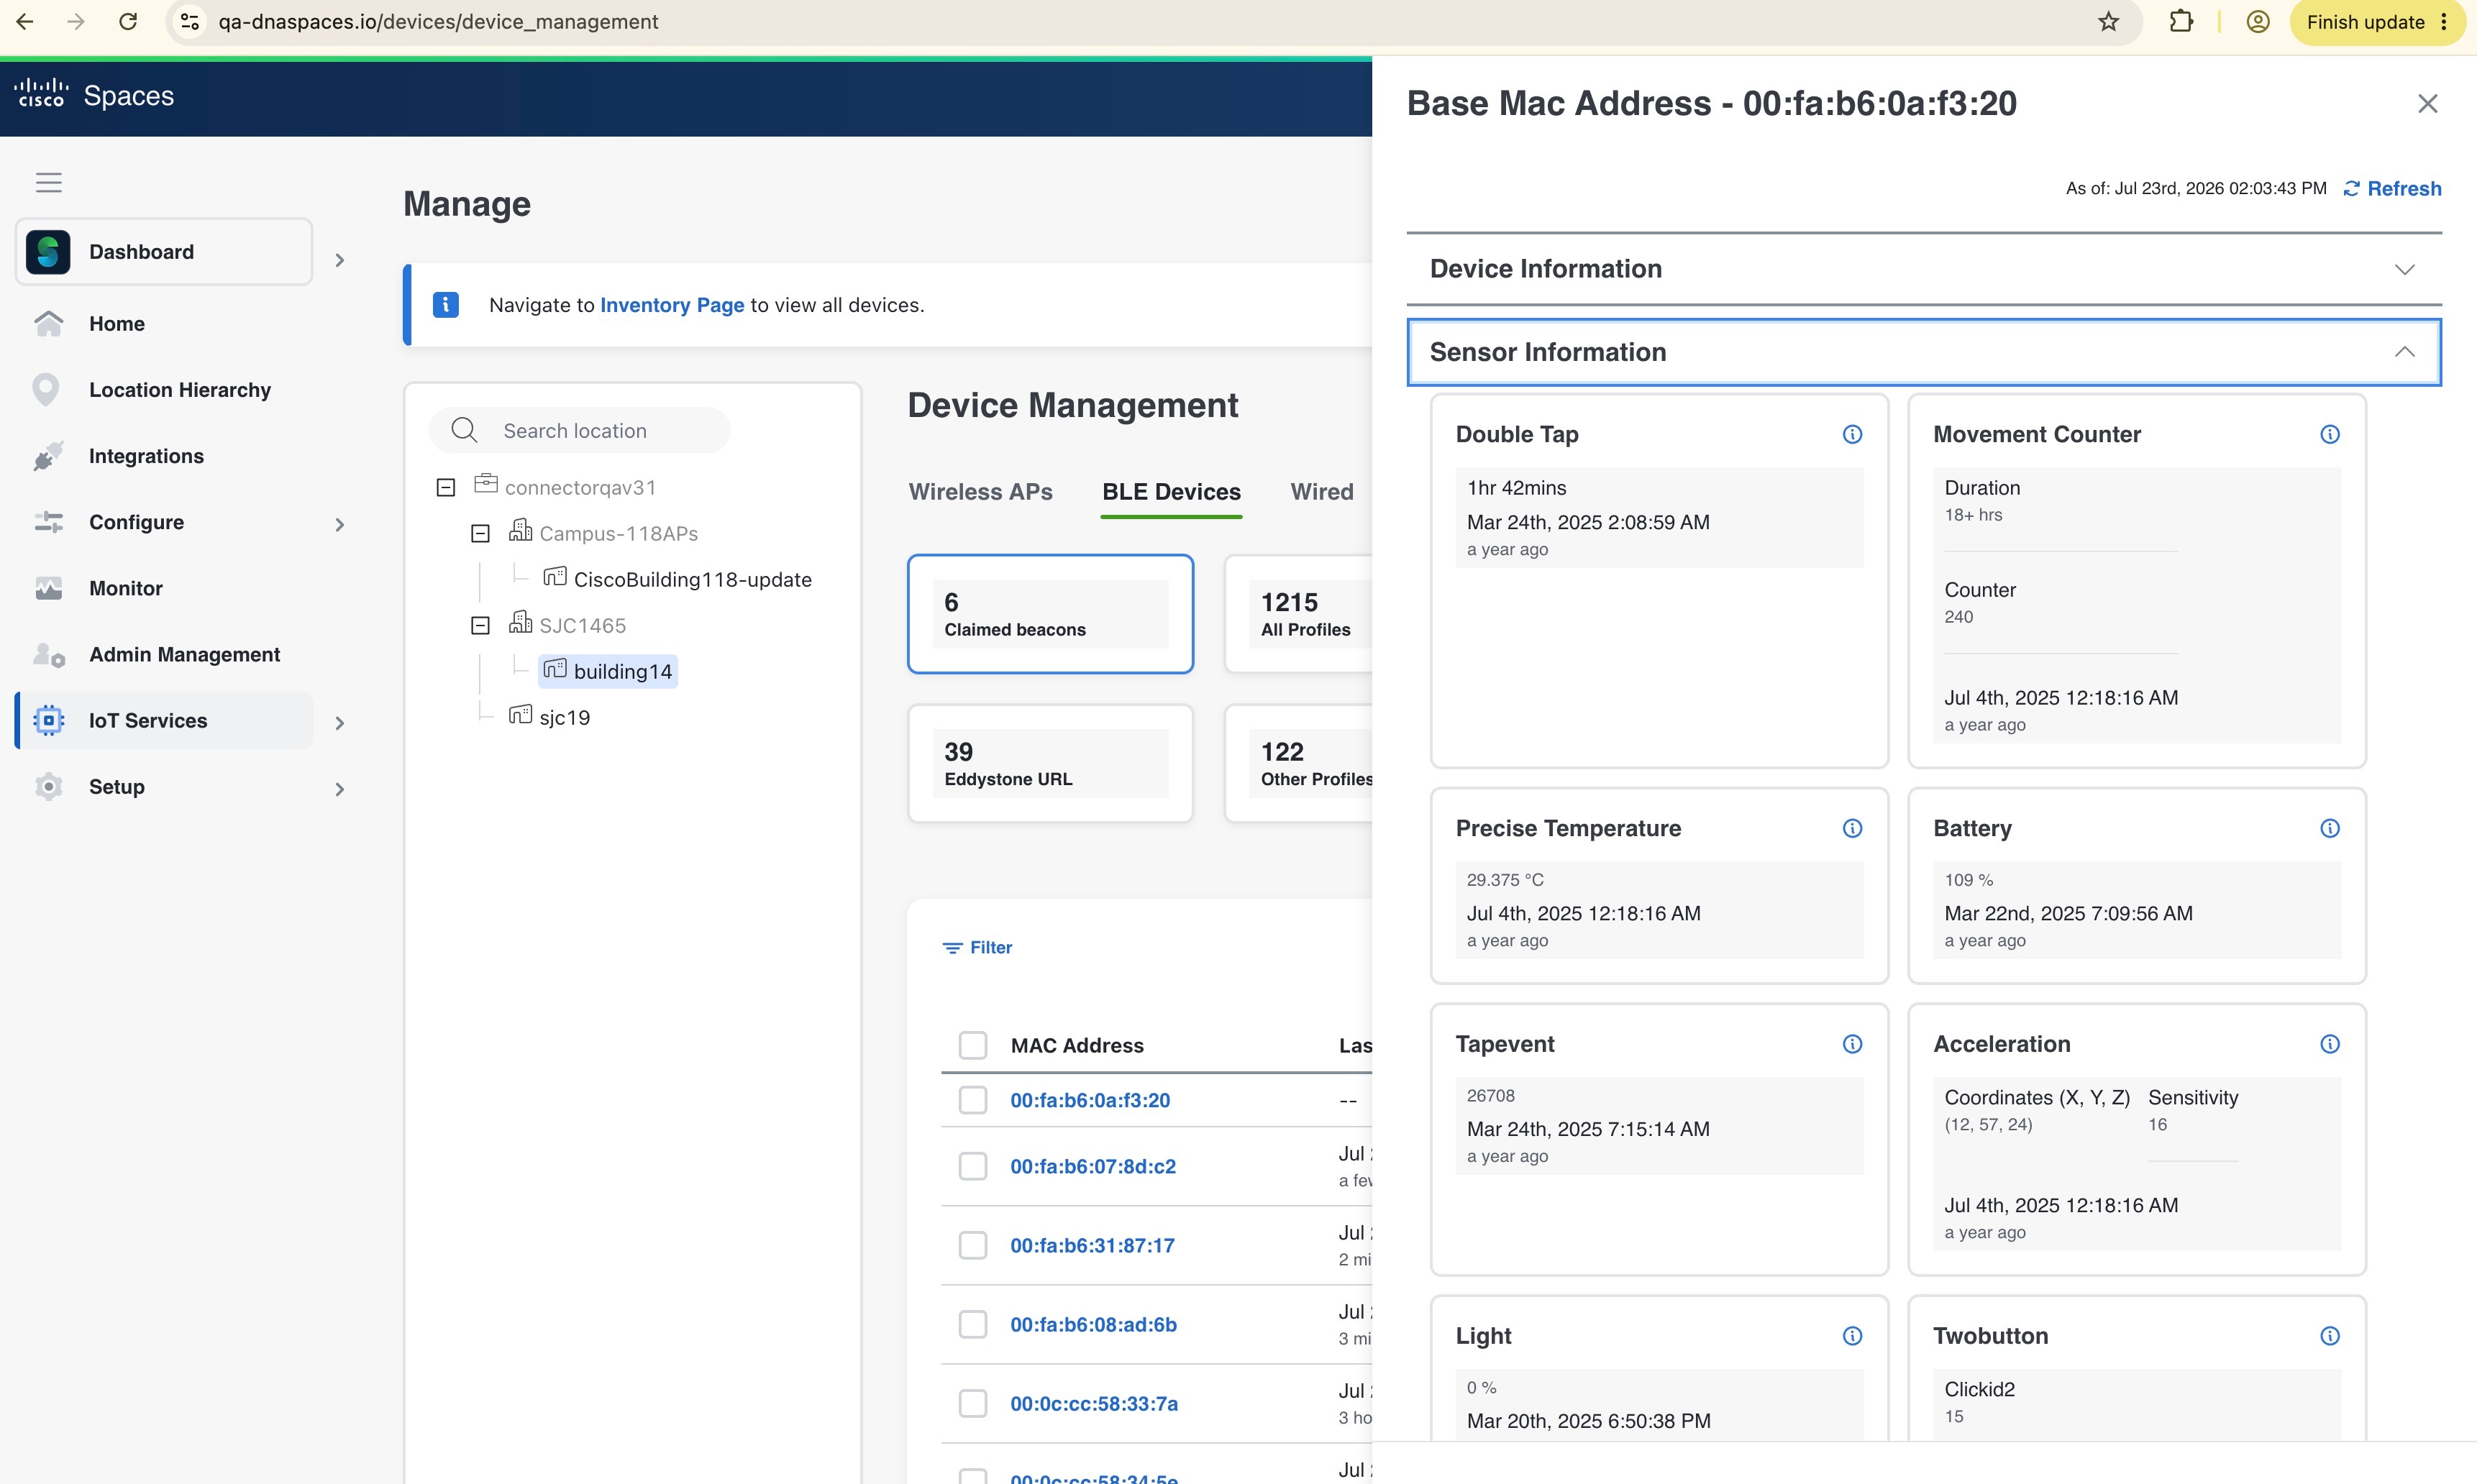
Allow you to view detailed sensor data for Floor Beacons that support telemetry, such as Double Tap, Movement Counter, and Precise Temperature.

Before you begin

Sensor Information is available only for Floor Beacons where Telemetry is enabled.

Procedure


Step 1

From the Cisco Spaces dashboard, choose IoT Services > Manage > BLE Devices.

Figure 10. BLE Devices tab

Step 2

Click Claimed beacons..

Step 3

In the Sensor Information area, you can see the broadcast sensor data for the beacon that includes Double Tap, Movement Counter, Precise Temperature etc.

Figure 11. Sensor Information tab