Settings

Device filtering

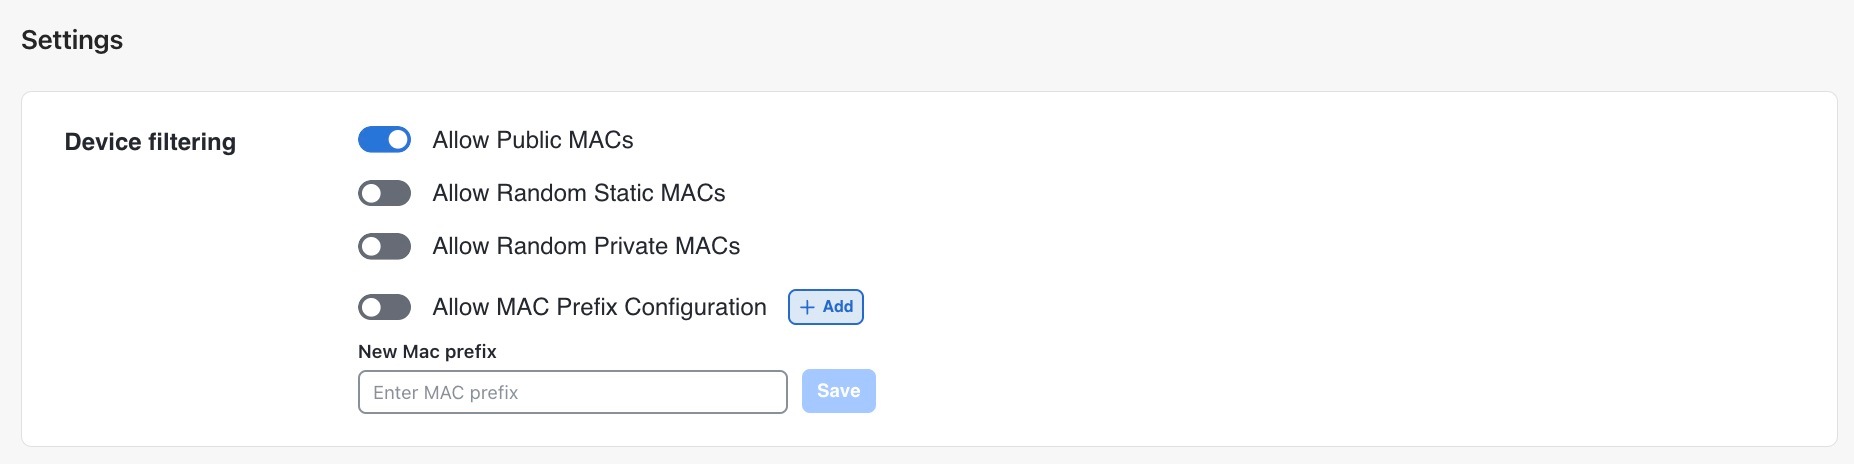
While Cisco Spaces: IoT Service scans all devices, you may not want to view certain devices on the dashboard. You can now filter out devices from the Cisco Spaces: IoT Service dashboard using types of MAC addresses. Filtering currently occurs at the cloud level, not at the AP level. Once filtered, these devices do not appear in these locations:
  • Cisco Spaces: Detect and Locate

  • Cisco Spaces: IoT Service

  • Output of Firehose API calls

You can filter out devices based on these MAC address types:

  • Allow Public MAC: Global, fixed MAC addresses registered with the IEEE Registration Authority that do not change during the device’s lifetime. Enable the toggle to allow Public MAC.

  • Allow Random Static MAC: Random static MAC addresses, which are random numbers generated every time the device boots up or values that stay the same for the device’s lifetime. These addresses do not change within one power cycle of the device. Enable the toggle to allow Random Static MAC.

  • Allow Random Private MAC: Random private MAC addresses of two types:

    • Resolvable: Generated from an identity resolving key (IRK) and a random number. These can change frequently (even during the lifetime of a connection) and prevents an unknown scanning device from identifying and tracking the device. Only scanning devices with the IRK from the beaconing device (exchanged using a private resolvable address) can resolve that address, allowing the scanning device to identify the beaconing device.​

    • Unresolvable: A random number that can change anytime.

    Enable the toggle to allow Random Private MAC.

  • Allow MAC Prefix Configuration: MAC Prefix configuration are new MAC prefixes that are added using the Add button. Enter the New MAC prefix and click Save to enable the toggle.

SUMMARY STEPS

  1. Navigate to IoT Services > Settings > Device filtering.

DETAILED STEPS


Navigate to IoT Services > Settings > Device filtering.

Figure 1. Device filtering tab

Categorize devices into manual groups

You can create groups and assign devices to them. You can focus attention on certain devices and view only these devices by filtering them using the group.

The advantages of manual groups are:

  • Policies are applied to groups.

  • Firehose APIs can filter devices by these groups.

  • In the Cisco Spaces: IoT Service dashboard, you can filter devices by groups.

Procedure


Step 1

In the Cisco Spaces: IoT Service dashboard, navigate to Settings > Groups.

Step 2

Click the Create a new group button. The Add a Group window appears.

Step 3

Enter the Group Name, Description, and choose Manual Group. Click Next.

Step 4

The Add a group page appears. Select either Wireless Devices or Wired Devices and choose the devices to add to this group.

Step 5

Click Next. On the Add a Group page, click Done, or Create another group.


On the Groups tab, you can view the group you created. Click the group to display its devices. To edit the group, click the Edit button.

To delete a device, select the group’s check box, then click Action > Delete button.

Categorize devices into dynamic groups

You can configure dynamic groups using parameters such as MAC prefix, vendor code, or location hierarchy including floor, building, or zone. New devices are automatically added to the group based on these configured parameters.

The advantages of dynamic groups are:

  • Policies are applied to groups. Dynamic groups automatically categorize new devices and apply policies to them.

  • Firehose APIs can filter devices by these groups.

  • In the Cisco Spaces: IoT Service dashboard, you can filter devices by groups.

Procedure


Step 1

In the Cisco Spaces: IoT Service dashboard, navigate to Settings > Groups.

Step 2

Click the Create a new group button. The Add a Group window appears.

Step 3

Enter the Group Name, Description, and choose Dynamic Group. Click Next.

Step 4

In the Add a Group page that is displayed, configure these parameters for this group.

  • Group by MAC Prefix
  • Group by Vendor Code
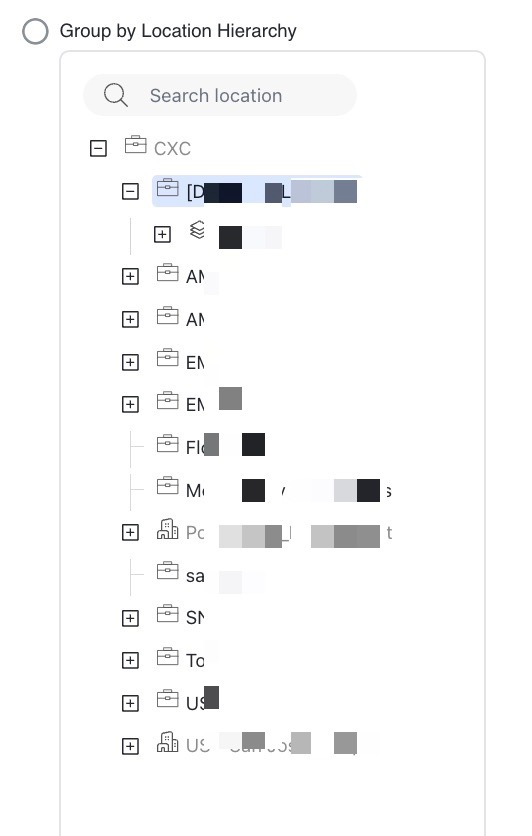
  • Group by Location Hierarchy
Figure 2. Group by MAC Prefix
Figure 3. Group by Vendor Code
Figure 4. Group by Location Hierarchy

Step 5

Click Next. On the Add a Group page, click Done, or Create another group.


On the Groups tab, you can view the group you created. Click the group to display its devices. To edit the group, click the Edit button.

What to do next

To delete a device, select the group’s check box, then click Action > Delete button.

Configure onboarding and nearby interaction settings

Use this procedure to optimize asset tag management and control BLE transmission rates by adjusting onboarding and interaction settings.

Procedure


Step 1

In Cisco Spaces, open the IoT Services settings page.

Step 2

Navigate to the Onboarding & Nearby Interaction section.

Figure 5. Onboarding & nearby interaction tab

Step 3

Enable or disable the Automated onboarding for Cisco asset tagsand the Optimized nearby interaction toggle buttons.

Note


Enabling these controls increases BLE transmission frequency for all Cisco Asset Tags. This higher frequency may reduce battery life.