Configuring the CSS for Device Management
Available Languages
Table Of Contents
Configuring the CSS for Device Management
WebNS Device Management User Interface Quick Start
Enabling the WebNS Device Management User Interface
Entering the Secure Management License Key for SSL Strong Encryption
Restricting Access to the Device Management User Interface
Using Privileges to Restrict Access
Configuring Access Control Lists
Viewing and Installing the SSL Security Certificate
Configuring the CSS for Device Management
Before you can use the WebNS Device Management user interface software, you need to perform the tasks described in the following sections:
•
WebNS Device Management User Interface Quick Start
•
•
•
•
•
•
WebNS Device Management User Interface Quick Start
Table 2-1 provides a quick overview of the steps required to configure the Device Management user interface on a CSS. Each step includes the CLI command required to complete the task. For a complete description of each feature and all the options associated with the CLI command, refer to the sections following the table.
Table 2-1 Device Management Configuration Quick Start
1.
# config
(config)#
2.
(config)# no restrict web-mgmt3.
(config)# boot(config-boot)#(config-boot)# ip address 192.168.16.2(config-boot)# subnet mask 255.255.255.04.
(config)# snmp community sqa read-write5.
6.
Enabling the WebNS Device Management User Interface
Use the no restrict web-mgmt CLI command to enable access to the WebNS Device Management user interface. The Device Management user interface is disabled by default.
To enable the Device Management user interface in a CSS, enter:
(config)# no restrict web-mgmt
Note
To disable the Device Management user interface in a CSS, enter:
(config)# restrict web-mgmtTo determine the state of the Device Management user interface on a CSS, enter:
# show running-config!************************* Global ***************************virtual authenticationno restrict web-mgmtWhen the Device Management user interface is enabled, the no restrict web-mgmt command appears in the running-config.
Note
Entering the Secure Management License Key for SSL Strong Encryption
To enable SSL strong encryption for the Device Management software, you must purchase the Secure Management software option. If you purchased the Secure Management software option:
•
•
Note
Follow the instructions on the license key Claim Certificate to obtain the Secure Management software license key.
To enter the Secure Management license key and enable SSL strong encryption on your CSS:
1.
# license2.
Enter the Software License Key (q to quit): nnnnnnnnnnnnThe Secure Management license key is now properly installed and SSL strong encryption is enabled.
Note
Configuring Idle Timeout
By default, the idle timeout for all active web management session is disabled (set to 0). To set the maximum amount of time that any active web management session can be idle on the CSS before the CSS logs it out, use the idle timeout web-mgmt command. Enter a timeout value between 0 and 65535 minutes.
For example, to set an idle timeout value of 15 minutes for all active web management sessions, enter:
(config)# idle timeout web-mgmt 15To disable the web management timeout period, enter:
(config)# no idle timeout web-mgmtConfiguring an Ethernet Port
To access the WebNS Device Management user interface, ensure that you first configure the appropriate Ethernet interface port (for example, the Ethernet Management port) from the CSS CLI.
1.
2.
# config(config)#3.
(config)# boot(config-boot)#4.
(config-boot)# ip address 192.168.16.2(config-boot)# subnet mask 255.255.255.0Configuring an SNMP Community
Use the snmp community command to set or modify Simple Network Management Protocol (SNMP) community names to access SNMP. You may specify as many community names as you wish.
The syntax for this global configuration mode command is:
snmp community community_name [read-only|read-write]
The variables and options are:
•
•
•
For example:
(config)# snmp community sqa read-writeFor details on SNMP, refer to the Cisco Content Services Switch Administration Guide.
Restricting Access to the Device Management User Interface
We recommend that you restrict access to the WebNS Device Management user interface to users who have the authority to modify CSS configuration settings. There are two ways that you can restrict access:
•
•
Using Privileges to Restrict Access
To access the WebNS Device Management Configuration tree HTML pages (SNMP GETs and SETs), you must be a privileged CSS user (SuperUser access). This includes all secondary Configuration pages that you access from the primary Configuration pages.
Non-privileged users (those with User access) have read-only access to the Monitor and Summary pages (SNMP Gets) and cannot access the Configuration pages. If a non-privileged user tries to access a Configuration page, the restriction page appears with the following message:
You do not have the appropriate privileges to access the configuration
page.
Note
For information on creating users with User and SuperUser access, refer to the Cisco Content Services Switch Administration Guide, Chapter 1, Getting Started.
Configuring Access Control Lists
You can use ACLs to restrict WebNS Device Management user interface access to specific IP addresses or subnets. ACLs provide traffic-filtering capabilities by controlling whether packets are forwarded or blocked at the CSS interfaces. You can configure ACLs for routed network protocols, filtering the protocol packets as the packets pass through the CSS.
If you use the CSS Ethernet management port to access the Device Management software, ACLs will have no effect. To take advantage of ACLs, use a different Ethernet port to access the Device Management software.
An ACL consists of clauses that you define. The CSS uses these clauses to determine how to handle each packet it processes. When the CSS examines each packet, it either forwards or blocks the packet based on whether or not the packet matches a clause in the ACL.

Caution
We recommend that you configure either a permit all or a deny all clause depending on your ACL configuration. For example, you could first configure a permit all clause and then configure deny clauses for only the traffic you wish to deny. Or, use the default deny all clause and configure permit clauses only for the traffic you wish to permit.
To define ACL clauses and to set ACL options, refer to the Cisco Content Services Switch Security Configuration Guide.
Configuring Your Browser
Before you can access the Device Management software, you must ensure that the following items are enabled in your Web browser:
•
•
Viewing and Installing the SSL Security Certificate
To protect data transfers (which can include passwords) between the WebNS Device Management user interface and your Web browser, we provide Secure Sockets Layer (SSL) as the standard Internet protocol for secure communications. SSL provides certificate-based authentication and public key cryptography to establish encrypted communication with clients and the WebNS Device Management user interface. Securing traffic consists of identifying (authenticating) the person configuring or monitoring the CSS, and once authenticated, encrypting the data.
With SSL, the HTTP Web server (which resides in the CSS) provides a secure connection between your Web browser and the CSS. The Web browser displays a "closed lock" (or similar symbol) at the bottom of each Device Management form to inform you that SSL is enabled.
The WebNS Device Management user interface supports SSL version 3.0. The user interface understands and accepts an SSL version 2.0 ClientHello message to allow dual version clients to communicate with the CSS. In this case, the client indicates an SSL version of 3.0 in the version 2.0 ClientHello, which informs the WebNS Device Management user interface that the client can support SSL version 3.0. The WebNS Device Management user interface returns a version 3.0 ServerHello message.
Note
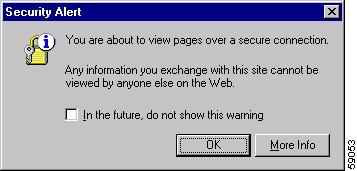
When you first access the Device Management user interface, a Security Alert message box prompts you to install and view the Cisco-issued security certificate. Depending on your security requirements, you can choose to install and view the certificate, or bypass the Security Alert message box and continue operating the CSS. Bypassing the Security Alert message box does not affect the security of the communications when using the Device Management user interface. The Security Alert message box appears every time you access the Device Management user interface until you either accept the certificate or disable the message box.
To view and install the SSL security certificate:
1.
For example:
https://192.168.16.2
Note
2.
Figure 2-1 First Security Alert Message Box
3.
Figure 2-2 Second Security Alert Message Box

4.
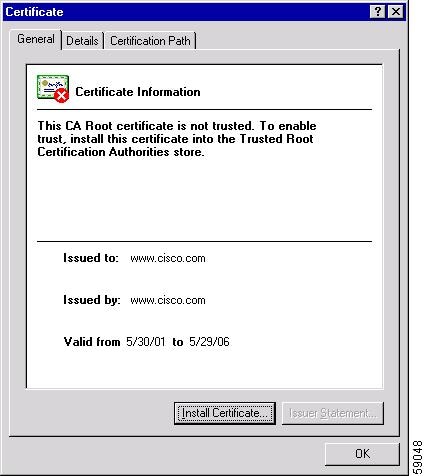
Figure 2-3 Certificate Dialog Box, General Property Tab
5.
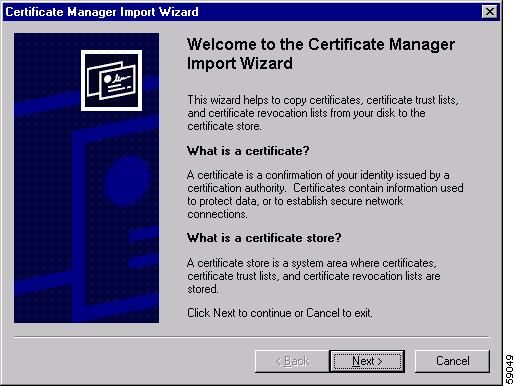
Figure 2-4 Certificate Manager Import Wizard
6.
7.
8.
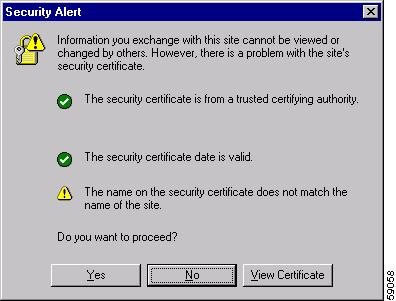
Figure 2-5 Security Alert Message Box With Certificate Information
9.
Figure 2-6 Certificate Dialog Box With Certificate Information
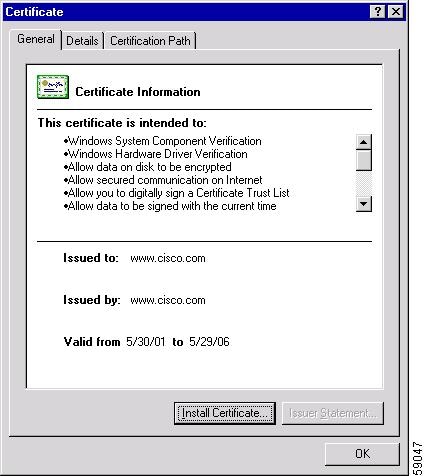
10.
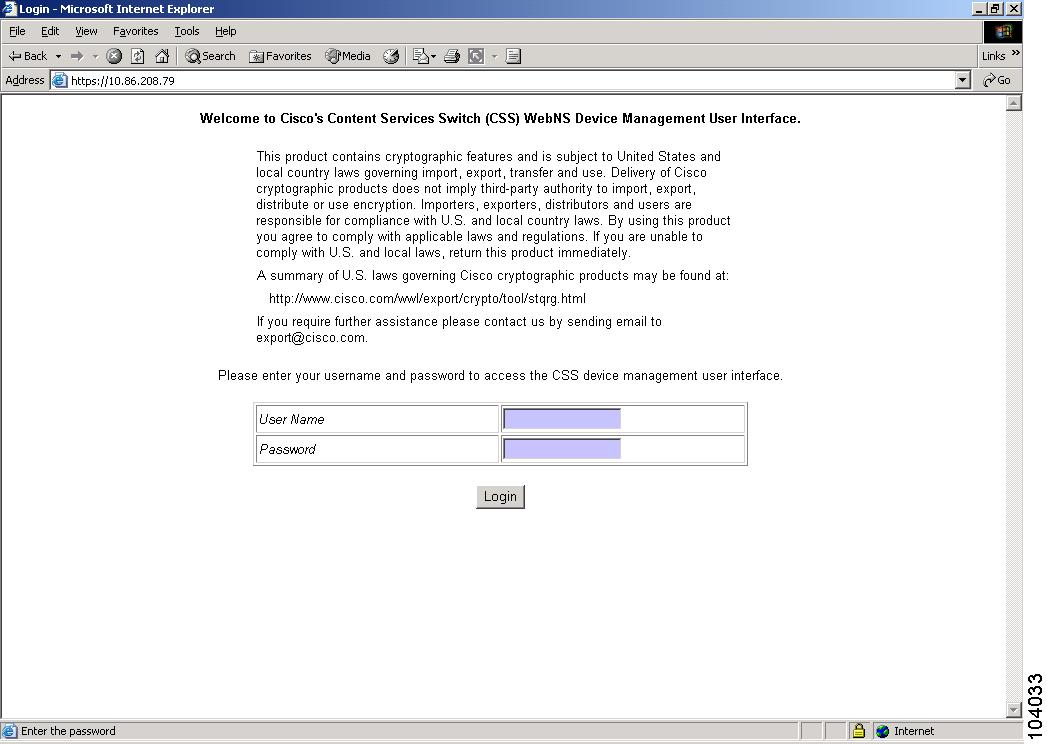
Figure 2-7 shows the Device Management Login form. For details on logging in to the Device Management software, see Chapter 3, Using the Device Management User Interface, in the "Accessing and Logging in to the WebNS Device Management User Interface" section.
Figure 2-7 WebNS Device Management User Interface Login Form
 Feedback
Contact Cisco
- Open a Support Case

- (Requires a Cisco Service Contract)
This Document Applies to These Products
- Collaboration Endpoints - Retired Products
- Conferencing - Retired Products
- Contact Center - Retired Products
- Optical Networking - Retired Products
- Routers - Retired Products
- Security - Retired Products
- Servers - Unified Computing (UCS) Retired Products
- Storage Networking Retired Products
- Switches - Retired Products
- Video - Retired Products
- Wireless - Retired Products