Cisco IoT FND Deployment on an Open Virtual Appliance, VMware ESXi 5.5/6.0
Available Languages
Table of Contents
Cisco IoT FND Deployment on an Open Virtual Appliance, VMware ESXi 5.5/6.0
Installing VMware ESX 5.5 or 6.0 on a Server
Cisco IoT FND Deployment on an Open Virtual Appliance, VMware ESXi 5.5/6.0
This chapter provides an overview of the steps required to install the Cisco IoT Field Network Director (Cisco IoT FND) Release 4.3 application within Open Virtual Appliance (OVA) software, VMware ESXi versions 5.5. or 6.0. The same instructions work for both versions.
Note: For an overview of the features and functionality of the IoT FND application and details on how to configure features and manage the Cisco IoT Field Network Director after its installation, refer to the Cisco IoT Field Network Director User Guide, Release 4.3.x.
Installing VMware ESX 5.5 or 6.0 on a Server
You use the VMware vSphere client to import OVA files into ESXi 5.5 and ESXi 6.0.
Log in to the VMware vSphere 5.5 or 6.0 client via a web browser with your user credentials (username and password).
Your IT admin can provide you the IP address to the VMware ESXi server.
If you are installing the VMware ESXi server software yourself, please go to the VMware ESXi site to download the software: https://www.vmware.com/products/esxi-and-esx.html
■![]() Install the VMware vSphere Client for the ESXi 5.5 or 6.0 server.
Install the VMware vSphere Client for the ESXi 5.5 or 6.0 server.
■![]() Locate the VMware credentials to create virtual machines in ESXi 5.5. or 6.0, respectively.
Locate the VMware credentials to create virtual machines in ESXi 5.5. or 6.0, respectively.
■![]() Ensure that you meet the VMware server machine requirements. Listed below are the VM CPU and memory requirements for a small scale deployment:
Ensure that you meet the VMware server machine requirements. Listed below are the VM CPU and memory requirements for a small scale deployment:
To import the IoT FND open virtual appliances (OVA) into ESXi 5.5 or ESXi6.0 using VMware vSphere Client version 5.5 or 6.0, respectively:
1.![]() Select the Network Adapter > NAT setting for the server.
Select the Network Adapter > NAT setting for the server.
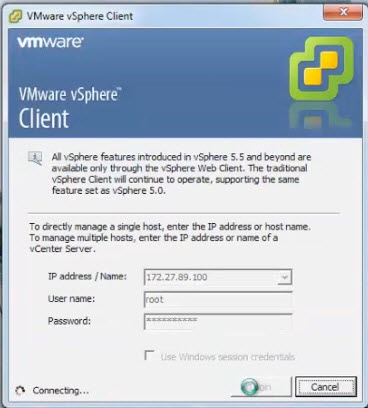
2.![]() At the VMware vSphere Client window enter the IP address, username and password of the server where VMware resides. Click Login.
At the VMware vSphere Client window enter the IP address, username and password of the server where VMware resides. Click Login.
Figure 1 VMware vSphere log in screen
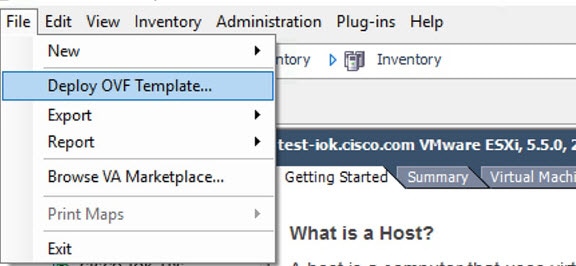
3.![]() Select File > Deploy OVF Template... (see Deploy New Template)
Select File > Deploy OVF Template... (see Deploy New Template)
4.![]() Browse to an OVF package from the Internet or a file accessible from your computer (for example, iot-fnd-4.3.0.59.ova). See Deploy OVF Template.
Browse to an OVF package from the Internet or a file accessible from your computer (for example, iot-fnd-4.3.0.59.ova). See Deploy OVF Template.
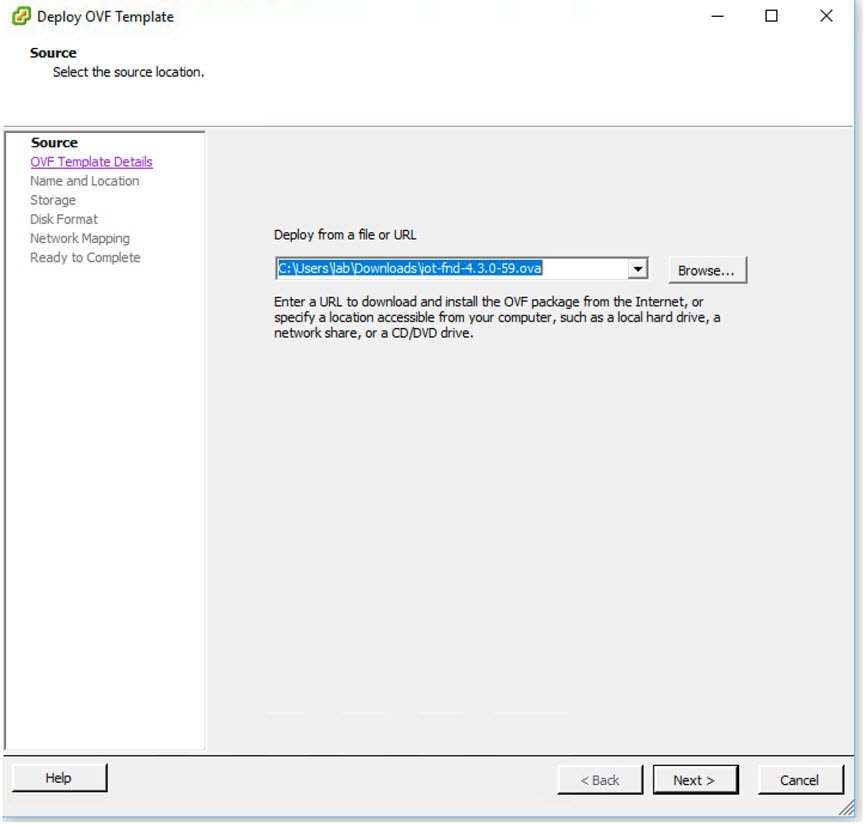
5.![]() Ensure that the correct OVA file (or URL) displays in the Source location window, and then click Next.
Ensure that the correct OVA file (or URL) displays in the Source location window, and then click Next.
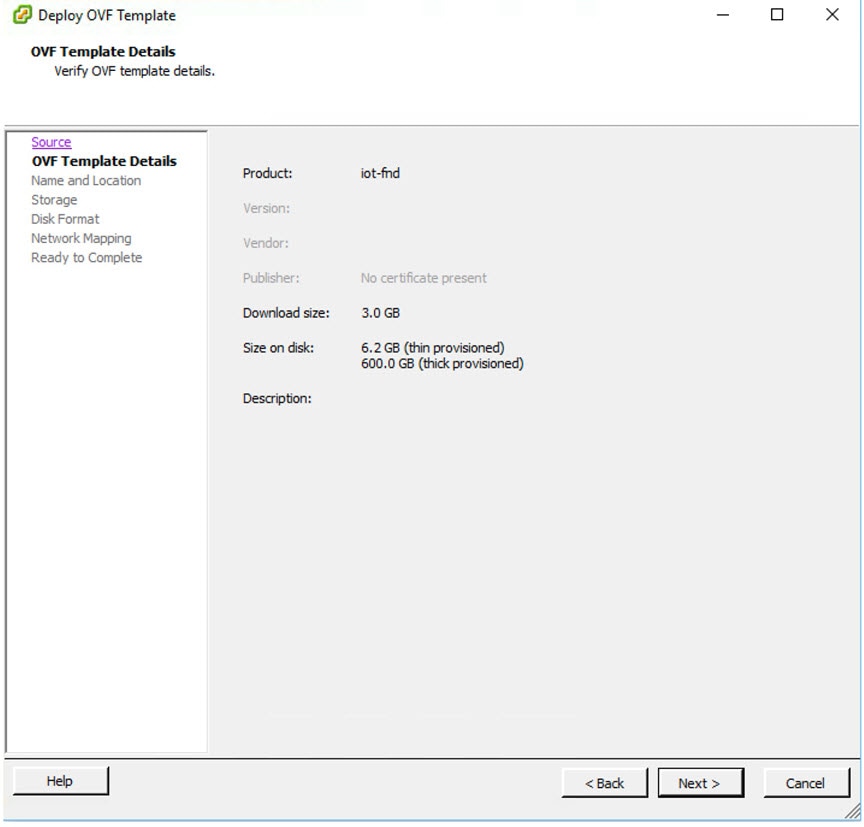
6.![]() OVF Template Details page displays again with the following information for planning purposes (OVF Template Details Page Noting Download File Size and Provision File Sizes):
OVF Template Details page displays again with the following information for planning purposes (OVF Template Details Page Noting Download File Size and Provision File Sizes):
–![]() Product name: iot-fnd <-- default
Product name: iot-fnd <-- default
–![]() Size on disk: 957.1 GB (Thick Provision Lazy Zeroed), 600 GB (Thick Provisioned) or 6.2 GB (Thin Provisioned)
Size on disk: 957.1 GB (Thick Provision Lazy Zeroed), 600 GB (Thick Provisioned) or 6.2 GB (Thin Provisioned)
You will select one of the options above later in the install process.
Figure 4 OVF Template Details Page Noting Download File Size and Provision File Sizes
7.![]() Note the storage requirements (Size on Disk) for Thin and Thick Provisioning, click Next.
Note the storage requirements (Size on Disk) for Thin and Thick Provisioning, click Next.
Figure 5 Define a name for the Deployment Template

8.![]() You may keep the default name of the template or enter a new name (up to 80 characters). A suggested name is to enter the Name and Inventory Location of the deployed template (for example, iot-fnd).
You may keep the default name of the template or enter a new name (up to 80 characters). A suggested name is to enter the Name and Inventory Location of the deployed template (for example, iot-fnd).
Note![]() : Be sure that the name you select is a unique name within its destination folder. Click Next.
: Be sure that the name you select is a unique name within its destination folder. Click Next.
Note![]() : In the next window that appears, verify the OVA file name matches what you entered in the previous window. If no issues, click Next. If the OVA file name does not match, click Back and reenter the information.
: In the next window that appears, verify the OVA file name matches what you entered in the previous window. If no issues, click Next. If the OVA file name does not match, click Back and reenter the information.
Figure 6 Select Storage Location for Virtual Machine Files
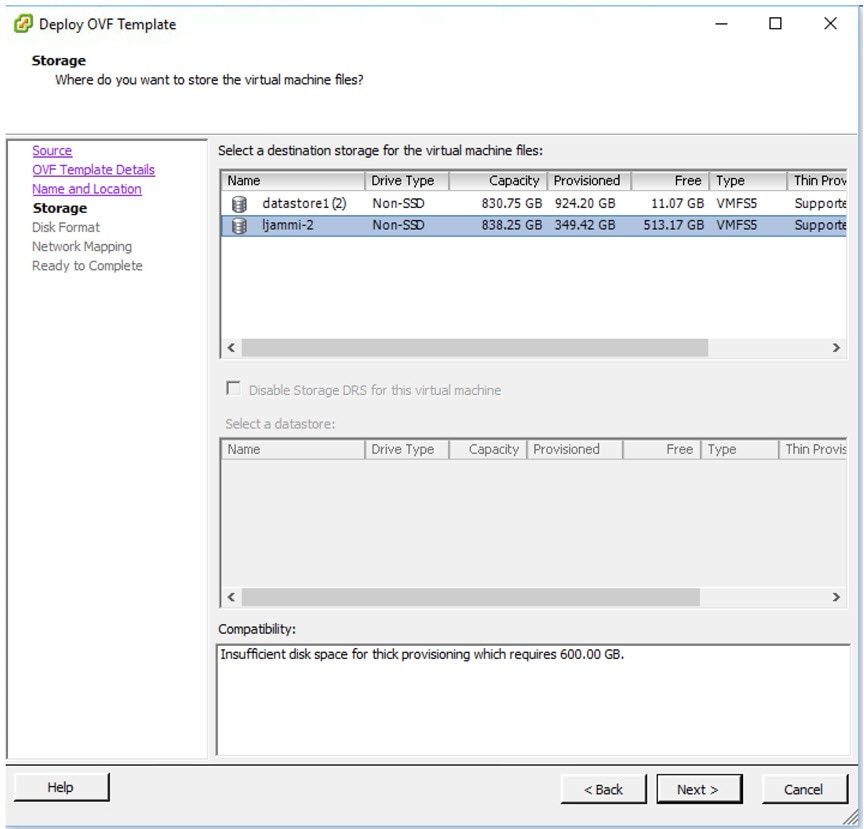
9.![]() Select a storage location for the virtual machine files from the listed options (e.g. ljammi, datastore1).
Select a storage location for the virtual machine files from the listed options (e.g. ljammi, datastore1).
Note![]() : If the selected storage location does not have sufficient storage for the largest file installation option, a message displays noting insufficient storage. This message appears before you select the provisioning type, so you can locate a storage resource with greater capacity if you want to support Thick provisioning (600 GB) as shown in this example.
: If the selected storage location does not have sufficient storage for the largest file installation option, a message displays noting insufficient storage. This message appears before you select the provisioning type, so you can locate a storage resource with greater capacity if you want to support Thick provisioning (600 GB) as shown in this example.
Note![]() : Thin Provision allows the VM disk to grow as needed.
: Thin Provision allows the VM disk to grow as needed.
a.![]() If no warning message appears, click Next. Go to Step 10.
If no warning message appears, click Next. Go to Step 10.
b.![]() If a warning message does appear and you want to use Thick Provisioning, select another server that has sufficient storage then click Next. Go to Step 10.
If a warning message does appear and you want to use Thick Provisioning, select another server that has sufficient storage then click Next. Go to Step 10.
Figure 7 Select Provisioning Type
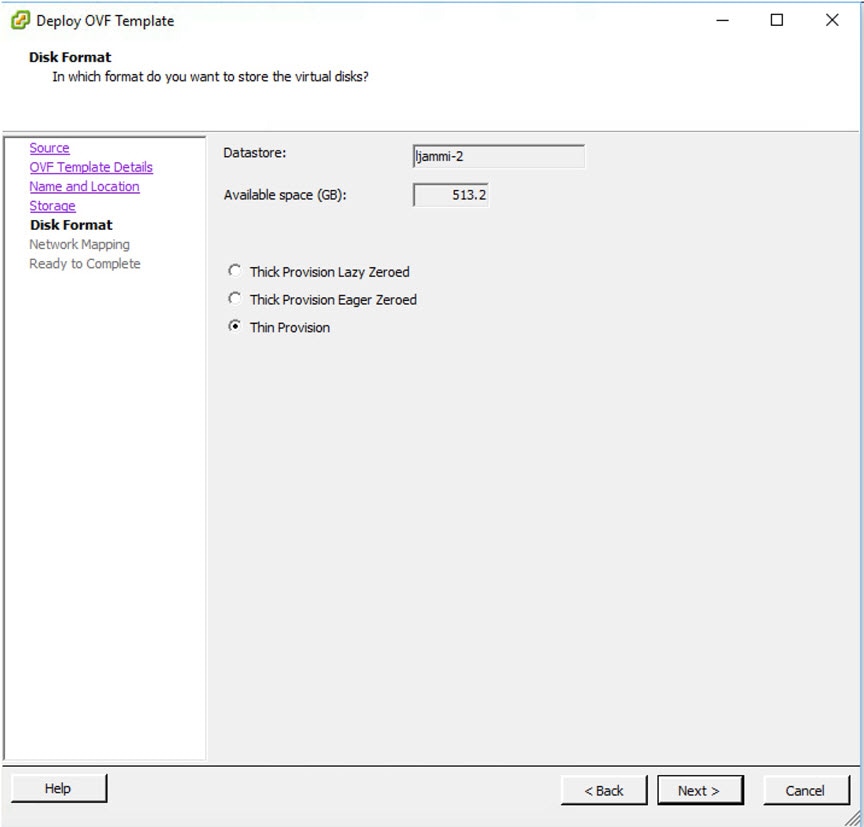
10.![]() After selecting a Datastore successfully, select the Provisioning type. Click Next.
After selecting a Datastore successfully, select the Provisioning type. Click Next.
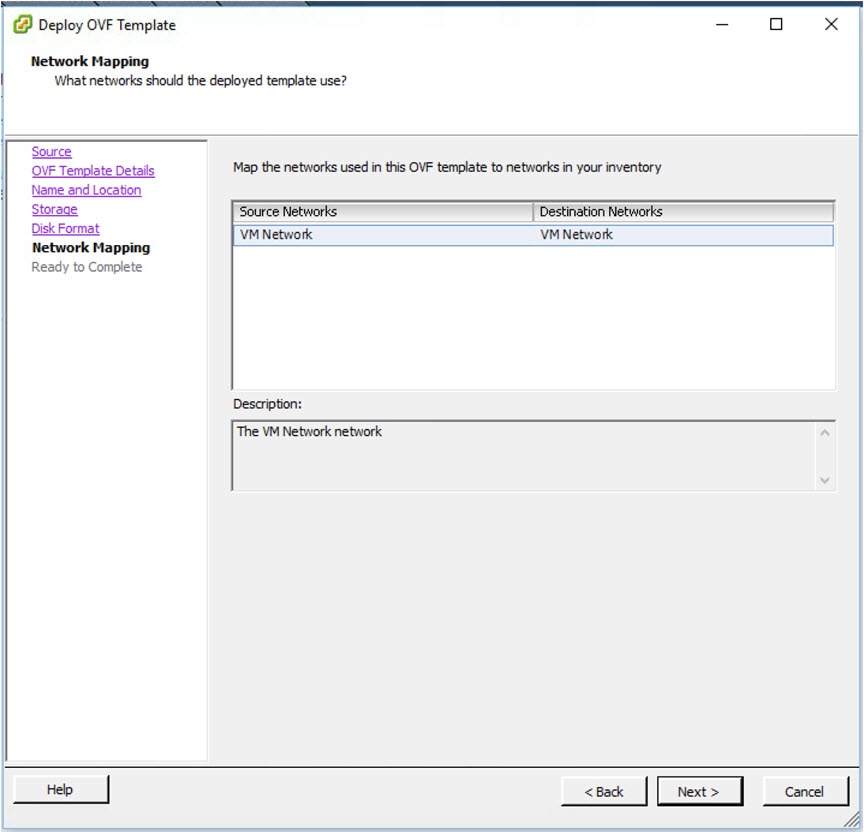
11.![]() Map the networks in the OVF template to a source and destination network within the inventory. Click Next.
Map the networks in the OVF template to a source and destination network within the inventory. Click Next.
Figure 9 Final Review: Ready to Complete
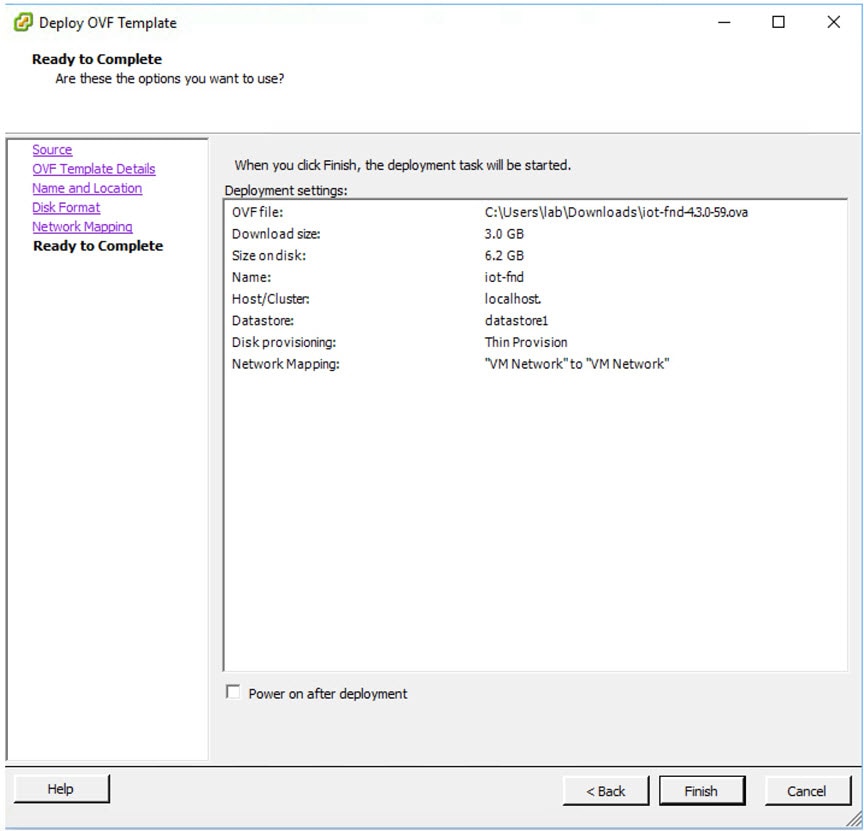
12.![]() At the Ready to Complete window, do a final review of the configuration (Final Review: Ready to Complete):
At the Ready to Complete window, do a final review of the configuration (Final Review: Ready to Complete):
a.![]() If you want to change any settings, use the Back button to parse back through the windows and save your changes. After making your changes, parse forward through the windows until you reach the Ready to Complete window. Click Finish.
If you want to change any settings, use the Back button to parse back through the windows and save your changes. After making your changes, parse forward through the windows until you reach the Ready to Complete window. Click Finish.
–![]() To power on the Virtual Machine immediately after deployment completes, select the Power on after deployment box. Click Finish.
To power on the Virtual Machine immediately after deployment completes, select the Power on after deployment box. Click Finish.
–![]() To complete the deployment process without powering on after the deployment, click Finish.
To complete the deployment process without powering on after the deployment, click Finish.
b.![]() If you do not want to change any settings, click Finish.
If you do not want to change any settings, click Finish.
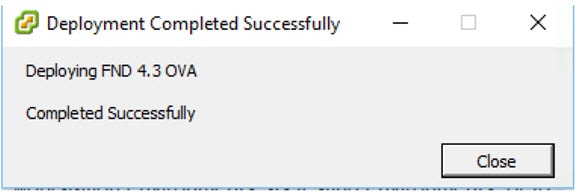
13.![]() After completion of the IoT-FND 4.3 install, the window in Deployment Completed displays.
After completion of the IoT-FND 4.3 install, the window in Deployment Completed displays.
FND is now fully setup. You can log in with your new credentials and configure FND to manage your network.
Figure 10 Deployment Completed
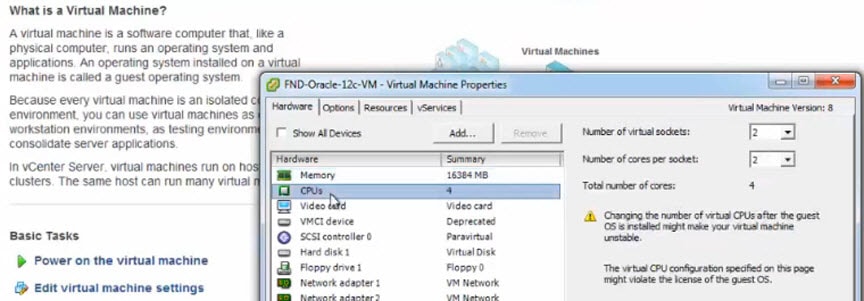
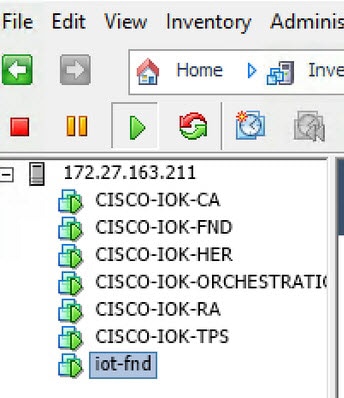
14.![]() After completion of the install, a window displays.
After completion of the install, a window displays.
–![]() In the left panel, select the FND machine name.
In the left panel, select the FND machine name.
–![]() In the right panel, Under Basic Task, select Edit virtual machine settings to confirm CPU and MEM settings.
In the right panel, Under Basic Task, select Edit virtual machine settings to confirm CPU and MEM settings.
–![]() Click OK to close the window.
Click OK to close the window.
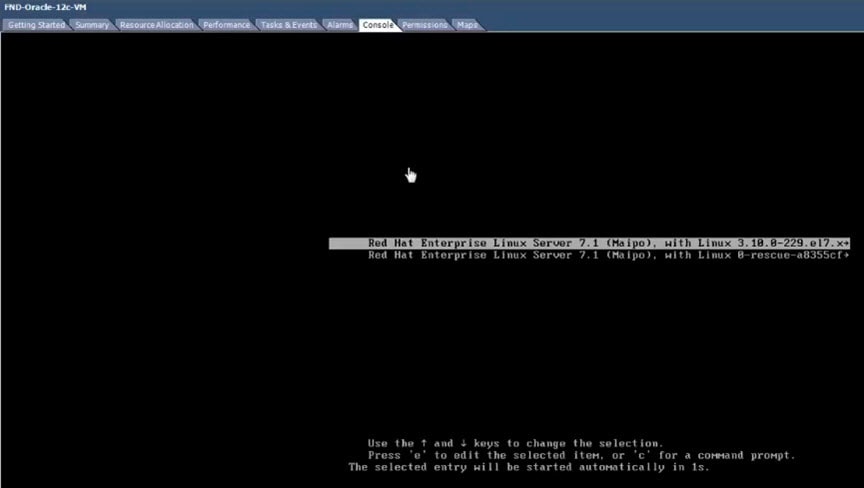
15.![]() In FND Virtual Machine, under Basic Tasks, click Power on the virtual machines and select the Console tab in the window that opens. The console opens showing possible RHEL server versions to select.
In FND Virtual Machine, under Basic Tasks, click Power on the virtual machines and select the Console tab in the window that opens. The console opens showing possible RHEL server versions to select.
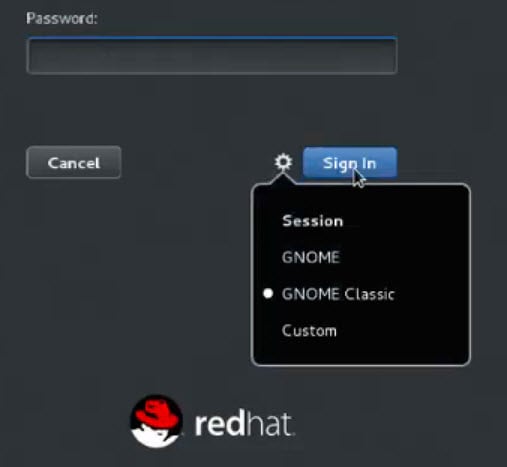
16.![]() After you select a RHEL option, you will be prompted for your username and password.
After you select a RHEL option, you will be prompted for your username and password.
17.![]() Click Sign In and select the GNOME Classic option.
Click Sign In and select the GNOME Classic option.
19.![]() At the Welcome screen, select the default language (such as English-United States) for the interface, Click Next.
At the Welcome screen, select the default language (such as English-United States) for the interface, Click Next.
20.![]() Continue through the install script until you reach the final screen that indicates that “Your computer is ready to use.” Click Start using Red Hat Enterprise Linux Server button.
Continue through the install script until you reach the final screen that indicates that “Your computer is ready to use.” Click Start using Red Hat Enterprise Linux Server button.
21.![]() Close Getting Started window, right-click to open.
Close Getting Started window, right-click to open.
22.![]() At the Application Places window, right-click in the window to display a menu panel. Select Open in Terminal.
At the Application Places window, right-click in the window to display a menu panel. Select Open in Terminal.
Open a browser window and enter the IP address for your FND application using your credentials (Log in Window for IoT FND 4.3):
Figure 14 Log in Window for IoT FND 4.3
23.![]() You are prompted to reset your password.
You are prompted to reset your password.
Note: After you complete the password reset, FND 4.3 is fully deployed.
You can log in with your new credentials and configure FND to manage your network.
Please refer to Cisco IoT FND User Guide, Release 4.3.x for configuration guidelines.
 Feedback
Contact Cisco
- Open a Support Case

- (Requires a Cisco Service Contract)
This Document Applies to These Products
- Collaboration Endpoints - Retired Products
- Conferencing - Retired Products
- Contact Center - Retired Products
- Optical Networking - Retired Products
- Routers - Retired Products
- Security - Retired Products
- Servers - Unified Computing (UCS) Retired Products
- Storage Networking Retired Products
- Switches - Retired Products
- Video - Retired Products
- Wireless - Retired Products