This section explains Onboarding models for Cisco Optical Site Manager. Use it to understand the purpose, behavior, and dependencies that support the related Cisco Optical Site Manager workflow.
Cisco Optical Site Manager supports two onboarding models that determine where device configuration originates.
Configure the complete data path, including circuits, in Cisco IOS XR, and then onboard the device to Cisco Optical Site Manager.
Perform day-0 configuration and prerequisites on NCS1010, and then push data path configuration from Cisco Optical Site Manager using Cisco Optical Network Planner initial installation parameters.
Import a Cisco Optical Network Planner configuration file
Use this task to import a Cisco Optical Network Planner NETCONF file (.xml) into Cisco Optical Site Manager to configure device parameters automatically.
If you have a NETCONF file (.xml) exported from Cisco Optical Network Planner (Cisco ONP), you can import it to Cisco Optical Site Manager. This file includes:
Node, shelf, card type, and port information, including wavelength
Pluggable Port Module (PPM), OTN, and FEC parameters
Degree, IPC, and link-related information
Fiber attributes and other network parameters
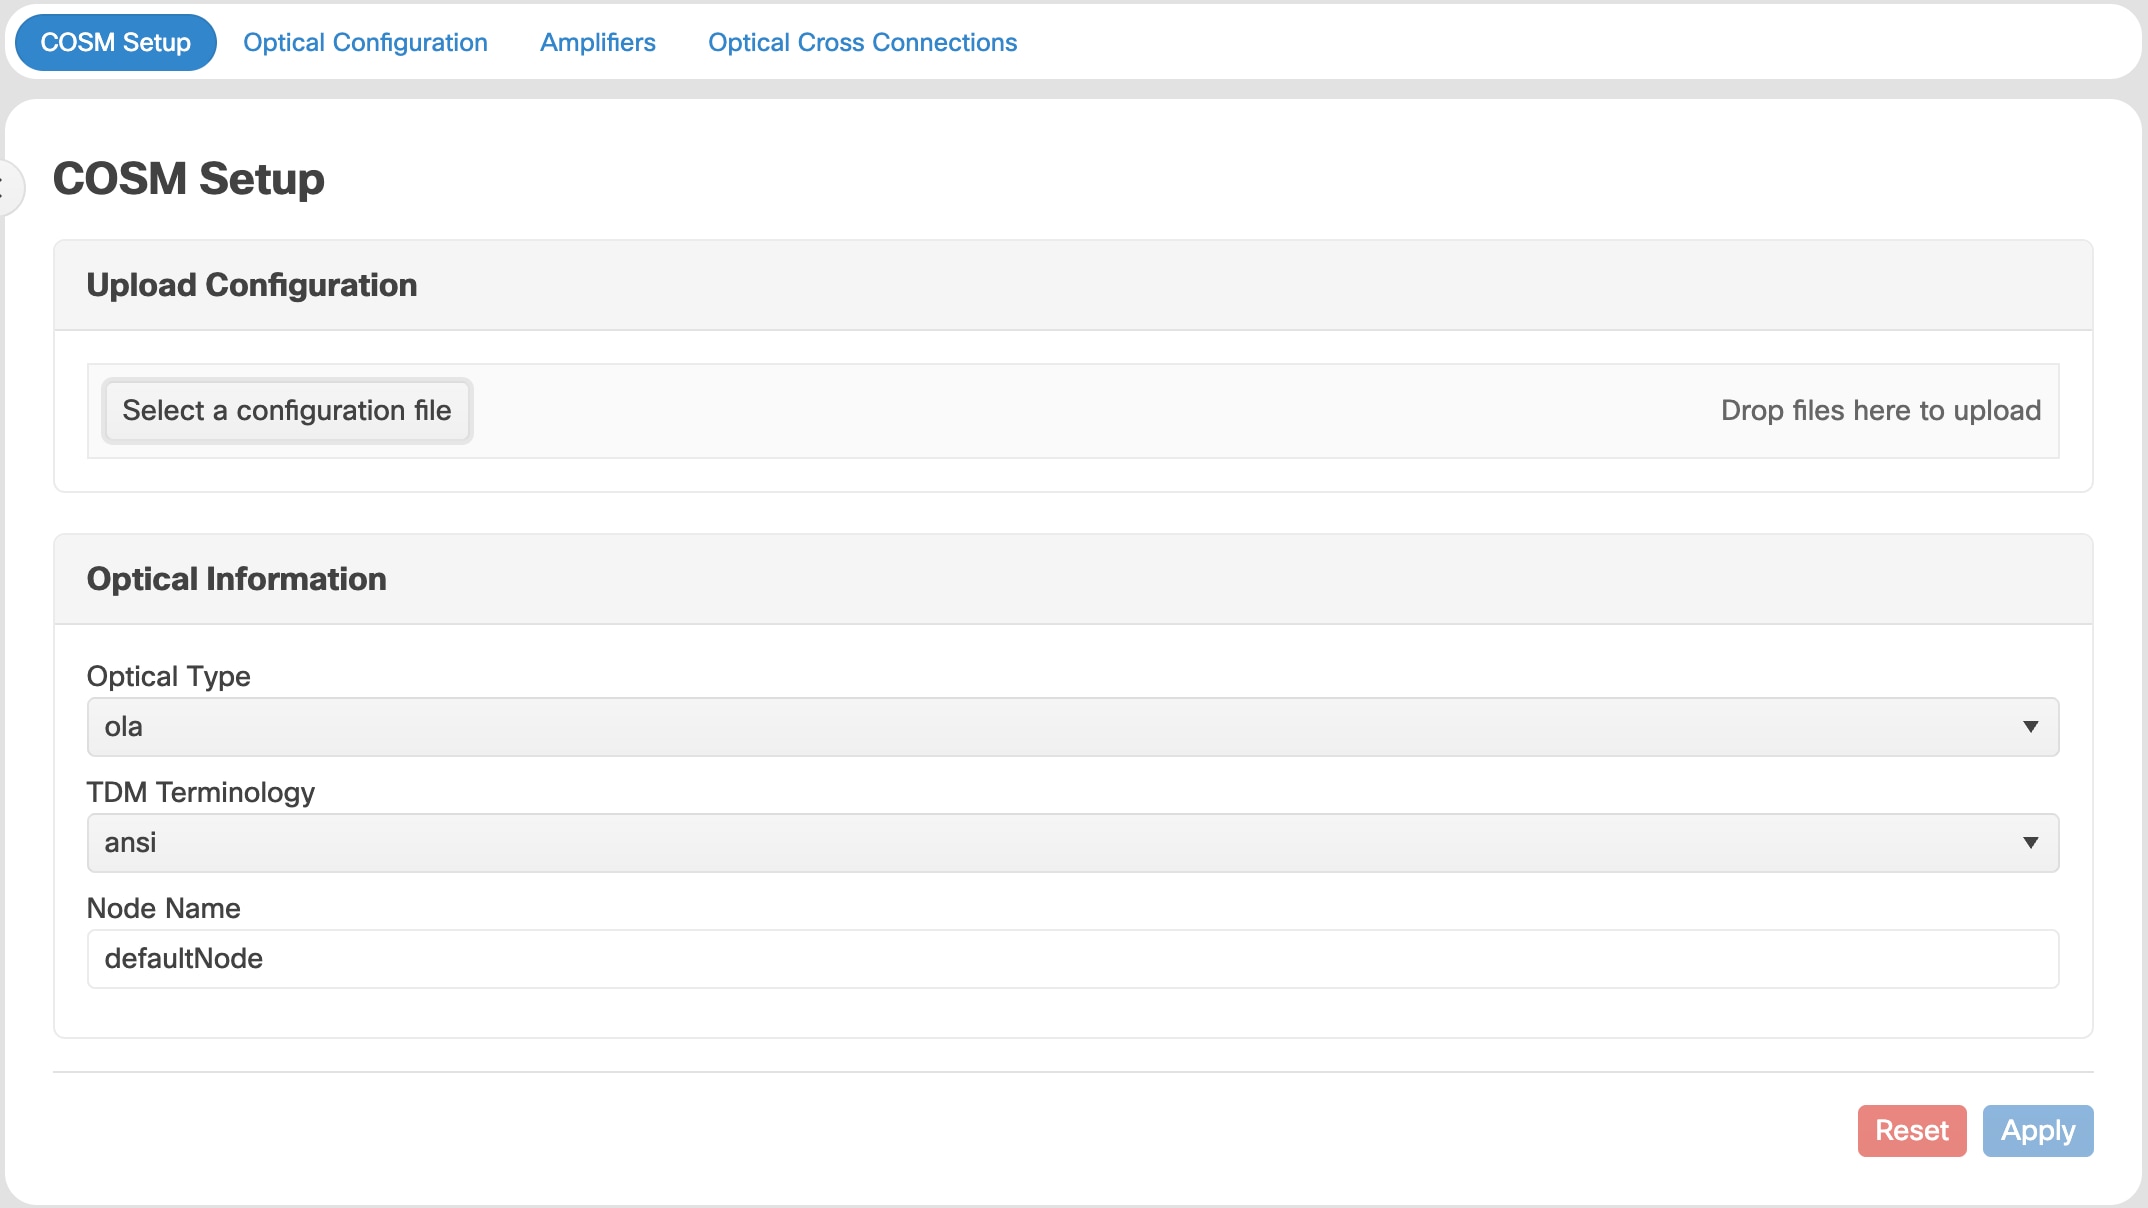
Figure 1. Upload Configuration
Before you begin
Ensure that:
The NETCONF file (.xml) contains these parameters available on Cisco Optical Site Manager:
device name
uid
rack id
chassis/passive unit id
Ensure the Cisco Optical Site Manager site name (in the CONP XML file or any other location) does not contain the string IP. If this string appears in the site name, network discovery in Cisco Optical Network Controller does not work correctly.
Cisco Optical Site Manager is newly activated with no devices added to it.
The Cisco Optical Network Planner configuration file does not include any Optical Cross-Connects.
In the Upload Configuration section, click Select a configuration file.
Navigate to the location where the NETCONF file (.xml) is present and select it.
Click Yes.
Click Upload.
A confirmation message appears after the upload is complete.
4.
Verify these configuration before adding a device:
Click Optical Setup.
In the Optical Configuration and ANS Parameters tabs, verify the successful configuration of CONP XML data onto the device.
The device node types must match TXP, OLT or ILA.
Confirm that the physical cabling on the device matches the Cisco Optical Site Manager Node Functional View.
verify that the rack positioning, degree, IPC and NFV views are aligned with the designed network of Cisco Optical Network Planner.
Prerequisites for devices managed by Cisco Optical Site Manager
Verify these prerequisites are met:
Device reachability from the Cisco Optical Site Manager host device Cisco IOS XR Linux shell.
SSH server is configured. Example settings include ssh server rate-limit 600, ssh server session-limit 110, ssh server v2, ssh server vrf default, and ssh server netconf vrf default.
NETCONF YANG agent is configured with SSH enabled, for example netconf-yang agent and ssh.
The device node types must match TXP, OLT or ILA.
Confirm that the physical cabling on the device matches the Cisco Optical Site Manager Node Functional View.
Verify that the rack positioning, degree, IPC and NFV views are aligned with the designed network of Cisco Optical Network Planner.
Synchronize devices in Cisco Optical Site Manager
Synchronization is essential for the effective management of devices by Cisco Optical Site Manager, ensuring accurate status, timely alarms, and proper operational visibility.
Complete this task after importing the Cisco Optical Network Planner XML.
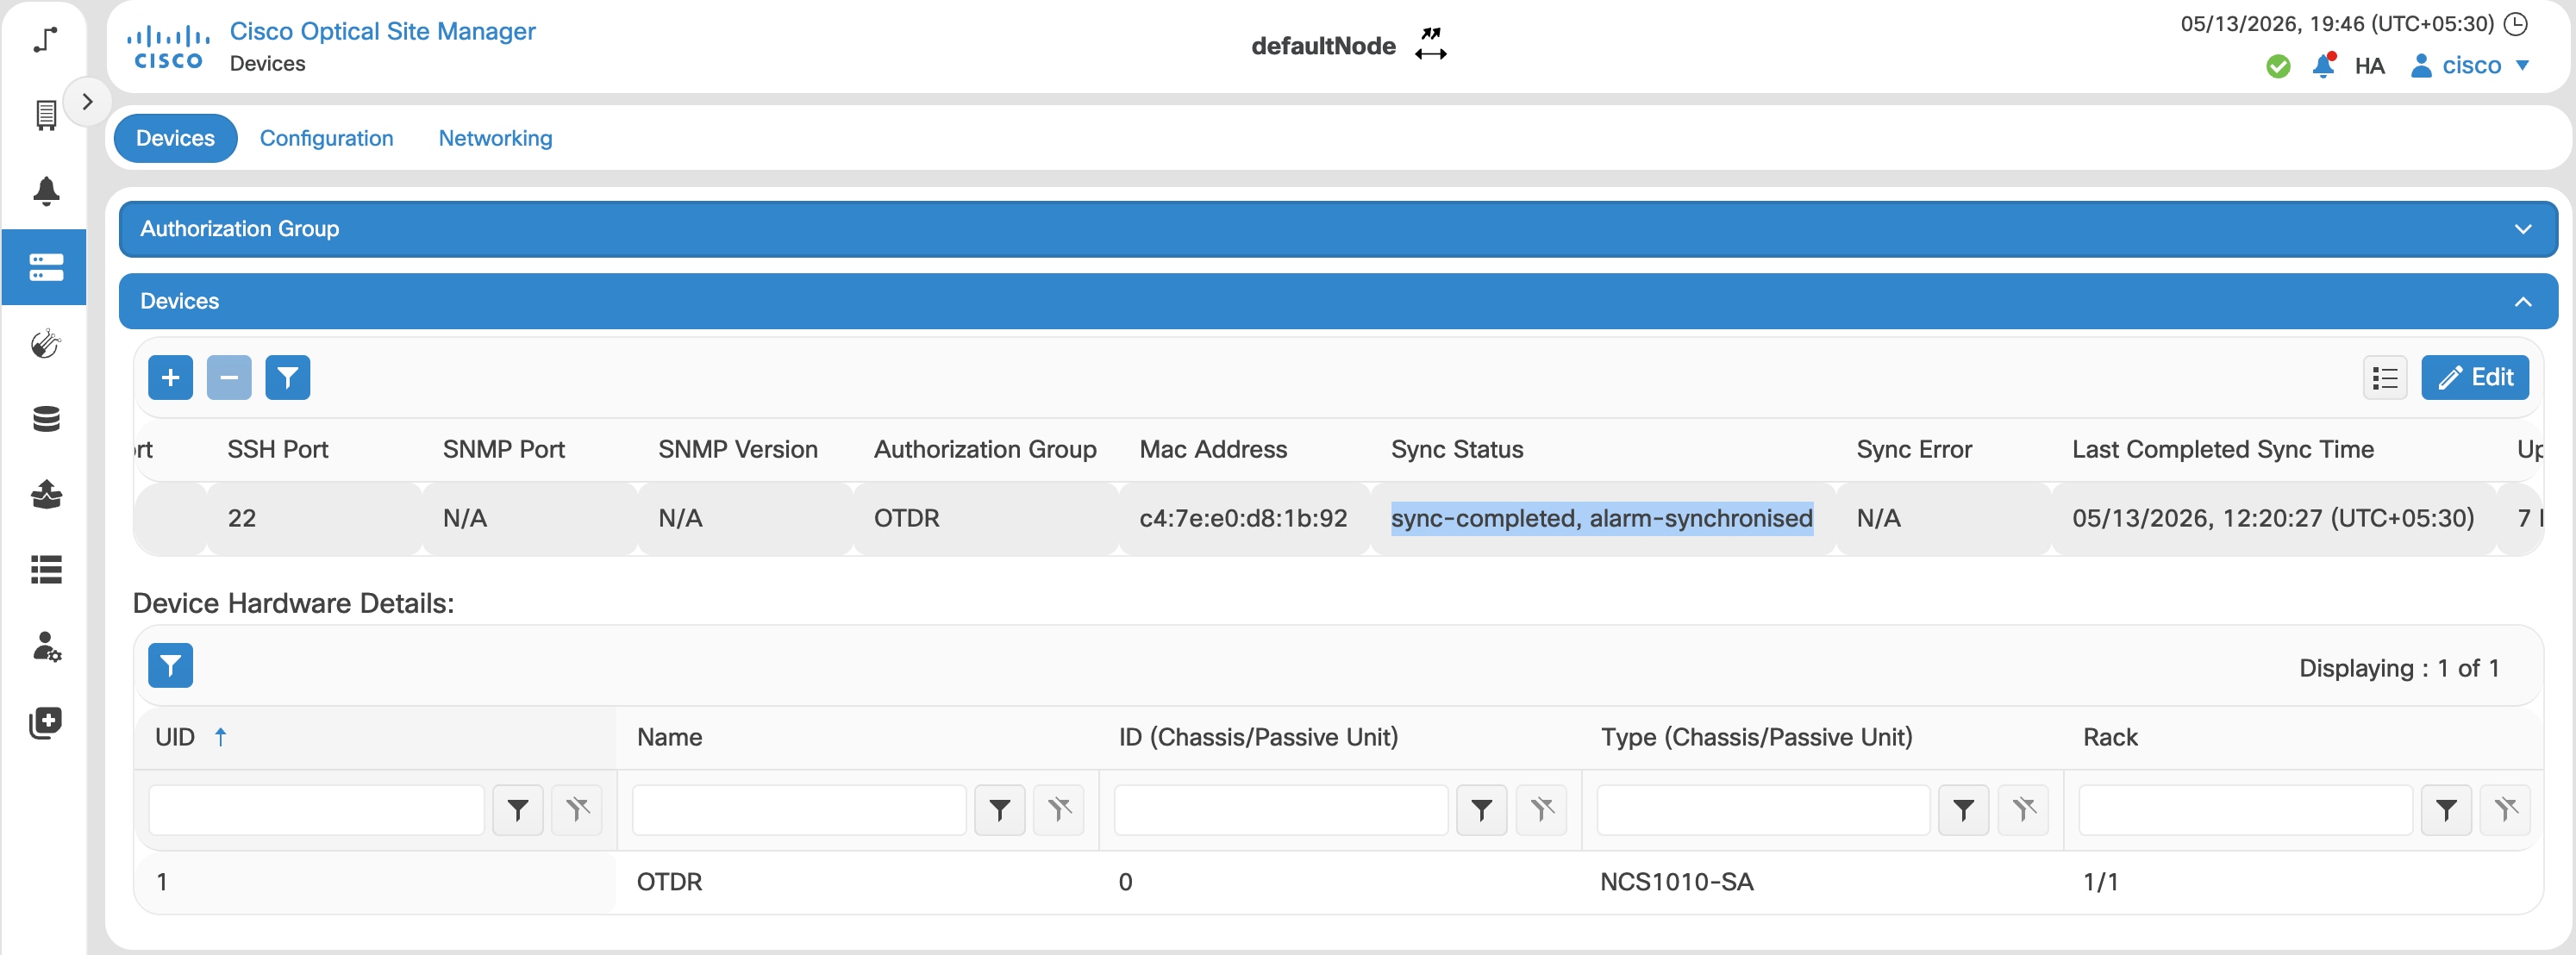
Figure 2. Synchronize devices
Before you begin
Edit one device at a time and wait for synchronization to complete before updating the next device.
Devices are onboarded and reachable from the Cisco Optical Site Manager host.
Follow these steps to synchronize devices.
Procedure
1.
Click Devices in the left panel.
The Device Configuration page appears.
2.
In the Devices area, click Authorization Group to expand it.
3.
Click Add Auth Group.
4.
Enter a name in Authorization Group Name and the device credentials in the Remote Name and Remote Password fields.
5.
Click Add.
The new authorization group is added to the table.
Note
If the devices to be managed do not share same credentials, you must create additional authorization groups to match each unique credential set. This ensures that Cisco Optical Site Manager can authenticate and manage each device securely according to its configuration.
6.
Expand the Devices section, then click Edit.
7.
Update these fields of the device to be managed by Cisco Optical Site Manager.
IP Address
Authorization Group
Device (XR) Netconf Port (default 830)
Device (XR) SSH Port (default 22)
Note
Keep the Cisco Optical Site Manager NETCONF port and the device XR NETCONF port at their default values. If either port is required to be changed, ensure that the Cisco Optical Site Manager NETCONF port and the device XR NETCONF port use different values.
Wait for sync status to complete for all the devices
8.
Wait until the Sync Status of all the devices is sync-completed, alarm-synchronized state.
9.
Verify physical connectivity to confirm that all cabling is correct and to prevent installation errors.
Smart Licensing is a cloud-based, software license management solution that enables you to automate time-consuming, manual licensing tasks. The solution allows you to easily track the status of your license and software usage trends.
Cisco Optical Site Manager Smart Licensing is honor based, and license utilization is based on the number of active line cards managed by Cisco Optical Site Manager.
Supported Smart Licensing modes include:
Smart Transport: Enables Cisco devices to send license usage information directly to Cisco Smart Software Manager (CSSM) over the internet.
CSLU: Enables Cisco devices to send license usage information through Cisco Smart Licensing Utility (CSLU) without direct connectivity to CSSM.
Offline: Enables Cisco devices to manage license usage locally without connectivity to CSSM.
Cisco Optical Site Manager software maintenance update
Use a Cisco Optical Site Manager software maintenance update (SMU) to update the Cisco Optical Site Manager application with the fixes and enhancements included in the SMU package. The Cisco Optical Site Manager image is bundled as an IOS XR RPM. Therefore, any Cisco Optical Site Manager SMU is delivered as an IOS XR SMU.
Before you install a Cisco Optical Site Manager SMU, review these points:
The Cisco Optical Site Manager base installation must already be available on the host device.
In a high availability deployment, install the SMU on the standby instance before installing it on the active instance.
The SMU installation reloads the controller of the host device, which can interrupt Cisco Optical Site Manager access during the update.
Cisco Optical Site Manager diagnostics offer robust tools for troubleshooting issues by collecting and organizing operational data from your managed devices.
You can choose the applicable log types and devices and download the collected data as a ZIP file. Key features and capabilities include:
Customizable Log Selection: You can choose specific log types and devices to tailor the diagnostic data to your troubleshooting needs.
Download Option: All selected logs can be downloaded as a ZIP archive, simplifying data sharing.
Collected Data Types:
Alarms
Audit logs
Operational conditions
Device inventory
Device diagnostics
For more details about Cisco Optical Site Manager diagnostics, see Diagnostics.