Table Of Contents
Icons and Menus
A.1 Launching Applications
A.2 Toolbar Options
A.3 Menu Options
A.3.1 File Menu
A.3.2 Edit Menu
A.3.3 Fault Menu
A.3.4 Performance Menu
A.3.5 Configuration Menu
A.3.6 Administration Menu
A.3.7 Window Menu
A.3.8 Help Menu
A.4 Hierarchy Pane Icons
A.4.1 Object Icons
A.4.2 Communication State Icons
A.4.3 Operational State Icons
A.4.4 Severity Icons
A.4.5 Hierarchy Pane Navigation Icons
A.5 Inspector View Icons
A.6 Network Map Icons
A.6.1 Icon States
A.6.2 Icon Colors
A.6.3 Operational and Communication State Icons
A.6.4 Network Map Edit Menu
Icons and Menus
This appendix describes the icons and menus used in Cisco MGM, and contains the following sections:
• Launching Applications
•Toolbar Options
•Menu Options
•Hierarchy Pane Icons
•Inspector View Icons
•Network Map Icons
A.1 Launching Applications
Applications in Cisco MGM can be launched from the toolbar and dashboard, as well as from menu options. Table A-1 list the icons.
Table A-1 Cisco MGM Applications Icons
|
Application
|
Icon
|
Alarm Browser |
|
Chassis View |
|
Configuration Center |
|
Diagnostic Center |
|
Domain Explorer |
|
EMS Alarm Browser |
|
Statistics Report |
|
A.2 Toolbar Options
The various Cisco MGM toolbar tools are described in .
Table A-2 Toolbar Tools Description
|
Tool
|
Item
|
Description
|
|
Acknowledge Alarms |
Acknowledge the selected alarm(s). Click again to unacknowledge the selected alarm(s). To enable alarm unacknowledgement, go to Control Panel > UI Properties. |
|
Acknowledge All Alarms |
Acknowledges all alarms. Click again to unacknowledge all alarms. |
|
Add Network Element(s) |
Opens the Add New Network Element wizard, which allows you to add a new NE or add several new NEs at once. |
|
Alarm Browser |
Opens the Alarm Browser window. |
|
Alarm Log |
Opens the Alarm Log window. |
|
Audit Log |
Opens the Audit Log window. |
|
Cancel Job |
Allows you to cancel a scheduled job. Cancel is enabled only for jobs with a Queued status. |
|
Cancel Task |
Allows you to cancel a task. |
|
Clear Selected Alarm(s) |
Clear selected alarms. A message displays, informing you that only PM failed and PM lost alarms on NEs in your domain will be cleared. |
|
Collapse |
Collapses the management domain or group to hide all groups or NEs in that management domain or group. |
|
Commit |
The Commit operation makes the standby software version the active version if it is a later version than the active software. |
|
Copy |
Copies the selected NE to the clipboard. The selected NE now appears in italics. |
|
Create a New User |
Opens the Create New Cisco MGM User wizard. |
|
Create a New User Profile |
Opens the Create New User Profile wizard. |
|
Cut |
Copies the selected NE to the clipboard. The selected item now appears in italics. The NE is not removed from its current location until the Paste action is performed. |
|
Delete |
Deletes the selected item. Deletes the selected user. |
|
Duplicate User Profile |
Opens the Create Duplicate Profile window, which allows you to duplicate an existing Cisco MGM user profile. |
|
Enable Drag |
Enables drag and drop functionality for all nodes within the Network Map window. |
|
Enable Offview |
Enables the display of off-view icons within the Network Map window. |
|
Error Log |
Opens the Error Log window. |
|
Expand |
Expands the management domain or group to display all groups or NEs in that management domain or group. |
|
Export Data To File |
Opens the Export dialog box.Exports data, such as alarms, events, and error logs. Data is exported in comma-separated values (CSV) or tab separated values (TSV) formats. |
|
Filter |
Opens a filter dialog box, which allows you to filter for information found in the table or window. Note Use the percent sign (%) as a wildcard character for filtering on substrings. |
|
Filter Time Period |
Allows you to filter using time as a parameter. As the default, Cisco MGM displays alarm and event information that occurred during the last four hours. To quickly filter the time period, select the Filter Time Period (4h) tool. You can change the default time period by using the User Preferences dialog box. The icon displayed in the tool bar changes according to the time period selected. |
|
Generate HTML Report |
Allows you to generate an HTML report based on the data in the table. You can generate a report for selected rows or for all rows. After you have made your selection, the browser window appears with the HTML report. Use your browser's Print option to print the HTML report. |
|
Help |
Displays online help for the current window. |
|
Hide Acknowledged Alarms |
Hides all alarms that have been acknowledged. |
|
Hide Cleared Alarms |
Hides all alarms that have been cleared. |
|
Launch User Profiles Table |
Opens the Cisco MGM User Profiles Table. |
|
Log Out User |
Logs out the selected user from the Cisco MGM application. |
|
Logged in Cisco MGM Users |
Opens the Logged In Cisco MGM Users Table, which lists the Cisco MGM users who are currently logged into the Cisco MGM application. |
|
Modify User |
Opens the Modify User wizard. |
|
Modify User Profile Properties |
Opens the Modify Cisco MGM User Profile Properties wizard. |
|
Network Map |
Opens the Network Map window for the selected node. |
|
New Group |
Opens the New Group dialog box. From here, you can add a new group, give the group a name, specify the group's geographic location, and provide a brief description of the group. |
|
Page Back |
Moves the table backward by one page if there is more than one page of data. |
|
Page Forward |
Moves the table forward by one page if there is more than one page of data. |
|
Parent (also Show Parent Network Map) |
If the Network Map is open to a specific NE, clicking Parent or Show Parent Network Map shifts the view back to the main Network Map view. |
|
Paste |
Pastes the NE on the clipboard into the selected group. |
|
Print Graph |
Prints the graphical display. |
|
Refresh Data |
Refreshes all data being displayed by Cisco MGM. There are two icons, and both refresh data from either the server or the database. The Refresh Data icon with blue and red arrow (as seen in Circuit Table) flashes when updates are available. This icon has two modes: manual refresh and autorefresh. The Refresh Data icon with the "hockey puck" and red arrow does not notify you that updates are available. You must click the button in order to retrieve updated data. Note Clicking Refresh Data in the Domain Explorer window refreshes all data for the entire Cisco MGM client. Depending on the number of NEs in your network, you might experience a delay while the data refreshes. Note It takes longer to refresh data from the NE than from the server. |
|
Reset All Alarms/Events |
Clears (resets) all alarms or events from the current view. Clears all alarms from the Alarm Browser window and fetches the alarms from now (current time on the server machine) onward. |
|
Reset to Default Size |
Resets the current window to its default size. |
|
Save |
Saves changes made in the current window. |
|
Show Alarm Note |
Opens the Alarm Note dialog box for the selected alarm. Shows any comments that were entered for the selected alarm and adds additional comments. Table A-11 provides descriptions of the fields in the Alarm Note Dialog Box. |
|
Show Cleared Alarms |
Shows all alarms that have been cleared. |
|
Show Parent Network Map |
See Parent. |
|
Unlock User |
Allows you to unlock a user account. |
|
Zoom Area |
Allows you to pan and zoom the view to a different region. |
|
Zoom In |
Allows you to zoom in on the Network Map. |
|
Zoom Out |
Allows you to zoom out on the Network Map. |
A.3 Menu Options
The various Cisco MGM menu options are described below, in the order they appear on each menu.
This section includes the following information:
•File Menu
•Edit Menu
•Fault Menu
•Performance Menu
•Configuration Menu
•Administration Menu
•Window Menu
•Help Menu
A.3.1 File Menu
This section describes the tools within the File menu in each application:
•Domain Explorer—File Menu Tools Description
•Network Map—File Menu Tools Description
•Alarm Browser, Alarm Log, Domain NE Table, Equipment Inventory Table, and Control Panel—File Menu Tools Description
Table A-3 Domain Explorer—File Menu Tools Description
|
Item
|
Description
|
New Group |
Opens the New Group dialog box. From here, you can add a new group, give the group a name, specify the group's geographic location, and provide a brief description of the group. |
Add Network Element(s) |
Opens the Add New Network Element wizard, which allows you to add a new NE or add several new NEs at once. |
Dashboard |
Opens the Cisco MGM Dashboard, which shows the number of NEs in the management domain, and the number of critical, major, minor, warning, or unacknowledged alarms. In addition, the dashboard contains an Alarm Browser tool, which allows you to launch the Alarm Browser window, and an Open Domain Explorer tool, which layers the Domain Explorer window as the top active window. |
Network Map |
Opens the Network Map window for the selected node. |
Domain NE Table |
Opens the Domain NE Table window for the selected node. |
Notify Users |
Opens the Notify Users dialog box. |
Refresh Data |
Refreshes all data being displayed by Cisco MGM. There are two icons, and both refresh data from either the server or the database. The Refresh Data icon with blue and red arrow (as seen in Circuit Table) flashes when updates are available. This icon has two modes: manual refresh and autorefresh. The Refresh Data icon with the "hockey puck" and red arrow does not notify you that updates are available. You must click the button in order to retrieve updated data. Note Clicking Refresh Data in the Domain Explorer window refreshes all data for the entire Cisco MGM client. Depending on the number of NEs in your network, you might experience a delay while the data refreshes. Note It takes longer to refresh data from the NE than from the server. |
Debug Options |
Opens the Debug Options dialog box. Use this dialog box to select parameters for the Debug Log, which contains data that is useful for debugging purposes. |
Lock Cisco MGM Client |
Prevents the Cisco MGM client from being used and opens the Cisco MGM Locked window. |
Exit |
Exits the program. |
Table A-4 Network Map—File Menu Tools Description
|
Item
|
Description
|
Open |
|
Parent (also Show Parent Network Map) |
If the Network Map is open to a specific NE, clicking Parent or Show Parent Network Map shifts the view back to the main Network Map view. |
Save |
Saves changes made in the current window. |
Save as Default |
Saves your customizations (map background, node icons, and x and y coordinates) as the default map view. |
Revert to Default |
Reverts your map customizations. |
Notify Users |
Opens the Notify Users dialog box. |
Refresh Data |
Refreshes all data being displayed by Cisco MGM. There are two icons, and both refresh data from either the server or the database. The Refresh Data icon with blue and red arrow (as seen in Circuit Table) flashes when updates are available. This icon has two modes: manual refresh and autorefresh. The Refresh Data icon with the "hockey puck" and red arrow does not notify you that updates are available. You must click the button in order to retrieve updated data. Note Clicking Refresh Data in the Domain Explorer window refreshes all data for the entire Cisco MGM client. Depending on the number of NEs in your network, you might experience a delay while the data refreshes. Note It takes longer to refresh data from the NE than from the server. |
Debug Options |
Opens the Debug Options dialog box. Use this dialog box to select parameters for the Debug Log, which contains data that is useful for debugging purposes. |
Close |
Closes the current window. |
Table A-5 Alarm Browser, Alarm Log, Domain NE Table, Equipment Inventory Table, and Control Panel—File Menu Tools Description
|
Item
|
Description
|
Page Back |
Moves the table backward by one page if there is more than one page of data. |
Page Forward |
Moves the table forward by one page if there is more than one page of data. |
Filter |
Opens a filter dialog box, which allows you to filter for information found in the table or window. Note Use the percent sign (%) as a wildcard character for filtering on substrings. |
Export |
Opens the Export dialog box.Exports data, such as alarms, events, and error logs. Data is exported in comma-separated values (CSV) or tab separated values (TSV) formats. |
HTML Report |
Allows you to generate an HTML report based on the data in the table. You can generate a report for selected rows or for all rows. After you have made your selection, the browser window appears with the HTML report. Use your browser's Print option to print the HTML report. |
Refresh Data |
Refreshes all data being displayed by Cisco MGM. There are two icons, and both refresh data from either the server or the database. The Refresh Data icon with blue and red arrow (as seen in Circuit Table) flashes when updates are available. This icon has two modes: manual refresh and autorefresh. The Refresh Data icon with the "hockey puck" and red arrow does not notify you that updates are available. You must click the button in order to retrieve updated data. Note Clicking Refresh Data in the Domain Explorer window refreshes all data for the entire Cisco MGM client. Depending on the number of NEs in your network, you might experience a delay while the data refreshes. Note It takes longer to refresh data from the NE than from the server. |
Debug Options |
Opens the Debug Options dialog box. Use this dialog box to select parameters for the Debug Log, which contains data that is useful for debugging purposes. |
Close |
Closes the current window. |
A.3.2 Edit Menu
This section describes the tools within the Edit menu in each application:
•Domain Explorer Edit Menu Tools Descriptions
•Network Map Edit Menu Tools Descriptions
•Cisco MGM User Edit Menu Tools Descriptions
•Job Monitor Edit Menu Tools Descriptions
Table A-6 Domain Explorer Edit Menu Tools Descriptions
|
Item
|
Description
|
Cut |
Copies the selected NE to the clipboard. The selected item now appears in italics. The NE is not removed from its current location until the Paste action is performed. |
Copy |
Copies the selected NE to the clipboard. The selected NE now appears in italics. |
Paste |
Pastes the NE on the clipboard into the selected group. |
Delete |
Deletes the selected instance of the NE or group. If this is the last instance of the NE, the NE is placed in the Deleted NEs group. Only out-of-service NEs can be placed in the Deleted NEs group. To delete the NE from the database, select the NE in the Deleted NEs group and choose Edit > Delete; then, click OK. This removes the NE from the client view and deletes all records associated with the NE from the database. If this is the last instance of the group, the group must be empty before you can delete it. |
Delete All |
Deletes all instances of the selected NE or group. The NE is placed in the Deleted Network Elements group. Only out-of-service NEs can be placed in the Deleted NEs group. The group must be empty before you can delete it. |
Undelete |
Undeletes the selected object. Restores all instances of an NE in the Deleted Network Elements group to their previous locations in the Domain Explorer Hierarchy pane. If the original parent group no longer exists, Cisco MGM does not recreate the group. Instead, Cisco MGM restores the NE under the management domain node. |
Expand |
Expands the management domain or group to display all groups or NEs in that management domain or group. |
Collapse |
Collapses the management domain or group to hide all groups or NEs in that management domain or group. |
Find |
Opens the Find dialog box, which allows you to search the tree by node name, IP address, or description. |
Find Next |
Searches for the next occurrence of the entry that was searched for using the Find command. |
User Preferences |
Opens the User Preferences dialog box. |
Change Password |
Opens the Change Password dialog box, which allows you to change your Cisco MGM user password. |
Table A-7 Network Map Edit Menu Tools Descriptions
|
Item
|
Description
|
Enable Drag |
Enables drag and drop functionality for all nodes within the Network Map window. |
Enable Offview |
Enables the display of off-view icons within the Network Map window. |
Change Map Background |
Opens the Select Map Background dialog box, which allows you to choose a different geographic background for the selected view. |
Change Node Icon |
Opens the Select Node Icon File dialog box, which allows you to select a new icon for the selected node. |
Zoom In |
Allows you to zoom in on the Network Map. |
Zoom Out |
Allows you to zoom out on the Network Map. |
Zoom Area |
Allows you to pan and zoom the view to a different region. |
User Preferences |
Opens the User Preferences dialog box. |
Change Password |
Opens the Change Password dialog box, which allows you to change your Cisco MGM user password. |
Circular Layout |
Arranges the NE on the Network Map in a circular formation. |
Spring Layout |
Arranges the icons on the Network Map in a coiled spring formation. |
Table Layout |
Arranges the icons on the Network Map in rows and columns. |
Declutter Layout |
Rearranges the icons on the Network Map so that they do not overlap. |
Table A-8 Cisco MGM User Edit Menu Tools Descriptions
|
Item
|
Description
|
Create |
Opens the Create New Cisco MGM User wizard. |
Modify |
Opens the Modify NE User wizard. |
Delete |
Deletes the selected instance of the NE or group. If this is the last instance of the NE, the NE is placed in the Deleted NEs group. Only out-of-service NEs can be placed in the Deleted NEs group. To delete the NE from the database, select the NE in the Deleted NEs group and choose Edit > Delete; then, click OK. This removes the NE from the client view and deletes all records associated with the NE from the database. If this is the last instance of the group, the group must be empty before you can delete it. |
Unlock |
Allows you to unlock a user account. |
Table A-9 Job Monitor Edit Menu Tools Descriptions
|
Item
|
Description
|
Cancel Task |
Allows you to cancel a task. |
Cancel Job |
Allows you to cancel a scheduled job. Cancel is enabled only for jobs with a Queued status. |
User Note |
Allows you to add a note to the job. |
NESoftware Table |
|
A.3.3 Fault Menu
Table A-10 describes the tools within the Fault menu.
Table A-10 Fault Menu Tools Description
|
Item
|
Description
|
Alarm Browser |
Opens the Alarm Browser window. |
Alarm Log |
Opens the Alarm Log window. |
Event Export Manager |
Opens the Event Export Manager window. |
MGX8880/8850 MG > Diagnostic Center |
Launch Diagnostic Center. |
Table A-11 Field Descriptions for the Alarm Note Dialog Box
|
Field
|
Description
|
Note |
Provides space to type comments about the selected alarm. To add your comments to the previous comments, click the Append radio button. To overwrite the previous comments, click Replace. To delete the comments, click Delete. Note You can enable and disable the Replace and Delete functions in the Control Panel > User Interface Properties sheet. |
History |
Displays comments that were entered by previous users. |
A.3.4 Performance Menu
Table A-12 describes the option within the Performance menu.
Table A-12 Performance Menu Tools Description
|
Item
|
Description
|
MGX8880/8850 MG > Statistics Report |
Launch Statistics Report. |
A.3.5 Configuration Menu
Table A-13 describes the tools within the Configuration menu.
Table A-13 Configuration Menu Tools Description
|
Item
|
Description
|
MGX8880/8850 MG > Equipment Inventory Table |
Launch Equipment Inventory Table. |
MGX8880/8850 MG > Chassis View |
Launch Chassis View |
MGX8880/8850 MG > Configuration Center |
Launch Configuration Center. |
A.3.6 Administration Menu
This section describes the tools within the Administration menu in each application:
•Domain Explorer Administration Menu Tools Description
•Cisco MGM Users Administration Menu Tools Description
•Control Panel Administration Menu Tools Description
Table A-14 Domain Explorer Administration Menu Tools Description
|
Item
|
Description
|
Job Monitor |
Opens the Job Monitor window. |
Service Monitor |
Opens the Service Monitor Table window. |
Self Monitor |
Opens the Self Monitor window, where you can view information about Cisco MGM threshold parameters. |
Memory Backup |
Opens the Memory Backup dialog box. |
Memory Restore |
Opens the Memory Restore dialog box. |
Software Download |
Opens the Software Download dialog box. |
Cisco MGM Users |
Opens the Cisco MGM Users window. |
Control Panel |
Opens the Control Panel window. |
Audit Log |
Opens the Audit Log window. |
Error Log |
Opens the Error Log window. |
Supported NE Table |
Opens the Supported NE Table window. |
MGX8880/8850 MG > Audit Trail |
Launch Audit Trail. |
Table A-15 Cisco MGM Users Administration Menu Tools Description
|
Item
|
Description
|
User Profiles |
|
Logged in Cisco MGM Users |
Opens the Logged In Cisco MGM Users Table, which lists the Cisco MGM users who are currently logged into the Cisco MGM application. |
Table A-16 Control Panel Administration Menu Tools Description
|
Item
|
Description
|
Audit Log |
Opens the Audit Log window. |
Error Log |
Opens the Error Log window. |
Supported NE Table |
Opens the Supported NE Table window. |
GW/CORBA Client Configuration Table |
Opens the Cisco MGM GateWay/CORBA Client Configuration Table window. |
A.3.7 Window Menu
Table A-17 describes the tools within the Window menu.
Table A-17 Window Menu Tool Description
|
Item
|
Description
|
Arrange Horizontally |
When multiple Cisco MGM windows are open, this option displays the windows side-by-side horizontally. |
Arrange Vertically |
When multiple Cisco MGM windows are open, this option displays the windows side-by-side vertically. |
Cascade |
When multiple Cisco MGM windows are open, this option positions the active window in the upper left-hand corner, and all other windows are layered on top of the active window in cascading order. |
Close All |
Closes all Cisco MGM windows except the Domain Explorer. |
Minimize All |
Minimizes all Cisco MGM windows. |
Restore All |
Restores all minimized Cisco MGM windows. |
Reset to Default Size |
Resets the current window to its default size. |
A.3.8 Help Menu
Table A-18 describes the tools within the Help menu.
Table A-18 Help Menu Tools Description
|
Item
|
Description
|
Color Legend |
Displays the Alarm Color Legend. |
Contents and Index |
Displays the contents and index for the online help. |
Current Window |
Displays online help for the current window. |
About Cisco MGM |
Opens the About Cisco MGM dialog box, which lists the Cisco MGM release you are running. |
A.4 Hierarchy Pane Icons
The following tables describe the icons shown in the Hierarchy pane:
•Object Icons
•Communication State Icons
•Operational State Icons
•Severity Icons
•Hierarchy Pane Navigation Icons
A.4.1 Object Icons
Table A-19 describes the object icons in the Hierarchy pane.
Table A-19 Object Icons
|
Object
|
Icon
|
Card |
|
Folder |
|
Group |
|
Line |
|
Network |
|
Path |
|
Peripheral |
|
Port |
|
Route Node |
|
Routing Node |
|
RPM Subinterface |
|
Sensor |
|
Unknown NE |
|
Virtual Port |
|
A.4.2 Communication State Icons
Table A-20 describes the communication state icons within the Domain Explorer Hierarchy pane.
Table A-20 Communication State Icons
|
State
|
Icon
|
Available |
|
Unavailable |
|
Not Applicable |
|
A.4.3 Operational State Icons
Table A-21 describes the operational state icons within the Domain Explorer Hierarchy pane.
Table A-21 Operational State Icons
|
State
|
Icon
|
In Service |
|
In Service - Initializing |
|
In Service - Synch Configuration |
|
In Service - Undiscovered |
|
Under Maintenance |
|
Out of Service |
|
A.4.4 Severity Icons
Table A-22 describes the severity icons in the Domain Explorer Hierarchy pane.
Table A-22 Severity Icons
|
Severity
|
Color
|
Icon
|
Critical |
Red |
|
Major |
Orange |
|
Minor |
Yellow |
|
Warning |
Light Blue |
|
Cleared |
Green |
|
Unknown |
Gray |
|
A.4.5 Hierarchy Pane Navigation Icons
Table A-23 lists the icons that are used to navigate through the hierarchy pane in the Configuration Center, Statistics Report and Diagnostic Center.
Table A-23 Hierarchy Pane Navigation Icons
|
Item
|
Icon
|
Find |
|
Find Next |
|
Find Previous |
|
Expand One Level |
|
Expand Two Levels |
|
Expand Three Levels |
|
Sort Ascending/Descending |
|
A.5 Inspector View Icons
In the Configuration Center and Statistics Report, the Inspector View provides a list of detailed information for the selected network element from the hierarchy view. Click the Show static data button to update the information in the Inspector View.
Table A-24 Inspector View Icons
|
Icon
|
Example
|
Show static date |
|
Refresh static data |
|
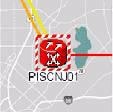
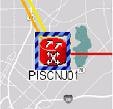
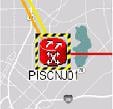
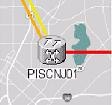
A.6 Network Map Icons
The Network Map allows you to visualize the structure of your network. Table A-25 gives examples of the icons that appear in the Network Map. When you open the Network Map from a selected NE in the Domain Explorer, the selected NEs is pre-selected on the map. The icon has white text displayed on a black background. This allows you to distinguish the previously selected NE from the other NEs in the same map.
This section includes the following information:
•Icon States
•Icon Colors
•Operational and Communication State Icons
•Network Map Edit Menu
Table A-25 Network Map Icons
|
Icon
|
Example
|
MGX8880/MGX8850 |
|
Not Managed/Other Vendor Note The Not Managed/Other Vendor icon is customizable. |
|
A.6.1 Icon States
Table A-26 describes the icon states for the icons displayed on the Network Map. Icon states are displayed according to condition priority. If two or more of the following states occur simultaneously on an icon, only the state with the highest priority is displayed:
•Loss of communications
•Under maintenance
•Unacknowledged alarms
Table A-26 Icon States
|
State
|
Icon Color
|
Overlay
|
Example
|
Loss of communications |
Icon color indicates whether the NE is reachable |
Red and white border |
|
Under maintenance |
Icon color indicates whether the NE is under maintenance |
Yellow and black border |
|
Unacknowledged alarms |
Icon color indicates whether an unacknowledged alarm is present on the NE |
Cream border |
|
Initializing |
Icon color indicates that the NE is initializing |
Blue and white border |
|
Synch configuration |
Icon color indicates that the NE is in the synchronization configuration state |
Blue and black border |
|
Out of service |
Gray |
None |
|
Unknown NE model |
Gray |
None |
|
Off-view icon |
Icon color indicates the last know alarm status of the NE that the off-view icon represents. |
None |
|
A.6.2 Icon Colors
Table A-27 displays map icons with the following colors:
Table A-27 Icon Colors
|
Status
|
Colors
|
Example
|
Critical |
Red |
|
Major |
Orange |
|
Minor |
Yellow |
|
Warning |
Light blue |
|
Clear |
Green |
|
Out of service |
Gray |
|
A.6.3 Operational and Communication State Icons
Table A-28 describes the operational and communication state map representation icons in the Network Map pane.
Table A-28 Operational and Communication State Map Representation Icons
|
State
|
Icon
|
|
Icon Color
|
Border Color
|
Loss of Communication (Communication State is Unavailable) |
|
|
Red |
Red/White |
In Service |
|
|
Orange |
None |
In Service - Initializing |
|
|
Gray |
Blue/White |
In Service - Synch Configuration |
|
|
Red |
Blue/Black |
Under Maintenance |
|
|
Red |
Black/Yellow |
Out of Service |
|
|
Gray |
None |
A.6.4 Network Map Edit Menu
Use the Edit menu and toolbar buttons to customize your Network Map. Choose the Enable Drag toolbar button to enable drag and drop functionality and easily display network partitioning. Other Edit menu options allow you to enable the display of off-view icons, change geographic backgrounds for the selected view, select a layout format for the icons, adjust the zoom level, or choose icons to represent specific nodes.
Note Use the File > Save as Default menu option to save your customizations (map background, node icons, and x and y coordinates) as the default map view. The Save as Default option is disabled for the root or Cisco MGM domain node. By default, the customized map background and node icons are saved on your local workstation under <client_install_directory>/images/mapbkgnds/custom/default and <client_install_directory>/images/mapicons/custom/default.
Note Use the File > Revert to Default menu option to revert your map customizations.
You can choose whether multiple windows or a single window are used for navigation:
Step 1 In the Network Map window, choose Edit > User Preferences.
Step 2 In the Map Preferences tab, check the Open Network Map in New Window check box to open a new window for subsequent map views, or leave the check box unchecked to open subsequent map frames in the same window.
Step 3 Click OK.
If an NE has a link defined to an NE on a different map, the off-view NE is represented by an off-view icon. The off-view icon serves as a hyperlink to the map that contains the NE at the opposite end of the link. Off-view icons are used only for links that terminate on an NE; off-view icons are not used for groups. You can enable or disable the display of off-view icons in the Network Map, as follows:
Note Link colors and NE alarm colors are identical.
Step 1 Choose Edit > User Preferences.
Step 2 In the Map Preferences tab, check the Show Off View Icons check box to show off-view icons in the Network Map, or leave the check box unchecked to hide off-view icons.
Step 3 Click OK.
The names that display under graphics on the map are truncated if they are too long to fit. By default, the end characters are truncated. If you want beginning characters truncated:
Step 4 Choose Administration > Control Panel in the Domain Explorer window.
Step 5 Click the UI tool to open the UI Properties sheet.
Step 6 Click the Truncate Network Map Node Name First Characters radio button.
Step 7 Click Save.
Step 8 Click Yes to confirm the change.
Step 9 In the Network Map window, click the Refresh Data tool.


 Feedback