Cisco Spaces Dashboard

Cisco Spaces Dashboard

Cisco Spaces dashboard is the default home page of Cisco Spaces application. The Cisco Spaces GUI adopts the Magnetic design implementation. Magnetic design follows a persistent header and collapsible left navigation pane.

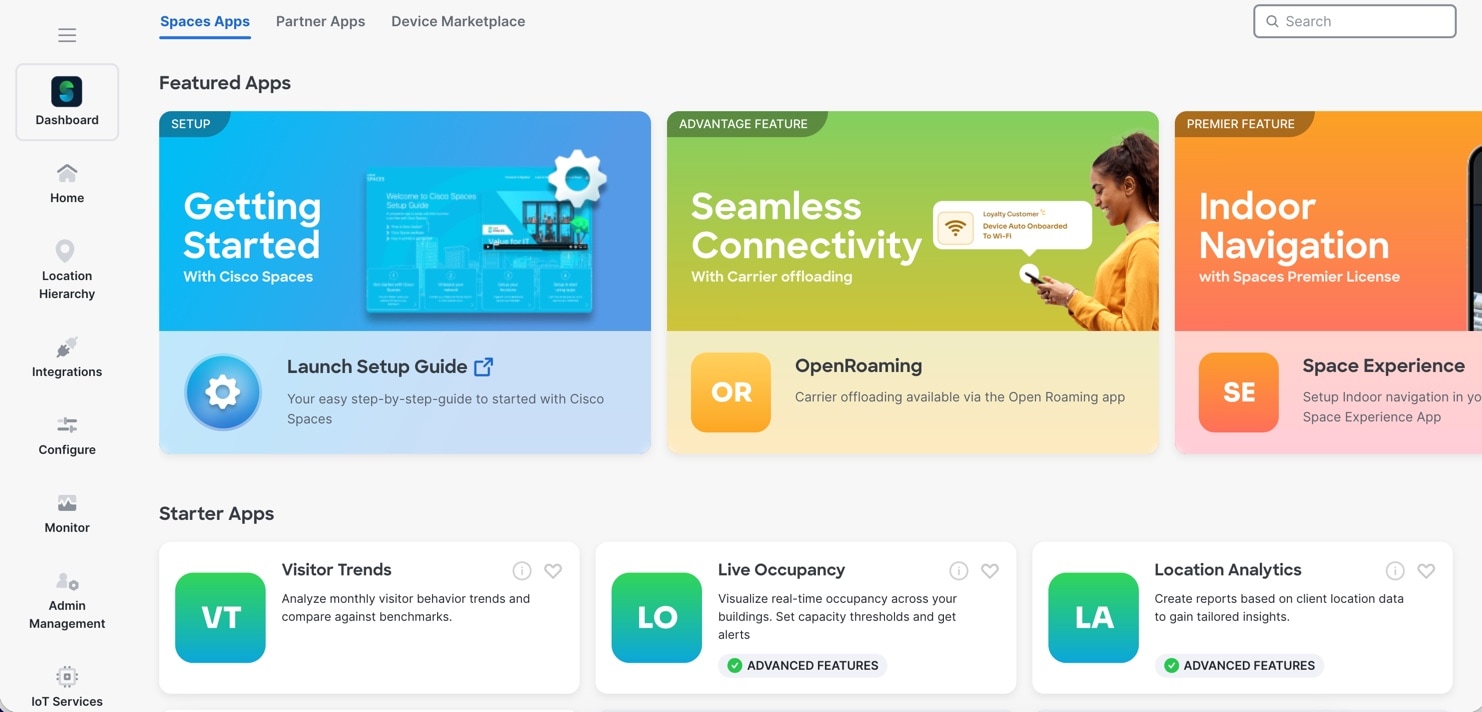
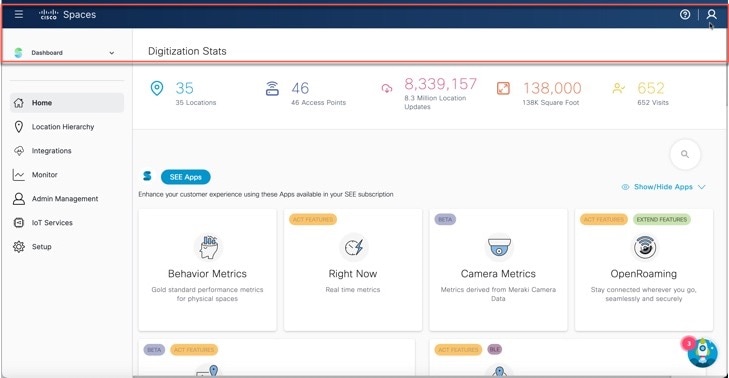
After you log in to Cisco Spaces, the Home window is displayed as shown in the following image:

Figure 6. Cisco Spaces Home

The Cisco Spaces Home window includes the Dashboard drop-down list (in the left navigation pane) which allows you to search and view the available apps associated with your Cisco Spaces license.

Use the Dashboard drop-down list to choose and navigate to any selected app. To navigate back to the Cisco Spaces Home window, choose Dashboard option from the drop-down list.

The dashboard has the following main areas: Menu Bar, Information icon, Profile icon, and various applications available as per your subscription.

Left Navigation Pane

Use the left navigation pane to access these features.

  • Home

  • Location Hierarchy

  • Integrations

  • Configure

  • Monitor

  • Admin Management

  • IoT Services

  • Setup

Icons

Click the icons on the right side of the menu bar to perform common tasks:

Icon

Description

Support: Displays help center, support and documentation links.

User Profile: Displays account, smart licenses and logout options. The license information is available under My Account > License Info > License Units Consumed.

For more information, refer to User Profile.

Cisco Spaces Features

The major features of Cisco Spaces dashboard includes:

Cisco Spaces Apps

On the Cisco Spaces Home page, you can view all available applications. In the left navigation pane, click Dashboard to view the apps.

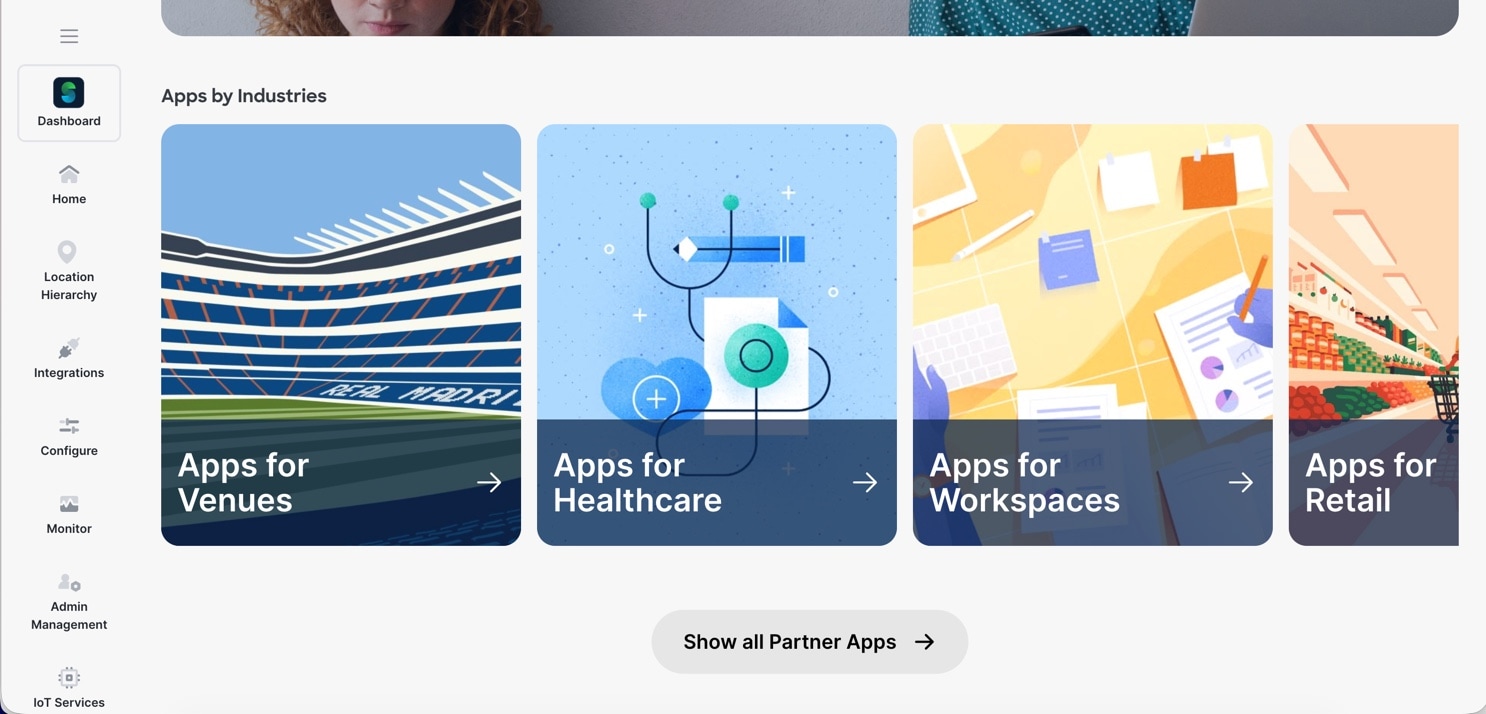
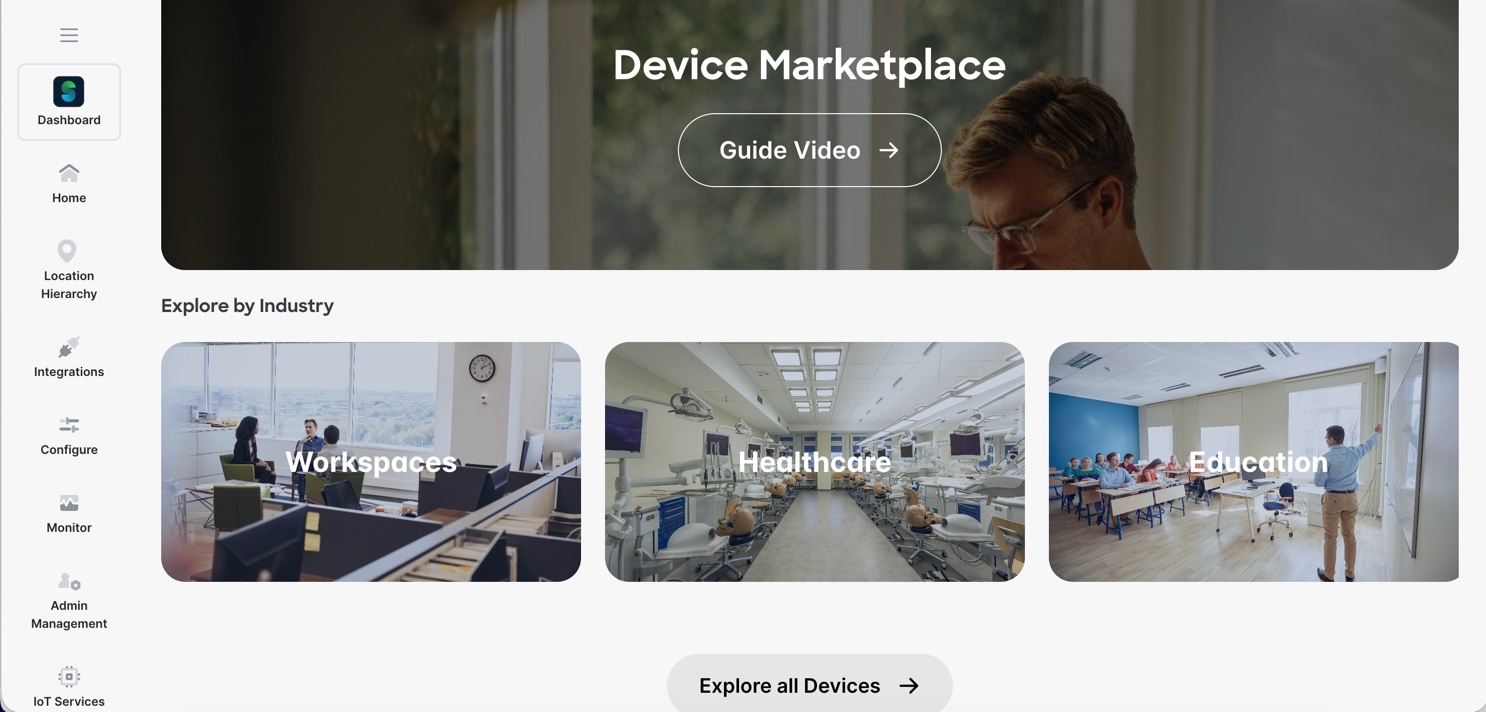
On the Home page, apps are grouped by use case. Use the Search field to search for apps and features. A lock icon on an app tile indicates that the app is not accessible with your current account or assigned license.

Figure 7. Spaces Apps

Note


Right Now is now called Live Occupancy, and Behavior Metrics is renamed Visitor Trends.


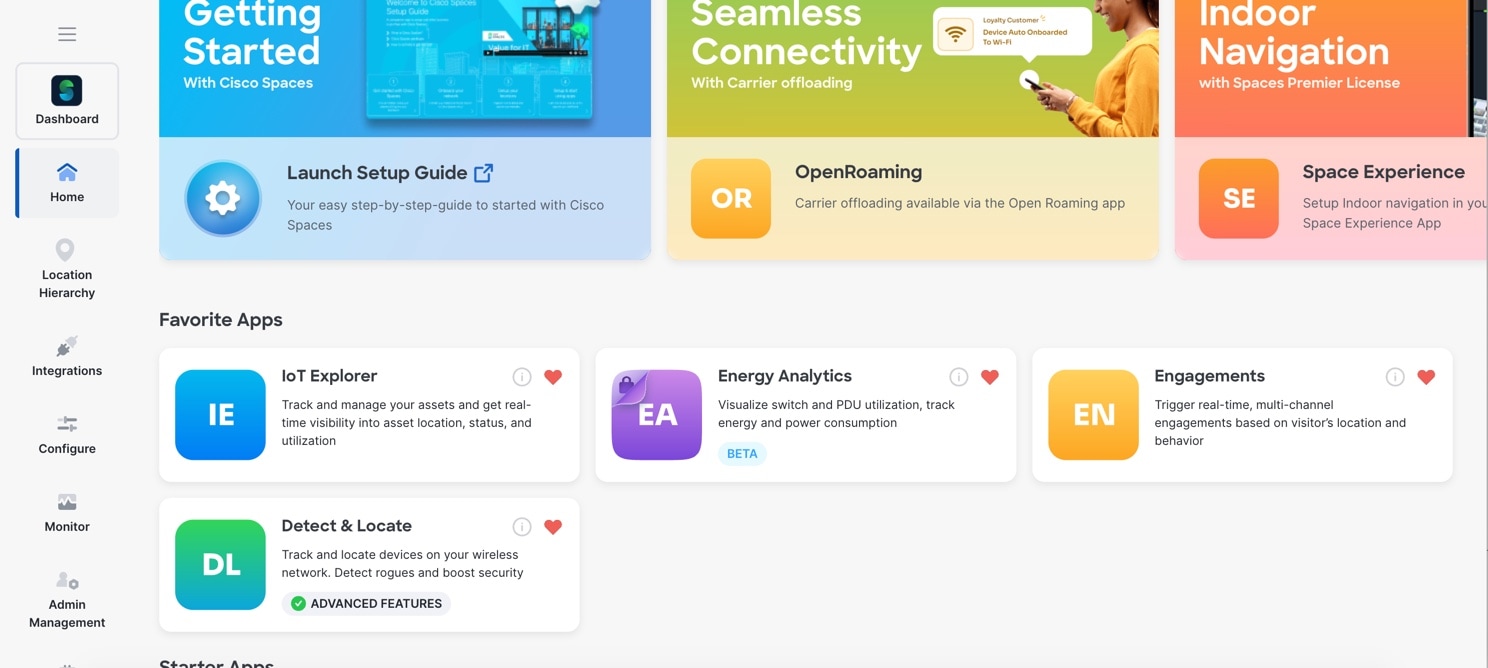
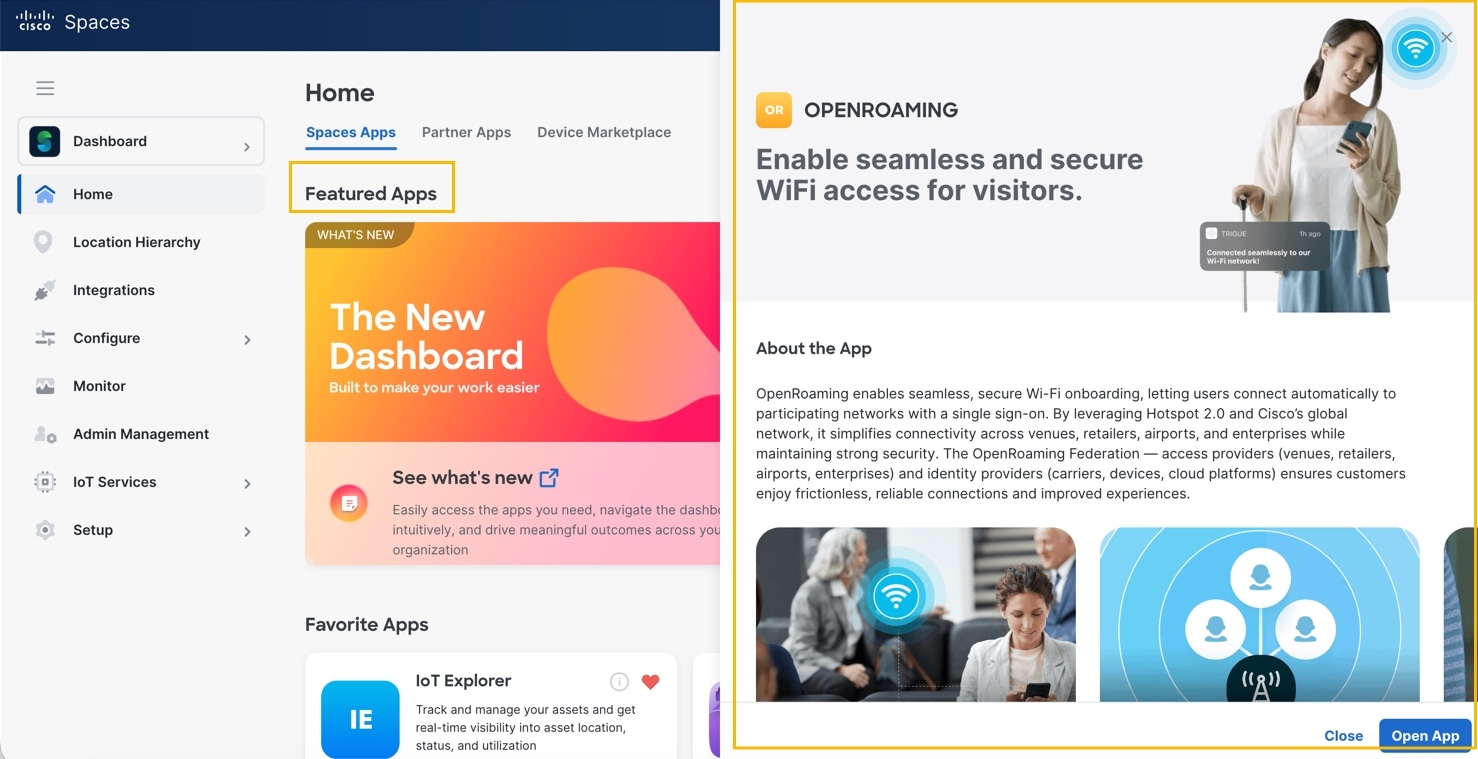
On the Home page, click a featured app card to open the overview drawer instead of launching the app directly. In the overview drawer, click Open App to launch the app.

Figure 8. Featured App Cards

Location Hierarchy

The Location Hierarchy feature enables you to define your business locations in Cisco Spaces. You can import the locations in the same structure in which they are defined it your wireless network . The apps such as Engagements, Captive Portals, and Location Personas Rules depend on the location hierarchy defined. Cisco Spaces provides universal account, and you can add the locations of multiple wireless networks to the location hierarchy.

The APs that you can add to the location hierarchy depends on the type of Cisco Spaces license you own.

Integrations

The Integrations feature enables you to connect Cisco Spaces with Cisco and third-party applications, such as Catalyst Center, Office 365, Google Calendar, ServiceNow, and Hamina.

These integrations help extend Cisco Spaces data and workflows into other systems. Depending on the integration, Cisco Spaces can synchronize maps, provide device location updates, share location, occupancy, space utilization, or footfall data, and synchronize meeting room booking information. This helps improve workspace operations and maximize the value of your Cisco Spaces deployment.

Configure

The Configure feature enables you to configure Cisco Spaces options such as SDK, Notifications, and Location Compute.

Monitor

The Monitor feature enables you to view the operational status of Cisco Spaces and related services. It displays summary information for connectivity, anomalies, connectors, controllers, location updates, Cisco Spaces apps, enterprise integrations, partner integrations, Meraki networks, and support tickets.

Admin Management

The Admin Management feature enables you to invite and manage Cisco Spaces admin users. You can create and edit roles, assign permissions, and restrict user access to specific locations based on their role.

IoT Services

Cisco Spaces: IoT Services enables you to activate, claim, manage, monitor, and configure IoT devices using Cisco wireless and wired infrastructure. It supports IoT device management across vendors, form factors, and technology protocols. Bluetooth Low Energy (BLE) is supported for IoT device management, with additional device and gateway workflows available through IoT Services.

IoT Services uses Cisco Spaces, Cisco Spaces Connector, Cisco Catalyst 9800 Series Wireless Controllers, compatible Cisco access points, and supported switches to enable wireless and wired gateway activation, device onboarding, inventory management, monitoring, and device configuration.

For more information, refer to Cisco Spaces: IoT Service Configuration Guide (Wireless).

Setup

Use the Setup menu to manage and configure core Cisco Spaces infrastructure and platform services, including wireless and wired networks, locations and maps, sensors, cameras, Webex, pxGrid Cloud, data export, plugins, and device placement.

The Setup menu features are categorized as:

  • Network Connectivity:

    • Wireless Networks

    • Wired Network

  • Location and Physical Monitoring:

    • Locations & Maps

    • Sensors

    • Camera

  • Integrations and Management:

    • Webex

    • pxGrid Cloud

    • Data Export

    • Plugins

    • Device Placement

Map Service

Map Service enables you to upload the map of locations for Cisco CMX tethering.

User Profile

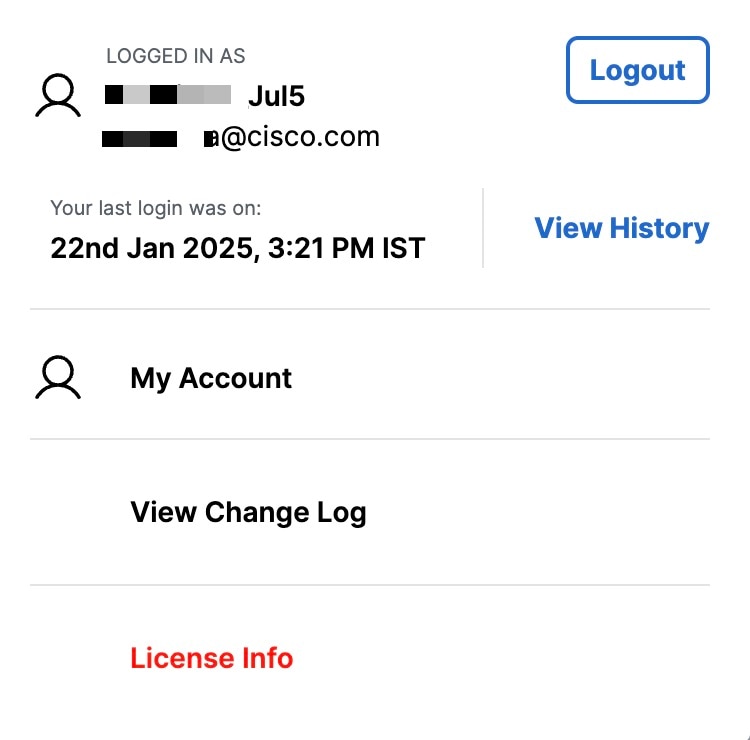
The User Profile option () in the top-right of the Cisco Spaces dashboard lets you view account, smart licenses and logout options.

Figure 9. User Profile

You can view the last login and timestamp details. Click View History to view the recent login attempts.

The User Profile feature includes the following options:

  • My Account: Click to display the My Account window. For more information, refer to Viewing Cisco Spaces Account Details.

  • View Change Log: Click to open the Change Log tab in the My Account window that displays the activity details of all the users in a particular account. For more information, refer to Viewing Cisco Spaces Account Details.

  • Activate Smart License: Click to activate Smart License. For more information, refer to Activate Smart License.

  • Logout: Click to log out from Cisco Spaces.

Viewing Cisco Spaces Account Details

Use the My Account window to view the Cisco Spaces profile details, account activity, and other account-related information. The My Account window has the following tabs:

  • My Profile: Displays the basic profile information such as first name, last name, email and mobile number.

  • Account Activity: Displays Recent Login details in a searchable table with columns for IP Address, Date, and Browser, with pagination controls at the bottom.

  • License Info: Displays the Cisco Spaces account information, access points limit and Smart Software License details. Click Link your Smart Account to activate Cisco Smart License.

  • Preferences: This tab includes the following options:

    • Add new domain: Click to add a new domain for SSO authentication.

    • Enable Support Access: Click this option to enable or disable access to their account to the Cisco Spaces support team. Enabling this option helps the Cisco Spaces support team to detect and debug issues under exceptional situations.


      Note


      • By default, the Enable Support Access option is enabled.

      • When access is enabled, the Cisco Spaces support team gets access to the customer's Cisco Spaces account.


  • Change Log: Displays a filterable table with Activity, Time, App, Section, and User columns, with rows-per-page and page navigation controls.

    The View Change Log feature (Profile icon > View Change Log > Change Log) helps you to track audit trail activities for the Cisco Spaces apps.

Cisco Smart License

Cisco Smart License is a flexible licensing model that streamlines how you activate and manage software. It helps you track license status and software usage trends.

Smart License support in Cisco Spaces allows you to view and manage the Cisco Spaces software license associated with your Cisco Smart Account. To enable Smart Licensing in Cisco Spaces, you must have a Smart Account configured in Cisco Smart Software Manager (CSSM).

In Cisco Spaces, choose Profile icon > Activate Smart License to start the activation workflow. You can also go to Profile icon > My Account > License Info and click Link Your Smart Account or Register for Smart Licensing, if shown.

Cisco Spaces can now display more detailed Smart License states during registration and post-registration review, including progress, completed, and unavailable statuses while the back end processes the entitlement lifecycle.


Note


To enable Smart Licensing in Cisco Spaces, you must have a Cisco Smart Account configured in CSSM. For more information, refer to Smart Software Licensing.


Verify Cisco Smart License Status

The purpose of this task is to verify the Cisco Smart License Status in the Cisco Smart Software Manager (CSSM).

Follow these steps to verify the Cisco Smart License Status.

Procedure


Step 1

Log in to CSSM.

Step 2

Identify the virtual account selected for Cisco Spaces.

Step 3

In CSSM, navigate to Virtual Account > Licenses and ensure that the correct SKUs are available for Cisco Spaces licenses.

The Cisco Spaces SKUs available determine the base license level. The base license is determined based on the SKUs purchased and available in the smart account. If you have multiple types of SKUs, SKU upgrades for specific locations are possible through Location Hierarchy providing the upgrades using Split Licensing.

The available entitlements in the Smart Account and Virtual Account determine which Cisco Spaces license levels can be activated or selected later in Cisco Spaces.

This includes:

  • ACT or ADVANTAGE

  • EXT or EXTEND

  • SMART_VENUES

  • SMART_OPERATIONS

  • SMART_OPERATIONS_BASE

  • UNLIMITED

  • PREMIER_W

  • PREMIER_CW

If multiple entitlement families are present, Cisco Spaces can also apply parent-child location precedence and split-licensing style behavior when license assignments are changed within the hierarchy.

Step 4

(Optional) Contact Cisco Spaces support team to downgrade the base license level.


Activate Smart License

Procedure


Step 1

Log in to Cisco Spaces.

Step 2

In the Cisco Spaces dashboard, choose Profile Icon () > Activate Smart License.

The Terms and Conditions window is displayed.

Step 3

Read the terms and condition statements and click Accept Terms and Condition.

The Smart Licensing Configuration window is displayed.

Step 4

If you already have a Cisco Smart Software Manager (CSSM) account, choose Yes, I have. If you do not have a CSSM account, choose No, I don't have and complete the account-creation flow before returning to this registration process.

Step 5

Click Next.

Step 6

Follow the on-screen instructions to create a token in the CSSM tool.

Note


Ensure that you copy the generated token to use the same in step 7.

Make sure the Product Instance Token is copied exactly as generated in CSSM. This token is used by Cisco Spaces to start Smart License registration against the selected Smart Account and Virtual Account.

Step 7

Click Next after you have generated the token.

Step 8

In the Product Instance Token field, paste the generated token.

Step 9

Click Register to register Cisco Spaces with your CSSM account.

A success notification message is displayed. You can view the Smart License Software registration details and license compliance information in the Profile icon > My Account > License Info

Note

 
  • After the Cisco Smart License activation, contact the Cisco Spaces support team to enable the trial support. If trial mode is enabled, the smart agent will not update the license usage to Cisco Smart License Management.

  • After you activate your Cisco Smart License, you can upgrade the base license level to match the licenses present in the linked Smart Account. To do this, choose Profile Icon > License Info > Select License. For more information, refer to Update License Information.

  • After the Cisco Smart License activation, contact the Cisco Spaces support team to downgrade the base license level.


Update License Information

Use License Support feature to manage onboarding, renewals/extensions, or to troubleshoot activation and entitlement visibility issues.

Use the License Info tab in the My Accounts window to manage your Cisco Spaces licenses. These licenses are available:

  • ADVANTAGE

  • EXTEND

  • SMART VENUES

  • SMART OPERATIONS

  • UNLIMITED

  • PREMIER

  • PREMIER (CW)


Note


For UNLIMITED, PREMIER, and PREMIER_CW, floor area can increase the calculated license quantity. If floor area is not defined, device counts are converted by the configured building-unit threshold instead.


Procedure


Step 1

Log in to Cisco Spaces.

Step 2

In the Cisco Spaces dashboard, choose Profile Icon () > My Account.

Step 3

In the My Account window, click the License Info tab.

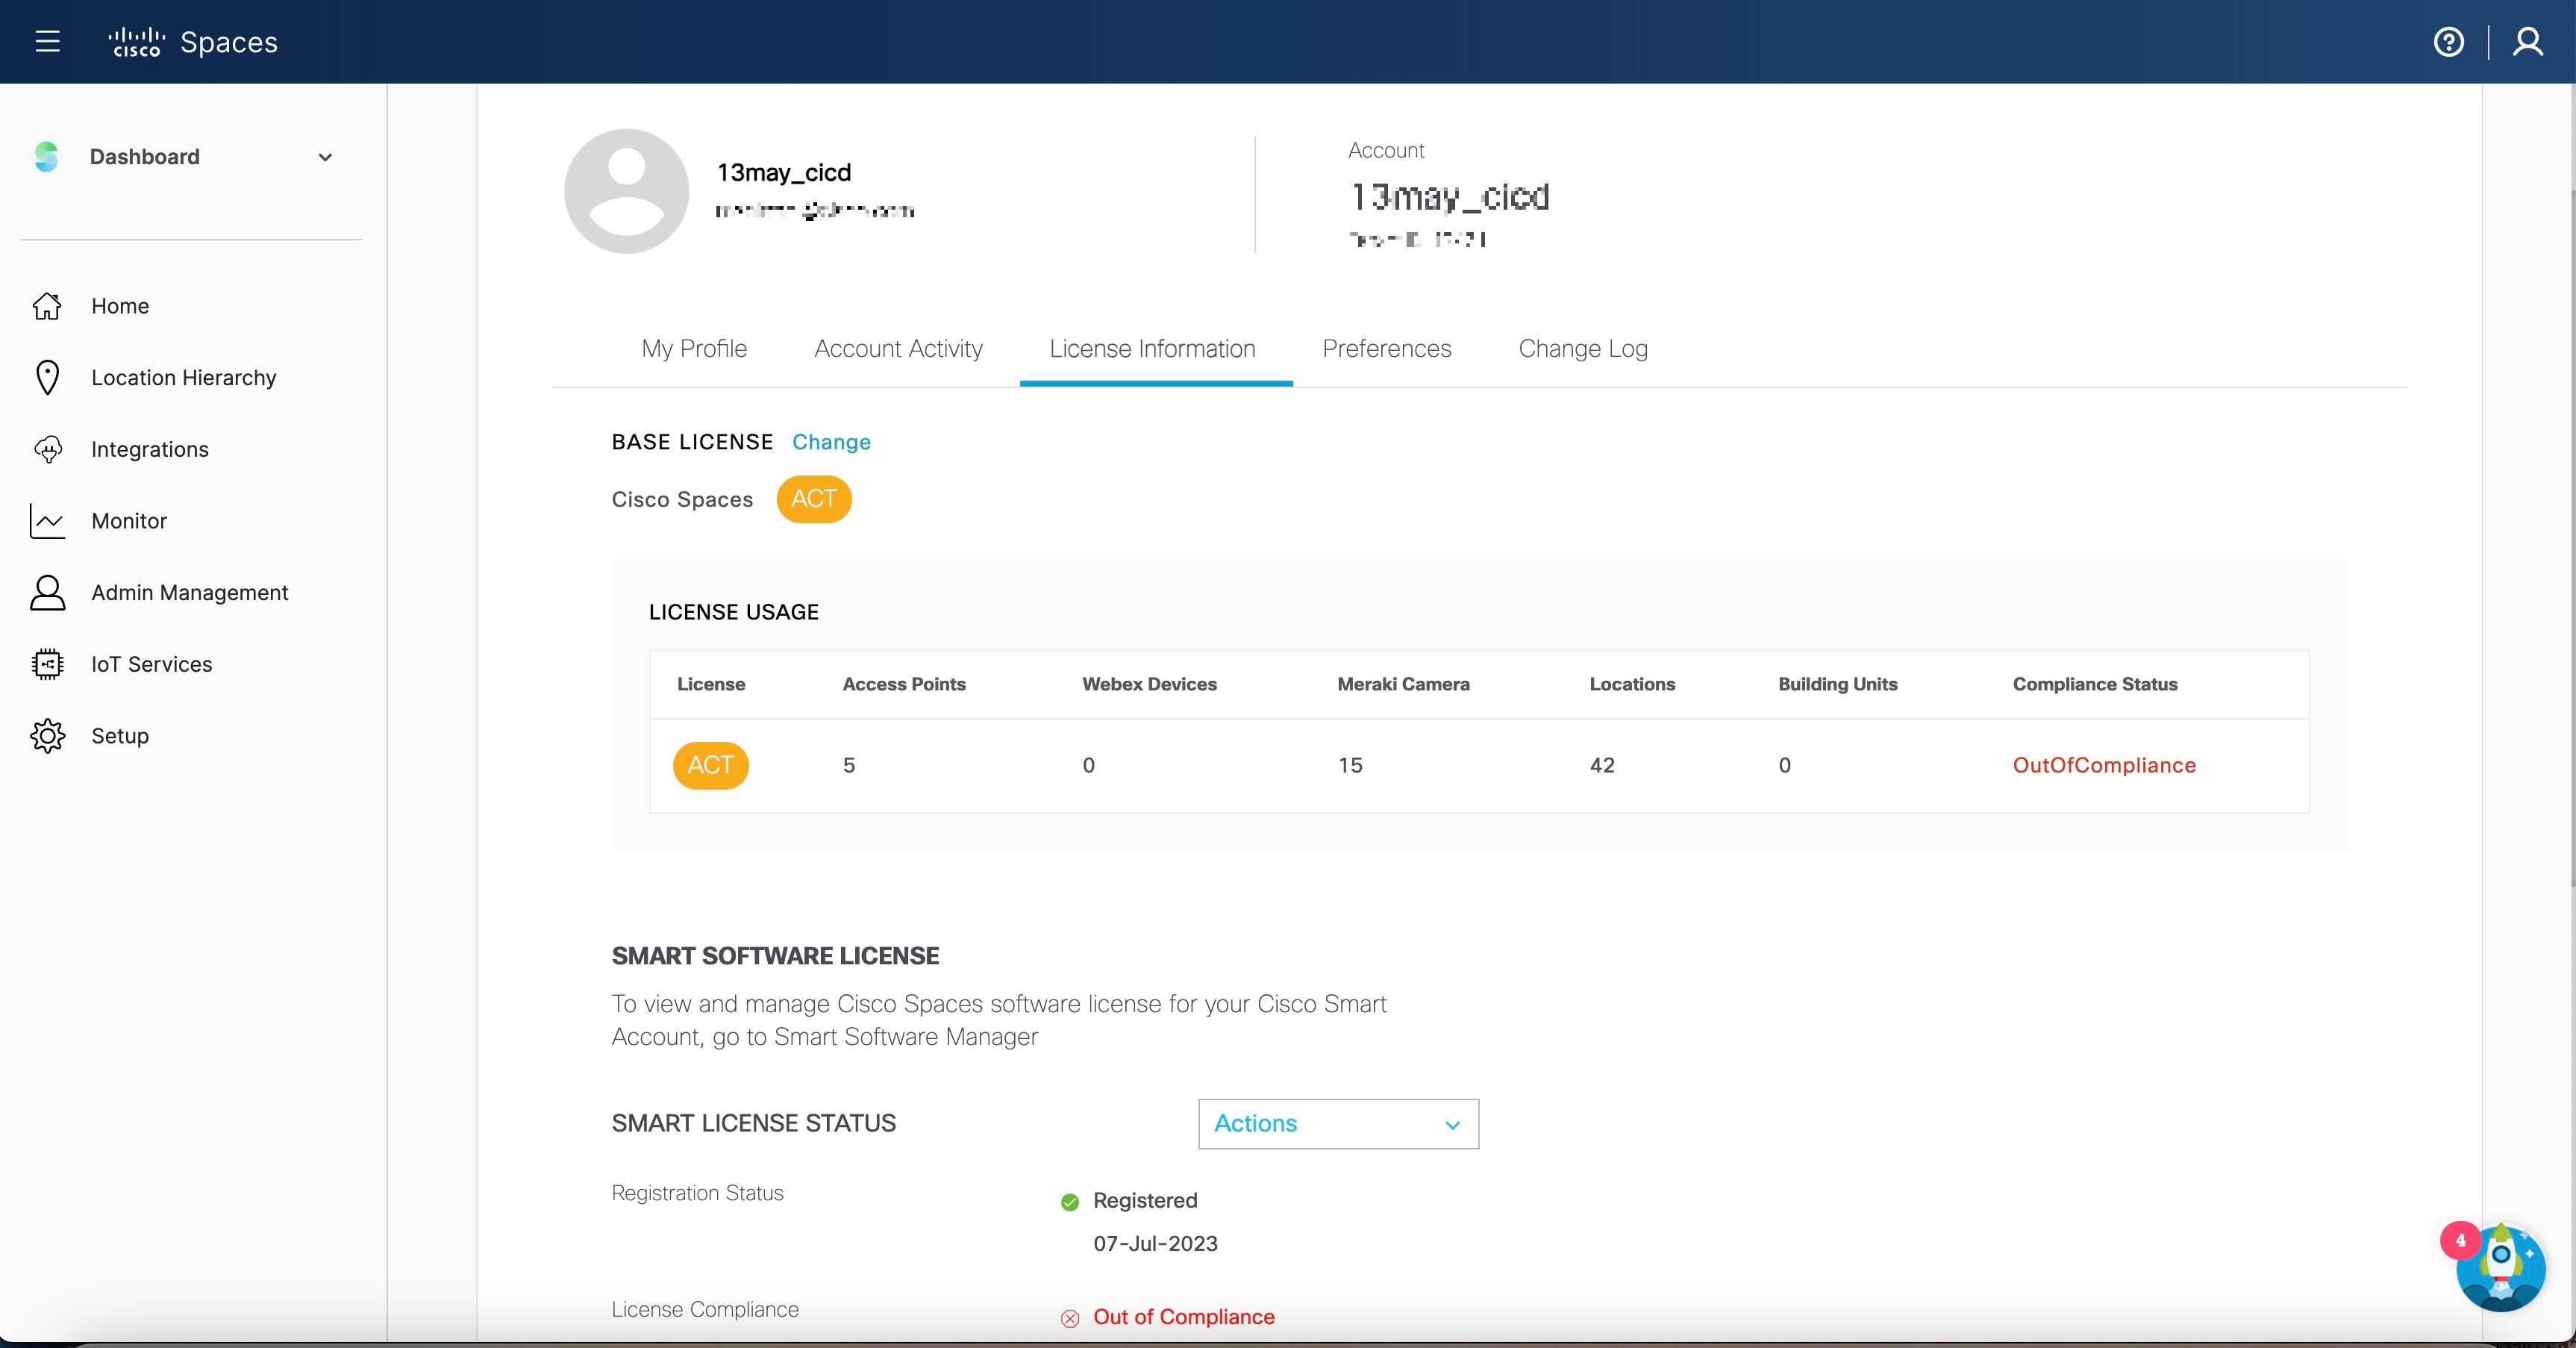
The LICENSE USAGE area displays the Cisco Spaces license details and compliance status.

Figure 10. License Usage

Step 4

To upgrade or change the license for your Cisco Spaces account, click Change.

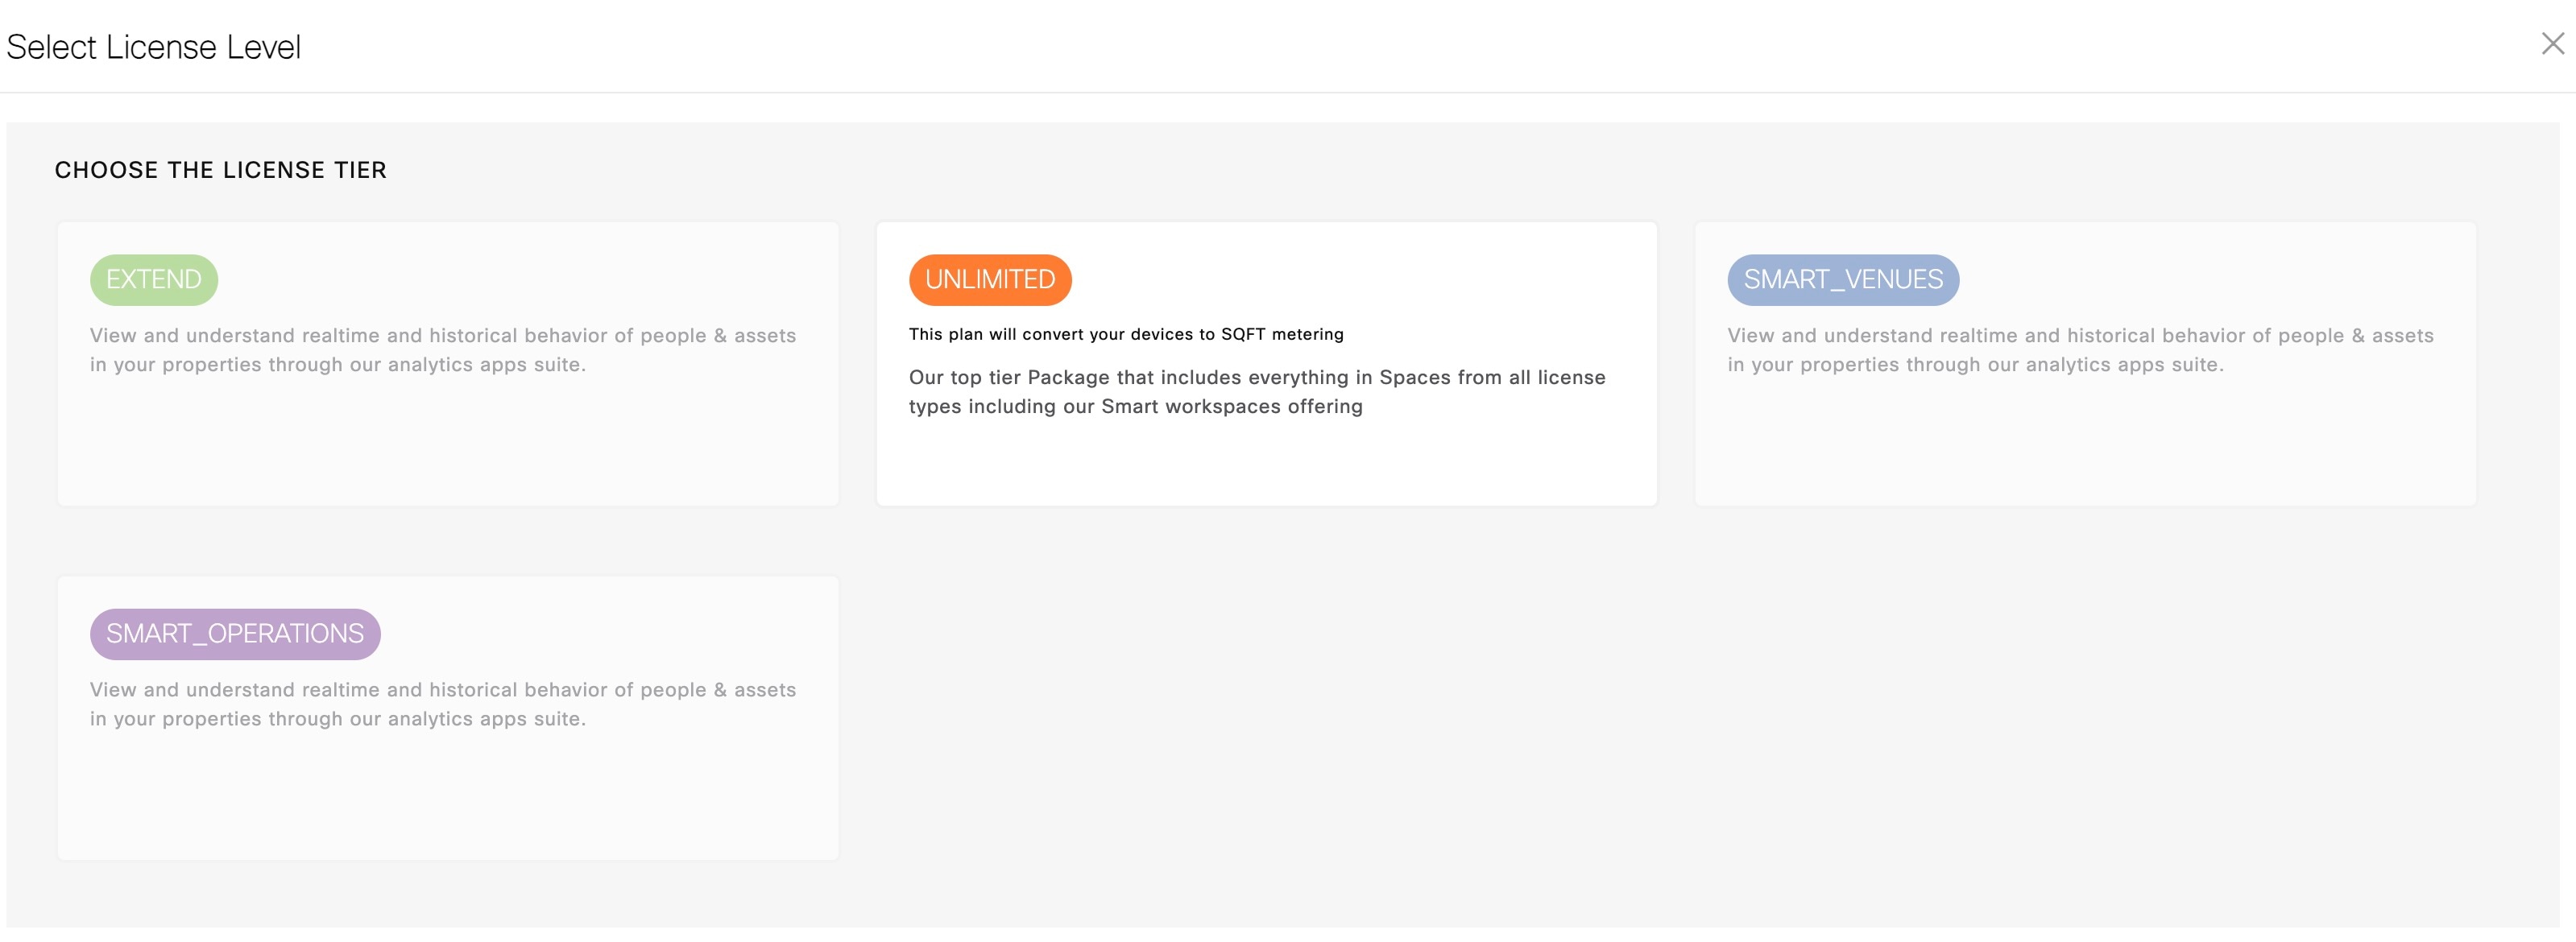
The Select License window is displayed. The current license detail is displayed in the top right of the window. The upgrade possibilities are enabled in the Select License window.

  1. Select the plan you would like to upgrade.

    A warning message is displayed with license upgrade information.

  2. Check the I accept the terms and conditions checkbox to proceed.

  3. Click Change Plan.

    Cisco Spaces displays a success notification message. You need to log out, and then log back in to Cisco Spaces to use the new license privileges.

Step 5

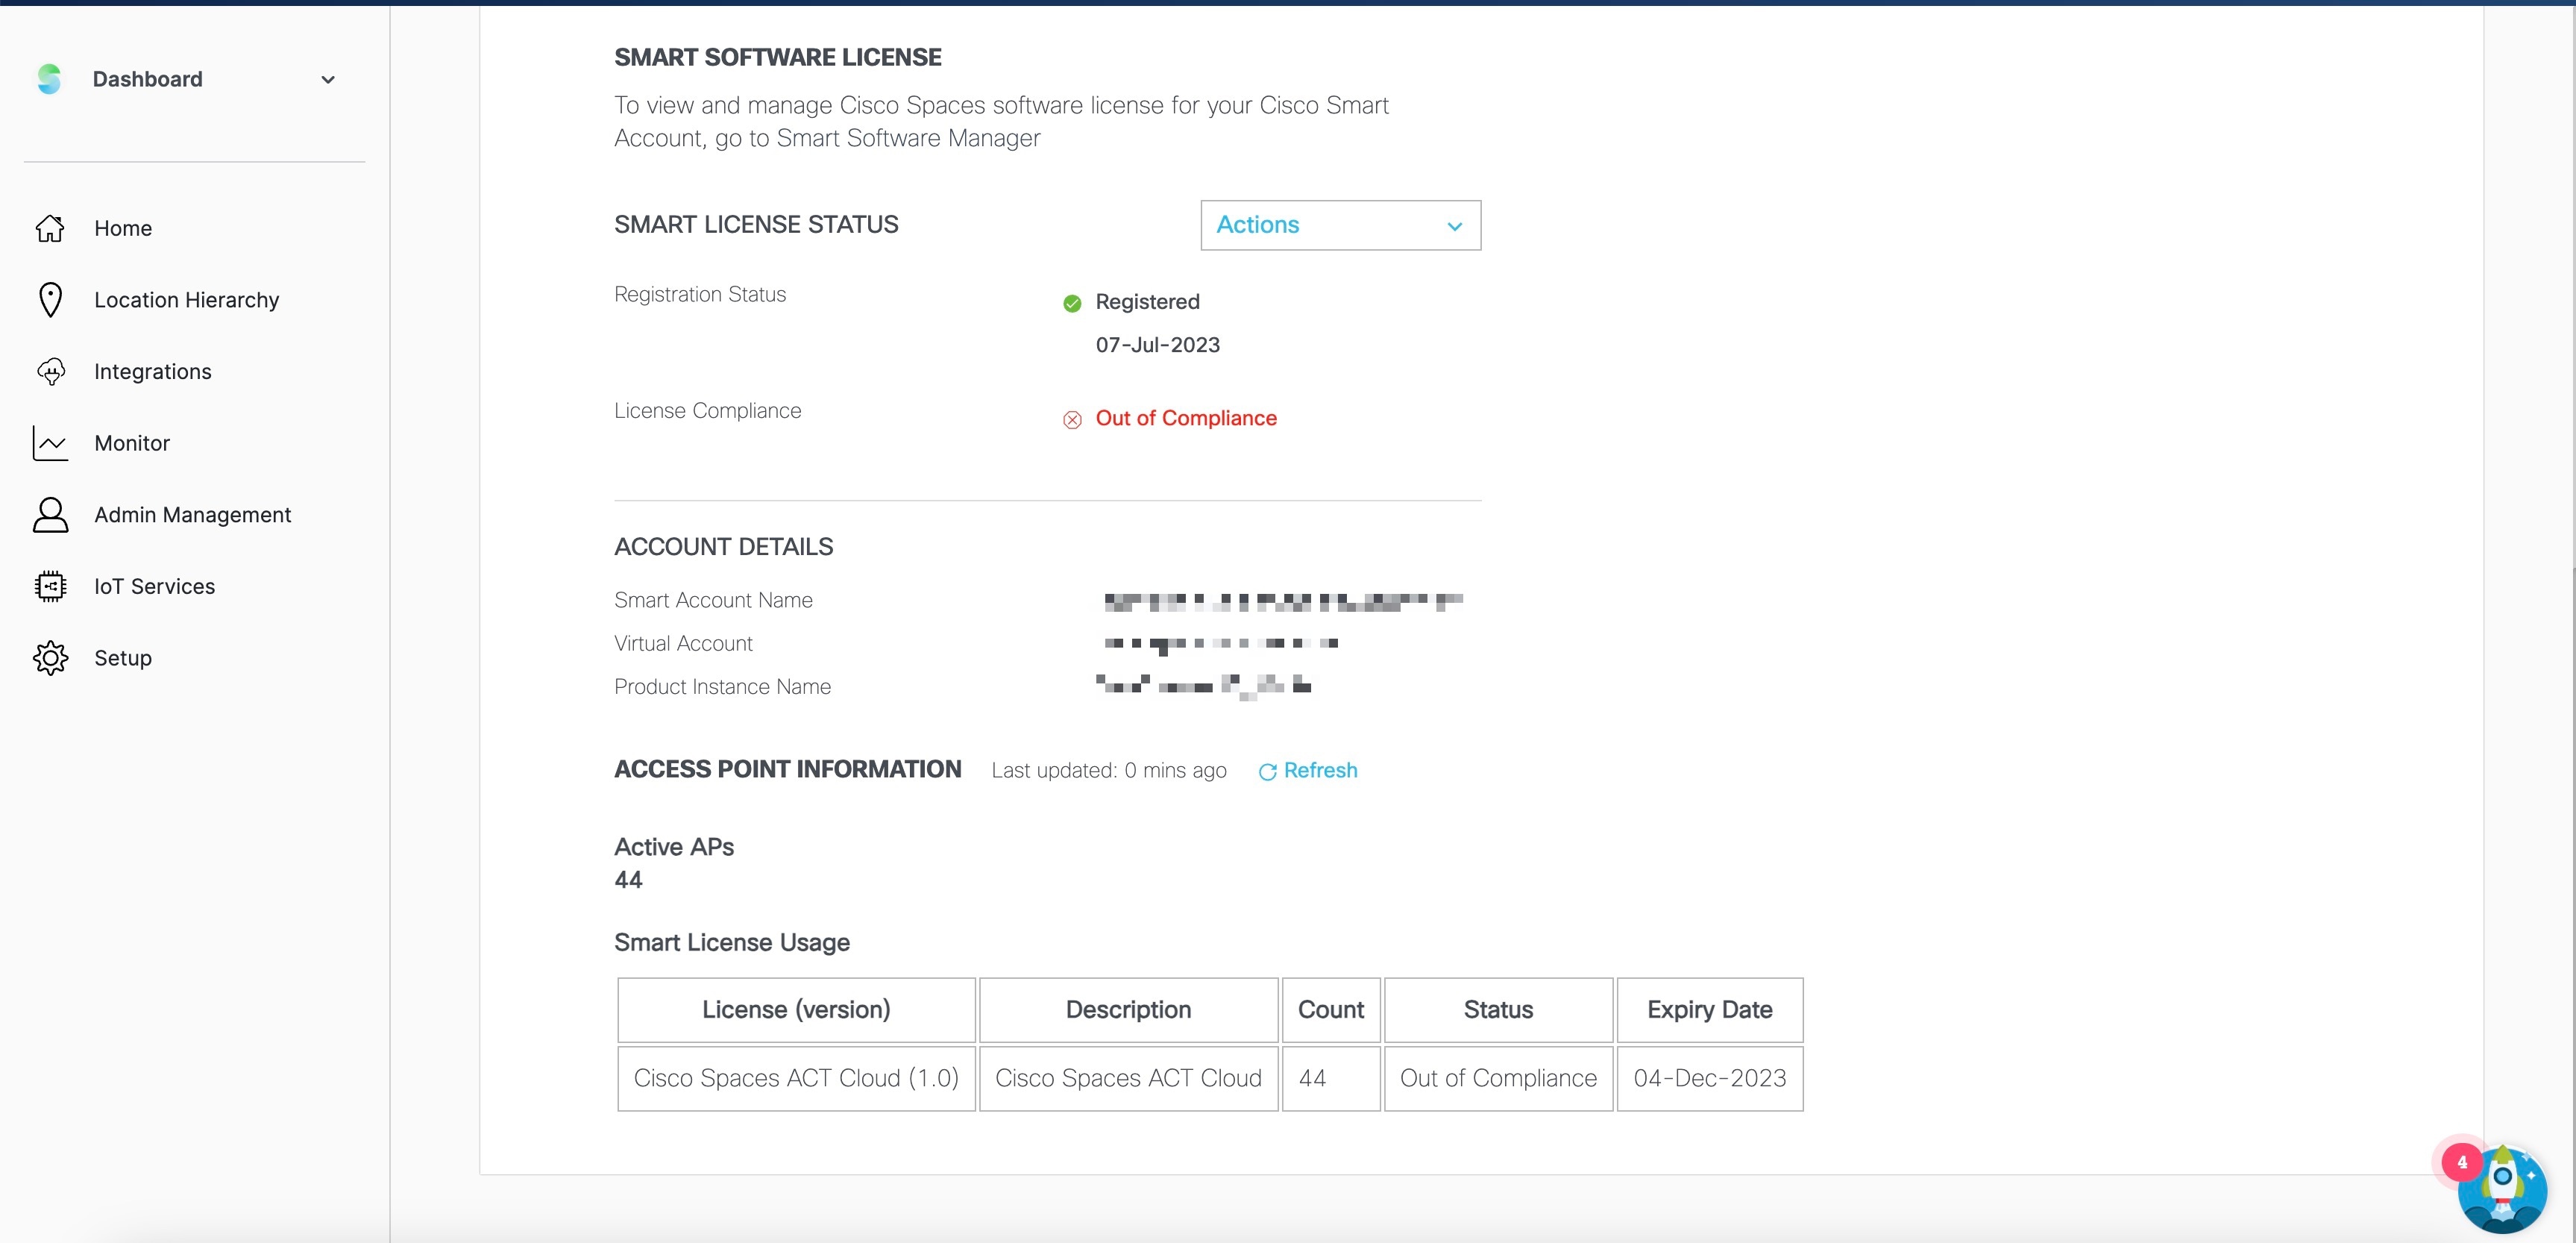
In the Smart License Status area, the following information is displayed:

Figure 11. Smart Software License
  • Registration Status: Displays the Cisco Spaces smart license registered status.

  • License Compliance: Displays the Cisco Spaces smart license compliance details. The compliance statuses available are: Init (Initiated), In Compliance and Out of Compliance.

    Note


    If the status indicates Out of Compliance, you cannot access the Cisco Spaces dashboard once the Smart Account licenses expire. However, Cisco Spaces will still allow access to the Cisco Spaces dashboard if the number of access points exceeds the license limit or the account is in an Out of Compliance status.

    In addition to the compliance states listed above, you can also track unavailable, deregistered, failed, and retry conditions during the registration lifecycle. The Smart Software License window also shows Refresh and Last updated information.

Step 6

Click Actions drop-down list to view these options:

  • Renew Authorization: Click to renew Cisco Spaces smart license authorization. Use Renew Authorization when you want Cisco Spaces to refresh the authorization view against CSSM after recent Smart Account changes.

    Note

     
    • This action is optional as renew authorization is performed automatically when Cisco Spaces communicates with CSSM. Alternatively, Smart License agent performs renew authorization automatically after every 30 days from backend.

    • We recommend that you perform this action if you want to troubleshoot or renew authorization manually if status is Out of Compliance. You also can renew authorization manually to reflect any recent Smart Account updates in Cisco Spaces.

  • Renew Registration: Click to renew Cisco Spaces smart license registration. Use Renew Registration when you want to renew the registration identity and certificate.

    Note

     
    • This action is optional as renew registration is performed by Cisco Spaces automatically in backend at the time of registration.

    • This action renews the Registration ID and Certificate with CSSM. Cisco Spaces performs this action automatically every 6 months from backend.

  • Re-register: Click to re-register Cisco Spaces smart license in the CSSM. Use Re-register only when you are ready to replace the existing registered instance.

    Note

     
    • This action forcefully re-registers Smart License and overrides any existing registered instance. This action results in reported data loss of that particular instance in Smart Account.

    • We recommend that you perform this action to troubleshoot Smart License.

  • De-register: Click to de-register Cisco Spaces smart license in the CSSM.

    Note


    We recommend that you perform this action if Cisco Spaces is not in use and you want to deregister the instance from CSSM.

Step 7

In the Account Details area, the following information is displayed:

  • Smart Account Name: Displays the Cisco Spaces smart license account name.

  • Virtual Account: Displays the Cisco Spaces virtual account name.

  • Product Instance Name: Displays the Cisco Spaces product instance name.

Use Refresh option to refresh the account details.

Note


Smart Account Name, Virtual Account, and Product Instance Name remain the key account-identification fields for the linked CSSM registration.

Step 8

In the Access Points area, the following information is displayed:

  • Active APs: Displays the number of active access points.

Step 9

In the Smart License Usage area, the following information is displayed:

  • License (Version): Displays the license version.

  • Description: Displays the license description.

  • Devices: Displays the device counts.

  • Status: Displays the license status.