Recording Screen
Available Languages
Table Of Contents
Beginning Recording Process Screen
Play Back Video Options Screen
Managing Recordings with Cisco Show and Share
Recording Screen
Revised: September, 2010, OL-21702-01The Recording Screen allows you to sign in on the Cisco TelePresence Recording Server (CTRS) to view, record, or delete videos. Your Recording Screen navigation options are described in the following sections:
•
Beginning Recording Process Screen
•
•
•
Recording Screen Sign-In
Figure 7-1 Recording Sign-In Screen
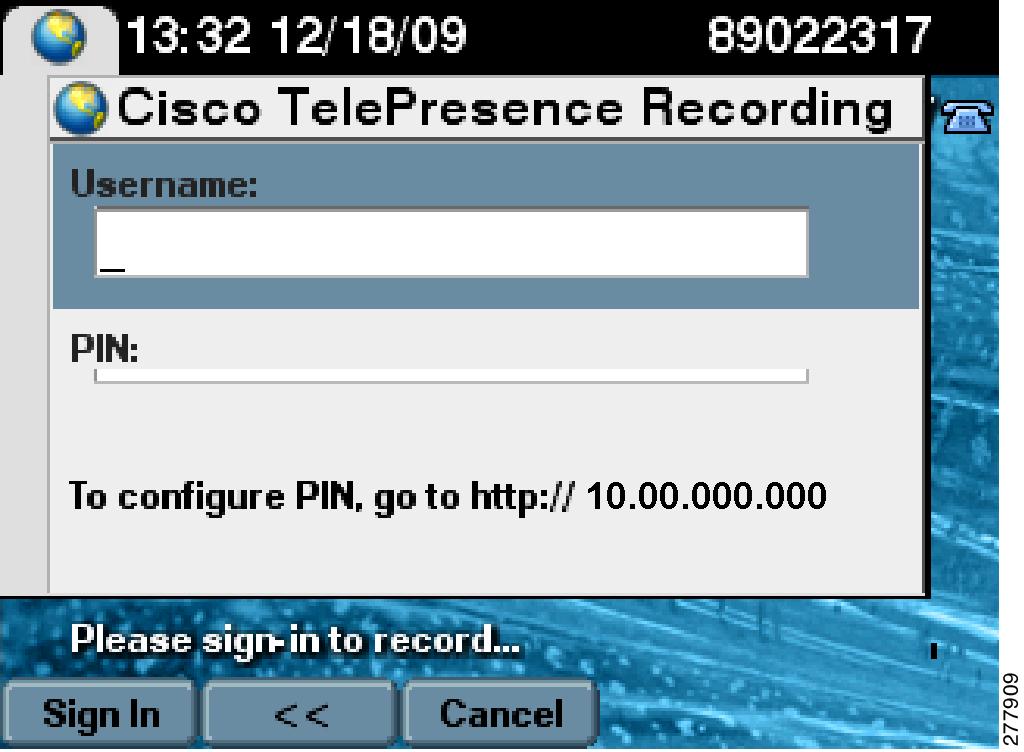
Table 7-1 shows available Recording Sign-In Screen softkeys.
Table 7-1 Recording Sign-In Screen Softkeys
Sign In
Enter your username and PIN number then touch Sign In. The Ready to Record Screen appears.
<<
Backspace command.
Exit
Exits the Screen.
Cancel
Cancels the current sign-in request.
Ready to Record Screen
Once you are signed in, the Ready to Record Screen allows you to begin recording.
Figure 7-2 Recording Screen

Table 7-2 shows available Ready to Record Screen buttons and softkeys.
Table 7-2 Ready to Record Screen Buttons and Softkeys
Record. Touch to begin recording.
Settings
Takes you to the Recording Settings Screen.
Sign Out
Signs you out of the Recording Screen.
Exit
Exits the Recording Screen.
Beginning Recording Process Screen
Figure 7-3 Beginning Recording Process
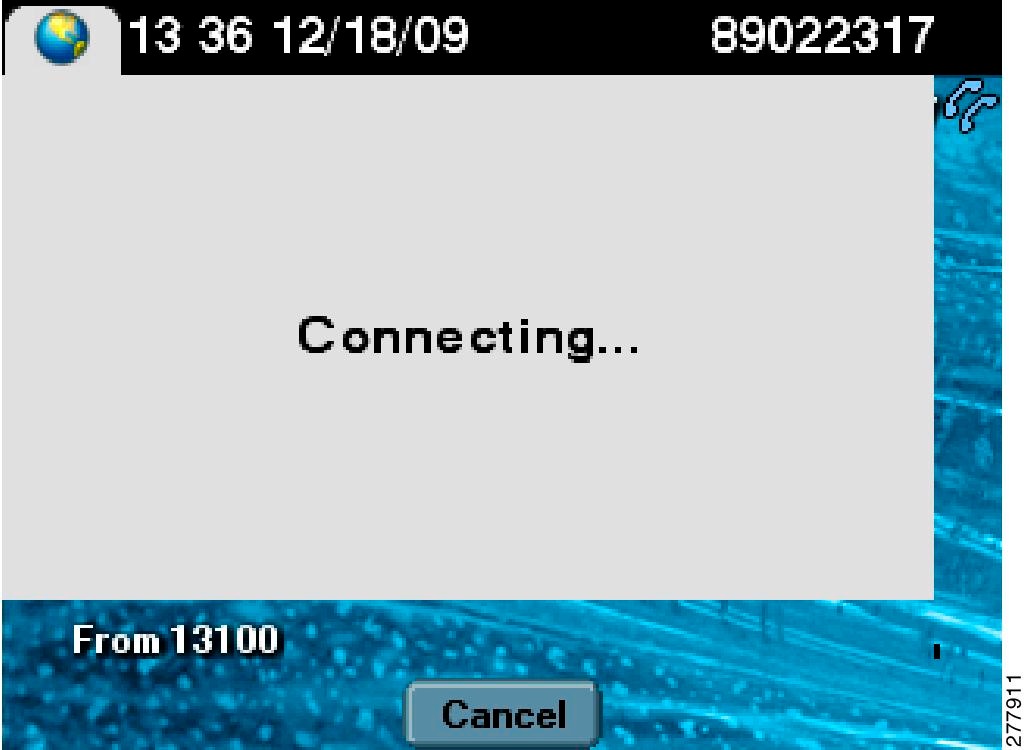
Table 7-3 shows available Beginning Recording Process Screen softkeys.
Table 7-3 Beginning Recording Process Screen Softkeys
Cancel
Cancels the recording initialization.
Recording in Progress Screen
Allows you to cancel the current in-progress recording.
Figure 7-4 Recording in Progress - Cancel Recording
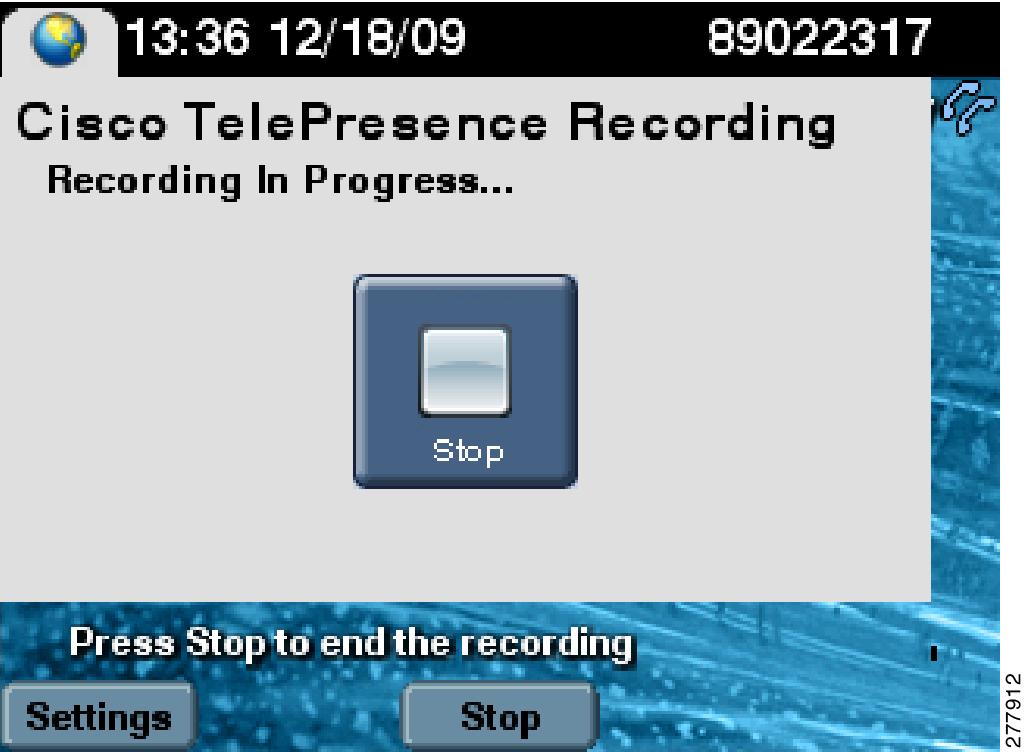
Table 7-4 shows available Recording in Progress Screen softkeys.
Table 7-4 Recording in Progress Screen Softkeys
Settings
Takes you to the Recording Settings Screen.
Stop
Stops the in-progress recording.
Recording Settings Screen
Allows you to manage recording settings.
Figure 7-5 Recording Settings Screen
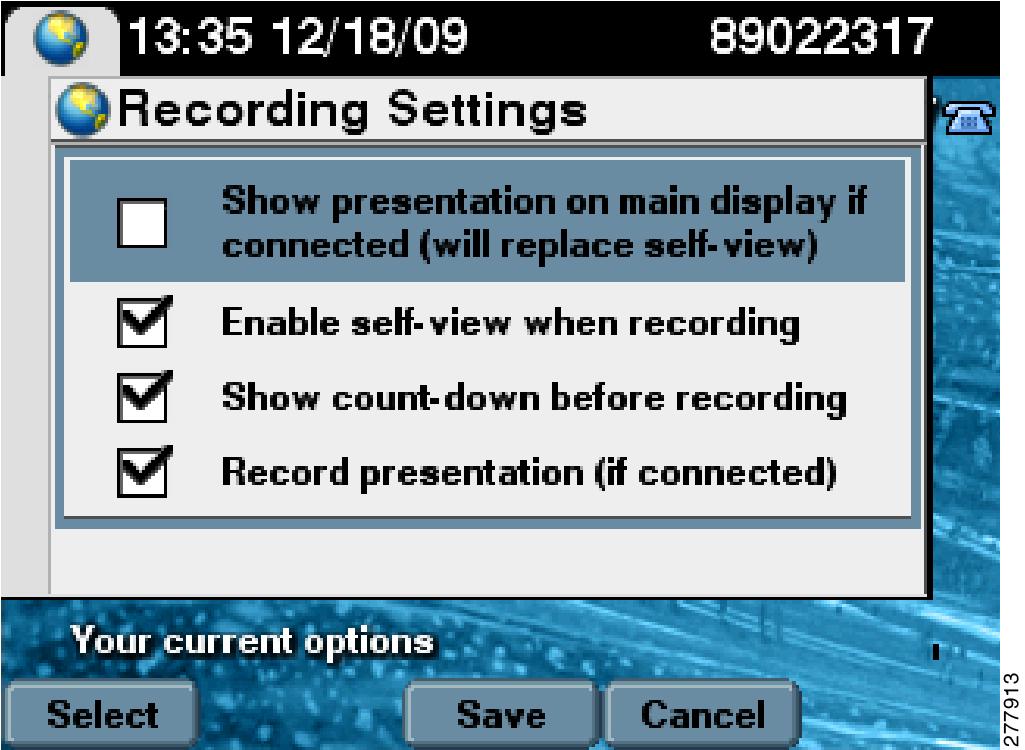
Table 7-5 shows available Recording Settings Screen softkeys.
Post Recording Options Screen
Allows you to view or delete the recently recorded video. This screen also allows you to record more videos.
Figure 7-6 Post Recording Options Screen
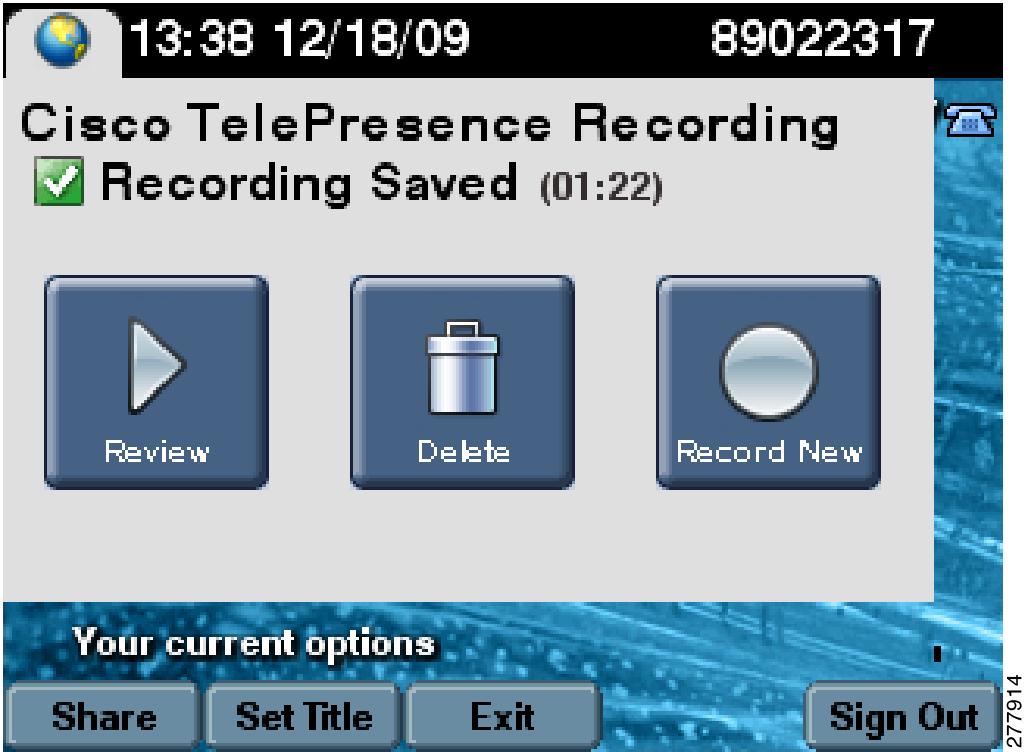
Table 7-6 shows available Post Recording Options Screen buttons and softkeys.
Table 7-6 Post Recording Options Screen Buttons and Softkeys
Review
Plays back the recently recorded video.
Delete
Deletes the recently recorded video.
Record
Records a new video.
Share
Takes you to the Share Video Screen.
Set Title
Sets the video title.
Save To
Saves a recording to the Show and Share feature. See Managing Recordings with Cisco Show and Share.
Exit
Exits the current screen and takes you to the Ready to Record Screen.
Play Back Video Options Screen
Allows you to play back the current video, skip (rewind) certain video segments, stop at certain video segments (pause), or skip (fast forward) certain segments.
Figure 7-7 Play Back Video Options Screen
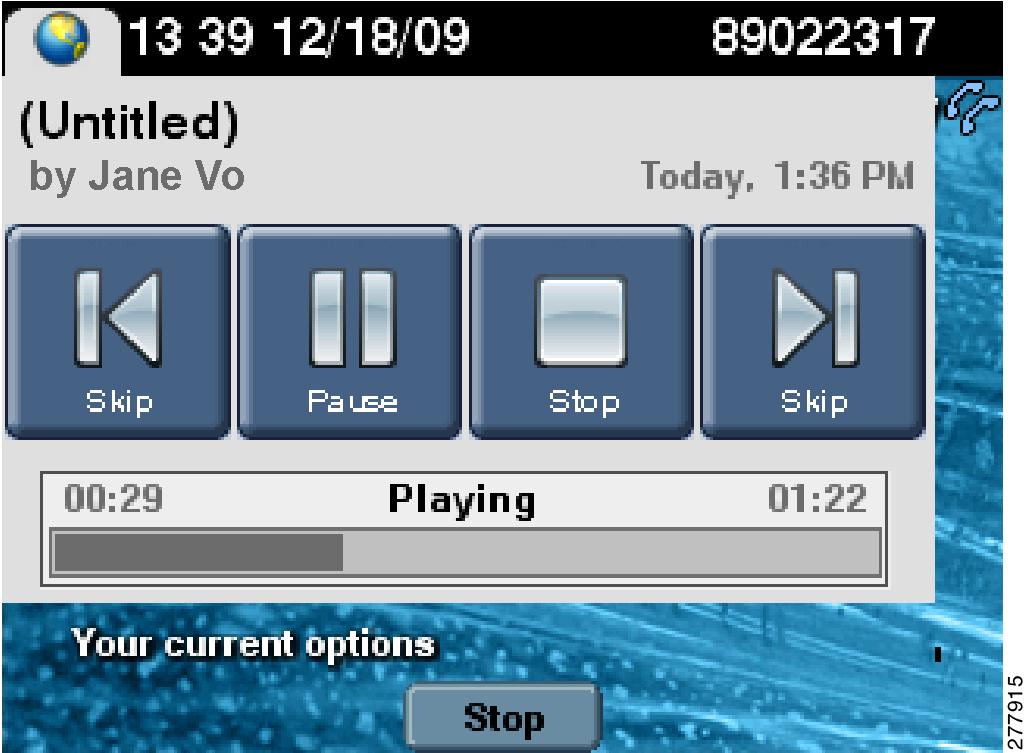
Table 7-7 shows available Play Back Video Options Screen buttons and softkeys.
Managing Recordings with Cisco Show and Share
If your Cisco TelePresence network administrator has configured Cisco Show and Share as your enterprise video portal, you can immediately publish your recording or save a draft to Cisco Show and Share from the CTS Cisco Unified IP phone.
After you touch the Stop icon to end recording, you have several options available from the Cisco Unified IP phone (see the "Post Recording Options Screen" section for these options).
With Cisco Show and Share in your network, you have one additional option: Save To, as shown in Figure 7-8.
Figure 7-8 Cisco Show and Share Option

To save a recording to Show and Share, follow these steps:
Step 1
Figure 7-9 Cisco Unified IP Phone: Save Video To

Step 2
•
•
Step 3
Figure 7-10 Cisco Unified IP Phone: Set Video Title

Step 4
To access your recording on the Show and Share video portal, enter the URL on the Saving Video screen into a browser on your computer.
Figure 7-11 Cisco Unified IP Phone: Saving Video

Related Information
See the following resources for more information:
•
•
•
 Feedback
Contact Cisco
- Open a Support Case

- (Requires a Cisco Service Contract)
This Document Applies to These Products
- Collaboration Endpoints - Retired Products
- Conferencing - Retired Products
- Contact Center - Retired Products
- Optical Networking - Retired Products
- Routers - Retired Products
- Security - Retired Products
- Servers - Unified Computing (UCS) Retired Products
- Storage Networking Retired Products
- Switches - Retired Products
- Video - Retired Products
- Wireless - Retired Products