Creating Self-Sign certificates
Available Languages
Table Of Contents
Provisioning Self-Sign Certificates
Generating and Installing Self-Signed Certificates
Editing SSL Settings in Cisco Fabric Manager Web Client
Provisioning Self-Sign Certificates
The Secure Socket Layer (SSL) protocol secures the network communication and allows data to be encrypted before transmission and provides security. Many application servers and Web servers support the use of keystores for SSL configuration.
This appendix also includes information on how to select the RSA Key Manager.
This appendix includes the following sections:
•
Generating and Installing Self-Signed Certificates
•
Configuring SSL for SME
A certificate is an electronic document that you use to identify a server, a company, or some other entity and to associate that identity with a public key.
Certificate authority (CA) are entities that validate identities and issue certificates. The certificate that the CA issues binds a particular public key to the name of the entity that the certificate identifies (such as the name of a server or device). Only the public key that the certificate certifies works with the corresponding private key that is possessed by the entity that the certificate identifies. Certificates help prevent the use of fake public keys for impersonation.
You must install a third-party tool such as the OpenSSL application to generate a certificate request. In Windows, by default, openssl.exe is located at c:\openssl\bin.
Before configuring the SSL, consider the following:
•
•
•
This section describes the following topics:
Creating CA Certificates
Before creating the CA certificates, download OpenSSL for Windows from the following link:
http://gnuwin32.sourceforge.net/packages/openssl.htm
To generate the CA certificates, follow these steps:
Step 1
OpenSSL> req -x509 -days 365 -newkey rsa:1024 -out cacert.pem -outform PEM -config openssl.conf
This creates a cacert.pem file in the directory with OpenSSL.exe.

Note
C:\Program Files\GnuWin32\share
Step 2
switch# config tEnter configuration commands, one per line. End with CNTL/Z.Step 3
switch(config)#crypto ca trustpoint my_caStep 4
switch(config-trustpoint)# rsakeypair my_ca_keyStep 5
switch(config-trustpoint)# exitStep 6
switch(config)# crypto ca authenticate my_cainput (cut & paste) CA certificate (chain) in PEM format;end the input with a line containing only END OF INPUT :----BEGIN CERTIFICATE----MIIDnjCCAwegAwIBAgIBADANBgkqhkiG9w0BAQQFADCBlzELMAkGA1UEBhMCVVMxEzARBgNVBAgTCkNhbGlmb3JuaWExETAPBgNVBAcTCFNhbiBKb3NlMRowGAYDVQQKExFDaXNjbyBTeXN0ZW1zIEluYzEOMAwGA1UECxMFRGV2ZWwxETAPBgNVBAMTCG1hbWFzc2V5MSEwHwYJKoZIhvcNAQkBFhJtYW1hc3NleUBjaXNjby5jb20wHhcNMDcxMTIyMDgzNDM1WhcNMDgxMTIxMDgzNDM1WjCBlzELMAkGA1UEBhMCVVMxEzARBgNVBAgTCkNhbGlmb3JuaWExETAPBgNVBAcTCFNhbiBKb3NlMRowGAYDVQQKExFDaXNjbyBTeXN0ZW1zIEluYzEOMAwGA1UECxMFRGV2ZWwxETAPBgNVBAMTCG1hbWFzc2V5MSEwHwYJKoZIhvcNAQkBFhJtYW1hc3NleUBjaXNjby5jb20wgZ8wDQYJKoZIhvcNAQEBBQADgY0AMIGJAoGBAMbZAv0+Ka/FS3/jwdaqItc8Ow3alpw9gyqEzA3uFLjNtXSfHRu9OsrP5tliHHlJP+fezeAUuVfmMTPrOIxURcF2c7Yq1Ux5s4Ua3cMGf9BGYBRbhO8Filt2mGDqY5u0mJY+eViR69MZk8Ouj+gRxQq83fB8MqJG39f1BedRcZLBAgMBAAGjgfcwgfQwHQYDVR0OBBYEFGXsBg7f7FJcL/741j+M2dgI7rIyMIHEBgNVHSMEgbwwgbmAFGXsBg7f7FJcL/741j+M2dgI7rIyoYGdpIGaMIGXMQswCQYDVQQGEwJVUzETMBEGA1UECBMKQ2FsaWZvcm5pYTERMA8GA1UEBxMIU2FuIEpvc2UxGjAYBgNVBAoTEUNpc2NvIFN5c3RlbXMgSW5jMQ4wDAYDVQQLEwVEZXZlbDERMA8GA1UEAxMIbWFtYXNzZXkxITAfBgkqhkiG9w0BCQEWEm1hbWFzc2V5QGNpc2NvLmNvbYIBADAMBgNVHRMEBTADAQH/MA0GCSqGSIb3DQEBBAUAA4GBAFmDucZlBZFJk09IihEm5wd4oouxHsKPQroyG/CYShv1XXAyEGytxuCAITDzMq2IJiFbZt0kIiyuP9YRQLNRz47G4IRJGp5J2HnOc2cdF8Mc0DDApdgndUiIX/lv7vuQfyxqX45oSncwQct3y38/FPEbcRgZgnOgwcrqBzKV0Y3+----END CERTIFICATE----END OF INPUTFingerprint(s): MD5 Fingerprint=1E:18:10:69:7B:C1:CC:EA:82:08:67:FB:90:7D:58:EBDo you accept this certificate? [yes/no]:yesStep 7
switch(config)# crypto ca enroll my_caCreate a challenge password. You will need to verbally provide thispassword to the CA Administrator in order to revoke your certificate.For security reasons your password will not be saved in the configuration.Please make a note of it.Password:nbv123The subject name in the certificate will be: ips-vegas8.cisco.comInclude the switch serial number in the subject name? [yes/no]:noInclude an IP address in the subject name [yes/no]:noThe certificate request will be displayed...----BEGIN CERTIFICATE REQUEST----MIIBJTCB0AIBADAfMR0wGwYDVQQDExRpcHMtdmVnYXM4LmNpc2NvLmNvbTBcMA0GCSqGSIb3DQEBAQUAA0sAMEgCQQCeAzv5w9d32YpPfYdNYoFjOW0yRVbYEe+mNHi8b2VPOVZ6UOFdhIS1Im0/Xv1Bpcuy4TRktu7whNyyvvu3niVdAgMBAAGgTDAVBgkqhkiG9w0BCQcxCBMGbmJ2MTIzMDMGCSqGSIb3DQEJDjEmMCQwIgYDVR0RAQH/BBgwFoIUaXBzLXZlZ2FzOC5jaXNjby5jb20wDQYJKoZIhvcNAQEEBQADQQBzPcKE3EjeTjODnPXNkz1WsU3oUdsuxOT/m1OSBZvhBfHICQZZpfS2ILqaQP16LiZCZydHWViNQ+9LmHUZ4BDG----END CERTIFICATE REQUEST----switch(config)#Step 8
Ensure that you include the BEGIN CERTIFICATE REQUEST and END CERTIFICATE REQUEST lines in the file content.
Step 9
OpenSSL> x509 -req -days 365 -in switch.csr -CA cacert.pem -CAkey privkey.pem -set_serial 01 -out switch.pem
Step 10
switch(config)# crypto ca import my_ca certificateinput (cut & paste) certificate in PEM format:----BEGIN CERTIFICATE----MIIB4jCCAUsCAQEwDQYJKoZIhvcNAQEEBQAwgZcxCzAJBgNVBAYTAlVTMRMwEQYDVQQIEwpDYWxpZm9ybmlhMREwDwYDVQQHEwhTYW4gSm9zZTEaMBgGA1UEChMRQ2lzY28gU3lzdGVtcyBJbmMxDjAMBgNVBAsTBURldmVsMREwDwYDVQQDEwhtYW1hc3NleTEhMB8GCSqGSIb3DQEJARYSbWFtYXNzZXlAY2lzY28uY29tMB4XDTA3MTIxNDAyMzIzOVoXDTA4MTIxMzAyMzIzOVowHzEdMBsGA1UEAxMUaXBzLXZlZ2FzOC5jaXNjby5jb20wXDANBgkqhkiG9w0BAQEFAANLADBIAkEAngM7+cPXd9mKT32HTWKBYzltMkVW2BHvpjR4vG9lTzlWelDhXYSEtSJtP179QaXLsuE0ZLbu8ITcsr77t54lXQIDAQABMA0GCSqGSIb3DQEBBAUAA4GBAKR3WAAF/9zMb2u9A42I2cB2G5lucSzndc4P+O4sYZF5pBt7UpyAs1GKAqivGXVq2FJ2JetX78Fqy7jYCzanWm0tck0/G1dSfr/XlCFXUuVed9de02yqxARSEx8mX4ifqzYHErHdbi+vDAaMzkUEvHWthOuUZ7fvpoNH+xhRAuBo----END CERTIFICATE----Step 11
Generating KMC Certificate
To generate the KMC server certificate, follow these steps:
Step 1
OpenSSL> genrsa -out sme_kmc_server.key 1024
OpenSSL> req -new -key sme_kmc_server.key -out sme_kmc_server.csr -config openssl.conf
OpenSSL> x509 -req -days 365 -in sme_kmc_server.csr -CA cacert.pem -CAkey privkey.pem -CAcreateserial -out sme_kmc_server.cert
OpenSSL> pkcs12 -export -in sme_kmc_server.cert -inkey sme_kmc_server.key -out sme_kmc_server.p12
Note
C:\Program Files\GnuWin32\share
Step 2
"C:\Program Files\Java\jre1.6.0_02\bin\keytool.exe" -importkeystore -srckeystore sme_kmc_server.p12 -srcstoretype PKCS12 -destkeystore sme_kmc_server.jks -deststoretype JKS
Note
Step 3
"C:\Program Files\Java\jre1.6.0_02\bin\keytool.exe" -importcert -file cacert.pem -keystore sme_kmc_trust.jks -storetype JKS
Step 4
Step 5
Step 6
Note
Generating and Installing Self-Signed Certificates
To configure SSL when KMC is not integrated with Fabric Manager server, follow these steps:
Step 1
switch:./createSmeCerts.tclUsage: ./createSmeCerts.tcl [r] [k] [s] [a] [h]r Generate Root CA certificatek Generate KMC server certificates Generate Switch certificate and configure switch trust pointa Generate all certificates and configure switchh Print this usage screenUsage: ./createSmeCerts.tcl [r] [k] [s] [a] [h]r Generate Root CA certificatek Generate KMC server certificates Generate Switch certificate and configure switch trust pointa Generate all certificates and configure switchh Print this usage screenswitch:./createSmeCerts.tcl aDir to store certificates [] :.Openssl path [/usr/bin] :RootCA CN [RootCA] :SMECATrust Pass Phrase [nbv123] :nbv123Certificate Validity days [365] :1024Trust point name [sme_ca] :Generating CA certificate ...Generated CA certificate /users/filename1/SSL script/./cacert.pemCreate switch certificate and configure trustpoint ...Switch IP [] :switchnameusername [] :adminpassword [] :Created certificate and configured trustpoint for switch: ips-hac4Do you want to configure another switch? (y/n) [n] :nGenerating KMC certificate ...KMC Common Name [] :KMCGenerated KMC certificate: /users/filename1/SSL script/./sme_KMC_server.p12switch:./createSmeCerts.tcl kDir where RootCA certificate is stored [] :.Reading properties from /users/filename1/SSL script/./sme_cert.propertiesGenerating KMC certificate ...KMC Common Name [] :FMGenerated KMC certificate: /users/filename1/SSL script/./sme_FM_server.p12switch:lscacert.pem openssl_FM.conf sme_FM_server.cert sme_KMC_server.csrcacert.srl openssl_KMC.conf sme_FM_server.csr sme_KMC_server.keycreateSmeCerts.tcl* privkey.pem sme_FM_server.key sme_KMC_server.p12createSmeCerts.tcl.orig* README* sme_FM_server.p12 sw_ips.csropenssl.conf sme_cert.properties sme_KMC_server.cert sw_ips.pemswitch:Step 2
"C:\Program Files\Java\jre1.6.0_02\bin\keytool.exe" -importkeystore -srckeystore
sme_KMC_server.p12 -srcstoretype PKCS12 -destkeystore sme_kmc_server.jks -deststoretype
JKS
"C:\Program Files\Java\jre1.6.0_02\bin\keytool.exe" -importkeystore -srckeystore sme_FM_server.p12 -srcstoretype PKCS12 -destkeystore sme_fm_server.jks -deststoretype JKS"C:\Program Files\Java\jre1.6.0_02\bin\keytool.exe" -importcert -file cacert.pem -keystore sme_kmc_trust.jks -storetype JKS"C:\Program Files\Java\jre1.6.0_02\bin\keytool.exe" -importcert -file cacert.pem -keystore fmtrust.jks -storetype JKSStep 3
Copy sme_fm_server.jks to <FMINSTALL>/jboss/server/default/conf/fmserver.jksCopy fmtrust.jks to <FMINSTALL>/jboss/server/default/conf/fmtrust.jksGo to <FMInstall>/binRun ./Encrypter.sh sslEdit <FMInstall>/conf/server.properties; set useSSL=trueStep 4
Copy sme_kmc_server.jks to <FMINSTALL>/conf/cert/sme_kmc_server.jksCopy sme_kmc_trust.jks to <FMINSTALL>/conf/cert/sme_kmc_trust.jksCopy sme_kmc_server.jks to <FMINSTALL>/jboss/server/default/conf/fmserver.jksCopy fmtrust.jks to <FMINSTALL>/jboss/server/default/conf/fmtrust.jksGo to <FMInstall>/binRun ./Encrypter.sh sslEdit <FMInstall>/conf/server.properties; set useSSL=trueGo to Key Manager settings tab in SME tab on web client. In KMC SSL settings selectsme_kmc_trust.jks as KMC trust and sme_kmc_server.jks as KMC server certificate
Editing SSL Settings in Cisco Fabric Manager Web Client
You can edit the SSL settings if you chose the Cisco Key Manager.
To edit the SSL settings in the SME wizard, follow these steps:
Step 1
Step 2
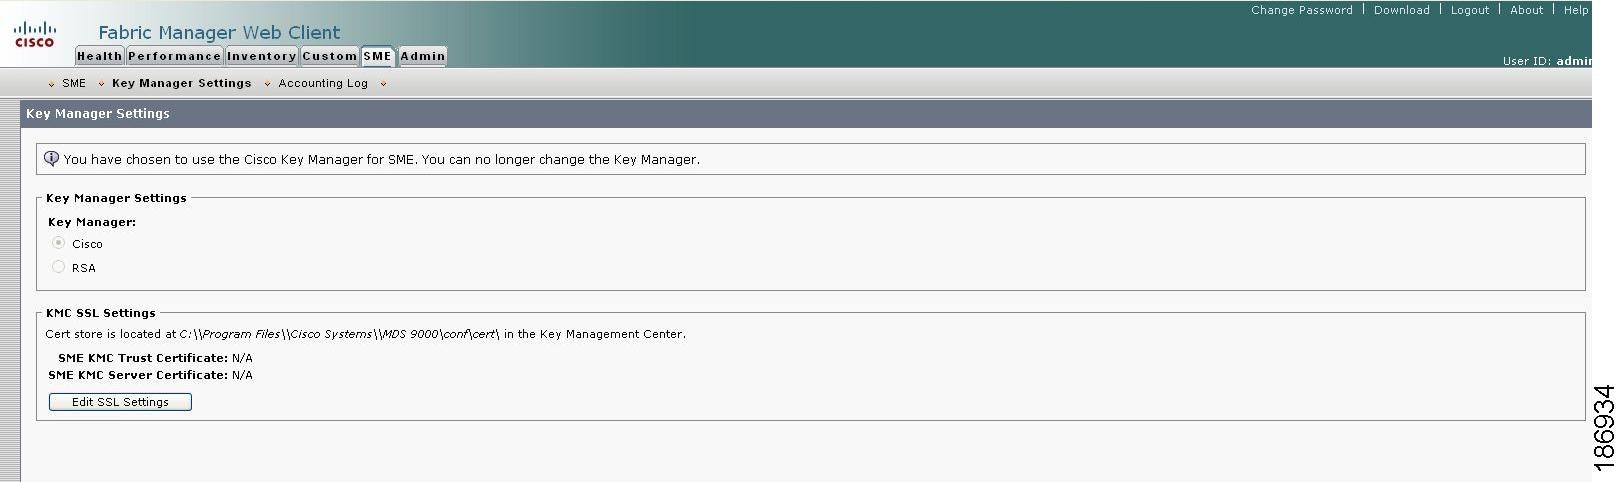
Step 3
Step 4
Note
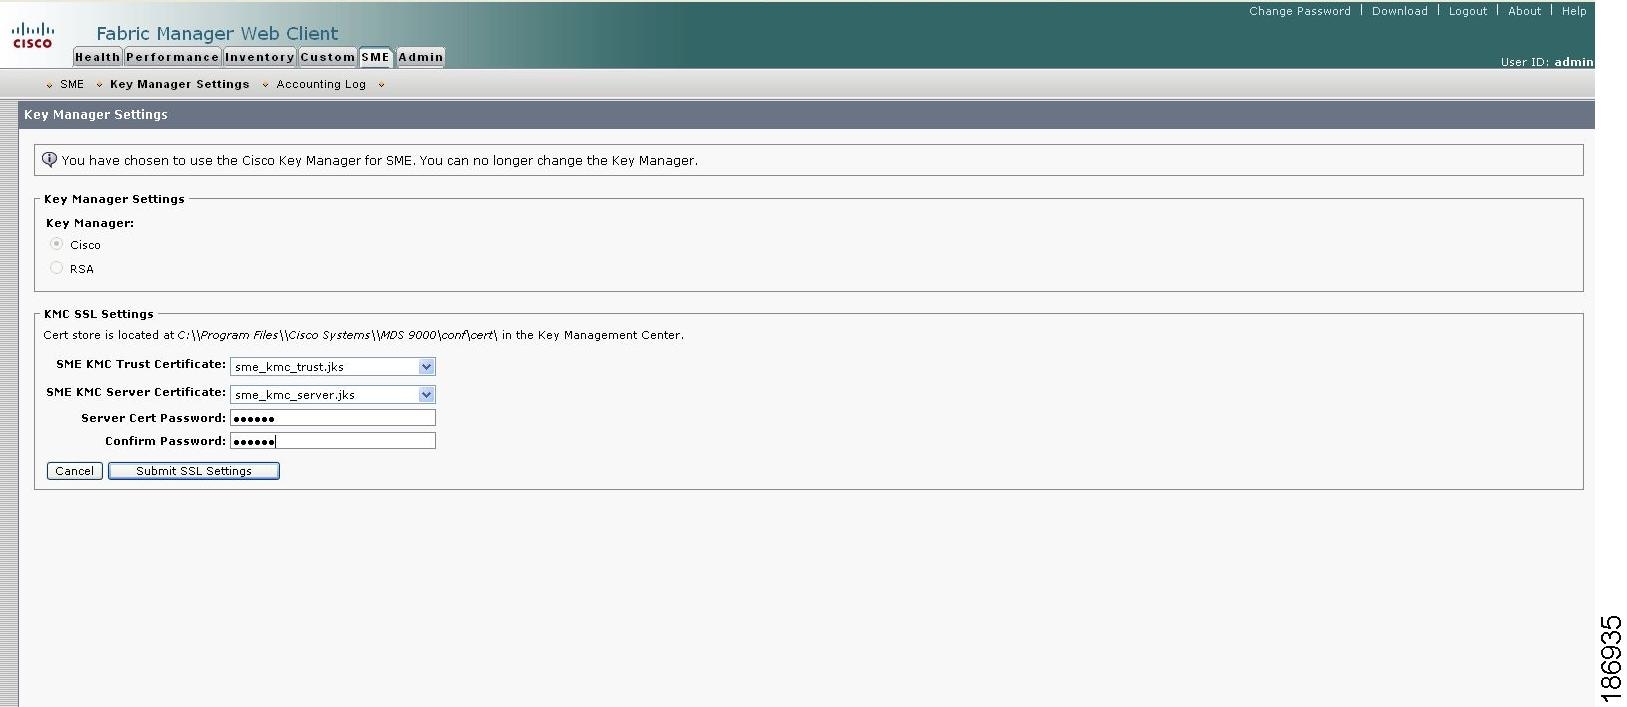
Step 5
The keystore files that are stored in the KMC directory are listed in the drop-down menu.
Step 6
Step 7
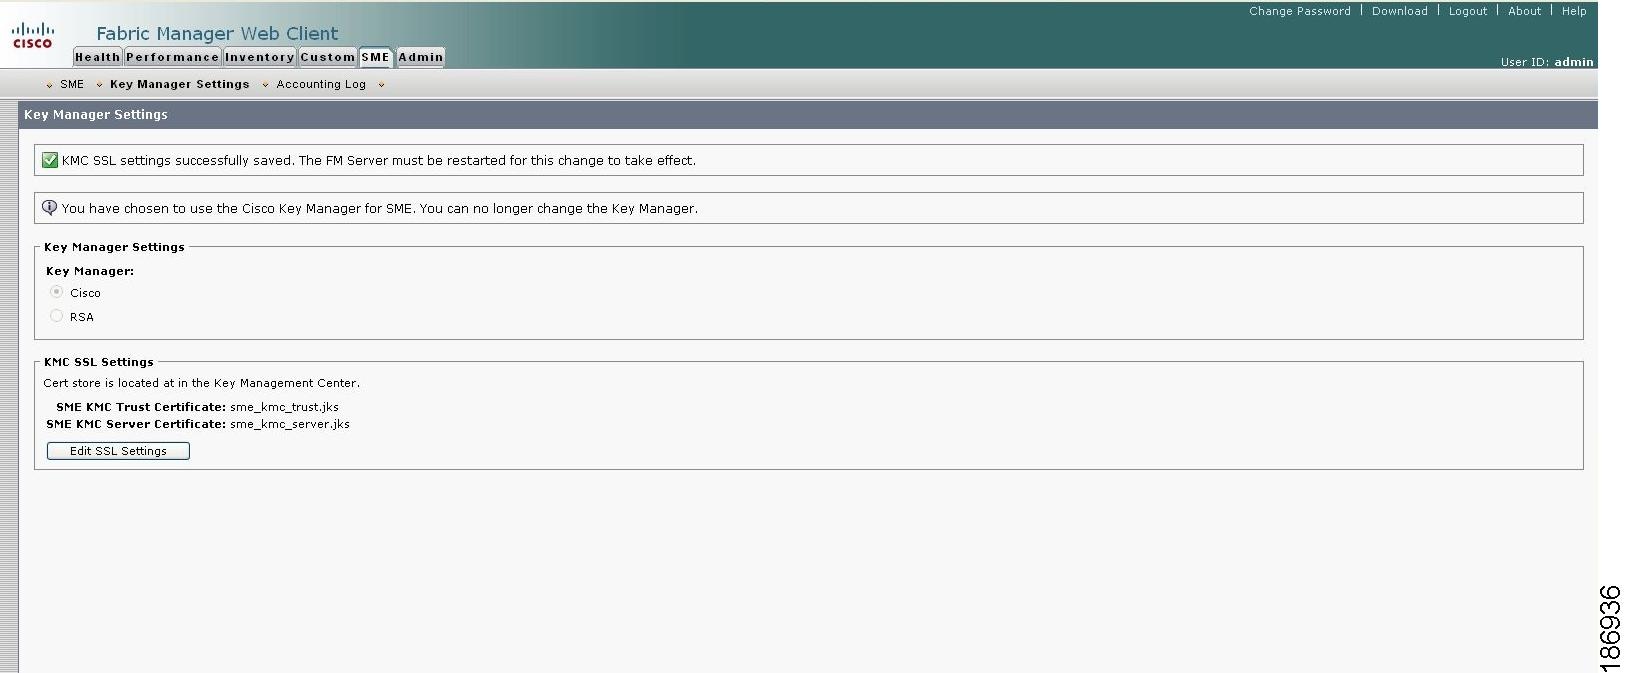
To change the SSL settings again, click Edit SSL Settings.
Note
If On is selected in the Transport Settings during cluster creation, then SSL is enabled on KMC with the following results:
•
•
For more information, refer to Selecting Transport Settings, page 4-11.
 Feedback
Contact Cisco
- Open a Support Case

- (Requires a Cisco Service Contract)
This Document Applies to These Products
- Collaboration Endpoints - Retired Products
- Conferencing - Retired Products
- Contact Center - Retired Products
- Optical Networking - Retired Products
- Routers - Retired Products
- Security - Retired Products
- Servers - Unified Computing (UCS) Retired Products
- Storage Networking Retired Products
- Switches - Retired Products
- Video - Retired Products
- Wireless - Retired Products