Management Tab Overview
Available Languages
Table Of Contents
To activate a set of management additions or changes
Search for an Event Description or CVE Names
To view a list of all currently supported CVEs
To filter by event groups or severity
Search for an Address, Network, Variable, or Host
Add a Network, IP Range, or Variable
Add a Service Provider (Cell phone/Pager)
Add or Remove a User from a User Group
Management Tab Overview
Revised: April 5, 2007, OL-14647-02Use the management features in the Local Controller to assign: event, addressing, service, and user information. This information is used in rules, queries, and to determine false positives.
Activating
In general, you need to activate changes in the Management tabs if the changes are part of a rule.
To activate a set of management additions or changes
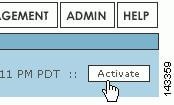
Step 1
When changes (or additions) are complete, activate them by clicking Activate.
Figure 24-1 Clicking the Activate Button
Event Management
To open the Event Management sub-tab, click the Management > Event Management tabs.
On the Event Management page, you can search and filter events and event groups, and work with groups of events.
Search for an Event Description or CVE Names
You can search for partial matches of event descriptions or Common Vulnerabilities and Exposures (CVE) names.
Step 1
Step 2
To view a list of all currently supported CVEs
Step 1
Step 2
Event Groups
Using and creating event groups is one of the most powerful ways to leverage rules. You can take any of the events presented here, group them, and then use them with rules to concentrate your searches for attacks.
To filter by event groups or severity
From the appropriate list, select the group or severity.
Edit a Group of Events

Note
Step 1
Step 2
Step 3
Step 4
Step 5
Add a Group
Step 1
Step 2
Step 3
Step 4
Step 5
IP Management
The IP Management page, accessed by clicking Management > IP Management, enables the definition of network assets that you use as building blocks for inspection rules, drop rules, reports and queries, topology discovery schedules, and in defining reporting devices and mitigation devices. You can define assets as networks, IP ranges, or hosts. You can also defined named variables for use within inspection rules.
The vulnerability assessment information that you define for a host, specifically the operating system type and patch level and the known services that run on the host, assists MARS in determining false positives.

Tip
Note
Search for an Address, Network, Variable, or Host
Step 1
Step 2
Filter by Groups
From the Select Group list, select the group.
Edit a Group
Step 1
The IP Management page appears.
Step 2
Step 3
Step 4
Step 5
Step 6
Add a Group
Step 1
The IP Management page appears.
Step 2
Step 3
Step 4
Step 5
Step 6
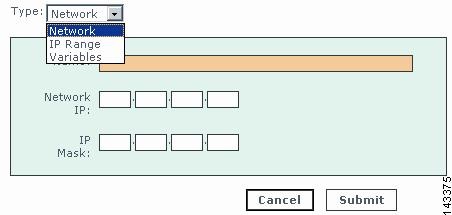
Add a Network, IP Range, or Variable
Step 1
The IP Management page appears.
Figure 24-2 Add a Network, IP Range, or Variable
Step 2
Step 3
Step 4
•
•
•
Step 5
Add a Host
Within MARS, a host is manually or automatically defined as the result of one of the following options:
•
•
•
•
•
Because of these various options, you can have a large number of hosts defined on the IP Management page in the web interface. If you do not have a vulnerability assessment package that is compatible with MARS, you should consider providing as much information as possible about these hosts. For more information, see Define Vulnerability Assessment Information, page 11-12.
Note
To manually add a host, follow these steps:
Step 1
The IP Management page appears.
Step 2
Step 3
Figure 24-3 General Information for a Host
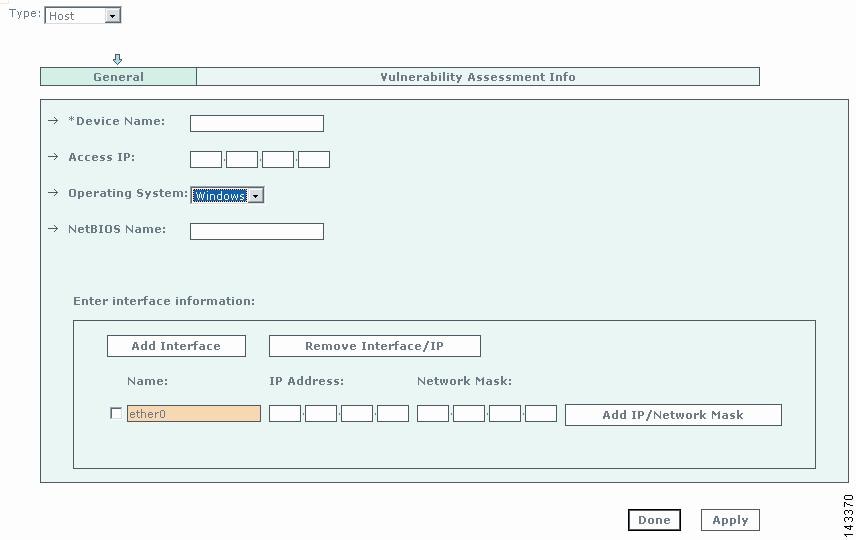
Step 4
Step 5
Step 6
Step 7
NetBIOS provides name registration and resolution services. MARS uses this setting to provide attack path analysis and address resolution.
Step 8
Step 9
Step 10
Step 11
Edit Host Information
Step 1
Step 2
Step 3
Step 4
Step 5
Step 6
Step 7
Service Management
To open the Service Management sub-tab, click the Management > Service Management tabs.
Service is a combination of source port, destination port and protocol. The Service Management page displays services and their descriptions, ports and protocols. On the Service Management page, you can work with the services on your networks.
Search for a Service
Step 1
Step 2
To filter by service groups
From the appropriate list, select the group.
Add a Group of Services
Step 1
Step 2
Step 3
Step 4
Step 5
Edit a Group of Services
Note
Step 1
Step 2
Step 3
Step 4
Step 5
Add a Service
Step 1
Step 2
Step 3
Edit a Service
Step 1
Step 2
Step 3
Delete a Service
Step 1
Step 2
Step 3
User Management
MARS supports local authentication of MARS users; user credentials are stored the MARS Appliance in SHA-1 cryptographic hash format. Each MARS Appliance only has one Administrative account, pnadmin. This account is the only account with privileges to access the command line interface via SSH or direct console connection.
The User Management page allows you to manage other users and administrators of the MARS system, including the roles and groups to which those users belong. On this page, you can define new user accounts, enabling access to specific features of the web interface. You can define user-specific notification settings for the user, such as a valid e-mail address or pager number. Some system-wide settings, such as pager and cell phone service provider settings, are also accessible exclusively through this page. To access the User Management page, click either Management > User Management or Admin > User Management.
In MARS, four separate user roles exist that can be assigned to any user who needs to access the web interface:
•
•
•
•
No limit exists on the number of user accounts that can be defined in MARS.
While roles are system defined, you can define, edit, and delete user groups. For more information, see Create a User Group and Add or Remove a User from a User Group.
Good security practices suggest strong passwords for use with the MARS Appliances. When defining user names and password, keep the following guidelines in mind:
Login names and passwords:
•
•
•
•
Login names can have up to 20 characters. Passwords can have up to 64 characters.
Add a New User
Defining a new user involves specifying the user name, password, role, contact information, and notification information.
To add a new user, follow these steps:
Step 1
Figure 24-4 User Configuration Page
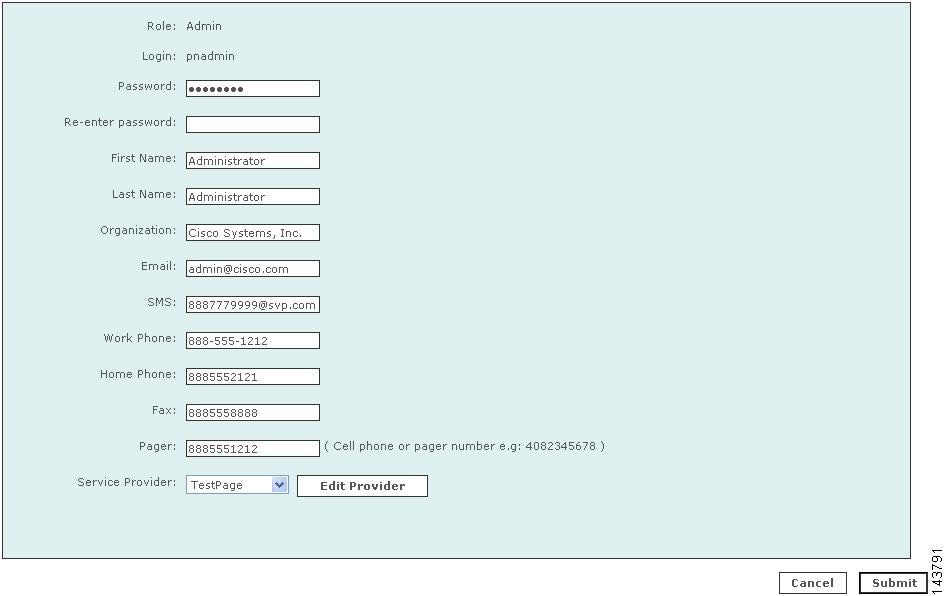
Step 2
•
•
•
•
Step 3
Step 4
The information can include the following:•
•
•
•
•
•
•
•
•
Step 5
Add a Service Provider (Cell phone/Pager)
When configuring a notification by pager, add a service provider (cell phone or pager company) by completing the following procedure:
Step 1
The pull-down menu is populated as you add new service providers.
Figure 24-5 Select a New Provider and Provide Contact Details
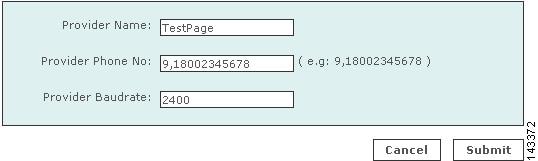
Step 2
Step 3
This is the number the service provider uses for accepting alpha-numeric messages using the IXO/TAP protocol. The format is like a regular phone number, such as: 18001234567. The format of 1-800-1234567 is also acceptable. If dialing "9" is required to access a number outside your private branch exchange, type a "9," before the full telephone number (for example, 9,1-800-1234567).
Step 4
This is the baud rate the service provider requires for the specified phone number. Common values are 1200, 2400, 4800, and 9600.
Consult your service provider's website for more information on their baud rates.
Step 5
Search for a User
Step 1
Step 2
Edit or Remove a User
Step 1
Step 2
Step 3
The User Configuration page appears.Step 4
Step 5
Create a User Group
Step 1
Step 2
Step 3
The checked names move to the lefthand side of the dialog box.Step 4
Step 5
Add or Remove a User from a User Group
To add or remove a user from a custom User Group, do the following steps:
Note
Step 1
Step 2
Step 3
The checked names move to the lefthand side of the dialog box.Step 4
Step 5
Filter by Groups
From the Select Group list, select the group. Only the members of the group are displayed.
 Feedback
Contact Cisco
- Open a Support Case

- (Requires a Cisco Service Contract)
This Document Applies to These Products
- Collaboration Endpoints - Retired Products
- Conferencing - Retired Products
- Contact Center - Retired Products
- Optical Networking - Retired Products
- Routers - Retired Products
- Security - Retired Products
- Servers - Unified Computing (UCS) Retired Products
- Storage Networking Retired Products
- Switches - Retired Products
- Video - Retired Products
- Wireless - Retired Products