Cisco Secure Firewall Management Center Virtual Getting Started Guide

PDF

Deploy the Firewall Management Center Virtual

Want to summarize with AI?

Log in

Overview

Learn about the workflow to deploy Firewall Management Center Virtual on Nutanix, including reviewing prerequisites, uploading the QCOW2 image, optionally preparing a Day 0 configuration file, completing deployment, and finishing initial setup.

Step

Task

More Information

1

Review the prerequisites. Prerequisites

2

Upload the Firewall Management Center Virtual qcow2 file to the Nutanix environment. Upload the Firewall Management Center Virtual QCOW2 File to Nutanix

3

(Optional) Prepare a Day 0 configuration file that contains the initial configuration data that gets applied at the time a virtual machine is deployed. Prepare the Day 0 Configuration File

4

Deploy the Firewall Management Center Virtual to the Nutanix environment.

Deploy the Management Center Virtual to Nutanix

5

(Optional) If you did not use a Day 0 configuration file to set up the Firewall Management Center Virtual, complete the setup by logging in to the CLI.

Complete the Firewall Management Center Virtual Setup


Upload the Firewall Management Center Virtual QCOW2 File to Nutanix

To deploy the Firewall Management Center Virtual to the Nutanix environment, you must create an image from the Firewall Management Center Virtual qcow2 disk file in the Prism Web Console.

Before you begin

Download the Firewall Management Center Virtual qcow2 disk file from Cisco.com: https://software.cisco.com/download/navigator.html

Procedure

1.

Log in to the Nutanix Prism Web Console.

2.

Click the gear icon to open the Settings page.

3.

Click Image Configuration from the left pane.

4.

Click Upload Image.

5.

Create the image.

  1. Enter a name for the image.

  2. From the Image Type drop-down list, choose DISK.

  3. From the Storage Container drop-down list, choose the desired container.

  4. Specify the location of the Firewall Management Center Virtual qcow2 disk file.

    You can either specify a URL (to import the file from a web server) or upload the file from your workstation.

  5. Click Save.

6.

Wait until the new image appears in the Image Configuration page.


Prepare the Day 0 Configuration File

You can prepare a Day 0 configuration file before you deploy the Firewall Management Center Virtual. This file is a text file that contains the initial configuration data that gets applied at the time a virtual machine is deployed.

Keep in mind that:

  • If you deploy with a Day 0 configuration file, the process allows you to perform the entire initial setup for the Firewall Management Center Virtual appliance.

  • If you deploy without a Day 0 configuration file, you must configure System-required settings after launch; see Complete the Firewall Management Center Virtual Setup for more information.

You can specify:

  • The End User License Agreement (EULA) acceptance.

  • A hostname for the system.

  • A new administrator password for the admin account.

  • Network settings that allow the appliance to communicate on your management network.

Procedure

1.

Create a new text file using a text editor of your choice.

2.

Enter the configuration details in the text file as shown in the following sample. Note that the text is in JSON format. You can validate the text using a validator tool before copying the text.

Example:

#FMC
{
    "EULA": "accept",
    "Hostname": "FMC-Production",
    "AdminPassword": "Admin123",
    "DNS1": "10.1.1.5",
    "DNS2": "192.168.1.67",
    "IPv4Mode": "manual",
    "IPv4Addr": "10.12.129.45",
    "IPv4Mask": "255.255.0.0",
    "IPv4Gw": "10.12.0.1",
    "IPv6Mode": "disabled",
    "IPv6Addr": "",
    "IPv6Mask": "",
    "IPv6Gw": "",
}

3.

Save the file as “day0-config.txt.”

4.

Repeat Step 1–3 to create unique default configuration files for each Firewall Management Center Virtual that you want to deploy.


Deploy the Firewall Management Center Virtual to Nutanix

Before you begin

Ensure that the image of the Firewall Management Center Virtual that you plan to deploy is appearing on the Image Configuration page.

Procedure

1.

Log in to the Nutanix Prism Web Console.

2.

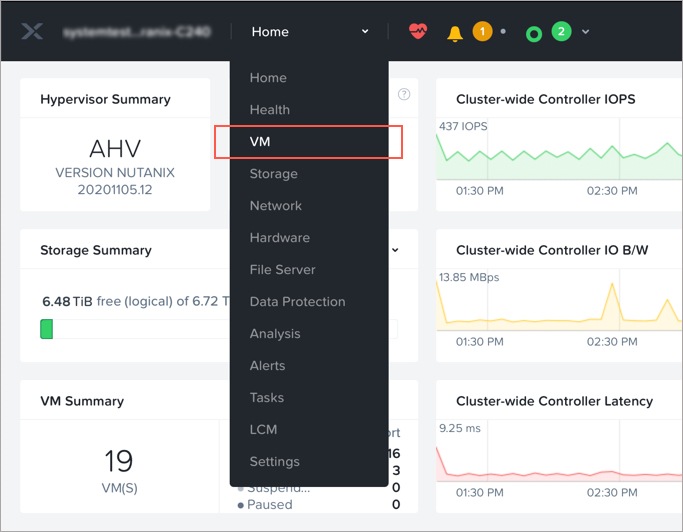
From the main menu bar, click the view drop-down list, and choose VM.

3.

On the VM Dashboard, click Create VM.

4.

Do the following:

  1. Enter a name for the Firewall Management Center Virtual instance.

  2. Optionally enter a description for the Firewall Management Center Virtual instance.

  3. Select the timezone that you want the Firewall Management Center Virtual instance to use.

5.

Enter the compute details.

  1. Enter the number of virtual CPUs to allocate to the Firewall Management Center Virtual instance.

  2. Enter the number of cores that must be assigned to each virtual CPU.

  3. Enter the amount of memory (in GB) to allocate to the Firewall Management Center Virtual instance.

6.

Attach a disk to the Firewall Management Center Virtual instance.

  1. Under Disks, Click Add New Disk.

  2. From the Type drop-down list, choose DISK.

  3. From the Operation drop-down list, choose Clone from Image Service.

  4. From the Bus Type drop-down list, choose SCSI, PCI, or SATA.

  5. From the Image drop-down list, choose the image that you want to use.

  6. Click Add.

7.

Under Network Adapters (NIC), click Add New NIC, select a network, and click Add.

8.

Configure affinity policy for the Firewall Management Center Virtual.

Under VM Host Affinity , click Set Affinity, select the hosts, and click Save.

Select more than one host to ensure that the Firewall Management Center Virtual can be run even if there is a node failure.

9.

If you have prepared a Day 0 configuration file, do the following:

  1. Select Custom Script.

  2. Click Upload A File, and choose the Day 0 configuration file (day0-config.txt).

Note

All the other custom script options are not supported in this release.

10.

Click Save to deploy the Firewall Management Center Virtual. The Firewall Management Center Virtual instance appears in the VM table view.

11.

Create and attach a virtual serial port to the Management Center Virtual. To do this, log in to a Nutanix Controller VM (CVM) with SSH and run the Acropolis CLI (aCLI) commands given below. For more information on aCLI, see the aCLI Command Reference.

Commands for Nutanix AHV version 6.8 and below:

vm.serial_port_create <management-center-virtual-VM-name> type=kServer index=0

vm.update <management-center-virtual-VM-name> disable_branding=true

vm.update <management-center-virtual-VM-name> extra_flags="enable_hyperv_clock=False"

Commands for Nutanix AHV version 6.8.1 and above:

vm.serial_port_create <management-center-virtual-VM-name> type=kServer index=0

vm.update <management-center-virtual-VM-name> disable_branding=true

vm.update <management-center-virtual-VM-name> disable_hyperv=True

12.

Go to the VM table view, select the newly created the Firewall Management Center Virtual instance, and click Power On.

13.

After the Firewall Management Center Virtual is powered on, verify the status. Go to Home > VM > Firewall Management Center Virtual that you deployed and log in.


Complete the Firewall Management Center Virtual Setup

For all Firewall Management Centers, you must complete a setup process that allows the appliance to communicate on your management network. If you deploy without a Day 0 configuration file, setting up the Firewall Management Center Virtual is a two-step process:

Procedure

1.

After you initialize the Firewall Management Center Virtual, run a script at the appliance console that helps you configure the appliance to communicate on your management network.

2.

Then, complete the setup process using a computer on your management network to browse to the web interface of the Firewall Management Center Virtual.

3.

Complete the initial setup on Firewall Management Center Virtual using the CLI. See Configure Network Settings Using a Script.

4.

Complete the setup process using a computer on your management network to browse to the web interface of the Firewall Management Center Virtual. See Perform Initial Setup Using the Web Interface.


Configure Network Settings Using a Script

The following procedure describes how you complete the initial setup on the Firewall Management Center Virtual using the CLI.

Procedure

1.

At the console, log into the Firewall Management Center Virtual appliance. Use admin as the username and Admin123 as the password. If you are using the Nutanix console, the default password is Admin123.

If prompted, reset the password.

2.

At the admin prompt, run the following script:

Example:

sudo /usr/local/sf/bin/configure-network

On first connection to the Firewall Management Center Virtual you are prompted for post-boot configuration.

3.

Follow the script’s prompts.

Configure (or disable) IPv4 management settings first, then IPv6. If you manually specify network settings, you must enter IPv4 or IPv6 address.

4.

Confirm that your settings are correct.

5.

Log out of the appliance.

What to do next

  • Complete the setup process using a computer on your management network to browse to the web interface of the Firewall Management Center Virtual.


Perform Initial Setup Using the Web Interface

The following procedure describes how you complete the initial setup on the Firewall Management Center Virtual using the web interface.

Procedure

1.

Direct your browser to default IP address of the Firewall Management Center Virtual’s management interface:

Example:

https://192.168.45.45
2.

Log into the Firewall Management Center Virtual appliance. Use admin as the username and Admin123 as the password. If prompted, reset the password.

The setup page appears. You must change the administrator password, specify network settings if you haven’t already, and accept the EULA.

3.

When you are finished, click Apply. The Firewall Management Center Virtual is configured according to your selections. After an intermediate page appears, you are logged into the web interface as the admin user, which has the Administrator role.

The Firewall Management Center Virtual is configured according to your selections. After an intermediate page appears, you are logged into the web interface as the admin user, which has the Administrator role.

What to do next