|
1. |
Download the Firewall Management Center Virtual compressed VHD image from the Cisco Download Software page:
-
Navigate to Products > Security > Firewalls > Firewall Management > Secure Firewall Management Center Virtual.
-
Click Firepower Management Center Software.
Follow the instructions for downloading the image.
For example, Cisco_Secure_FW_Mgmt_Center_Virtual_Azure-7.3.0-69.vhd.bz2
|
|
2. |
Copy the compressed VHD image to your Linux VM in Azure.
There are many options that you can use to move files up to Azure and down from Azure. This example shows SCP or secure copy:
# scp /username@remotehost.com/dir/Cisco_Secure_FW_Mgmt_Center_Virtual_Azure-7.3.0-69.vhd.bz2 <linux-ip>
|
|
3. |
Log in to the Linux VM in Azure and navigate to the directory where you copied the compressed VHD image. |
|
4. |
Unzip the Firewall Management Center Virtual VHD image.
There are many options that you can use to unzip or decompress files. This example shows the Bzip2 utility, but there are also Windows-based utilities that would work.
# bunzip2 Cisco_Secure_FW_Mgmt_Center_Virtual_Azure-7.3.0-69.vhd.bz2
|
|
5. |
Upload the VHD to a container in your Azure storage account. You can use an existing storage account or create a new one. The storage account name can only contain lowercase letters and numbers.
There are many options that you can use to upload a VHD to your storage account, including AzCopy, Azure Storage Copy Blob API, Azure Storage Explorer, Azure CLI, or the Azure Portal. We do not recommend using the Azure Portal for a file as large as the Firewall Management Center Virtual VHD.
The following example shows the syntax using Azure CLI:
azure storage blob upload \
       --file <unzipped vhd> \
       --account-name <azure storage account> \
       --account-key yX7txxxxxxxx1dnQ== \
       --container <container> \
       --blob <desired vhd name in azure> \
       --blobtype page
|
|
6. |
Create a Managed Image from the VHD:
In the Azure Portal, select Images. Click Add to create a new image. Provide the following information:
-
Subscription—Choose a subscription from the drop-down list.
-
Resource group—Choose an existing resource group or create a new one.
-
Name—Enter a user-defined name for the managed image.
-
Region—Choose the region in which the VM Is deployed.
-
OS type—Choose Linux as the OS type.
-
VM generation Choose Generation 1 for BIOS boot mode. Choose Generation 2 for UEFI boot mode.
-
Storage blob—Browse to the storage account to select the uploaded VHD.
-
Account type—As per your requirement, choose Standard HDD, Standard SSD, or Premium SSD, from the drop-down list. When you select the VM size planned for deployment of this image, ensure that the VM size supports the selected account type.
-
Host caching—Choose Read/write from the drop-down list.
-
Data disks—Leave at default; don't add a data disk.
Click Create.
Wait for the Successfully created image message under the Notifications tab.
Note
Once the Managed Image has been created, the uploaded VHD and upload Storage Account can be removed.
|
|
7. |
Acquire the Resource ID of the newly created Managed Image.
Internally, Azure associates every resource with a Resource ID. You’ll need the Resource ID when you deploy new Firewall Management Center Virtual instances from this managed image.
In the Azure Portal, select Images. Select the managed image created in the previous step. Click Overview to view the image properties. Copy the Resource ID to the clipboard.
The Resource ID takes the form of:
/subscriptions/<subscription-id>/resourceGroups/<resourceGroup>/providers/Microsoft.Compute/<container>/ <vhdname>
|
|
8. |
Build a Firewall Management Center Virtual instances using the managed image and a resource template:
-
On the Azure GUI, search for Custom deployment.
-
Under Select a template, click Build your own template in the editor.
You have a blank template that is available for customizing. See GitHub for the template files.
-
Paste your customized JSON template code into the window, and then click Save.
-
Choose a Subscription from the drop-down list.
-
Choose an existing Resource group or create a new one.
-
Choose a Region from the drop-down list.
-
Paste the Managed Image Resource ID from the previous step into the Vm Image Id field.
-
To deploy the Threat Defense Virtual without the diagnostic interface, enter a day-0 configuration script that includes the key-value pair Diagnostic: OFF in the Custom Data field. A sample day-0 configuration script is given below.
{
"AdminPassword": "E28@2OiUrhx!",
"Hostname": "ciscothreatdefensevirtual",
"FirewallMode": "routed",
"ManageLocally": "No",
"Diagnostic": "OFF"
}
Note
The key value pair, "Diagnostic": "ON/OFF", is case-sensitive.
You can also modify the script in the Custom Data field in the ARM template that is used for fresh deployment.
|
|
9. |
Click Edit parameters at the top of the Custom deployment page. You have a parameters template that is available for customizing.
-
Click Load file and browse to the customized Firewall Management Center Virtual parameter file. See GitHub for the template parameters.
Paste your customized JSON parameters code into the window, and then click Save. |
|
10. |
Review the Custom deployment details. Make sure that the information in Basics and Settings matches your expected deployment configuration, including the Resource ID. |
|
11. |
Review the Terms and Conditions, and check the I agree to the terms and conditions stated above check box. |
|
12. |
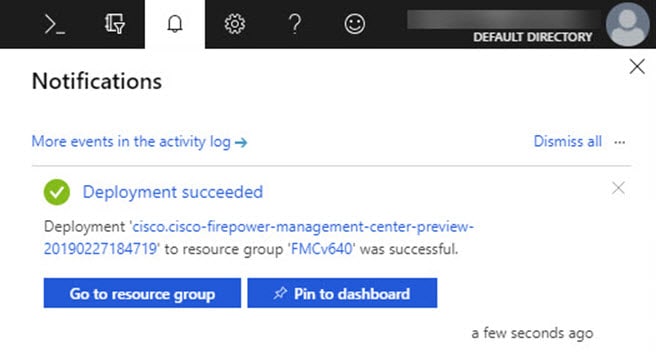
Click Purchase to deploy a Firewall Management Center Virtual instance using the managed image and a custom template.
If there are no conflicts in your template and parameter files, you should have a successful deployment.
The Managed Image is available for multiple deployments within the same subscription and region.
|