About the Dynamic Attributes Connector
The dynamic attributes connector enables your access control and DNS policy to adapt in real time to the changes in public and private cloud workloads and business-critical software-as-a-service (SaaS) applications. It simplifies policy management by keeping rules up to date without tedious manual updates and policy deployment. Customers require policy rules to be defined based on non-network constructs such as VM name or security group, so that firewall policy is persistent even when the IP address or VLAN changes.
Supported connectors
We currently support:
|
CSDAC version |
AWS |
AWS security groups |
AWS service tags |
Azure |
Azure Service Tags |
Cisco Cyber Vision |
Cisco Multicl. Defense |
Generic text |
GitHub |
Google Cloud |
Microsoft Office 365 |
vCenter |
Tenable |
Webex |
Zoom |
|---|---|---|---|---|---|---|---|---|---|---|---|---|---|---|---|
|
Version 1.1 (on-premises) |
Yes |
No |
No |
Yes |
Yes |
No |
No |
No |
No |
No |
Yes |
Yes |
No |
No |
No |
|
Version 2.0 (on-premises) |
Yes |
No |
No |
Yes |
Yes |
No |
No |
No |
No |
Yes |
Yes |
Yes |
No |
No |
No |
|
Version 2.2 (on-premises) |
Yes |
No |
No |
Yes |
Yes |
No |
No |
No |
Yes |
Yes |
Yes |
Yes |
No |
No |
No |
|
Version 2.3 (on-premises) |
Yes |
No |
No |
Yes |
Yes |
No |
No |
No |
Yes |
Yes |
Yes |
Yes |
No |
Yes |
Yes |
|
Version 3.0 (on-premises) |
Yes |
Yes |
Yes |
Yes |
Yes |
Yes |
No |
Yes |
Yes |
Yes |
Yes |
Yes |
No |
Yes |
Yes |
|
Cloud-delivered (Security Cloud Control) |
Yes |
Yes |
Yes |
Yes |
Yes |
Yes |
Yes |
Yes |
Yes |
Yes |
Yes |
No |
Yes |
Yes |
Yes |
More information about connectors:
-
Amazon Web Services (AWS)
For more information, see a resource like Tagging AWS resources on the Amazon documentation site.
See Amazon Web Services Connector—About User Permissions and Imported Data
-
Cisco Cyber Vision
-
Cisco Multicl. Defense
-
Generic text list of IP addresses you specify
For more information, see Create a generic text connector.
-
GitHub
For more information, see Create a GitHub connector.
-
Google Cloud
For more information, see Setting Up Your Environment in the Google Cloud documentation.
See Google Cloud connector—About user permissions and imported data.
-
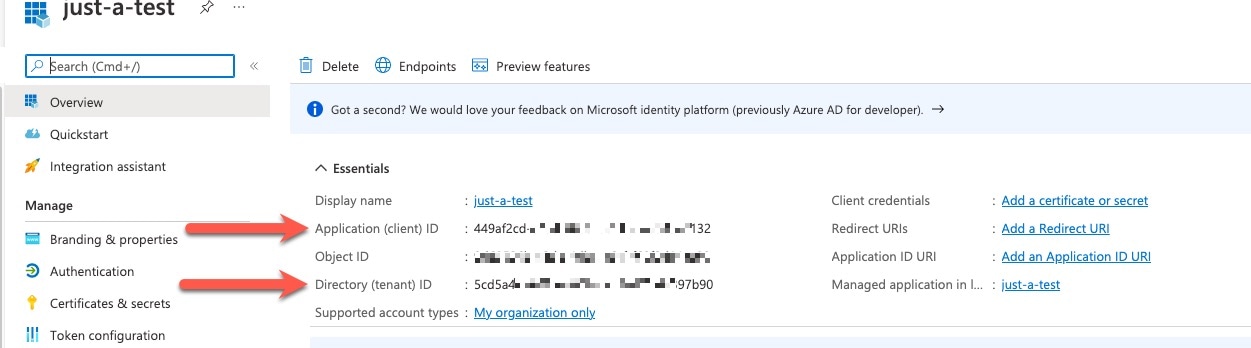
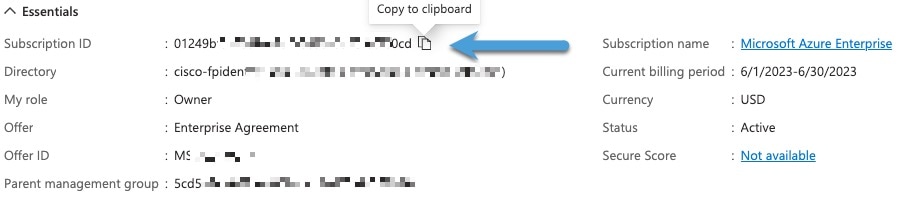
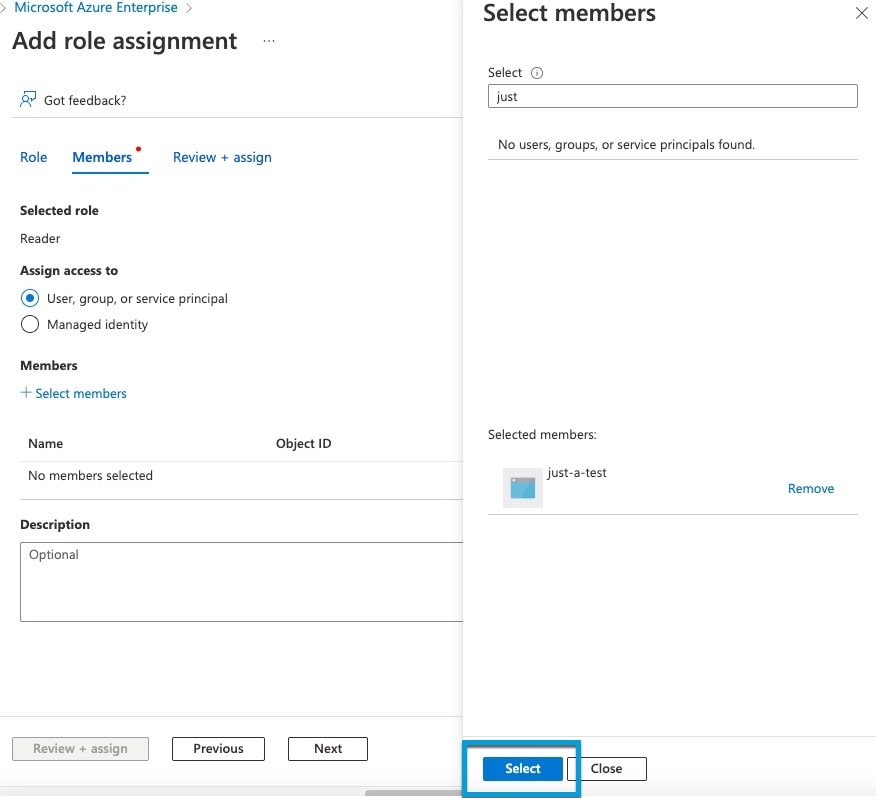
Microsoft Azure
For more information, see this page on the Azure documentation site.
See Azure Connector—About User Permissions and Imported Data.
-
Microsoft Azure service tags
For more information, see a resource like Virtual network service tags on Microsoft TechNet.
-
Office 365 IP addresses
For more information, see Office 365 URLs and IP address ranges on docs.microsoft.com.
-
Tenable vulnerabilities
For more information, see Tenable connector
-
VMware categories and tags managed by vCenter and NSX-T
For more information, see a resource like vSphere Tags and Attributes in the VMware documentation site.
-
Webex IP addresses
For more information, see Create a Webex connector.
-
Zoom IP addresses
For more information, see Create a Zoom Connector.
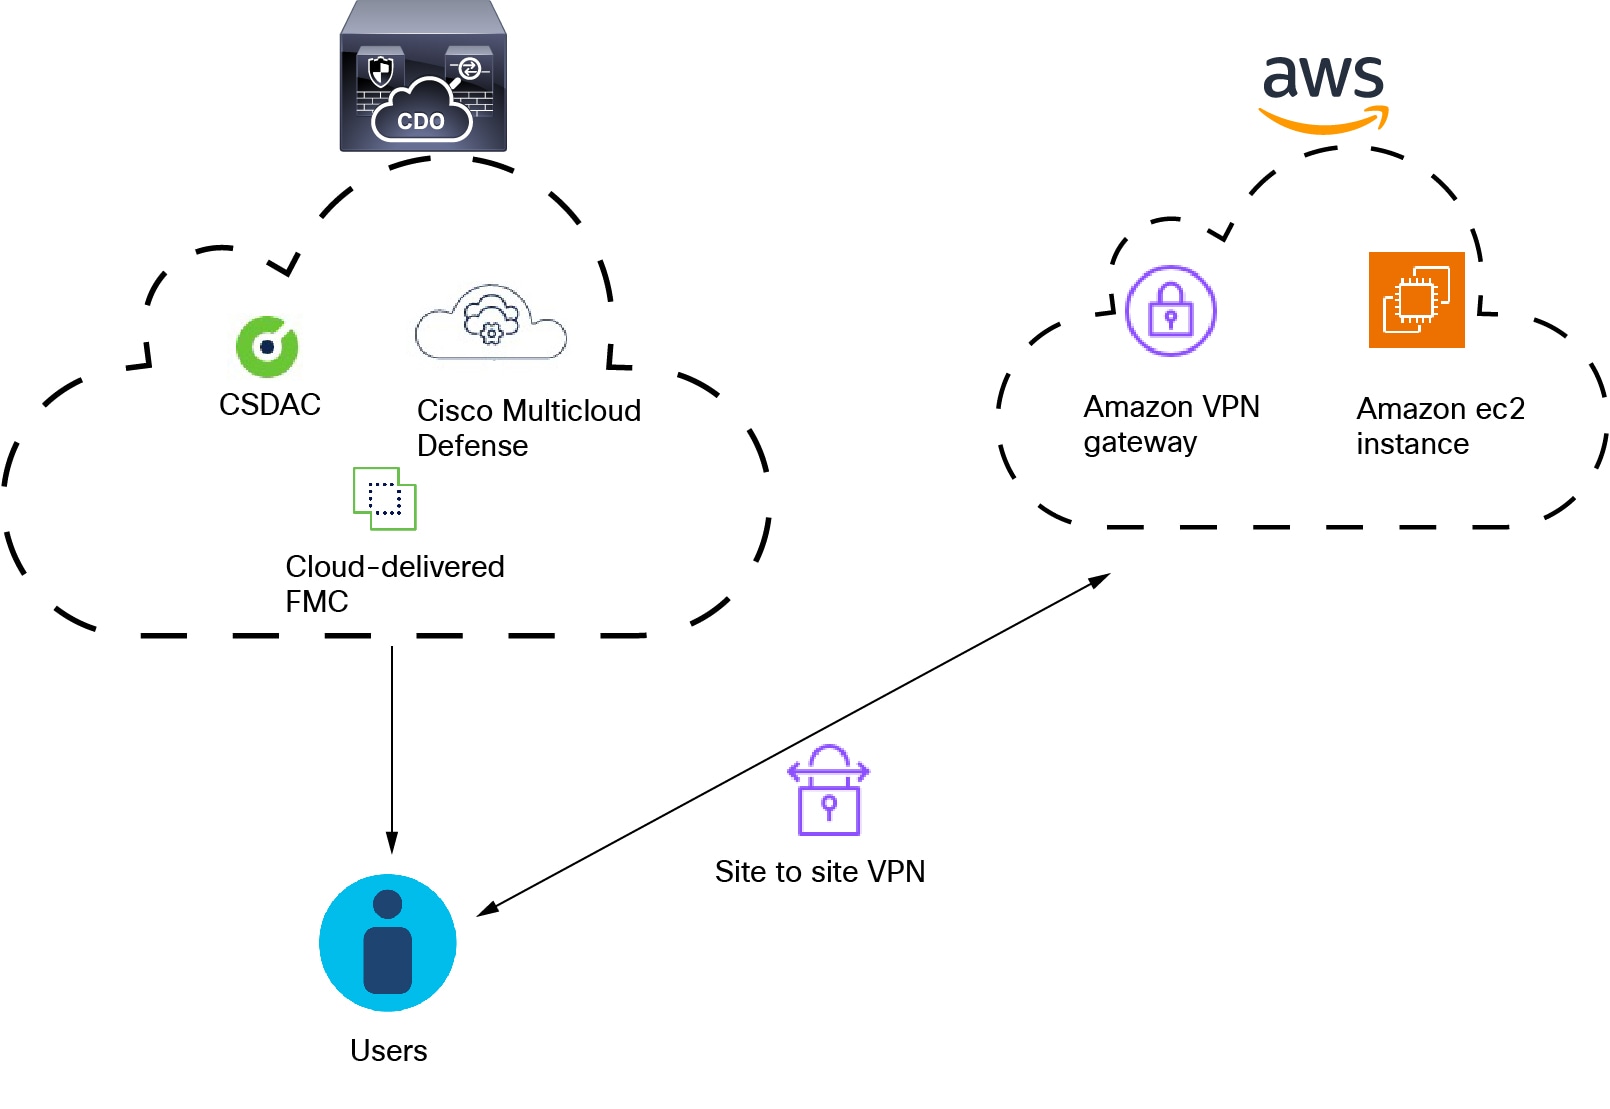
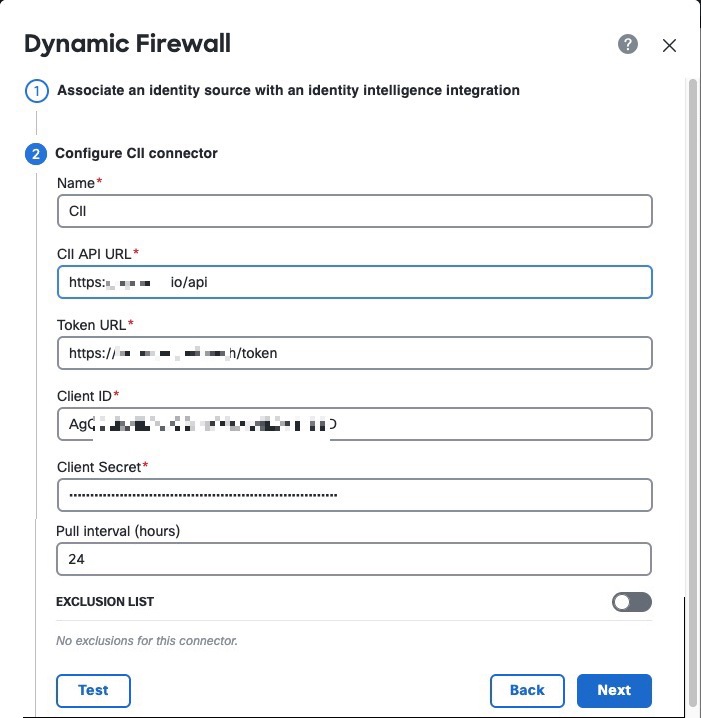
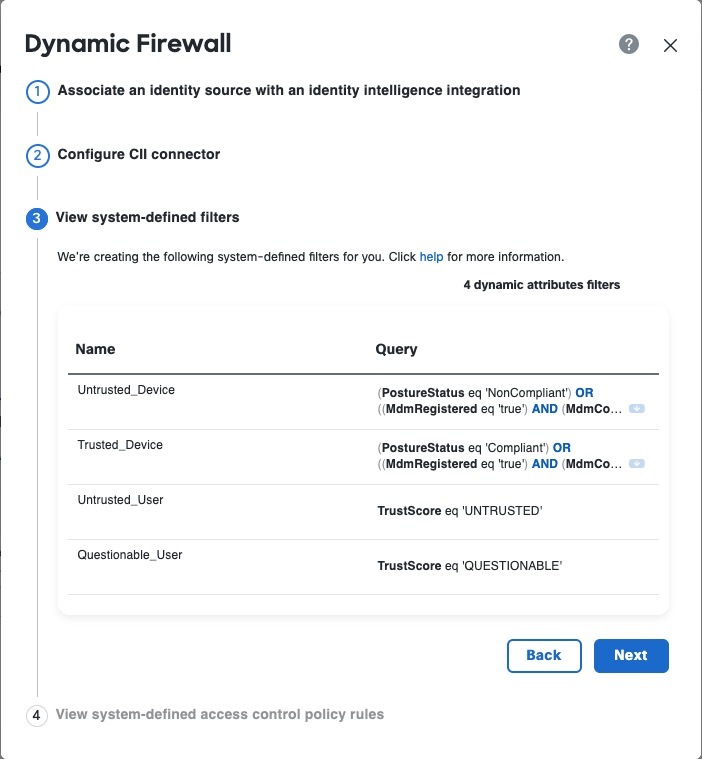
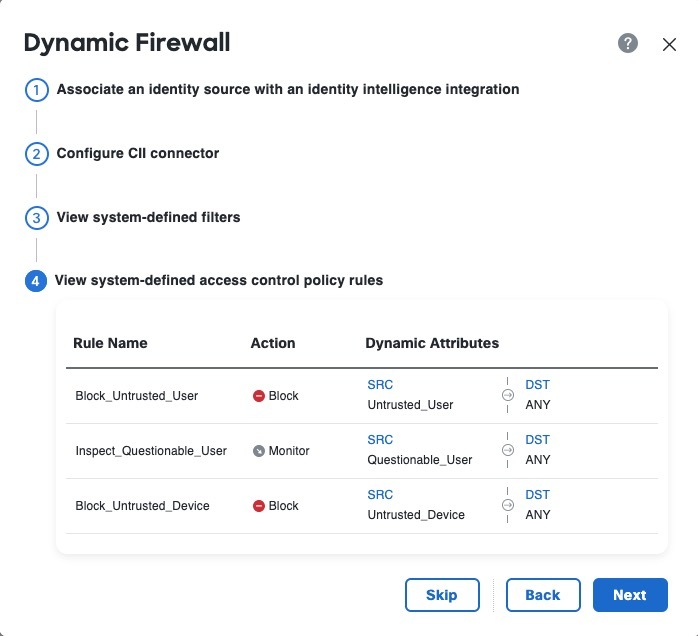
How It Works
This topic discusses the architecture of the Dynamic Attributes Connector.
The following figure shows how the system functions at a high level.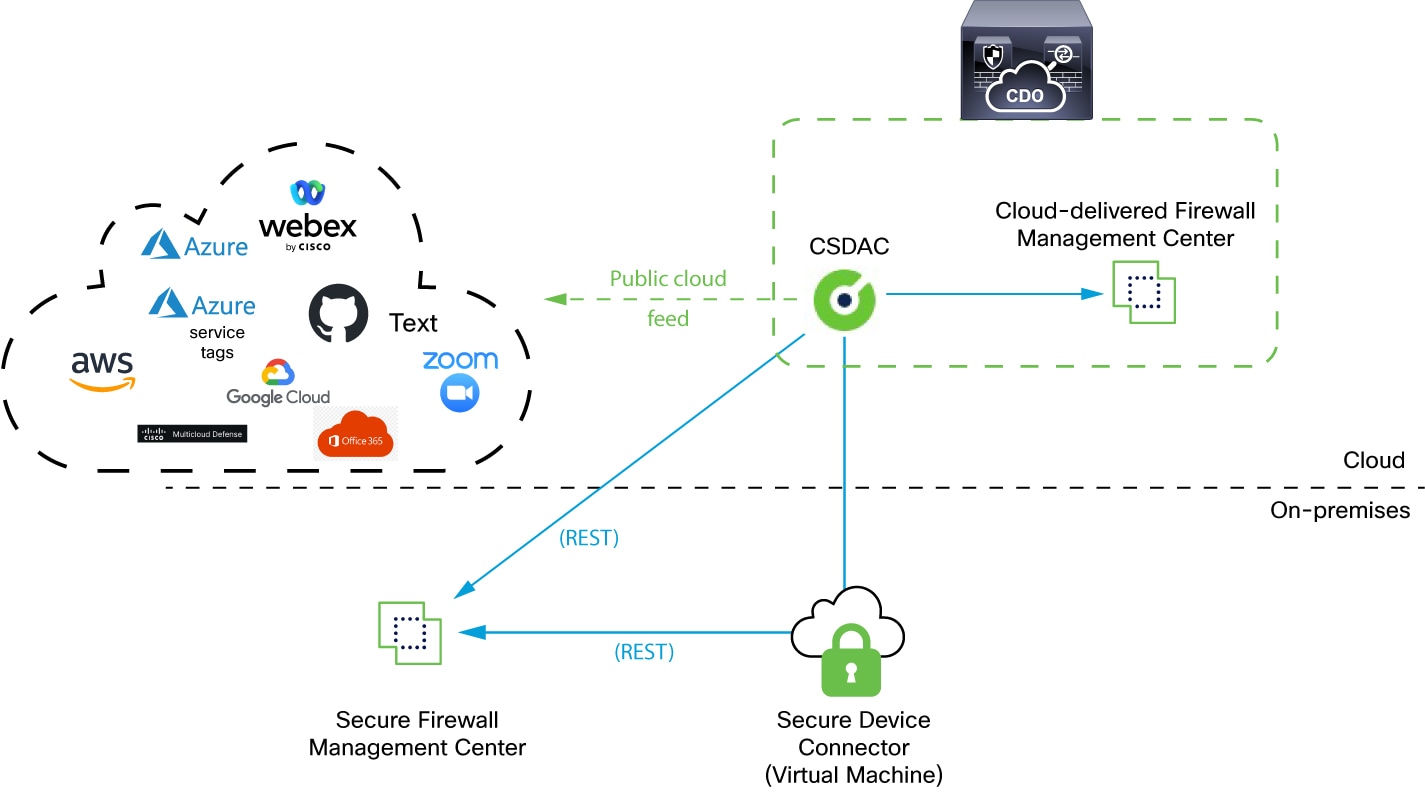
-
The system supports certain public cloud providers.
This topic discusses supported connectors (which are the connections to those providers).
-
The dynamic attributes connector is provided with Security Cloud Control; it includes a Cloud-Delivered Firewall Management Center adapter and you can connect to an On-Prem Firewall Management Center using the Secure Device Connector.
For more information about the Secure Device Connector, see Secure Device Connector (SDC).
-
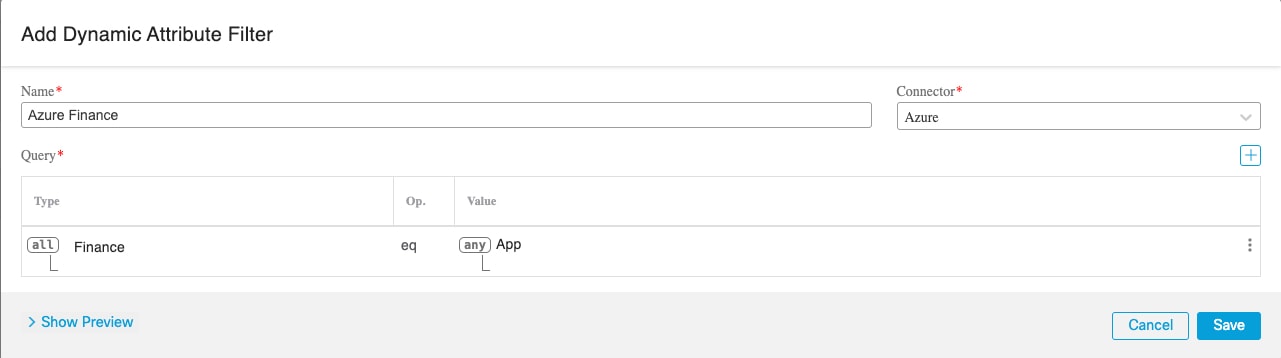
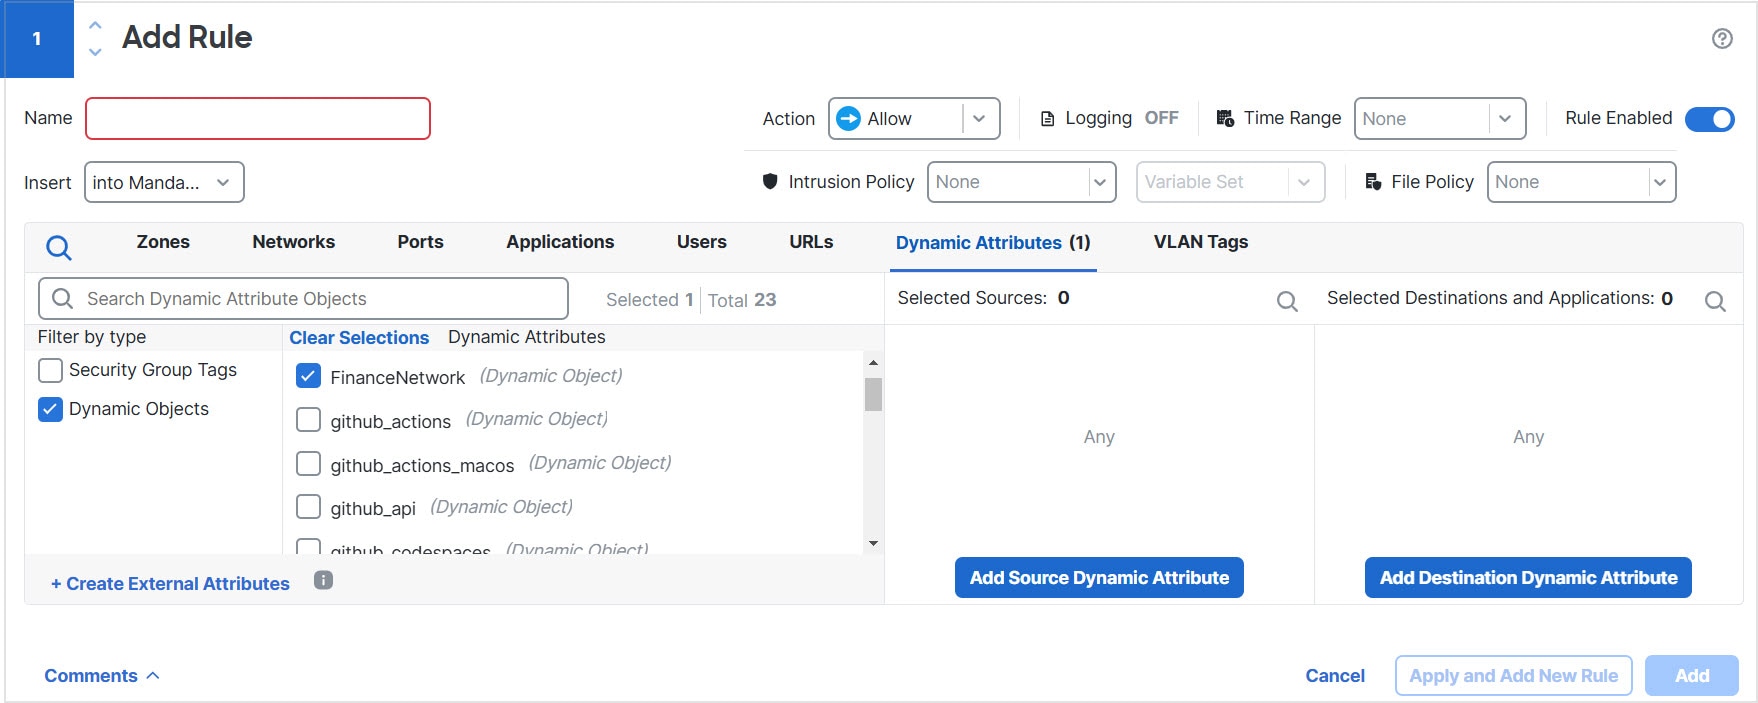
The adapter defined by the dynamic attributes connector receives those dynamic attributes filters as dynamic objects and enables you to use them in access control rules.
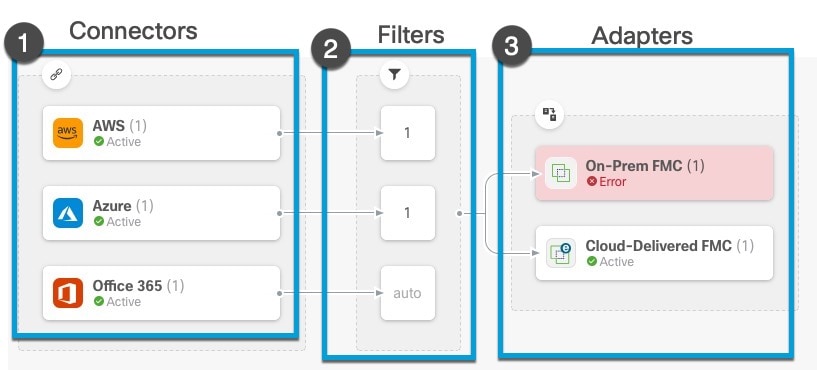
You can create the following types of adapters:
-
On-Prem Firewall Management Center for an on-premises device.
This type of device might be managed by Security Cloud Control or it might be a standalone.
-
Cloud-Delivered Firewall Management Center for devices managed by Security Cloud Control.
-

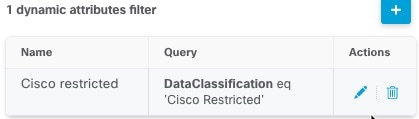
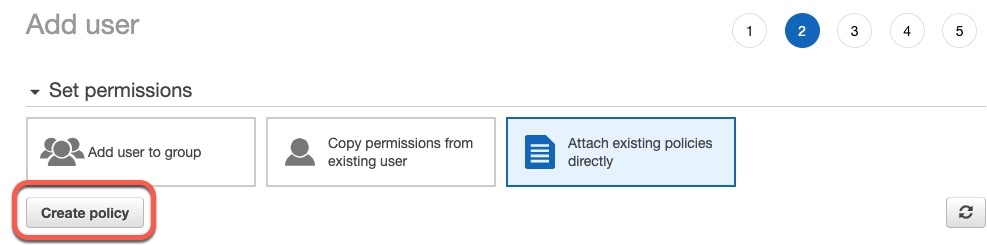
 to create a new one.

 )
) )
) to close the panel.
 )
)
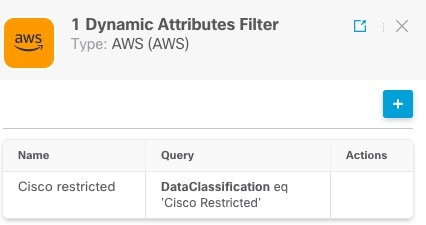
 in the filters column (
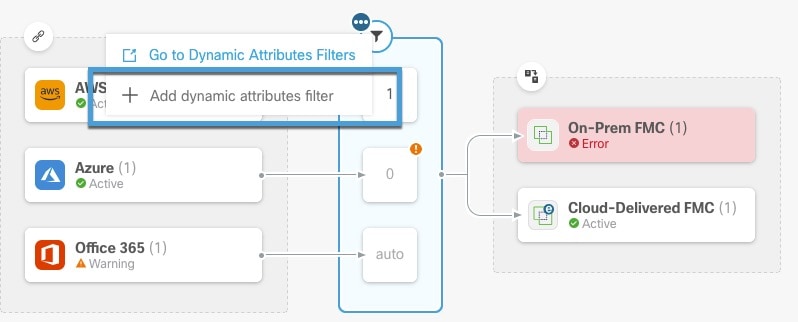
 to add, edit, or delete filters.
 )
) )
)

 to copy the token to the clipboard.


 )
)


 )
)

 Feedback