CLI users
A CLI user is a user account that
-
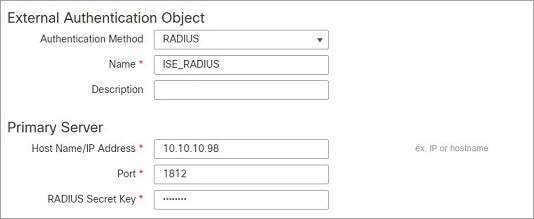
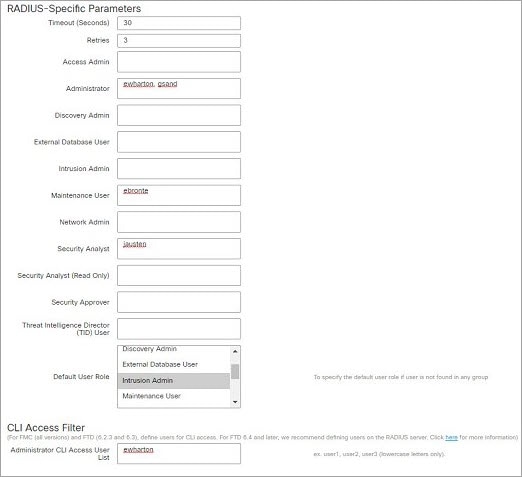
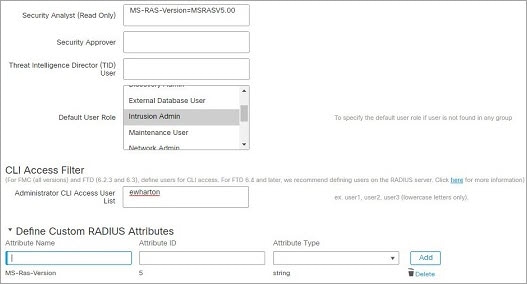
can be added as internal users or as external users on a LDAP or RADIUS server
-
is maintained separately on each managed device, and
-
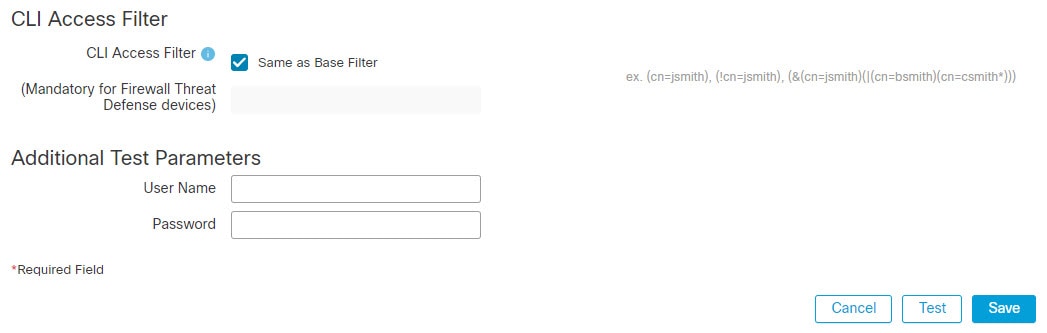
requires separate configuration for access to the Cloud-Delivered Firewall Management Center versus managed devices.
User account separation
When you add a user to the Cloud-Delivered Firewall Management Center, that user only has access to the Cloud-Delivered Firewall Management Center; you cannot then use that username to log directly into a managed device. You must separately add a user on the managed device.
Internal and external users
Internal and external users are authentication categories that managed devices support for user access control.
-
Internal users authenticate through a local database on the device
-
External users authenticate through external LDAP or RADIUS authentication servers when not present in the local database, and
-
both user types enable secure access management to network devices.
User authentication types
Managed devices support these user authentication methods:
-
Internal user—The device checks a local database for user authentication.
-
External user—If the user is not present in the local database, the system queries an external LDAP or RADIUS authentication server.
User Roles
Web Interface User Roles
There are a variety of user roles in Security Cloud Control (Security Cloud Control): Read-Only, Edit-Only, Deploy-only, Admin, and Super Admin. User roles are configured for each user on each tenant. If a Security Cloud Control user has access to more than one tenant, they may have the same user ID but different roles on different tenants. A user may have a read-only role on one tenant and a Super Admin role on another. When the interface or the documentation refers to a Read-only user, Deploy Only, Edit Only, an Admin user, or a Super Admin user we are describing that user's permission level on a particular tenant. Note that you cannot create user roles in the cloud-delivered Firewall Management Center because it uses Security Cloud Control user roles.
- Read Only
-
Read Only users can view all device configurations but not change them.
- Deploy Only
-
Deploy Only users can audit queued changes made to device configurations and deploy them but cannot change them.
- Edit Only
-
Edit Only users can make changes to all device configurations but cannot deploy them to devices.
- Super Admin and Admin
-
Super Admin and Admin users can access everything in the product. The difference between Super Admin and Admin users is that Super Admins can create accounts for other users on a tenant and modify existing user roles, while admins cannnot.
To know more about user roles in Security Cloud Control, see User Roles.
 Tip |
We recommend that you read through the table only if you are familiar with the user roles in On-Premises Firewall Management Center. |
|
On-Premises Firewall Management Center User Role |
Equivalent Cloud-delivered Firewall Management Center User Role |
Capabilities |
|---|---|---|
|
Access Admin, Discovery Admin, Intrusion Admin, Maintenance User |
Edit Only |
You can search, filter, or view the following:
You can back up or restore a device but cannot deploy policies to the devices. |
|
Administrator |
Super Admin |
You can access all features of the cloud-delivered Firewall Management Center and perform tasks, including create, read, modify, or delete policies or objects and deploy those changes to the devices. You can also edit user roles or create user records in Security Cloud Control. |
|
Network Admin |
Admin |
You can access all features of the cloud-delivered Firewall Management Center and perform tasks, including create, read, modify, or delete policies or objects and deploy those changes to the devices. However, you cannot edit user roles or create user records in Security Cloud Control. |
|
Security Analyst, Security Analyst (Read Only) |
Read Only |
You can view device information, policies, objects, and their related settings but cannot do the following:
|
|
Security Approver |
Deploy Only |
You can view most settings and deploy staged changes to devices but cannot create or modify objects or policies. |


 Feedback