Intrusion Policies

This chapter provides information on managing Snort 3 intrusion policies and access control rule configurations for intrusion detection and prevention.

Intrusion policies

An intrusion policy is a defined set of intrusion detection and prevention configurations that

  • inspects traffic for security violations,

  • can block or alter malicious traffic in inline deployments, and

  • serves as the system's last line of defense before traffic is allowed to its destination.

At the heart of each intrusion policy are the intrusion rules. An enabled rule causes the system to generate intrusion events for (and optionally block) traffic matching the rule. Disabling a rule stops processing of the rule.

The system delivers several base intrusion policies, which enable you to take advantage of the experience of the Cisco Talos Intelligence Group (Talos). For these policies, Talos sets intrusion and inspector rule states (enabled or disabled), as well as provides the initial configurations for other advanced settings.


Tip


System-provided intrusion and network analysis policies are similarly named but contain different configurations. For example, the Balanced Security and Connectivity network analysis policy and the Balanced Security and Connectivity intrusion policy work together and can both be updated in intrusion rule updates. However, the network analysis policy governs mostly preprocessing options, whereas the intrusion policy governs mostly intrusion rules.


If you create a custom intrusion policy, you can:

  • Tune detection by enabling and disabling rules, as well as by writing and adding your own rules.

  • Use Secure Firewall recommendations to associate the operating systems, servers, and client application protocols detected on your network with rules specifically written to protect those assets.

An intrusion policy can drop matching packets and generate intrusion events. To configure an intrusion or preprocessor drop rule, set its state to Block.

When tailoring your intrusion policy, especially when enabling and adding rules, keep in mind that some intrusion rules require that traffic first be decoded or preprocessed in a certain way. Before an intrusion policy examines a packet, the packet is preprocessed according to configurations in a network analysis policy. If you disable a required inspector, the system automatically uses it with its current settings, although the inspector remains disabled in the network analysis policy web interface.


Caution


Because preprocessing and intrusion inspection are so closely related, the network analysis and intrusion policies examining a single packet must complement each other. Tailoring preprocessing, especially using multiple custom network analysis policies, is an advanced task.


After you configure a custom intrusion policy, you can use it as part of your access control configuration by associating the intrusion policy with one or more access control rules or an access control policy's default action. This forces the system to use the intrusion policy to examine certain allowed traffic before the traffic passes to its final destination. A variable set that you pair with the intrusion policy allows you to accurately reflect your home and external networks and, as appropriate, the servers on your network.

By default, the system disables intrusion inspection of encrypted payloads. This default reduces false positives and improves performance when an encrypted connection matches an access control rule with intrusion inspection enabled.

Refer to the video for additional support and information - Snort 3 Intrusion Policy Overview.

Create a custom snort 3 intrusion policy

Create a custom Snort 3 intrusion policy to tailor intrusion detection and prevention settings to your network security requirements.

Snort 3 intrusion policies define how the system inspects traffic and responds to potential threats. You can create custom policies based on existing system-provided policies or other custom policies to meet specific security needs.

Before you begin

Follow these steps to create a custom Snort 3 intrusion policy:

Procedure


Step 1

Choose Policies > Access Control heading > Intrusion.

Step 2

Click Create Policy.

Step 3

Enter a unique Name and, optionally, a Description.

Step 4

Choose the Inspection Mode.

The selected action determines whether intrusion rules block and alert (Prevention mode) or only alert (Detection mode).

Note


Before selecting the prevention mode, you might want block rules to alert only so you can identify rules that cause many false positives.

Step 5

Choose the Base Policy.

You can use either a system-provided policy or an existing policy as your base policy.

Step 6

Click Save.

The new policy has the same settings as its base policy.


What to do next

To customize the policy, see Edit Snort 3 Intrusion Policies.

Edit Snort 3 Intrusion Policies

Use this task to understand how to access, modify, and manage Snort 3 intrusion policies in the Firewall Management Center, including editing policy settings, managing rule groups, and applying recommendations to protect your network.

While editing a Snort 3 policy, all the changes are saved immediately. No additional action is required to save the changes.

Before you begin

Procedure


Step 1

Choose Policies > Access Control heading > Intrusion .

Step 2

Ensure the Intrusion Policies tab is selected.

Step 3

Click Snort 3 Version next to the intrusion policy you want to configure.

Step 4

Edit your policy:

  • Change the mode—Click the Mode drop-down to change the inspection mode.

Caution


The inspection mode is changed only for the Snort 3 version of the policy. The existing inspection mode is retained in the Snort 2 version as is, which means that your Snort 2 and Snort 3 versions of the policy will have different inspection modes. We recommend that you use this option with caution.

  • Prevention —Triggered Block rules create an event (alert) and drop the connection.

  • Detection —Triggered Block rules create an alert.

    You can choose the detection mode before going for prevention. For example, before choosing the prevention mode, you might want block rules to alert only, so that you can identify rules that cause a lot of false positives.

Step 5

Click the Base Policy layer that defines the intrusion policy’s default settings.

  • Search rules—Use the search field to filter the display. You can enter the GID, SID, rule message, or reference info. For example, GID:1; SID:9621—to display only rule 1:962, SID:9621,9622,9623—to display multiple rules with different SIDs. You can also click inside the Search text box to choose any of the following options:

    • apply the filters Action = Alert , or Action: Block

    • apply the Disabled Rules filter
    • show Custom/User Defined Rules

    • filter by GID, SID, or GID:SID

    • filter by CVE

    • filter by comment

  • View filtered rules—Click any of the Presets to view rules that are set to alert, block, disabled, and so on.

    Overridden rules indicate the rules where the rule action has been changed from the default action to a different action. Note that, once changed, the rule action status is Overridden even if you change it back to its original default action. However, if you select Revert to default from the Rule Action drop-down list, the Overridden status is removed.

    Advanced Filters provides filter options based on the Lightweight Security Package (LSP) releases, Classifications of intrusions, and Microsoft Vulnerabilities.

  • View rule documentation—Click the rule ID or the Rule Documentation icon to display Talos documentation for the rule.

  • View a rule details—Click the Expand Arrow (expand arrow icon) icon in a rule row to view the rule details.

  • Add rule comments—Click Comment (comment icon) under the Comments column to add comments for a rule.

Step 6

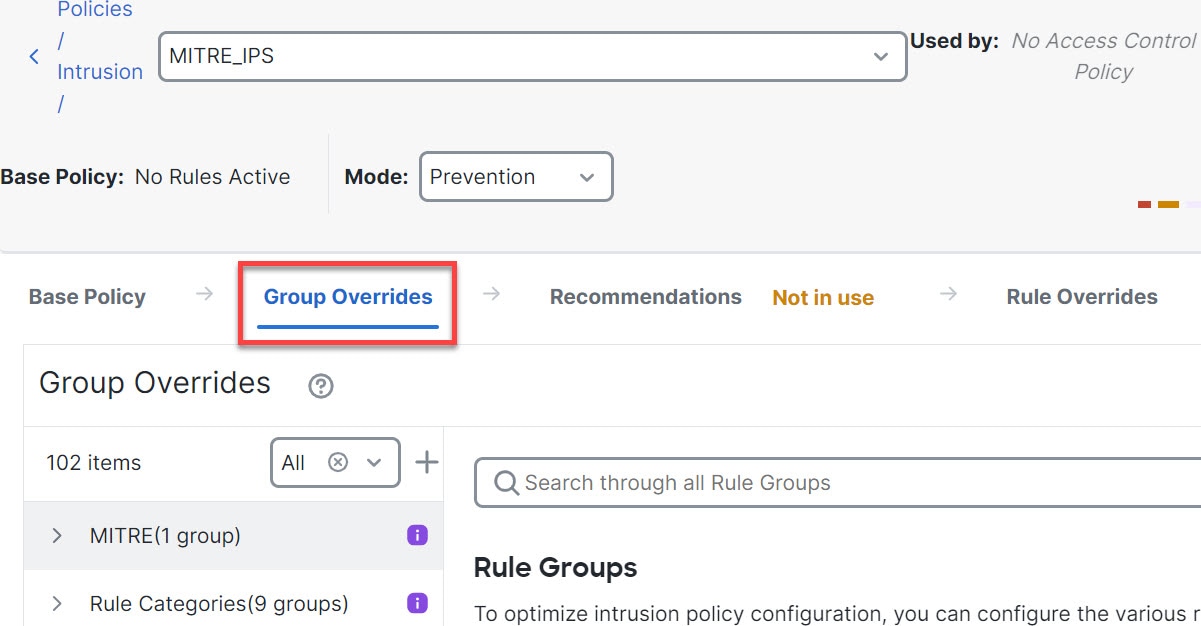
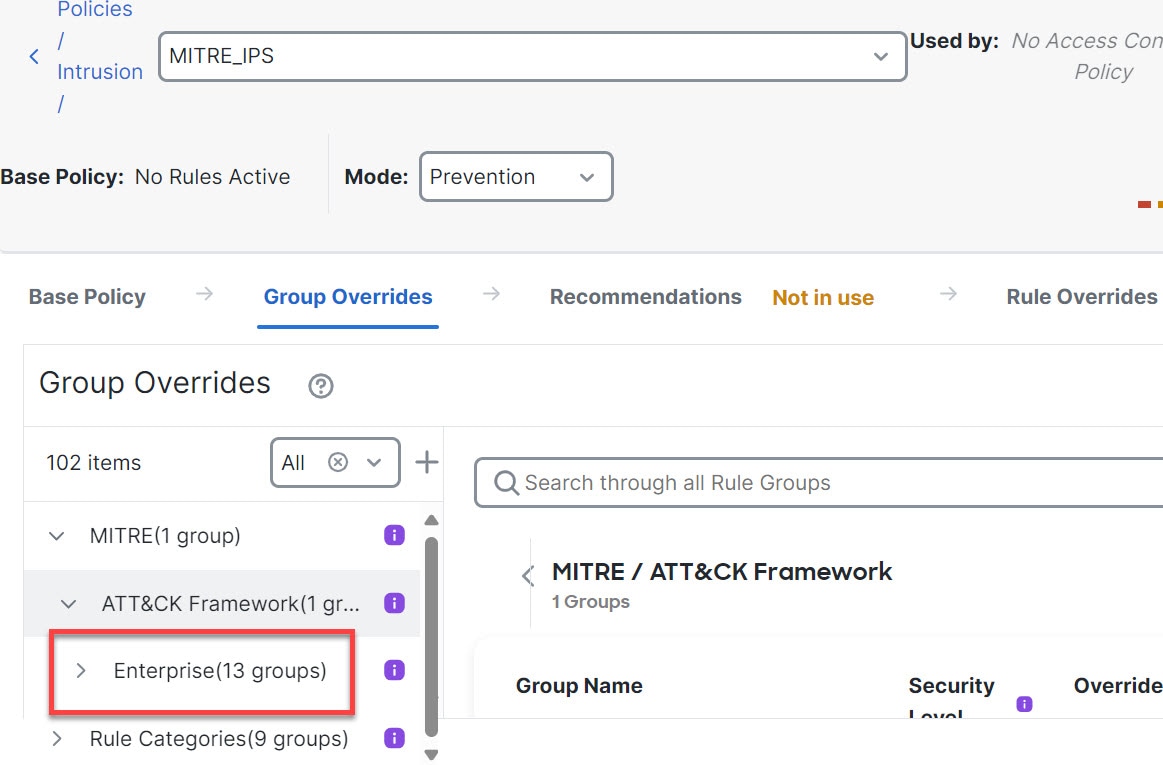
Group Overrides —Click the Group Overrides layer that lists all the categories of rule groups. The top-level parent rule group with Description, Overrides, Enabled Groups, and other details is displayed. Parent rule groups cannot be updated and are read-only. Only the leaf rule groups can be updated. In each rule group, you can traverse up to the last leaf group. Across each group, you can override, include, and exclude rule groups. In the leaf rule groups, you can:

  • Search rule groups—Use the search field to enter keywords and search for rule groups.

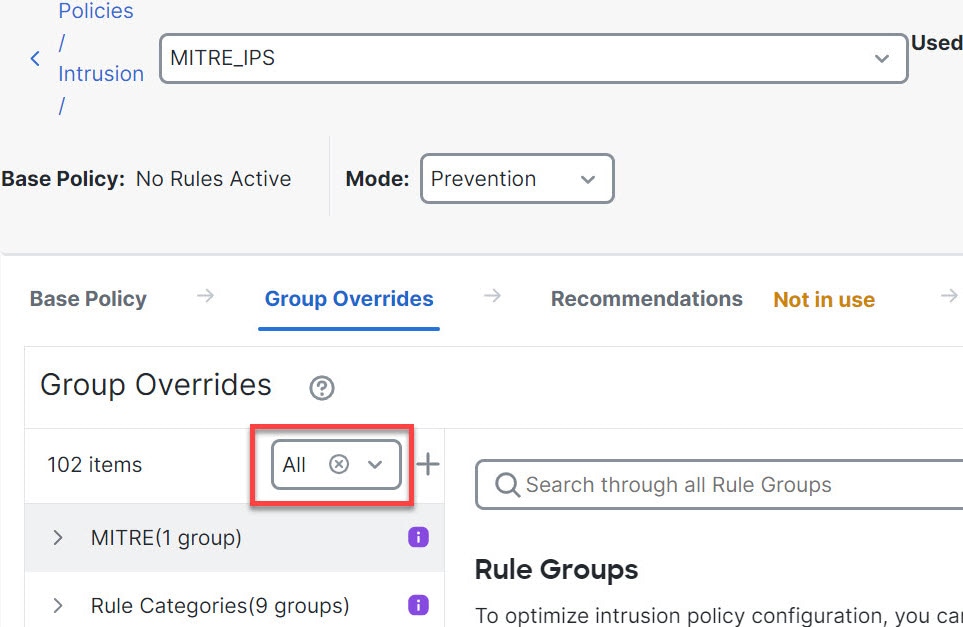
  • In the left panel, you can choose any of the preset filter options to search for rule groups:

    • All—For displaying all rule groups.

    • Excluded—For excluded groups.

    • Included—For included groups.

    • Overridden—For rule group configuration that is overridden.

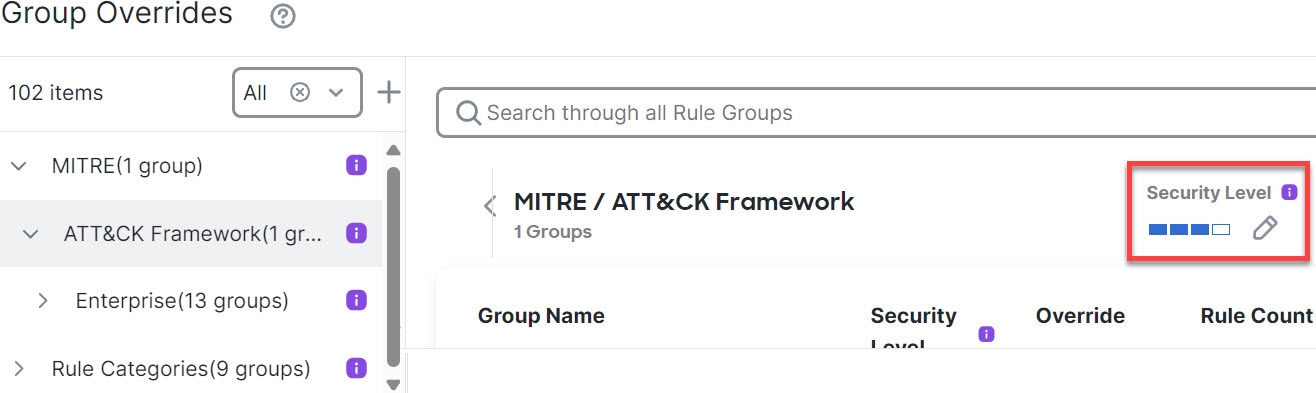
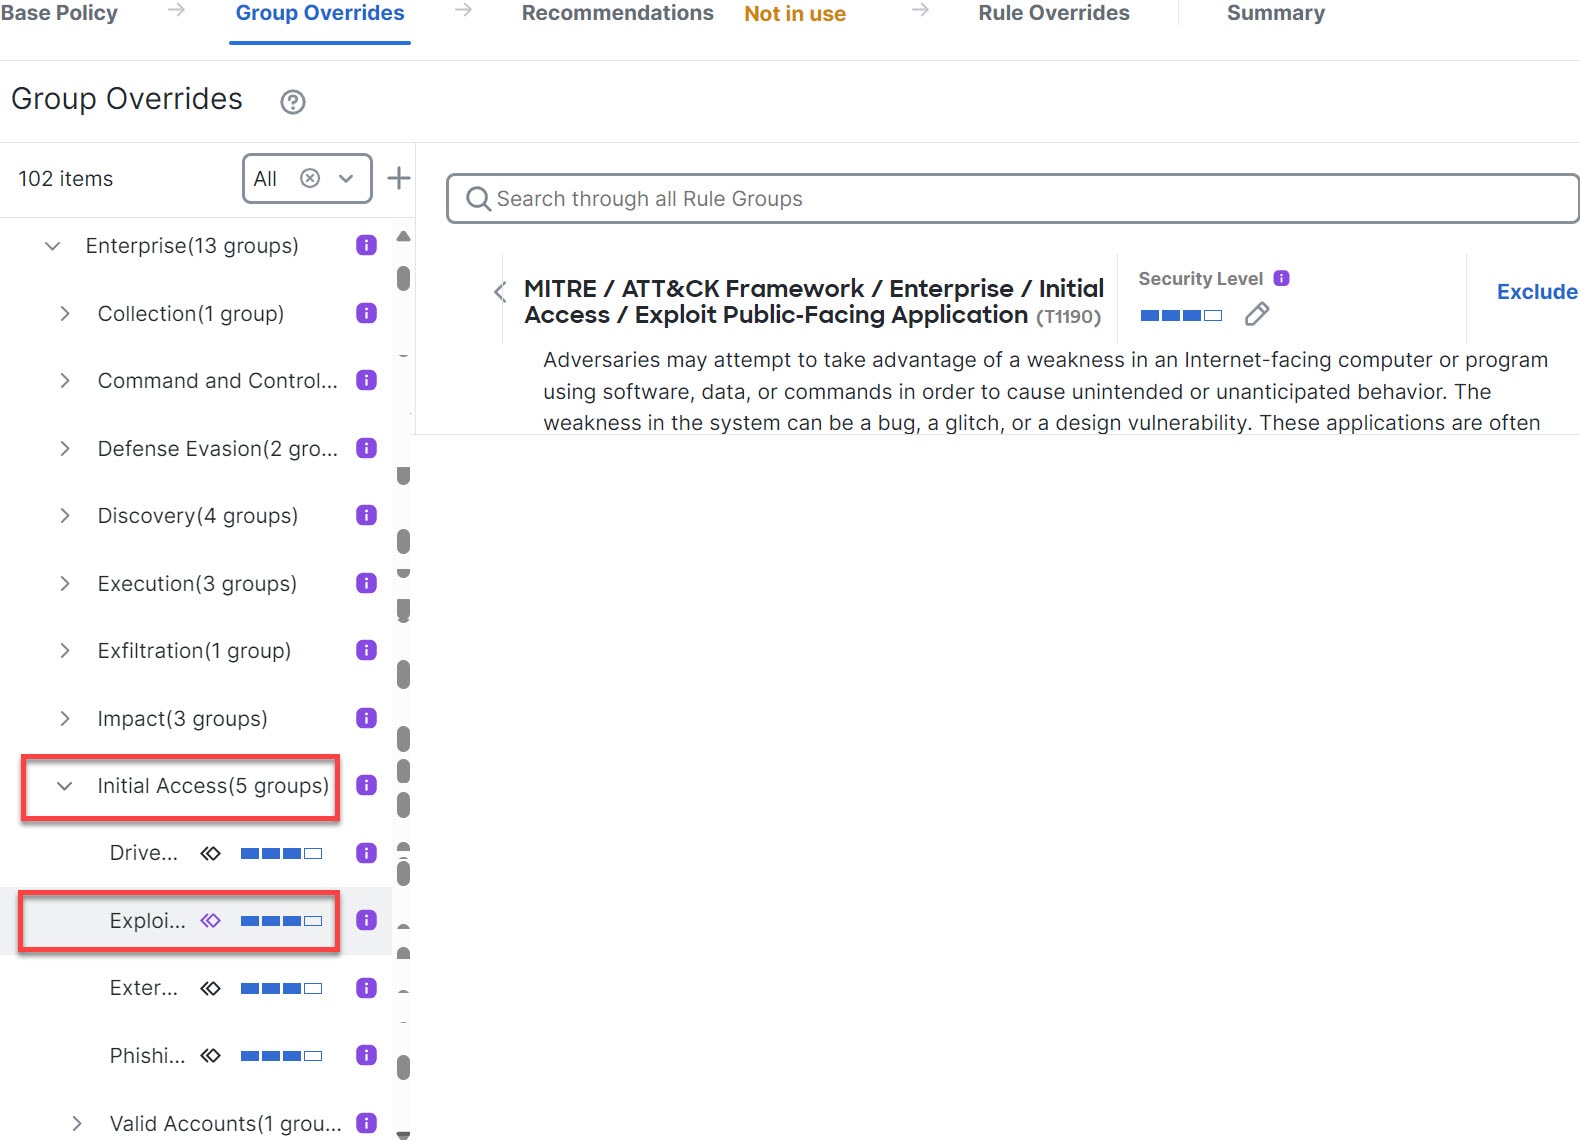
  • Set the security level for a rule group—Navigate to the required rule group on the left pane and click it. Click Edit next to the Security Level of the rule group to increase or decrease the security level based on system-defined rule settings.

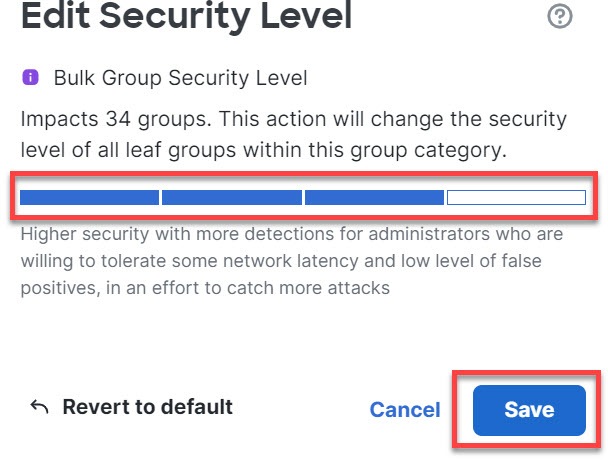
    In the Edit Security Level dialog box, you have the option to click Revert to Default , which reverts the changes you made.

    The Firewall Management Center automatically changes the action for the rules of the rule group for the configured security level. In the Rule Overrides layer, notice the count of Block Rules and Disabled Rules in the Presets every time you change the security level.

  • You can make bulk changes to the security level to change the security level of all rule groups within a particular rule category. Bulk security level applies to rule groups that have more than one rule group. After a bulk update of rule groups, you can still update the security level of any of the associated rule groups within it.

    There can be mixed security levels within rule groups; mixed indicates that the child groups contain a mix of security levels within the parent rule group.

  • Include or exclude rule groups—The rule groups displayed are the default rule groups associated with the system-provided base intrusion policy. You can include and exclude rule groups from the intrusion policy. An excluded rule group is removed from the intrusion policy and its rules are not applied on the traffic. For information on uploading custom rules in Firewall Management Center , see Add custom rules to rule groups .

    To exclude a rule group:

    1. Navigate the Rule Groups pane and choose the rule group that you want to exclude.

    2. Click the Exclude hyperlink on the right-pane.

    3. Click Exclude .

    To include a new rule group or multiple rule groups with the uploaded custom rules or a previously excluded rule group:

    1. Click Add (add icon) next to the rule group filter dropdown list.

    2. Choose all the rule groups you want to add by checking the check box next to it.

    3. Click Save .

  • For a leaf rule group, click the icon under the Override column header to see the rule action trail, which describes the sequence of overridden rule actions that can be assigned due to the base policy and group overrides for an intrusion rule. Rule actions can be obtained from either the base policy configurations or the user group override. The user group override takes the priority between the two; priority refers to the final overridden action that is assigned to the rule group.

  • Click the rule count (number) under the Rule Count column header to see a summary of rules that are part of the rule group.

Step 7

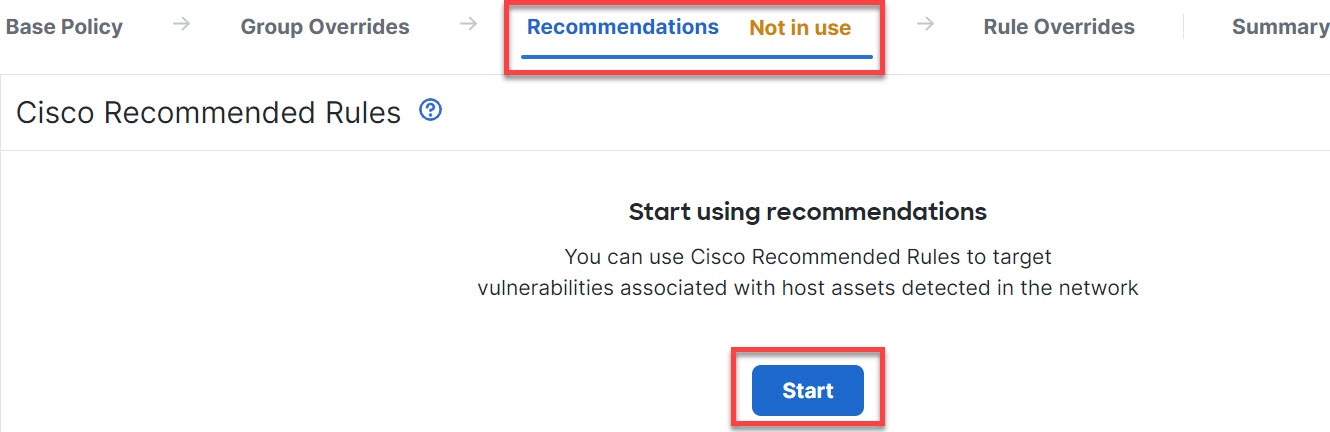
Recommendations —Click the Recommendations layer if you want to generate and apply Cisco recommended rules. Recommendations use the host database to enable or disable rules, based on known vulnerabilities.

Step 8

Rule Overrides —Click the Rule Overrides layer to choose any of the presets to view rules, which are set to alert, block, disabled, overridden, rewrite, pass, drop, or reject.

  • The Set By column shows the default set by state (Base Policy) or modified rule state by Group Overrides, Rule Overrides, or Recommendations. The Set By column in All Rules (in the left pane) shows the trail of rule action override actions based on priority order. The priority order of rule actions is Rule Override > Recommendations > Group Override > Base Policy.

  • Modify Rule Action —To modify rule actions, choose either of the following:
    • Bulk edit—Choose one or more rules, then choose the required action from the Rule Action drop-down list; and click Save .

      Note


      Bulk rule action changes are supported only for the first 500 rules.

    • Single rule edit—Choose the action for the rule from the drop-down list in the Rule Action column.

    Rule actions are:

    • Block — Generates event, blocks current matching packet and all the subsequent packets in this connection.

    • Alert — Generates only events for matching packet and does not drop packet or connection.

    • Disable —Does not match traffic against this rule. No events are generated.

    • Revert to default —Reverts to the system default action.

    • Pass — No events are generated, allows packet to pass without further evaluation by any subsequent Snort rules.

      Note


      The Pass action is available only for custom rules and not for system-provided rules.

    • Drop — Generates event, drops matching packet and does not block further traffic in this connection.

    • Reject — Generates event, drops matching packet, blocks further traffic in this connection and sends TCP reset if it is a TCP protocol to source and destination hosts.

      Behavior of reject in different firewall modes and IP address or source or destination in relation to Client or Server : Snort sends RST packets to both client and server in cases of routed, inline, and bridged interfaces. Snort sends two RST packets. The RST packet in the client's direction will have the source set to the server’s IP and the destination set to client’s IP. The RST packet in the server's direction will have the source set to the client’s IP and the destination set to the server’s IP.

    • Rewrite — Generates event and overwrites packet contents based on the replace option in the rule.

    For IPS rule action logging, see Rule action logging .

    If there is a React rule, it is converted to an alert action.

Step 9

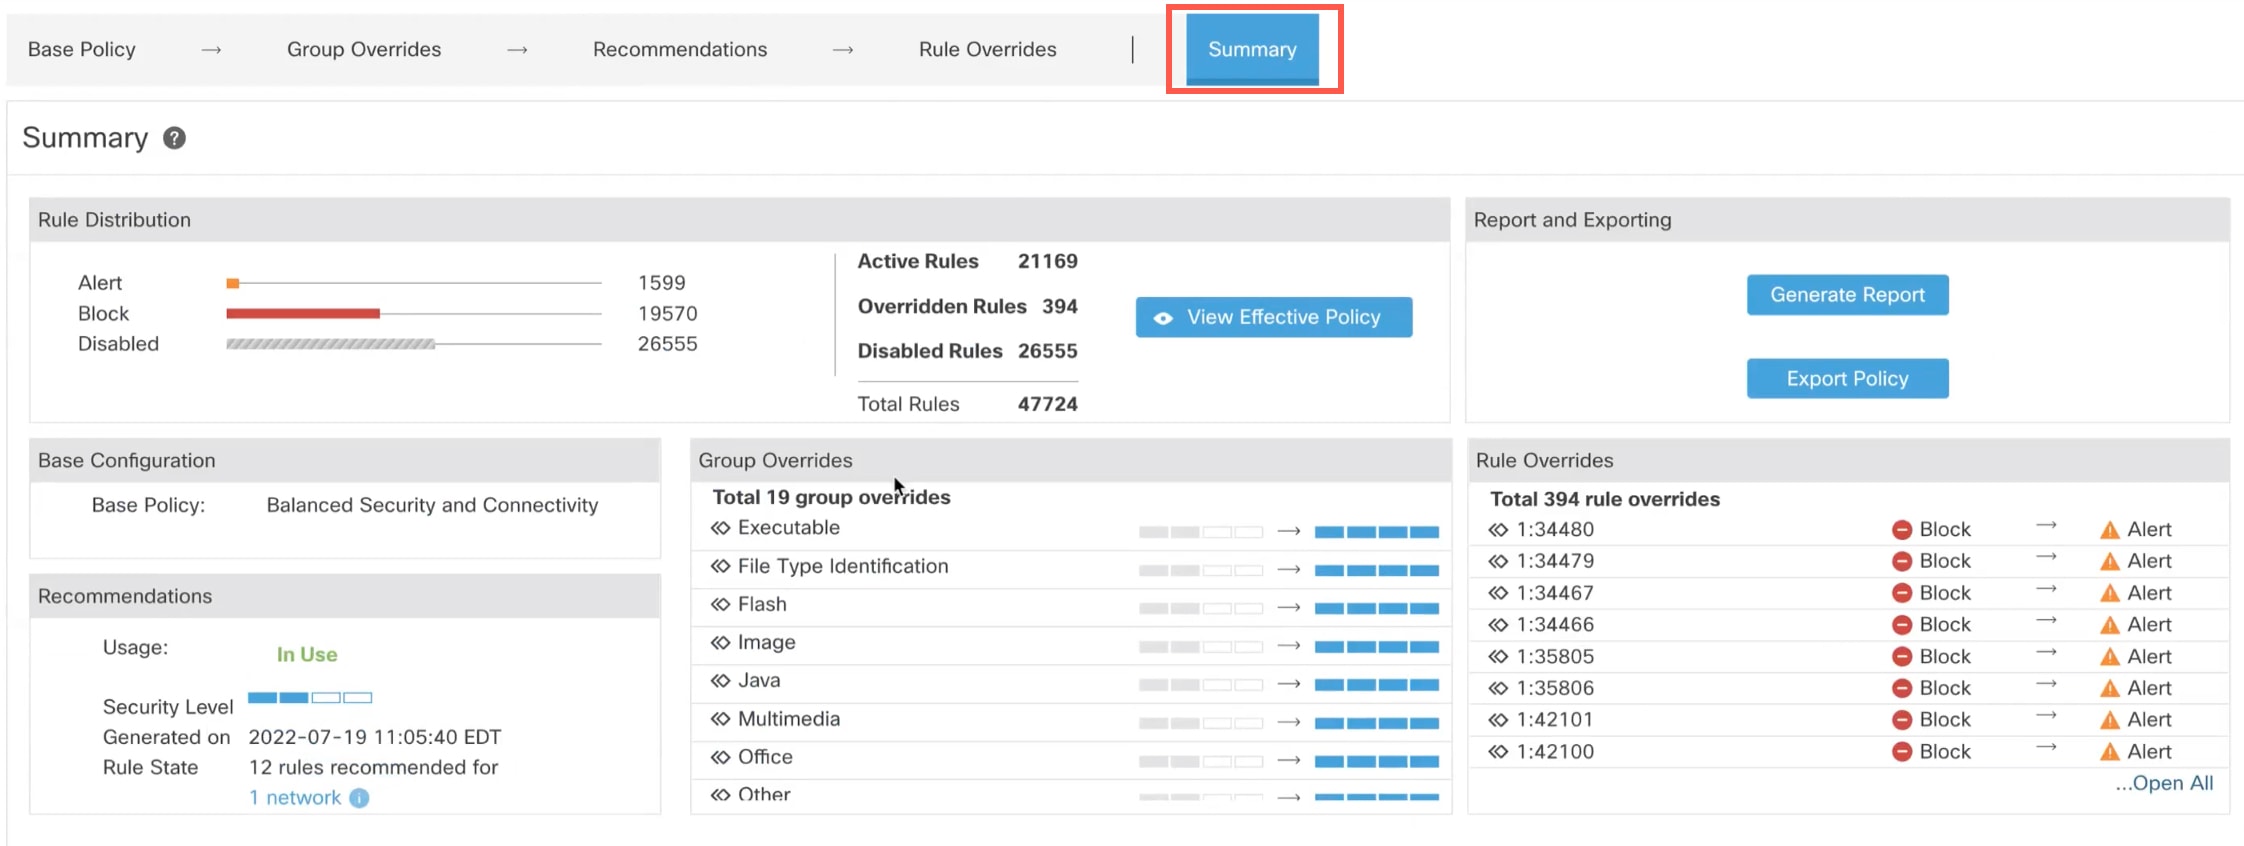
Click the Summary layer for a holistic view of the current changes to the policy. The policy summary page contains the following information:

  • Rule distribution of the policy, that is, active rules, disabled rules, and similar categories.

  • Option to export policy and generate report of the intrusion policy.

  • Base policy details.

  • Option to generate recommendations.

  • Group overrides list the groups you have overridden.

  • Rule overrides that shows the list of rules that you have overridden.

  • In the Summary layer, click the ? icon to open a pop-up window that explains the Snort layering concepts.

To change the base policy, see Change the base policy of an intrusion policy .

Note


You can navigate to Objects > Intrusion Rules and click the Snort 3 All Rules tab and traverse through all the intrusion rule groups. The parent rule group lists the associated child groups and rule count.


What to do next

Deploy configuration changes. See Deploy configuration changes .

Rule group reporting

Rule group reporting is a security analysis feature that

  • reflects rule groups in generated intrusion events,

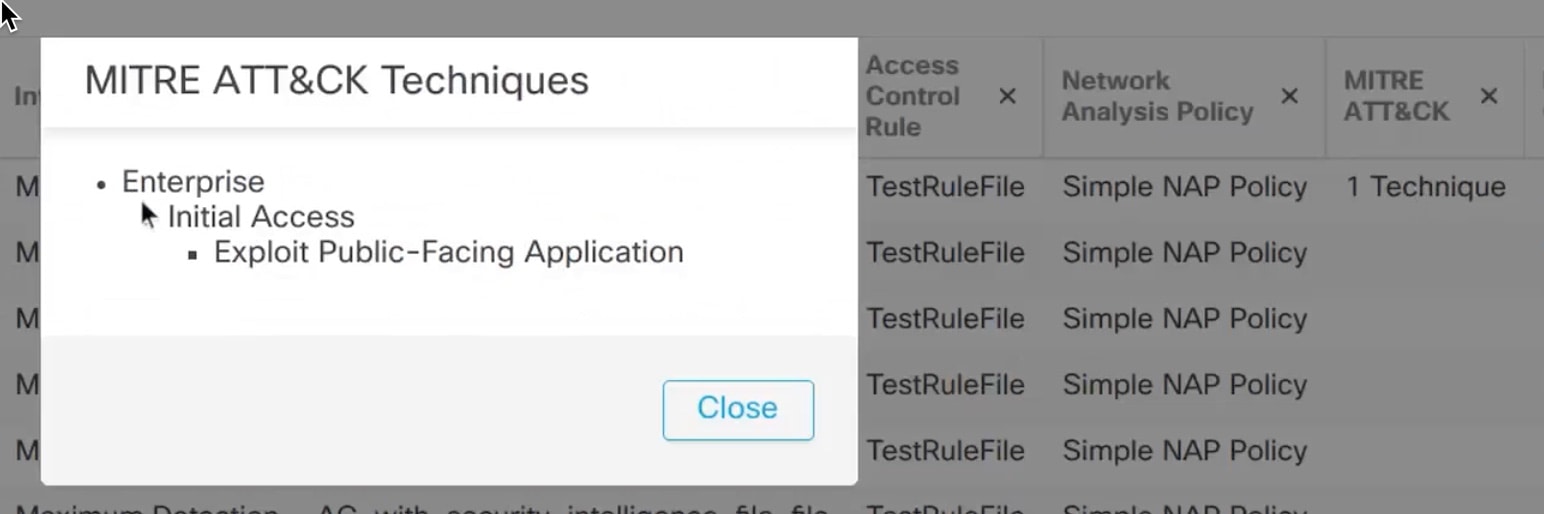
  • includes MITRE tactics and techniques identification, and

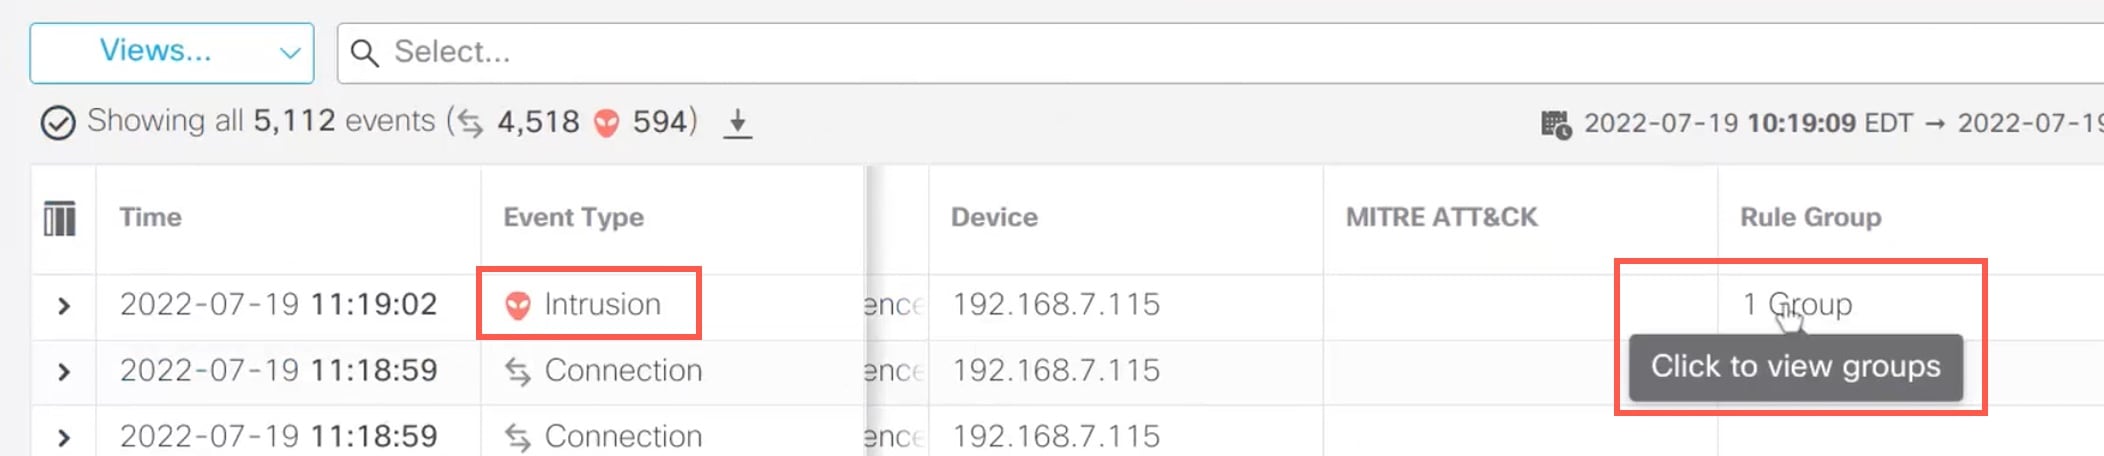
  • provides dedicated columns for both MITRE and non-MITRE rule groups in intrusion event displays.

Rule group reporting access and fields

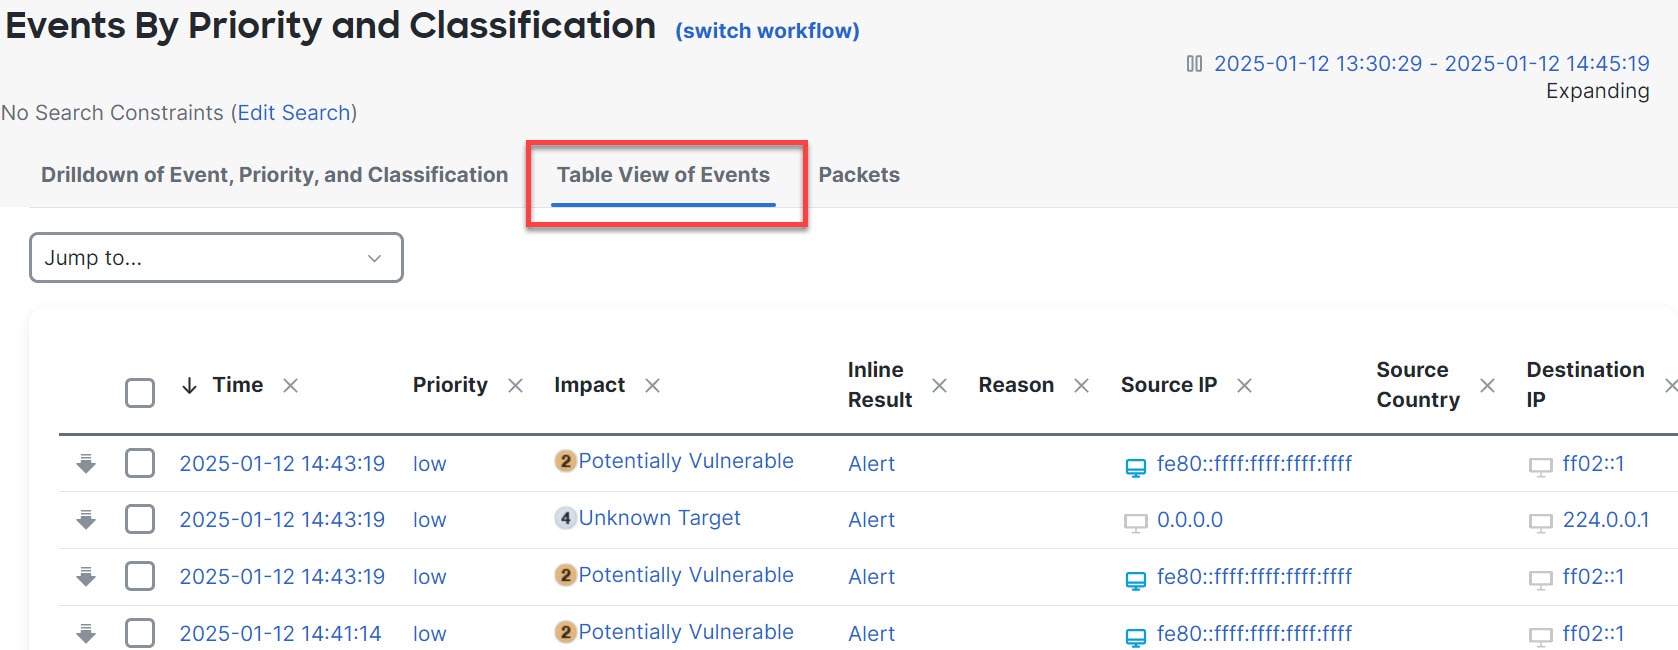
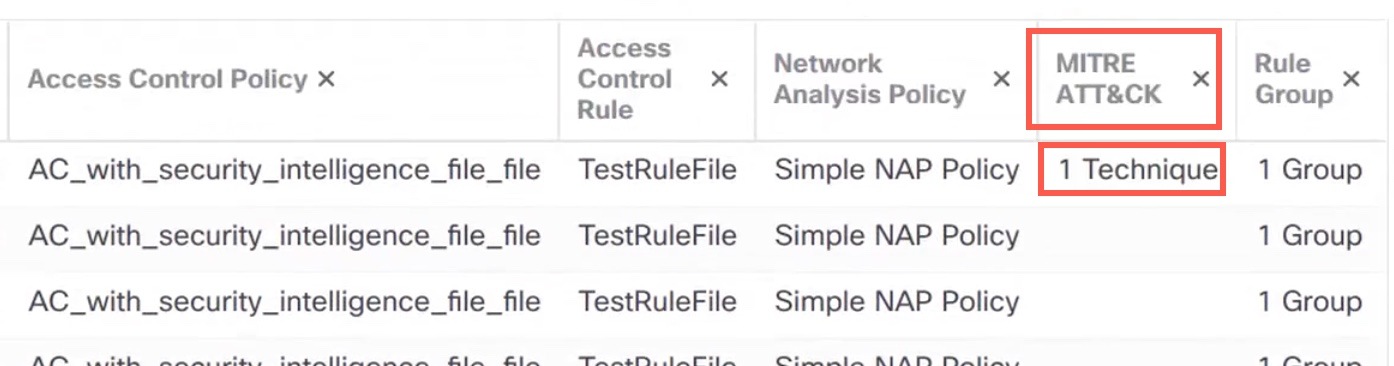
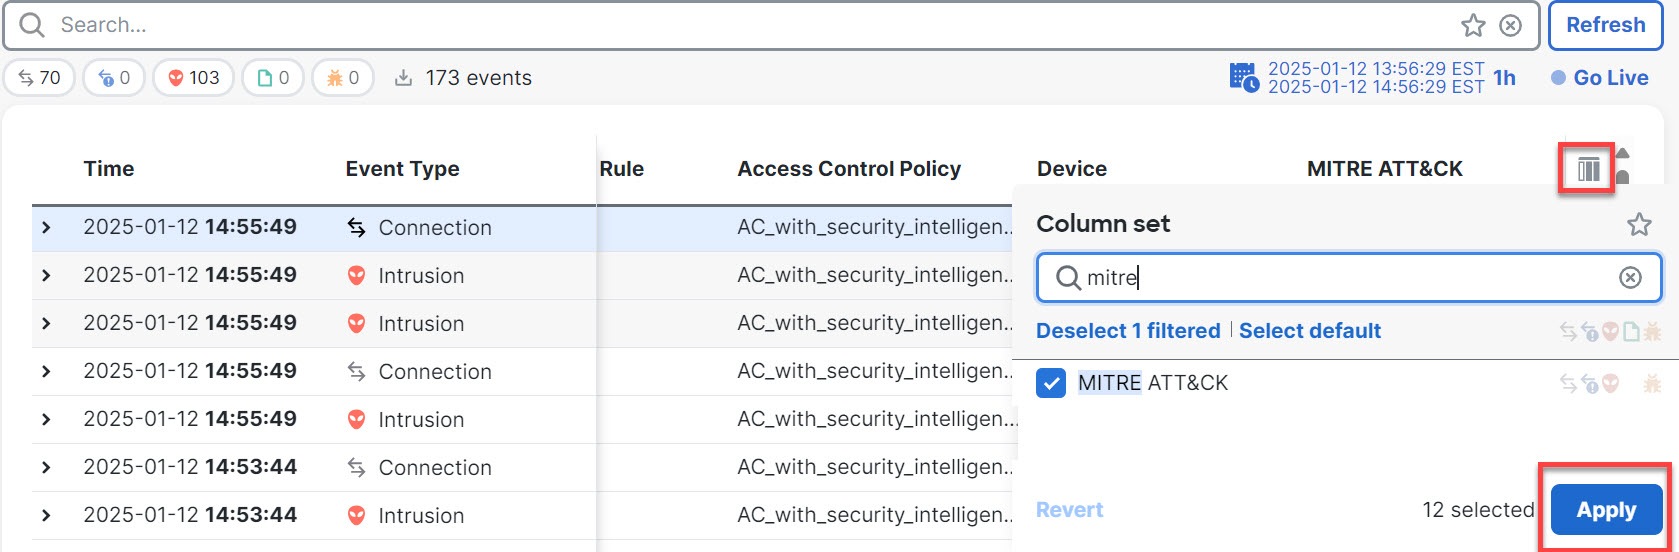
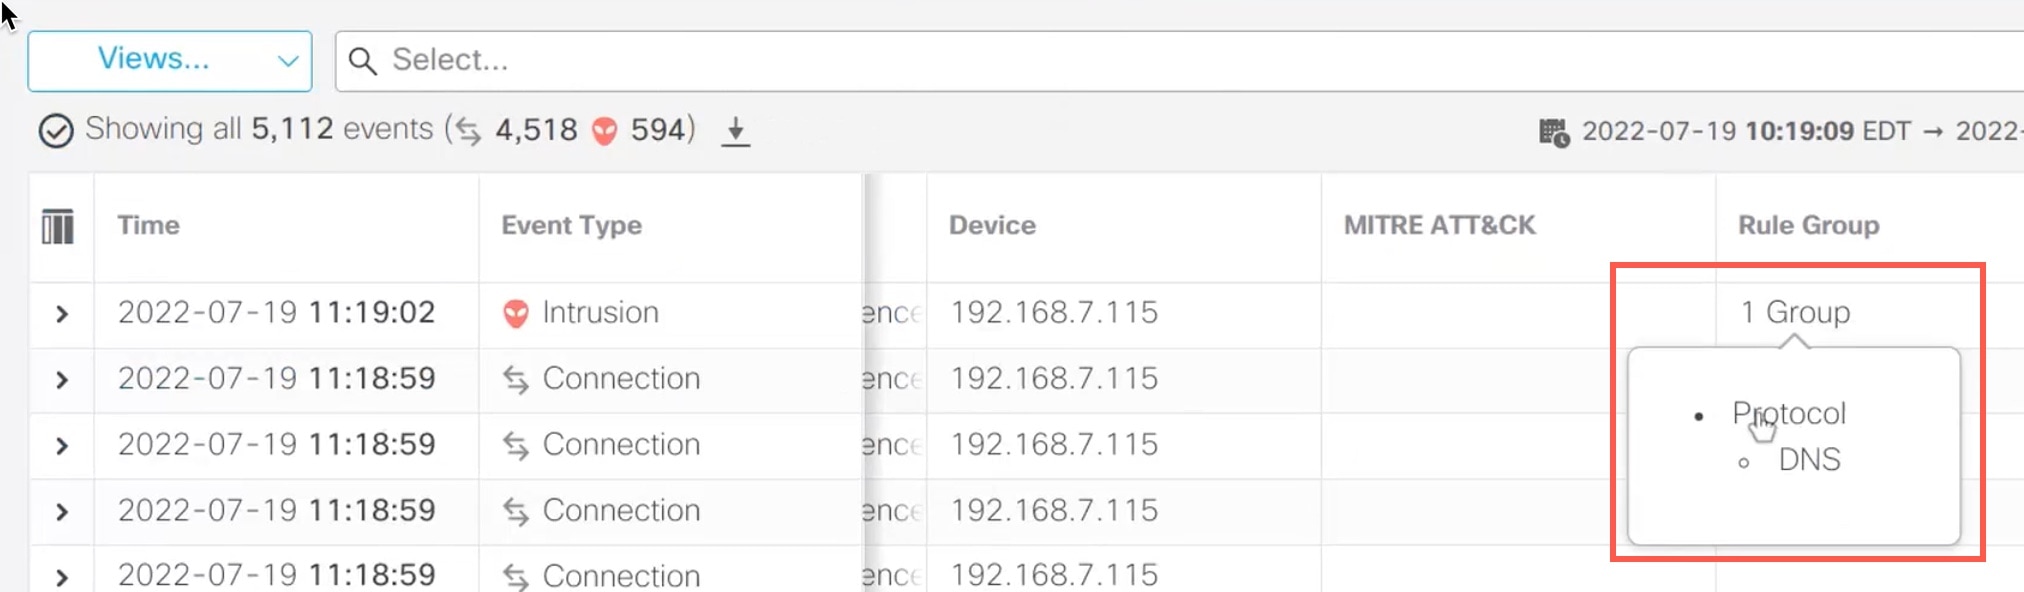
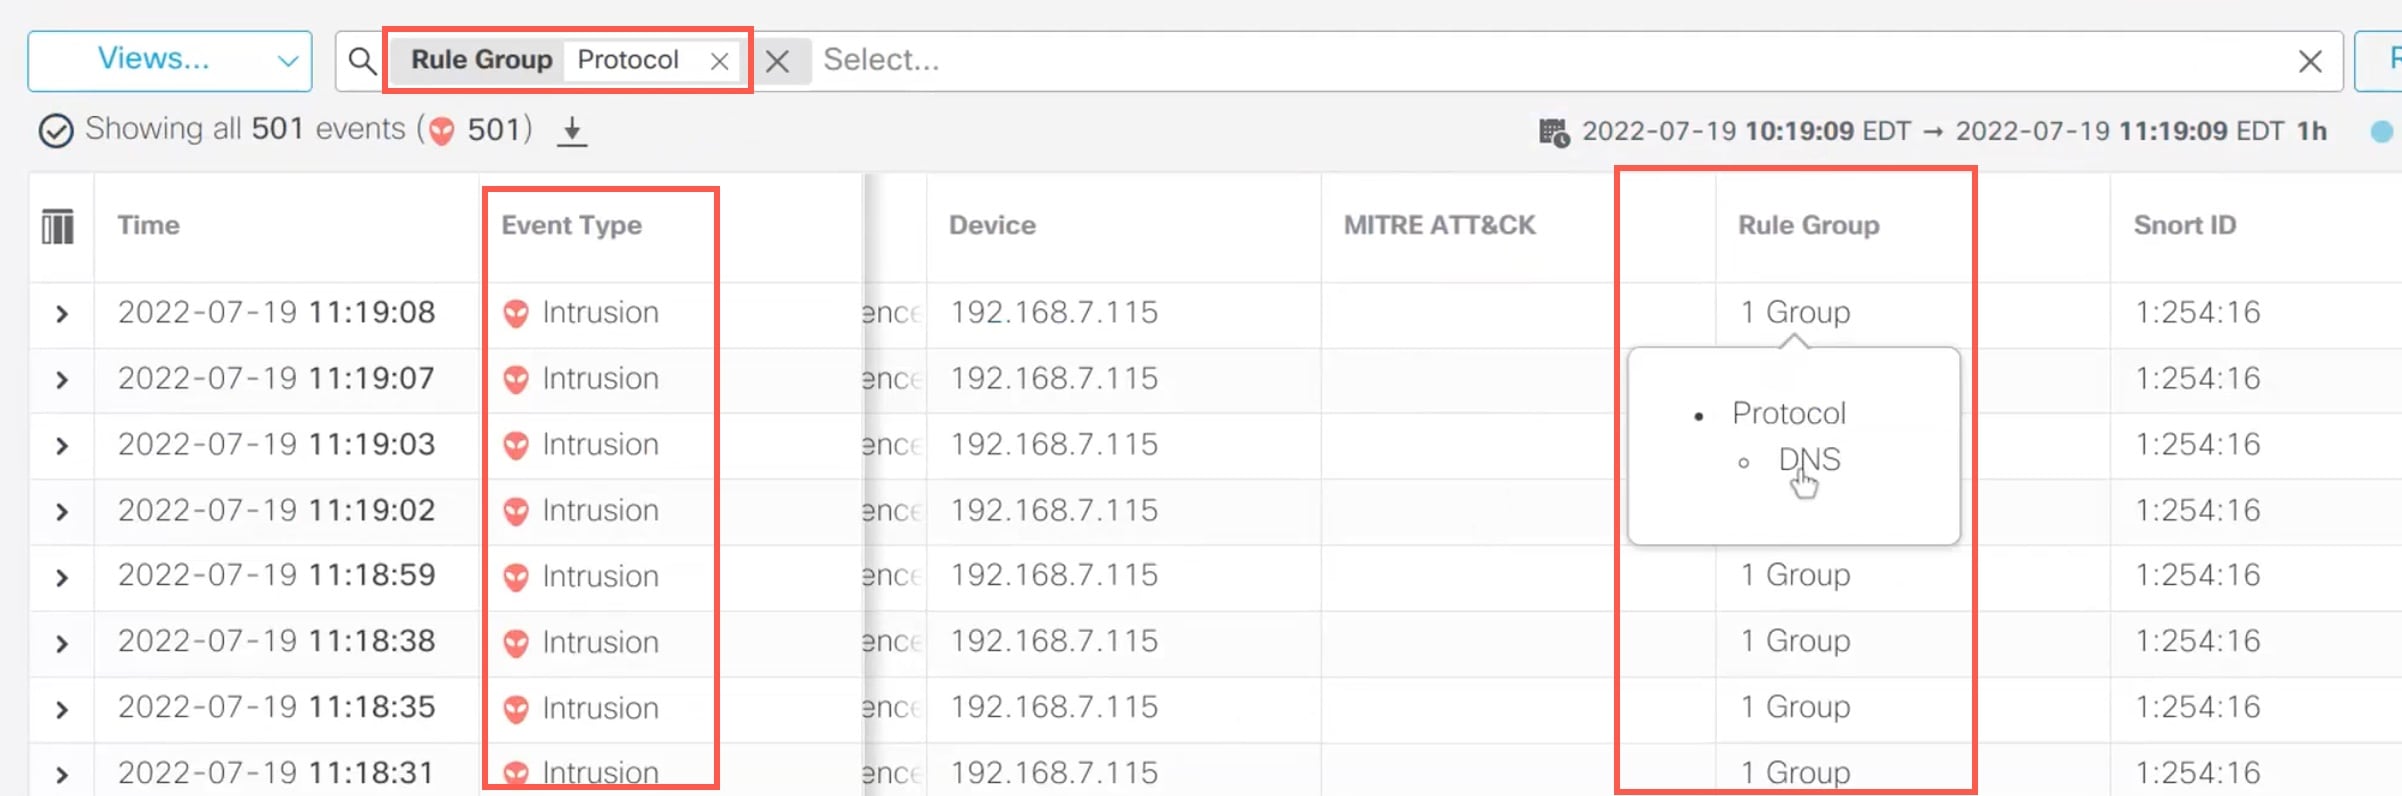
To access the intrusion events, in Firewall Management Center, go to Analysis > Intrusions > Events, and click the Table View of Events tab. You can also view the intrusion event fields in the Unified Events viewer. In the Analysis tab, click Unified Events.

In the Intrusion Events page, these fields are added for rule group reporting. Note that you must explicitly enable the mentioned columns:

  • MITRE ATT&CK

  • Rule Group

For information about these fields, see the section Intrusion Event Fields in the Cisco Secure Firewall Management Center Administration Guide, 7.3.

Rule action logging

From Cloud-Delivered Firewall Management Center 7.2.0 onwards, in the Intrusion Events window, the event in the Inline Result column displays the same name as the IPS action applied to the rule, so that you can see the action that was applied on the traffic matching the rule.

For the IPS actions, the tables show the events that are displayed in the Inline Result column of the Intrusion Events window and Action column for Intrusion Event Type in the Unified Events window.

IPS Action for Snort 3

Inline Result - Cloud-Delivered Firewall Management Center 7.1.0 and earlier

Inline Result -Cloud-Delivered Firewall Management Center 7.2.0 onwards

Alert

Pass

Alert

Block

Dropped/Would Have Dropped/Partially Dropped

Block/Would Block/Partial Block

Drop

Dropped/Would have dropped

Drop/Would drop

Reject

Dropped/Would have dropped

Reject/Would reject

Rewrite

Allow

Rewrite


Important


  • In case of a rule without the "Replace" option, the Rewrite action is displayed as Would Rewrite.

  • The Rewrite action would also be displayed as Would Rewrite if the "Replace" option is specified, but the IPS policy is in Detection mode or the device is in Inline-TAP or Passive mode.


Note


In case of backward compatibility (Cloud-Delivered Firewall Management Center 7.2.0 managing a Firewall Threat Defense 7.1.0 device), the events mentioned are applicable only to the Alert IPS action where Pass is displayed as Alert for events. For all the other actions, the events for Cloud-Delivered Firewall Management Center 7.1.0 are applicable.


Change the base policy of an intrusion policy

Change the base policy to use a different system-provided or custom policy as the foundation for your intrusion policy configuration.

You can choose a different system-provided or custom policy as your base policy. You can chain up to five custom policies, with four of the five using one of the other four previously created policies as its base policy; the fifth must use a system-provided policy as its base.

Procedure


Step 1

Choose Policies > Access Control heading > Intrusion.

Step 2

Click Edit (edit icon) next to the intrusion policy you want to configure.

Step 3

Choose a policy from the Base Policy drop-down list.

Step 4

Click Save.


What to do next

Deploy configuration changes. See Deploy configuration changes.

View Snort 2 and Snort 3 base policy mapping

This task allows you to view the mapping between Snort 3 and Snort 2 intrusion policies.


Note


Snort 2 is not supported on threat defense version 7.7. For information on Snort 2 features that are supported in versions earlier than 7.7, refer to the Cloud-Delivered Firewall Management Center guide that matches your Firewall Threat Defense version.


Procedure


Step 1

Choose Policies > Access Control heading > Intrusion.

Step 2

Ensure the Intrusion Policies tab is selected.

Step 3

Click IPS Mapping.

Step 4

In the IPS Policy Mapping dialog box, click View Mappings to view the Snort 3 to Snort 2 intrusion policy mapping.

Step 5

Click OK.


Synchronize Snort 2 rules with Snort 3

This task helps ensure that Snort 2 rule override settings and custom rules are replicated on Snort 3, allowing you to start with similar coverage when transitioning between versions.

To ensure that the Snort 2 version settings and custom rules are retained and carried over to Snort 3, the Firewall Management Center provides the synchronization functionality. Synchronization helps Snort 2 rule override settings and custom rules, which you may have altered and added over the last few months or years, to be replicated on the Snort 3 version. This utility helps to synchronize Snort 2 version policy configuration with Snort 3 version to start with similar coverage.


Note


Snort 2 is not supported on threat defense Version 7.7. For information on Snort 2 features that are supported in versions earlier than 7.7, refer to the Cloud-Delivered Firewall Management Center guide that matches your Firewall Threat Defense version.


If the Firewall Management Center is upgraded from 6.7 or earlier to 7.0 or later version, the system synchronizes the configuration. If the Firewall Management Center is a fresh 7.0 or later version, you can upgrade to a higher version, and the system will not synchronize any content during upgrade.

Before upgrading a device to Snort 3, if changes are made in Snort 2 version, you can use this utility to have the latest synchronization from Snort 2 version to Snort 3 version so that you start with a similar coverage.


Note


When you move to Snort 3, manage the Snort 3 version of the policy independently. Do not use this utility as a regular operation.


Important


  • Only the Snort 2 rule overrides and custom rules are copied to Snort 3 and not the other way around. You may not find a one-to-one mapping of all the intrusion rules in Snort 2 and Snort 3. Your changes to rule actions for rules that exist in both versions are synchronized when you perform the following procedure.

  • Synchronization does not migrate the threshold and suppression settings of any custom or system-provided rules from Snort 2 to Snort 3.


Procedure


Step 1

Choose Policies > Access Control heading > Intrusion.

Step 2

Ensure the Intrusion Policies tab is selected.

Step 3

Click Show Snort 3 Sync status.

Step 4

Identify the intrusion policy that is out-of-sync.

Step 5

Click the Sync icon Snort out-of-Sync (snort versions out-of-sync).

Note


If the Snort 2 and the Snort 3 versions of the intrusion policy are synchronized, then the Sync icon is in greenSnort in-Sync (snort versions in-sync).

Step 6

Read the summary. Download a copy of the summary if required.

Step 7

Click Re-Sync.

Note

 
  • The synchronized settings will be applicable on the Snort 3 intrusion engine only if it is applied on a device, and after a successful deployment.

  • Snort 2 custom rules can be converted to Snort 3 with the system-provided tool. If you have any Snort 2 custom rules, click the Custom Rules tab and follow the on-screen instructions to convert the rules. For more information, see Convert Snort 2 custom rules of a single intrusion policy to Snort 3.


What to do next

Deploy configuration changes. See Deploy configuration changes.

Manage intrusion policies

This task enables you to perform comprehensive management operations on your intrusion policies including creation, modification, deletion, export, deployment, and reporting.

On the Intrusion Policy window (Policies > Access Control heading > Intrusion) you can view your current custom intrusion policies, along with the following information:

  • The number of access control policies and devices using the intrusion policy to inspect traffic.

  • Indicates the domain where the policy was created in a multidomain deployment.


Note


Snort 2 is not supported on threat defense version 7.7. For information on Snort 2 features that are supported in versions earlier than 7.7, refer to the Cloud-Delivered Firewall Management Center guide that matches your Firewall Threat Defense version.


In a multidomain deployment, the system displays policies created in the current domain, which you can edit. It also displays policies created in ancestor domains, which you cannot edit. To view and edit policies created in a lower domain, switch to that domain.

Procedure


Step 1

Choose Policies > Access Control heading > Intrusion.

Step 2

Manage your intrusion policy:

  • Create — Click Create Policy; see Create a custom snort 3 intrusion policy.

  • Delete — Click Delete (delete icon) next to the policy you want to delete. The system prompts you to confirm and informs you if another user has unsaved changes in the policy. Click OK to confirm.

    If the controls are dimmed, the configuration belongs to an ancestor domain, or you do not have permission to modify the configuration.

  • Edit intrusion policy details — Click Edit (edit icon) next to the policy you want to edit. You can edit the Name, Inspection Mode, and the Base Policy of the intrusion policy.

  • Edit intrusion policy settings — Click Snort 3 Version; see Edit Snort 3 Intrusion Policies.

  • Export — If you want to export an intrusion policy to import on another Firewall Management Center, click Export; see the Exporting Configurations topic in the latest version of the Cisco Secure Firewall Management Center Configuration Guide.

  • Deploy — Choose Deploy > Deployment; see Deploy configuration changes.

  • Report — Click Report; see the Generating Current Policy Reports topic in the latest version of the Cisco Secure Firewall Management Center Configuration Guide. Generates two reports, one for each policy version.


Access control rule configuration to perform intrusion prevention

An access control rule configuration to perform intrusion prevention is a security mechanism that

  • enables multiple access control rules within an access control policy to be associated with intrusion policies,

  • permits intrusion inspection for Allow or Interactive Block access control rules to match different intrusion inspection profiles against different types of traffic, and

  • evaluates traffic before it reaches its final destination on the network.

Whenever the system uses an intrusion policy to evaluate traffic, it uses an associated variable set. Variables in a set represent values commonly used in intrusion rules to identify source and destination IP addresses and ports. You can also use variables in intrusion policies to represent IP addresses in rule suppressions and dynamic rule states.

System-provided and custom intrusion policies

Cisco delivers several intrusion policies with the system. By using system-provided intrusion policies, you can take advantage of the experience of the Cisco Talos Intelligence Group (Talos). For these policies, Talos sets intrusion and preprocessor rule states, as well as provides the initial configurations for advanced settings. You can use system-provided policies as-is, or you can use them as the base for custom policies. Building custom policies can improve the performance of the system in your environment and provide a focused view of the malicious traffic and policy violations occurring on your network.

Connection and intrusion event logging

When an intrusion policy invoked by an access control rule detects an intrusion and generates an intrusion event, it saves that event to the Management Center. The system also automatically logs the end of the connection where the intrusion occurred to the Management Center database, regardless of the logging configuration of the access control rule.

Access control rule configuration and intrusion policies

The number of unique intrusion policies you can use in a single access control policy depends on the model of the target devices; more powerful devices can handle more. Every unique pair of intrusion policy and variable set counts as one policy. Although you can associate a different intrusion policy-variable set pair with each Allow and Interactive Block rule (as well as with the default action), you cannot deploy an access control policy if the target devices have insufficient resources to perform inspection as configured.

Configure an access control rule to perform intrusion prevention

Configure an access control rule to enable intrusion prevention inspection on network traffic, allowing you to detect and prevent malicious activities based on intrusion signatures and policies.

You must be an Admin, Access Admin, or Network Admin to perform this task.

Follow these steps to configure an access control rule to perform intrusion prevention:

Procedure


Step 1

In the access control policy editor, create a new rule or edit an existing rule; see the Access Control Rule Components topic in the latest version of the Cisco Secure Firewall Management Center Configuration Guide.

Step 2

Ensure the rule action is set to Allow, Interactive Block, or Interactive Block with reset.

Step 3

Click Inspection.

Step 4

Choose a system-provided or a custom intrusion policy, or choose None to disable intrusion inspection for traffic that matches the access control rule.

Step 5

If you want to change the variable set associated with the intrusion policy, choose a value from the Variable Set drop-down list.

Step 6

Click Save to save the rule.

Step 7

Click Save to save the policy.


What to do next

Deploy configuration changes. See Deploy configuration changes.

Tune Intrusion Policies using Rules

This section provides information on custom rules in Snort 3, intrusion rule action, intrusion event notification filters in an intrusion policy, converting Snort 2 custom rules to Snort 3, and adding rule groups with custom rules to an intrusion policy.

Tuning intrusion rules

Tuning intrusion rules is a configuration process that

  • enables rule state modification for shared object rules, standard text rules, and inspector rules,

  • controls event generation and traffic processing based on rule configuration, and

  • allows filtering of rules to display specific subsets for targeted configuration changes.

Rule state configuration

You enable a rule by setting its rule state to Alert or to Block. Enabling a rule causes the system to generate events on traffic matching the rule. Disabling a rule stops processing of the rule. You can also set your intrusion policy so that a rule set to Block generates events on, and drops, matching traffic.

You can filter rules to display a subset of rules, enabling you to select the exact set of rules where you want to change rule states or rule settings.

When an intrusion rule or rule argument requires a disabled inspector, the system automatically uses it with its current configuration even though it remains disabled in the web user interface (UI) of the network analysis policy.


Note


We recommend that you do not modify shared object rules and you only enable or disable these rules for your threat defense device. To create custom Snort rules, contact Cisco support.


Intrusion rule types

An intrusion rule is a specified set of keywords and arguments that the system uses to detect attempts to exploit vulnerabilities in your network. As the system analyzes network traffic, it compares packets against the conditions specified in each rule, and triggers the rule if the data packet meets all the conditions specified in the rule.

  • intrusion rules, which are subdivided into shared object rules and standard text rules

  • inspector rules, which are associated with a detection option of the packet decoder or with one of the inspectors included with the system.

Rule type attributes and characteristics

This table summarizes attributes of these rule types:

Table 1. Intrusion rule types

Type

Generator ID (GID)

Snort ID (SID)

Source

Can Copy?

Can Edit?

shared object rule

3

lower than 1,000,000

Cisco Talos Intelligence Group (Talos)

yes

limited

standard text rule

1

(Global domain or legacy GID)

lower than 1,000,000

Talos

yes

limited

1,000-2,000

(descendant domain)

1,000,000 or higher

Created or imported by user

yes

yes

preprocessor rule

decoder- or preprocessor- specific

lower than 1,000,000

Talos

no

no

1,000,000 or higher

Generated by the system during option configuration

no

no

You cannot save changes to any rule created by Talos, but you can save a copy of a modified rule as a custom rule. You can modify either variables used in the rule or rule header information (such as source and destination ports and IP addresses). In a multidomain deployment, rules created by Talos belong to the Global domain. Administrators in descendant domains can save local copies of the rules, which they can then edit.

For the rules it creates, Talos assigns default rule states in each default intrusion policy. Most preprocessor rules are disabled by default and must be enabled if you want the system to generate events for preprocessor rules and, in an inline deployment, drop offending packets.

Custom rules in Snort 3

A custom rule in Snort 3 is an intrusion detection rule that

  • enables users to create custom threat detection by importing local rule files with .txt or .rules extensions,

  • belongs to rule groups and can be included in multiple groups simultaneously, and

  • receives a unique rule number in GID:SID:Rev format with system-generated identifiers.

Rule number format

When you create a custom intrusion rule, the system assigns it a unique rule number, which has the format GID:SID:Rev. The elements of this number are:

  • GID—Generator ID. For custom rules, it is not necessary to specify the GID. The system automatically generates the GID based on whether you are in the Global domain or a sub-domain while uploading the rules. For all standard text rules, this value is 2000 for a Global domain.

  • SID—Snort ID. Indicates whether the rule is a local rule of a system rule. When you create a new rule, assign a unique SID to the rule.

    SID numbers for local rules start at 1,000,000, and the SID for each new local rule is incremented by one.

  • Rev—The revision number. For a new rule, the revision number is one. Each time you modify a custom rule the revision number should be incremented by one.

In a custom standard text rule, you set the rule header settings and the rule keywords and arguments. You can use the rule header settings to focus the rule to only match traffic using a specific protocol and traveling to or from specific IP addresses or ports.

To check whether a SID is enabled or disabled, verify the entries in the snort.lua file located in the ./file-contents/ngfw/var/sf/detection_engines/<ID>/IPS/<ID> directory.

  • If the SID is disabled by default, no entry will be present in the file.

  • If the SID is manually enabled, you will see an entry with enable:yes.

  • If the SID is disabled after being manually enabled, the entry remains in the file and will display enable:no.


Note


  • Snort 3 custom rules cannot be edited. Ensure that custom rules have a valid classification message for classtype within the rule text. If you import a rule without a classification or with an incorrect classification, delete and recreate the rule.

  • You can create custom intrusion rules using Snort 3. However, support for tuning and troubleshooting these rules is currently not available.

  • The classtype in a Snort rule assigns a classification to the rule indicating the type of attack that is associated with an event. A priority level of 1-4 is also associated with each classtype. However, the priority level for certain classtypes on the Threat Defense device do not match the open-source Snort classtype priority levels that are mentioned in the Snort documentation. For example, tcp-connection has a priority of 4 in open-source Snort while a priority of 3 is assigned to it on the Threat Defense device.


Sensitive data detection

Sensitive data such as social security numbers, credit card numbers, emails, and so on may be leaked onto the internet, intentionally or accidentally. Sensitive data detection is used to detect and generate events on possible sensitive data leakage. Events are generated only when a significant amount of Personally Identifiable Information (PII) is transferred. Sensitive data detection can mask PII in the output of events.

Use the sd_pattern IPS option to detect and filter PII. This information includes credit card numbers, U.S. Social Security numbers, phone numbers, and email addresses. A regular expression (regex) syntax is available for defining your own PII.

The sd_pattern option has the following settings:

  • Pattern—An implicit, required setting that specifies the regular expression to look for in the PDU. The regex must be written in PCRE syntax.

  • Threshold—An explicit, optional setting that specifies the number of matches in the PDU required to generate an event.

    The sd_pattern as IPS rule option is available in Snort with no requirements for additional inspectors. The syntax for the rule option is:

    sd_pattern: "<pattern>"[, threshold <count>];

    For example:

    sd_pattern:"credit_card", threshold 2;

There are five built-in patterns for sensitive data. To use the built-in patterns in the "pattern" setting, you must specify the name of the PII type that needs to be matched and the necessary regex is substituted for it. The PII name and regex mappings or patterns are described here:

Table 2. Built-in patterns

PII Name

Pattern

credit_card

\d{4}\D?\d{4}\D?\d{2}\D?\d{2}\D?\d{3,4}

us_social

[0-8]\d{2}-\d{2}-\d{4}

us_social_nodashes

[0-8]\d{8}

Email

[a-zA-Z0-9!#$%&'*+\/=?^_`{|}~-]+(?:\.[a-zA-Z0-9!#$%&'*+\/=?^_`{|}~-]+)
*@(?:[a-zA-Z0-9](?:[a-zA-Z0-9-]*[a-zA-Z0-9])?\.)+[a-zA-Z0-9](?:[a-zA-Z0-9-]*[a-zA-Z0-9])?

us_phone

(?:\+?1[-\.\s]?)?\(?([2-9][0-8]\d)\)?[-\.\s]([2-9]\d{2})[-\.\s](\d{4})

Masking for data matching these patterns only work with system-provided rules or built-in patterns for Credit Cards, U.S. Social Security numbers, emails, and U.S. phone numbers. Masking does not work for custom rules or user-defined PII patterns. Rules are available in the Lightweight Security Package (LSP) for sensitive data, gid:13. By default, they are not enabled in any system-provided policy.

The sensitive data rules in LSP cover all built-in patterns and have the following threshold values:

  • credit_card: 2

  • us_social: 2

  • us_social_nodashes: 20

  • email: 20

  • us_phone: 20

You can use the sd_pattern option to create custom rules and modify existing rules. To do this, use the Snort 3 intrusion policy interface.

An example of a rule with sd_pattern with a custom pattern and threshold:

alert tcp (sid: 1000000001; sd_pattern:"[\w-\.]+@([\w-]+\.)+[\w-]{2,4}",threshold 4; msg: "email, threshold 4")

Examples

An example of custom rules using sensitive data detection:

Rule with built-in pattern

alert tcp (
        msg:"SENSITIVE-DATA Email";
        flow:only_stream;
        pkt_data;
        sd_pattern:"email", threshold 5;
        service:http, smtp, ftp-data, imap, pop3;
        gid:2000;
        sid:1000001;
)

Rule with custom pattern

alert tcp (
        msg:"SENSITIVE-DATA US phone numbers";
        flow:only_stream;
        file_data;
        sd_pattern:"+?3?8?(0[\s\.-]\d{2}[\s\.-]\d{3}[\s\.-]\d{2}[\s\.-]\d{2})", threshold 2;
        service:http, smtp, ftp-data, imap, pop3;
        gid:2000;
        sid:1000002;
)

Here are some more examples of complete Snort IPS rules with built-in sensitive data patterns:

  • alert tcp ( sid:1; msg:"Credit Card"; sd_pattern:"credit_card", threshold 2; )

  • alert tcp ( sid:2; msg:"US Social Number"; sd_pattern:"us_social", threshold 2; )

  • alert tcp ( sid:3; msg:"US Social Number No Dashes"; sd_pattern:"us_social_nodashes", threshold 2; )

  • alert tcp ( sid:4; msg:"US Phone Number"; sd_pattern:"us_phone", threshold 2; )

  • alert tcp ( sid:5; msg:"Email"; sd_pattern:"email", threshold 2; )

Disabling data masking is not supported in the Secure Firewall Management Center, and Secure Firewall Device Manager.

For information on how to add custom rules to rule groups, see Add custom rules to rule groups.

View Snort 3 intrusion rules in an intrusion policy

This task allows you to view and interact with Snort 3 intrusion rules within an intrusion policy, enabling you to manage rule display settings and access detailed rule information.

You can adjust how rules are displayed in the intrusion policy. You can also display the details for a specific rule to see rule settings, rule documentation, and other rule specifics.

Procedure


Step 1

Choose Policies > Access Control heading > Intrusion.

Step 2

Click Snort 3 Version next to the policy.

Step 3

While viewing the rules, you can:

  • Filter the rules.
  • Choose a rule group to see rules related to that group.
  • View an intrusion rule's details.
  • View rule comments.
  • View rule documentation.

See Edit Snort 3 Intrusion Policies for details on performing these tasks.


Intrusion rule actions

An intrusion rule action is a policy configuration mechanism that

  • enables or disables rules within individual intrusion policies,

  • specifies which action the system takes if monitored conditions trigger the rule, and

  • inherits default actions from the base policy used during intrusion policy creation.

Default action behavior

The Cisco Talos Intelligence Group (Talos) sets the default action of each intrusion and inspector rule in each default policy. For example, a rule may be enabled in the Security over Connectivity default policy and disabled in the Connectivity over Security default policy. Talos sometimes uses a rule update to change the default action of one or more rules in a default policy. If you allow rule updates to update your base policy, you also allow the rule update to change the default action of a rule in your policy when the default action changes in the default policy you used to create your policy (or in the default policy it is based on). Note, however, that if you have changed the rule action, the rule update does not override your change.

When you create an intrusion rule, it inherits the default actions of the rules in the default policy you use to create your policy.

Intrusion rule action options

In an intrusion policy, you can set a rule's action to specific values that determine how the system responds to matching traffic.

Alert

You want the system to detect a specific intrusion attempt and generate an intrusion event when it finds matching traffic. When a malicious packet crosses your network and triggers the rule, the packet is sent to its destination and the system generates an intrusion event. The malicious packet reaches its target, but you are notified through the event logging.

Block

You want the system to detect a specific intrusion attempt, drop the packet containing the attack, and generate an intrusion event when it finds matching traffic. The malicious packet never reaches its target, and you are notified through the event logging.

Disable

You do not want the system to evaluate matching traffic.


Note


Choosing either the Alert or Block options enables the rule. Choosing Disable disables the rule.

We strongly recommend that you do not enable all the intrusion rules in an intrusion policy. The performance of your managed device is likely to degrade if all rules are enabled. Instead, tune your rule set to match your network environment as closely as possible.


Set intrusion rule action

Set intrusion rule actions to control how the system responds to detected threats, allowing you to configure rules to alert on or block specific intrusion attempts.

Intrusion rule actions are policy-specific.

Procedure

Step 1

Choose Policies > Access Control heading > Intrusion.

Step 2

Click Snort 3 Version next to the policy you want to edit.

Tip

 
This page shows the total number of:
  • disabled rules

  • enabled rules set to Alert

  • enabled rules set to Block

  • overridden rules

Step 3

Choose the rule or rules where you want to set the rule action.

Step 4

Choose one of the rule actions from the Rule Action drop-down list. See Edit Snort 3 Intrusion Policies for more information about the different rule actions.

Step 5

Click Save.


What to do next

Deploy configuration changes. See Deploy configuration changes.

Intrusion event notification filters in an intrusion policy

An intrusion event notification filter in an intrusion policy is a security mechanism that

  • determines event importance based on frequency of occurrence or source and destination IP addresses,

  • allows administrators to specify thresholds for when events require attention, and

  • prevents system overwhelm by limiting notifications for widespread attacks.

Event notification filtering scenarios

The importance of an intrusion event can be based on frequency of occurrence, or on source or destination IP address. In some cases you may not care about an event until it has occurred a certain number of times. For example, you may not be concerned if someone attempts to log into a server until they fail a certain number of times. In other cases, you may only need to see a few occurrences to know there is a widespread problem. For example, if a DoS attack is launched against your web server, you may only need to see a few occurrences of an intrusion event to know that you need to address the situation. Your system is overwhelmed when it receives hundreds of the same event.

Intrusion event thresholds

An intrusion event threshold is a configuration setting that

  • limits the number of times the system logs and displays an intrusion event based on how many times the event is generated within a specified time period,

  • prevents you from being overwhelmed with a large number of identical events, and

  • can be set per shared object rule, standard text rule, or inspector rule.

Set intrusion event thresholds

To set a threshold, first specify the thresholding type.

Table 3. Thresholding options

Option

Description

Limit

Logs and displays events for the specified number of packets (specified by the Count argument) that trigger the rule during the specified time period. For example, if you set the type to Limit, the Count to 10, and the Seconds to 60, and 14 packets trigger the rule, the system stops logging events for the rule after displaying the first 10 that occur within the same minute.

Threshold

Logs and displays a single event when the specified number of packets (specified by the Count argument) trigger the rule during the specified time period. Note that the counter for the time restarts after you hit the threshold count of events and the system logs that event. For example, you set the type to Threshold, Count to 10, and Seconds to 60, and the rule triggers 10 times by second 33. The system generates one event, then resets the Seconds and Count counters to 0. The rule then triggers another 10 times in the next 25 seconds. Because the counters reset to 0 at second 33, the system logs another event.

Both

Logs and displays an event once per specified time period, after the specified number (count) of packets trigger the rule. For example, if you set the type to Both, Count to two, and Seconds to 10, these event counts result:

  • If the rule is triggered once in 10 seconds, the system does not generate any events (the threshold is not met)

  • If the rule is triggered twice in 10 seconds, the system generates one event (the threshold is met when the rule triggers the second time)

  • If the rule is triggered four times in 10 seconds, the system generates one event (the threshold is met when the rule triggers the second time, and subsequent events are ignored)

Secondly, specify tracking, which determines whether the event threshold is calculated per source or destination IP address.

Table 4. Thresholding IP options

Option

Description

Source

Calculates event instance count per source IP address.

Destination

Calculates event instance count per destination IP address.

Finally, specify the number of instances and time period that define the threshold.

Table 5. Thresholding Instance/Time options

Option

Description

Count

The number of event instances per specified time period per tracking IP address required to meet the threshold.

Seconds

The number of seconds that elapse before the count resets. If you set the threshold type to limit, the tracking to Source IP, the count to 10, and the seconds to 10, the system logs and displays the first 10 events that occur in 10 seconds from a given source port. If only 7 events occur in the first 10 seconds, the system logs and displays those; if 40 events occur in the first 10 seconds, the system logs and displays 10, then begins counting again when the 10-second time period elapses.

You can use intrusion event thresholding alone or combine it with rate-based attack prevention, the detection_filter keyword, or intrusion event suppression.


Tip


You can also add thresholds from within the packet view of an intrusion event.


Set threshold for an intrusion rule in snort 3

Set a threshold for an intrusion rule to control when and how often alerts are generated based on event instances within a specified time period.

You can set a single threshold for a rule from the Rule Detail window. Adding a threshold overwrites any existing threshold for the rule. The threshold you set for an intrusion rule is applied to each packet thread. However, the configuration is fully applied only within the context of a unique flow. You might see more alerts on different network flows, but you will not see fewer alerts than the configured number.

Procedure

Step 1

Choose Objects > Intrusion Rules.

Step 2

Click Snort 3 All Rules tab.

Step 3

From an intrusion rule's Alert Configuration column, click the None link.

Step 4

Click Edit (edit icon).

Step 5

In the Alert Configuration window, click the Threshold tab.

Step 6

From the Type drop-down list, choose the type of threshold you want to set:

  • Choose Limit to limit notification to the specified number of event instances per time period.

  • Choose Threshold to provide notification for each specified number of event instances per time period.

  • Choose Both to provide notification once per time period after a specified number of event instances.

Step 7

Choose Source or Destination in the Track By field to indicate whether you want the event instances tracked by source or destination IP address.

Step 8

Enter the number of event instances you want to use as your threshold in the Count field.

Step 9

Enter a number that specifies the time period, in seconds, for which event instances are tracked in the Seconds field.

Step 10

Click Save.

Refer to the video Snort 3 Suppression and Threshold for additional support and information.


What to do next

Deploy configuration changes. See Deploy configuration changes.

View and delete intrusion event thresholds

This task allows you to view existing threshold settings for intrusion rules and delete them when they are no longer appropriate for your system configuration.

To view or delete an existing threshold setting for a rule, use the Rules Details view to display the configured settings for a threshold and see if they are appropriate for your system. If they are not, you can add a new threshold to overwrite the existing values.

Procedure

Step 1

Choose Objects > Intrusion Rules.

Step 2

Click Snort 3 All Rules tab.

Step 3

Choose the rule with a configured threshold as shown in the Alert Configuration column (the Alert Configuration column displays Threshold as a link for the rule).

Step 4

To remove the threshold for the rule, click Threshold link in the Alert Configuration column.

Step 5

Click Edit (edit icon).

Step 6

Click Threshold tab.

Step 7

Click Reset.

Step 8

Click Save.


What to do next

Deploy configuration changes. See Deploy configuration changes.

Intrusion policy suppression configuration

Intrusion policy suppression configuration is a security mechanism that

  • suppresses intrusion event notification when a specific IP address or range of IP addresses triggers a specific rule or inspector,

  • eliminates false positives by allowing rules to trigger for all packets while only showing events for legitimate attacks, and

  • is useful for scenarios such as mail servers that transmit packets resembling specific exploits.

Mail server suppression example

If you have a mail server that transmits packets that look like a specific exploit, you might suppress event notification for that event when it is triggered by your mail server. The rule triggers for all packets, but you only see events for legitimate attacks.

Intrusion policy suppression types

You can use intrusion event suppression alone or in any combination with rate-based attack prevention, the detection_filter keyword, or intrusion event thresholding.


Tip


You can add suppressions from within the packet view of an intrusion event. You can also access suppression settings by using the Alert Configuration column on the intrusion rules editor page (Objects > Intrusion Rules, click Snort 3 All Rules).


Set suppression for an intrusion rule in Snort 3

This task allows you to configure one or more suppressions for a rule in your intrusion policy to reduce false positives and focus on relevant security events.

You can set one or more suppressions for a rule in your intrusion policy.

Before you begin

Ensure you create the required network objects to be added for source or destination suppression.

Follow these steps to set suppression for an intrusion rule in Snort 3:

Procedure

Step 1

Choose Objects > Intrusion Rules.

Step 2

Click Snort 3 All Rules tab.

Step 3

Click the None link in the Alert Configuration column for the intrusion rule.

Step 4

Click Edit (edit icon).

Step 5

From the Suppressions tab, click the add icon Add (add icon) next to any of these options:

  • Choose Source Networks to suppress events generated by packets originating from a specified source IP address.

  • Choose Destination Networks to suppress events generated by packets going to a specified destination IP address.

Step 6

Select any of the preset networks in the Network drop-down list.

Step 7

Click Save.

Step 8

(Optional) Repeat steps 5, 6, and 7 if needed.

Step 9

Click Save in the Alert Configuration window.


What to do next

Deploy configuration changes. See Deploy configuration changes.

View and delete suppression conditions

View or delete existing suppression conditions to manage event notifications for specific network conditions.

You may want to view or delete an existing suppression condition. For example, you can suppress event notification for packets originating from a mail server IP address because the mail server normally transmits packets that look like exploits. If you then decommission that mail server and reassign the IP address to another host, you should delete the suppression conditions for that source IP address.

Procedure

Step 1

Choose Objects > Intrusion Rules.

Step 2

Click Snort 3 All Rules tab.

Step 3

Choose the rule for which you want to view or delete suppressions.

Step 4

Click Suppression in the Alert Configuration column.

Step 5

Click Edit (edit icon).

Step 6

Click Suppressions tab.

Step 7

Remove the suppression by clicking Clear (clear icon) next to the suppression.

Step 8

Click Save.


What to do next

Deploy configuration changes. See Deploy configuration changes.

Add intrusion rule comments

Add comments to rules in your intrusion policy for documentation and management purposes.

You can add comments to rules in your intrusion policy. Comments added this way are specific to the policy. Comments you add to a rule in one intrusion policy are not visible in other intrusion policies.

Procedure


Step 1

Choose Policies > Access Control heading > Intrusion.

Step 2

Click Snort 3 Version next to the policy you want to edit.

Step 3

In the right side of the page where all the rules are listed, choose the rule where you want to add a comment.

Step 4

Click Comment (comment icon) under the Comments column.

Step 5

In the Comments field, enter the rule comment.

Step 6

Click Add Comment.

Step 7

Click Save.

Tip


The system displays a Comment (comment icon) next to the rule in the Comments column.


What to do next

Deploy configuration changes. See Deploy configuration changes.

Prepare custom rules for snort 3 conversion

Before converting from Snort 2 to Snort 3, make sure you are prepared to manage your custom rule set for Snort 3.

  • If you are using a rule set from a third-party vendor, contact that vendor to confirm that their rules will successfully convert to Snort 3 or to obtain a replacement rule set written natively for Snort 3.

  • If you have custom rules that you have written yourself, familiarize yourself with writing Snort 3 rules before converting, so you can update your rules to optimize Snort 3 detection after conversion.

Learn more about writing rules in Snort 3:

You can refer to other blogs at https://blog.snort.org/ to learn more about Snort 3 rules.


Important


Snort 2 network analysis policy (NAP) settings cannot be copied to Snort 3 automatically. NAP settings must be manually replicated in Snort 3.


Convert all Snort 2 custom rules across all intrusion policies to Snort 3

Convert legacy Snort 2 custom rules to the updated Snort 3 format to ensure compatibility with current intrusion detection systems.

This task migrates existing Snort 2 custom rules to Snort 3 format, allowing you to maintain your custom rule configurations while upgrading to the latest intrusion detection engine. You can either import the converted rules directly or download them for review before importing.

Procedure

Step 1

Choose Objects > Intrusion Rules.

Step 2

Click Snort 3 All Rules tab.

Step 3

Ensure All Rules is selected in the left pane.

Step 4

Click the Tasks drop-down list and choose:

  • Convert Snort 2 rules and import—To automatically convert all the Snort 2 custom rules across all the intrusion policies to Snort 3 and import them into Firewall Management Center as Snort 3 custom rules.

  • Convert Snort 2 rules and download—To automatically convert all the Snort 2 custom rules across all the intrusion policies to Snort 3 and download them into your local system.

Step 5

Click OK.

Note

 
  • If you selected Convert and import in the previous step, then all the converted rules are saved under a newly created rule group All Snort 2 Converted Global under Local Rules.

  • If you selected Convert and download in the previous step, then save the rules file locally. You can review the converted rules in the downloaded file and later upload them by following the steps in Add custom rules to rule groups.

Refer to the video Converting Snort 2 Rules to Snort 3 for additional support and information.


What to do next

Deploy configuration changes. See Deploy configuration changes.

Convert Snort 2 custom rules of a single intrusion policy to Snort 3

Convert Snort 2 custom rules in an intrusion policy to Snort 3 format to maintain compatibility with Snort 3 environments.

When migrating to Snort 3, existing Snort 2 custom rules need to be converted to maintain their functionality. This task allows you to convert custom rules for a specific intrusion policy.

Procedure

Step 1

Choose Policies > Access Control heading > Intrusion.

Step 2

In the Intrusion Policies tab, click Show Snort 3 Sync status.

Step 3

Click the Sync icon Snort out-of-Sync (snort versions out-of-sync) of the intrusion policy.

Note


If the Snort 2 and the Snort 3 versions of the intrusion policy are synchronized, then the Sync icon is in greenSnort in-Sync (snort versions in-sync). It indicates that there are no custom rules to be converted.

Step 4

Read the summary and click the Custom Rules tab.

Step 5

Choose:

  • Import converted rules to this policy: To convert the Snort 2 custom rules in the intrusion policy to Snort 3 and import them into Firewall Management Center as Snort 3 custom rules.

  • Download converted rules: To convert the Snort 2 custom rules in the intrusion policy to Snort 3 and download them into your local system. You can review the converted rules in the downloaded file and later upload the file by clicking the upload icon.

Step 6

Click Re-Sync.


What to do next

Deploy configuration changes. See Deploy configuration changes.

Add custom rules to rule groups

Upload custom rules to add locally created Snort 3 rules to the list of all available rules in the system.

Uploading custom rules in the Firewall Management Center adds the custom rules that you have created locally to the list of all the Snort 3 rules.

Procedure


Step 1

Choose Objects > Intrusion Rules.

Step 2

Click Snort 3 All Rules tab.

Step 3

Click the Tasks drop-down list.

Step 4

Click Upload Snort 3 Rules.

Step 5

Drag and drop the .txt or .rules file that contains the Snort 3 custom rules that you have created.

Step 6

Click OK.

Note

 
If there are any errors in the selected file, then you cannot proceed further. You can download the error file and Replace File link to upload version 2 of the file, after fixing the errors.

Step 7

Associate rules to a rule group to add the new rules to that group.

You can also create a new custom rule group (by clicking the Create New Custom Rule Group link) and then add the rules to the new group.

Note

 
If there are no existing local rule groups, then proceed by clicking Create New Custom Rule Group to proceed. Enter a Name for the new rule group and click Save.

Step 8

Choose either of these options:

  • Merge Rules to merge the new rules that you are adding with the existing rules in the rule group.

  • Replace all rules in the group with file contents to replace all the existing rules with the new rules that you are adding.

Note


If you chose more than one rule group in the previous step, then only the Merge Rules option is available.

Step 9

Click Next.

Review the summary to know the new rule IDs that are being added and optionally download it.

Step 10

Click Finish.


Important


All uploaded rules are disabled by default. Change their state as needed to ensure the rules are active.


What to do next

Add rule groups with custom rules to an intrusion policy

Enable custom rules in an intrusion policy to enforce these rules on network traffic.

Custom rules that are uploaded in the system have to be enabled in an intrusion policy to enforce those rules on the traffic. After uploading custom rules on Firewall Management Center, add the rule group with the new custom rules in the intrusion policy.

Procedure


Step 1

Choose Policies > Access Control heading > Intrusion.

Step 2

In the Intrusion Policies tab, click the Snort 3 Version of the intrusion policy.

Step 3

Click Add (add icon) next to the Rule Groups search bar.

Step 4

In the Add Rule Groups window, click the Expand Arrow (expand arrow icon) icon next to a rule group to expand the local rule group.

Step 5

Check the check box next to the uploaded custom rules group.

Step 6

Click Save.


What to do next

Deploy configuration changes. See Deploy configuration changes.

Manage custom rules in Snort 3

This task enables uploaded custom rules in intrusion policies to enforce rule monitoring on network traffic.

Custom rules that are uploaded in the system have to be added to an intrusion policy and enabled to enforce those rules on the traffic. You can enable the uploaded custom rules across all policies or selectively on individual policies.

Before you begin

Follow these steps to enable custom rules in one or many intrusion policies:

Procedure


Step 1

Choose Objects > Intrusion Rules.

Step 2

Click Snort 3 All Rules tab.

Step 3

Expand Local Rules.

Step 4

Select the required rule group.

Step 5

Select the rules by checking the check boxes next to them.

Step 6

Select Per Intrusion Policy from the Rule Actions drop-down list.

Step 7

Choose:

  • All Policies to have the same rule actions for all the rules to be added.

  • Per Intrusion Policy to have different rule actions for each intrusion policy.

Step 8

Set the rule actions:

  • If you selected All Policies in the previous step, then select the required rule action from the Select Override state drop-down list.

  • If you selected Per Intrusion Policy in the previous step, then select the Rule Action against the policy name. To add more policies, click Add Another.

Step 9

Optionally, add a comment in the Comments text box.

Step 10

Click Save.


What to do next

Deploy configuration changes. See Deploy configuration changes.

Delete custom rules

Delete custom rules that are no longer needed from your intrusion rule configuration to maintain an organized and efficient rule set.

Use this procedure when you need to remove custom rules from the Local Rules section in the Snort 3 All Rules interface. Before deletion, all rules must be disabled to prevent configuration conflicts.

Procedure


Step 1

Choose Objects > Intrusion Rules.

Step 2

Click Snort 3 All Rules tab.

Step 3

Expand Local Rules in the left pane.

Step 4

Check the check boxes of the rules you want to delete.

Step 5

Ensure that the rule action for all the rules that you select is Disable.

If required, follow these steps to disable the rule action for multiple selected rules:

  1. From the Rule Actions drop-down box, select Per Intrusion Policy.

  2. Select All Policies radio button.

  3. Select Disable from the Select Override state drop-down list.

  4. Click Save.

  5. Check the check boxes of the rules you want to delete.

Step 6

From the Rule Actions drop-down list, select Delete.

Step 7

Click Delete in the Delete Rules pop-up window.


What to do next

Deploy configuration changes. See Deploy configuration changes.

Delete rule groups

Delete rule groups to remove unwanted or obsolete intrusion detection rules from your system configuration and maintain an organized rule structure.

Before deleting a rule group, you must exclude it from all intrusion policies and disable all rules within the group to prevent system conflicts.

Before you begin

Exclude the rule group you want to delete from all intrusion policies where you have included it. For steps on excluding a rule group from an intrusion policy, see Edit Snort 3 Intrusion Policies.

Follow these steps to delete rule groups:

Procedure


Step 1

Choose Objects > Intrusion Rules.

Step 2

Click Snort 3 All Rules tab.

Step 3

Expand Local Rules in the left pane.

Step 4

Select the rule group to be deleted.

Step 5

Ensure the rule action for all the rules in the group is set to Disable before proceeding.

If the rule action for any of the rules is anything other than Disable, then you cannot delete the rule group. If required, follow the steps below to disable the rule action for all the rules:

  1. Check the check box below the Rule Actions drop-down list to select all the rules in the group.

  2. From the Rule Actions drop-down box, select Per Intrusion Policy.

  3. Select All Policies radio button.

  4. Select Disable from the Select Override state drop-down list.

  5. Click Save.

Step 6

Click the Delete (delete icon) next to the rule group.

Step 7

Click OK in the Delete Rule Group pop-up window.


What to do next

Deploy configuration changes. See Deploy configuration changes.

Recommended rules

This section provides an insight into Secure Firewall recommended rules and generating and applying Secure Firewall recommended rules.

Snort 3 rule changes in LSP updates

Snort 3 rule changes in LSP updates are modifications to system-defined intrusion rules that

  • replace existing rules with new rules for better detection capabilities,

  • combine multiple rules into a single rule or expand a single rule into multiple rules when better detection is possible, and

  • remove existing system-defined rules for better management as part of the LSP update.

To get notifications for changes to any overridden system-defined rules during LSP updates, ensure that the Retain user overrides for deleted Snort 3 rules check box is checked.

To navigate to the Retain user overrides for deleted Snort 3 rules check box, click System (system gear icon) > Configuration > Intrusion Policy Preferences.

By default this check box is checked. When this check box is checked, the system retains the rule overrides in the new replacement rules that are added as a part of the LSP update. The notifications are shown in the Tasks tab under the Notifications icon that is located next to System (system gear icon).

Secure Firewall recommended rules

Secure Firewall recommended rules are intrusion rule recommendations that

  • target vulnerabilities associated with host assets detected in the network, such as operating systems, servers, and client application protocols,

  • allow you to tailor your intrusion policy to the specific needs of your monitored network, and

  • provide individual recommendations for each intrusion policy. These typically apply to standard text rules and shared object rules, but recommendations can also include inspector and decoder rules.

Rule recommendation configuration options

When you generate rule state recommendations, you can use the default settings or configure advanced settings. Advanced settings allow you to:

  • Redefine which hosts on your network the system monitors for vulnerabilities

  • Influence which rules the system recommends based on rule overhead

  • Specify whether to generate recommendations to disable rules

You can also choose to use the recommendations immediately or review the recommendations (and affected rules) before accepting them.

Choosing to use recommended rule states adds a read-only Secure Firewall Recommendations layer to your intrusion policy, and subsequently choosing not to use recommended rule states removes the layer.

You can schedule a task to generate recommendations automatically based on the most recently saved configuration settings in your intrusion policy.

The system does not change rule states that you set manually such as:

  • Manually setting the states of specified rules before you generate recommendations prevents the system from modifying the states of those rules in the future.

  • Manually setting the states of specified rules after you generate recommendations overrides the recommended states of those rules.


    Tip


    The intrusion policy report can include a list of rules with rule states that differ from the recommended state.


While displaying the recommendation-filtered Rules page, or after accessing the Rules page directly from the navigation panel or the Policy Information page, you can manually set rule states, sort rules, and take any of the other actions available on the Rules page, such as suppressing rules, setting rule thresholds, and so on.


Note


The Cisco Talos Intelligence Group (Talos) determines the appropriate state of each rule in the system-provided policies. If you use a system-provided policy as your base policy, and you allow the system to set your rules to the Secure Firewall recommended rule state, the rules in your intrusion policy match the settings recommended for your network assets.


Generate new Secure Firewall recommendations in Snort 3

Generate Secure Firewall recommendations to create new recommended rule settings in Snort 3.

Generate the Secure Firewall recommendations for the intrusion policy and then follow the steps that are listed here to create new recommended rule settings in Snort 3. Rule overheads are interpreted as security levels based on the threshold policies you select in Snort 3. The recommended action depends on the selected security level. If it is higher than the base policy, the recommendation includes actions beyond only generating events.

Prior to setting the Secure Firewall recommendations you should ask which of the three points listed below closely matches the goal:

  • Increased Protection —Enable additional rules based on vulnerabilities found in the host database and do not automatically disable any rules. This will likely result in a larger rule set.

  • Focused Protection—Enable additional rules and disable existing rules based on vulnerabilities found in the host database. This can increase or decrease the number of rules depending on vulnerabilities discovered.

  • Higher Efficiency—Use the currently enabled rule set and disable any rules for vulnerabilities not found in the host database. This will likely result in a smaller enabled rule set.

Based on the response, these are the recommended actions:

  • Set recommendations to the next highest security level, and clear the option to disable rules.

  • Set recommendations to the next highest security level, and select the option to disable rules.

  • Set recommendations to the current security level, and select the option to disable rules.

Before you begin

Secure Firewall recommendations have the following requirements:

  • Ensure that hosts are present in the system to generate recommendations.

  • Protected networks configured for recommendations should map to the hosts present in the system

Follow these steps to generate new Secure Firewall recommendations in Snort 3:

Procedure


Step 1

Choose Policies > Access Control heading > Intrusion.

Step 2

Click the Snort 3 Version button of the intrusion policy.

Step 3

Click the Recommendations (Not in Use) layer to configure the rule recommendations. Click Start.

In the Secure Firewall Rule Recommendations window you can set the following:

  • Security Level: Click to select the security level. Optionally, you can check the Accept Recommendation to Disable Rules checkbox to disable rules that are not enabled at the input security level and in protected networks. Only enable this option if you need to trim your rule set due to a high number of alerts or to improve inspection performance. The security levels are:

    • Security level 1: Connectivity Over Security

      No Impact—No new rules are enabled and no existing rules are disabled. To increase the protection, select a higher security level.

      Lower Security (checkbox is checked)—All rules are disabled except for the rules in the Connectivity Over Security ruleset that match potential vulnerabilities on discovered hosts. It is recommended instead to adjust the Base Policy.

    • Security level 2: Balanced Security Over Connectivity

      No Impact—No new rules are enabled and no existing rules are disabled. To increase the protection, select a higher security level.

      Higher Efficiency(checkbox is checked)—Keeps existing rules that match potential vulnerabilities on discovered hosts and disables rules for vulnerabilities not found on the network.

    • Security level 3: Security Over Connectivity

      Increased Security—Enables additional rules that match potential vulnerabilities on discovered hosts based on the Maximum Detection ruleset.

      Focused Security(checkbox is checked)—Enables additional rules that match vulnerabilities on discovered hosts based on the Security Over Connectivity ruleset, while disabling existing rules that do not match potential vulnerabilities on discovered hosts.

    • Security level 4 : Maximum Detection

      Increased Security—Enables additional rules that match potential vulnerabilities on discovered hosts based on the Security Over Connectivity ruleset.

      Focused Security (checkbox is checked)—Enables additional rules that match vulnerabilities on discovered hosts based on the Maximum Detection ruleset, while disabling existing rules that do not match potential vulnerabilities on discovered hosts.

      Note


      Maximum Detection enables a very high number of rules and may impact performance. We recommend you to review and test this setting before deploying into a production environment.

  • Protected Networks: Specifies the monitored networks or individual hosts to examine for recommendations. You can select one or more system or custom defined network objects from the drop-down list. By default, any IPv4 or IPv6 networks are selected, if no selection is done.

    Important


    The Secure Firewall Rule Recommendations depend on network discovery. Protected Networks apply to any hosts discovered within the ranges configured in your Network Discovery policy. For more information, see the chapter Network Discovery Policies in the Cisco Secure Firewall Management Center Device Configuration guide.

    Click the Add + button to create a new network object of type Host or Network and click Save.

Step 4

Generate and apply recommendations:

  • Generate: Generates the recommendations for an intrusion policy. This action lists the rules under Recommended Rules (Not in use).

  • Generate and Apply: Generates and applies the recommendations for an intrusion policy. This action lists the rules under Recommended Rules (In use).

Recommendations are generated successfully. A new recommendation tab appears with all the recommended rules with their corresponding recommended actions. Rule action preset filters are also available for this tab, in addition with new recommendations.

Step 5

You can verify the recommendations and choose to apply them.

  • Accept—Applies the previously generated recommendations for an Intrusion policy.

  • Refresh—Regenerates and updates the rule recommendations for an Intrusion policy.

  • Edit—It opens the Recommendations dialog box, you can provide the recommendation input values and then generate the recommendations.

  • Remove All—Revert or remove the applied recommended rules from the policy and also removes the recommendation tab.

Under All Rules, there is a Recommended Rules section which displays the recommended rules.

Note


Final action for an Intrusion rule is applied based on the rule action priority order and following is the rule action priority order:

Rule Override > Generated Recommendations > Group Override > Base​ Policy Default Action

For enabled recommendations, Firewall Management Center considers the current state: group overrides, base policy, and recommendation configurations and priority order of actions is:

pass > block > reject > drop > rewrite > alert


What to do next

Deploy configuration changes. See Deploy configuration changes.

Mitigate threats using MITRE framework in Snort 3 intrusion policies

This section describes how to use the MITRE ATT&CK framework in Snort 3 intrusion policies to identify attack tactics and techniques, review rule coverage, and improve threat mitigation.

MITRE framework

The MITRE Adversarial Tactics, Techniques, and Common Knowledge (ATT&CK) framework is a comprehensive knowledge base that

  • provides insights into the tactics, techniques, and procedures (TTPs) distributed by threat actors aiming to harm systems,

  • incorporates groups to refer to threat groups, activity groups, or threat actors based on the set of tactics and techniques they employ, and

  • is compiled as matrices, with each matrix representing an operating system or a particular platform.

Each technique includes information about execution, procedures, defenses, detections, and real-world examples.


Note


See https://attack.MITRE.org for additional information about MITRE ATT&CK.


The management center uses the MITRE ATT&CK Framework to enhance threat detection and response, incorporating these capabilities:

  • Intrusion events include TTPs, allowing administrators to manage traffic with greater granularity by grouping rules according to vulnerability type, target system, or threat category.

  • Select malware events use TTPs, enhancing the ability to detect and respond to threats.

MITRE framework benefits

MITRE framework provides security advantages that

  • enable administrators to act on traffic based on MITRE Tactics, Techniques, and Procedures (TTPs) added to intrusion events,

  • allow viewing and handling traffic with more granularity through grouping rules by vulnerability type, target system, or threat category, and

  • provide the ability to organize intrusion rules according to the MITRE ATT&CK framework for customized policies based on specific attacker tactics and techniques.

Sample business scenario for MITRE network

A sample business scenario for MITRE network is a security implementation example that

  • uses Snort 3 as the primary intrusion detection and prevention system for a large corporate network,

  • addresses the need for robust network security measures in a rapidly evolving threat landscape, and

  • enables network administrators to determine if configured policies are finding traffic of interest and tracking known attack groups.

Network security considerations

Network administrators need to know if adversaries are attempting to take advantage of weaknesses in their systems or applications to cause unanticipated behavior. The weakness in the system can be a bug, a glitch, or a design vulnerability. The applications may be websites, databases, standard services, such as Server Message Block (SMB) or Secure Shell (SSH), network device administration and management protocols or applications, such as web servers and related services.

The insights provided by the MITRE framework provide administrators with a more precise opportunity to specify protection for specific assets and protect their network from specific threat groups.

Prerequisites for MITRE framework

Ensure that your system meets these requirements before implementing the MITRE framework:

  • You must be running Secure Firewall Management Center and Secure Firewall Threat Defense Version 7.3.0 or later with Snort 3.

  • You must have at least one intrusion policy. See Create a custom snort 3 intrusion policy.

View and edit your Snort 3 intrusion policy

This task allows you to customize your Snort 3 intrusion policy by modifying rule groups, security levels, and accessing Cisco-recommended rules to enhance threat detection capabilities.

Snort 3 intrusion policies use a hierarchical rule group structure organized by the MITRE framework. You can drill down to specific rule categories and modify security levels for bulk changes or individual rule actions. The policy editor provides multiple layers, including Group Overrides, Rule Overrides, Recommendations, and Summary views.

Procedure


Step 1

Choose Policies > Access Control heading > Intrusion.

Step 2

Ensure that the Intrusion Policies tab is chosen.

  1. Click Snort 3 Version next to the intrusion policy that you want to view or edit.

  2. Close the Snort helper guide that is displayed.

Step 3

Click the Group Overrides layer.

This layer lists all the categories of rule groups, in a hierarchical structure. You can drill down to the final leaf rule group under each rule group.

The layer displays a hierarchical structure of rule groups for the Snort 3 intrusion policy, allowing users to drill down to the specific leaf rule group within each category.
  1. Under Group Overrides, ensure that All is chosen in the drop-down list, so that all the rule groups for the corresponding intrusion policy are visible in the left pane.

    The image illustrates the Snort 3 intrusion policy interface, highlighting the available rule categories and their organization within the MITRE framework.

Step 4

Click MITRE in the left pane.

Note


Depending on your specific requirements, you can choose the Rule Categories rule group or any other rule group and subrule groups under it. All the rule groups use the MITRE framework.

The image illustrates the Snort 3 intrusion policy interface, highlighting the available rule categories and their organization within the MITRE framework.
  1. Under MITRE, click ATT&CK Framework to drill down.

    The Snort 3 intrusion policy interface displays options for viewing and editing various security rules and configurations. Users can modify settings to enhance network protection against threats.
  2. Under ATT&CK Framework, click Enterprise to expand it.

    The Snort 3 intrusion policy interface displays options for viewing and editing various security rules and configurations. Users can modify settings to enhance network protection.
  3. Click the Edit (edit icon) icon next to the Security Level of the rule group to make bulk changes to all associated rule group security levels under the Enterprise rule group category.

    The Snort 3 intrusion policy interface displays options for viewing and editing various security rules and configurations. Users can modify settings to enhance network protection against threats.
  4. In the Edit Security Level window, choose a Security Level (in this example, 3), and click Save.

    The Snort 3 intrusion policy interface displays options for viewing and editing various security rules and configurations. Users can modify settings to enhance network protection.

Step 5

Under Enterprise, click Initial Access to expand it.

Step 6

Under Initial Access, click Exploit Public-Facing Application, which is the last leaf group.

The Snort 3 intrusion policy interface displays options for viewing and editing various security rules and configurations. Users can modify settings to enhance network protection against threats.

Step 7

Click View Rules in Rule Overrides to view the available rules, their details, and actions. You can change the rule actions for one or multiple rules in the Rule Overrides layer.

The Snort 3 intrusion policy interface displays options for viewing and editing various security rules and configurations. Users can modify settings to enhance network protection.

Step 8

Click the Recommendations layer and then click Start to start using Cisco-recommended rules. You can use the intrusion rule recommendations to target the vulnerabilities that are associated with the host assets detected in the network. For more information, see Generate new Secure Firewall recommendations in Snort 3.

The Snort 3 intrusion policy interface displays various configuration options, including rules and settings for managing network security. Users can view and edit specific policies to enhance threat detection and response.

Step 9

Click the Summary layer for a holistic view of the current changes to the policy. Based on the rule overrides, security-level changes, and generation of Cisco-recommended rules, you can view the rule distribution of the policy, group overrides, rule overrides, rule recommendations, and additional details to verify your changes.

The Snort 3 intrusion policy interface displays the customized rule groups, security levels, and recommendations, along with a summary layer for verification of modifications.

What to do next

Deploy your intrusion policy to detect and log events that are triggered by the Snort rules. See Deploy configuration changes.

View intrusion events

This task allows you to view MITRE ATT&CK techniques and rule groups associated with intrusion events, providing security context and attack pattern mapping for better threat analysis.

You can view the MITRE ATT&CK techniques and rule groups in the intrusion events on the Classic Event Viewer and Unified Event Viewer pages. Talos provides mappings from Snort rules (GID:SID) to MITRE ATT&CK techniques and rule groups. These mappings are installed as part of the Lightweight Security Package (LSP).

Procedure


Step 1

Click Analysis and select Events under Intrusions.

Step 2

Click the Table View of Events tab.

The diagram illustrates the process of exploiting a public-facing application, highlighting the steps involved in the intrusion event.

Step 3

Under MITRE ATT&CK, you can see the techniques for an intrusion event. Click 1 Technique to view the MITRE ATT&CK techniques.

The diagram illustrates the process of exploiting a public-facing application, highlighting the steps involved in the intrusion event.

In this example, Exploit Public-Facing Application is the technique.

The diagram illustrates the process of exploiting a public-facing application, highlighting the steps involved in the attack and the potential vulnerabilities that can be targeted.

Step 4

Click Close.

Step 5

Click Analysis and select Unified Events.

Step 6

If not enabled, click the column selector icon to enable the MITRE ATT&CK and Rule Group columns.

The image illustrates a timeline of intrusion events, highlighting key incidents and their timestamps for analysis. It provides a visual representation of the frequency and types of intrusions detected over a specified period.

Step 7

In this example, the intrusion event is triggered by an event that is mapped to one rule group. Click 1 Group under the Rule Group column.

The search results display a list of intrusion events, highlighting key details such as event type, timestamp, and affected systems.

Step 8

You can view Protocol, which is the parent rule group, and the DNS rule group under it. Choose Protocol > DNS to search for all the intrusion events that have at least one rule group.

The search results display the MITRE ATT&CK techniques and rule groups linked to intrusion events, highlighting the security context and attack patterns for enhanced threat analysis.

The search results are displayed.

The search results display the MITRE ATT&CK techniques and rule groups linked to intrusion events, highlighting the security context and attack patterns for enhanced threat analysis.