- Preface
- Product Overview
- Graphical User Interface
- Device and Subdevice Manager
- Users Account Manager
- Configuration and Image Update Jobs Manager
- Groups
- Namespace Manager
- Query Manager
- Data Manager
- Directory Manager
- Parameters Manager
- Templates
- Security Manager
- Log Manager
- Service Manager
- Bulk Data Manager
- Email Manager
- Image Service
- Upgrade or Downgrade Cisco IOS Image
- Backup and Restore
- PIX Firewall Device Support
- ASA Firewall Device Support
- IMGW Device Module Development Kit
- Troubleshooting
- Software Licenses and Acknowledgements
- Index
User Account Manager

Note User accounts can be accessed only when operating in Internal Directory mode.
To access User tasks, log in to the system (see “Logging In” section). Then, from the Home page, click the Users tab.
A functional overview of the user administration options appears showing:
Adding User Account
Step 1![]() From the User Administration page, click
Add User
.
From the User Administration page, click
Add User
.
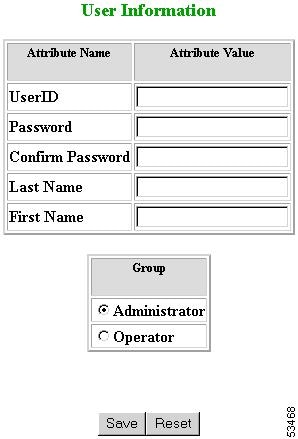
The User Information dialog box appears (see Figure 4-1).

Step 2![]() Enter a valid value (no spaces) in the
UserID
field.
Enter a valid value (no spaces) in the
UserID
field.
Table 4-1 shows valid values for these fields.
Step 3![]() Enter a password in the
Password
field.
Enter a password in the
Password
field.
Step 4![]() Confirm the password by entering it again in the
Confirm Password
field.
Confirm the password by entering it again in the
Confirm Password
field.
Step 5![]() Enter the user’s last name in the
Last Name
field.
Enter the user’s last name in the
Last Name
field.
Step 6![]() Enter the user’s first name in the
First Name
field.
Enter the user’s first name in the
First Name
field.
Step 7![]() In the Group pane, click the radio button that classifies the privilege level (
Administrator
,
Operator
) of this user.
In the Group pane, click the radio button that classifies the privilege level (
Administrator
,
Operator
) of this user.
Step 8![]() To clear your entries, click
Reset
.
To clear your entries, click
Reset
.
Step 9![]() To save your entries, click
Save
.
To save your entries, click
Save
.
Editing User Account
Step 1![]() From the User Administration page, click
Edit User
.
From the User Administration page, click
Edit User
.
A shows of users appears (see Figure 4-2).

Step 2![]() From the User List, click on the icon for the user account you want to edit.
From the User List, click on the icon for the user account you want to edit.

Note Administrator-level users are shown with a key icon associated with the figure icon.
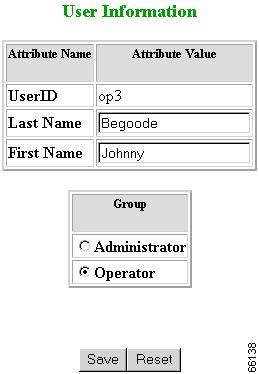
The User Information page appears (see Figure 4-3).

Step 3![]() To modify the user ID, enter a valid value (no spaces) in the
UserID
field.
To modify the user ID, enter a valid value (no spaces) in the
UserID
field.
Table 4-2 shows valid values for these fields.
Step 4![]() To modify the user’s last name, edit the
Last Name
field.
To modify the user’s last name, edit the
Last Name
field.
Step 5![]() To modify the user’s first name, edit the
First Name
field.
To modify the user’s first name, edit the
First Name
field.
Step 6![]() To modify the user group status, click the appropriate radio button in the
Group
pane.
To modify the user group status, click the appropriate radio button in the
Group
pane.
Step 7![]() To clear your entries, click
Reset
.
To clear your entries, click
Reset
.
Step 8![]() To save your entries, click
Save
.
To save your entries, click
Save
.
User information update status appears (see Figure 4-4).
Figure 4-4 User Information Update Status

Deleting User Account
Step 1![]() From the User Administration page, click
Delete User
.
From the User Administration page, click
Delete User
.
Step 2![]() From the user list (see Figure 4-2), click on the icon for the user account you want to delete.
From the user list (see Figure 4-2), click on the icon for the user account you want to delete.
Changing User Password
Step 1![]() From the User Administration page, click
Change Password
.
From the User Administration page, click
Change Password
.
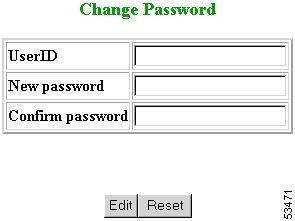
The Change Password dialog box (see Figure 4-5) appears.

Step 2![]() Enter the
UserID
for the user account password you want to change or reset.
Enter the
UserID
for the user account password you want to change or reset.
Table 4-3 shows valid values for these fields.
Step 3![]() Enter the new password in the
New password
field.
Enter the new password in the
New password
field.
Step 4![]() Enter the new password again in the
Confirm password
field.
Enter the new password again in the
Confirm password
field.
Step 5![]() To clear your entries, click
Reset
.
To clear your entries, click
Reset
.
Step 6![]() To save the new password, click
Edit
.
To save the new password, click
Edit
.
Changing Account Privilege Level
Step 1![]() From the User Administration page, click
Edit User
.
From the User Administration page, click
Edit User
.
Step 2![]() Choose the user in question from the user list (see Figure 4-2).
Choose the user in question from the user list (see Figure 4-2).
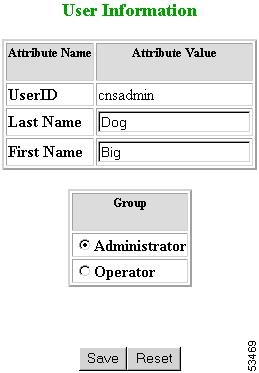
The User Information page appears (see Figure 4-6).

Step 3![]() In the Group pane, click the radio button that classifies the privilege level (Administrator, Operator) of this user.
In the Group pane, click the radio button that classifies the privilege level (Administrator, Operator) of this user.
Step 4![]() To clear your entries, click
Reset
.
To clear your entries, click
Reset
.
Step 5![]() To save your entries, click
Save
.
To save your entries, click
Save
.
 Feedback