- Preface
- Product Overview
- Graphical User Interface
- Device and Subdevice Manager
- Users Account Manager
- Configuration and Image Update Jobs Manager
- Groups
- Namespace Manager
- Query Manager
- Data Manager
- Directory Manager
- Parameters Manager
- Templates
- Security Manager
- Log Manager
- Service Manager
- Bulk Data Manager
- Email Manager
- Image Service
- Upgrade or Downgrade Cisco IOS Image
- Backup and Restore
- PIX Firewall Device Support
- ASA Firewall Device Support
- IMGW Device Module Development Kit
- Troubleshooting
- Software Licenses and Acknowledgements
- Index
Namespace Manager
The Namespace Manager provides a GUI for managing the system namespace known as “config,” which contains the set of Cisco standardized events, such as com.cisco.cns.mgmt.config.load , etc. By default, each event defines a mapping to itself for both the publish and subscribe mapping.
If you are using the Cisco Configuration Engine Software Development Kit API Reference and Programmer Guide to develop your own application, you are free to redefine the map according to your application needs. Additional application-specific namespace values can be defined by means of the Cisco Configuration Engine SDK.

Note Cisco Configuration Engine supports multiple namespaces and their respective mappings by means of the Cisco Configuration Engine GUI.
The system namespace is guaranteed to return a mapping even for undefined events; in which case, the input map is returned as the output map. This is a requirement for supporting future devices which might depend on new events that are not currently defined.
To access Namespace management tasks, log into the system (see “Logging In” section). Then, from the Home page, click the Tools tab. The Tools page appears.
From the Tools page, click Namespace Mgr . The Namespace Management page appears showing:
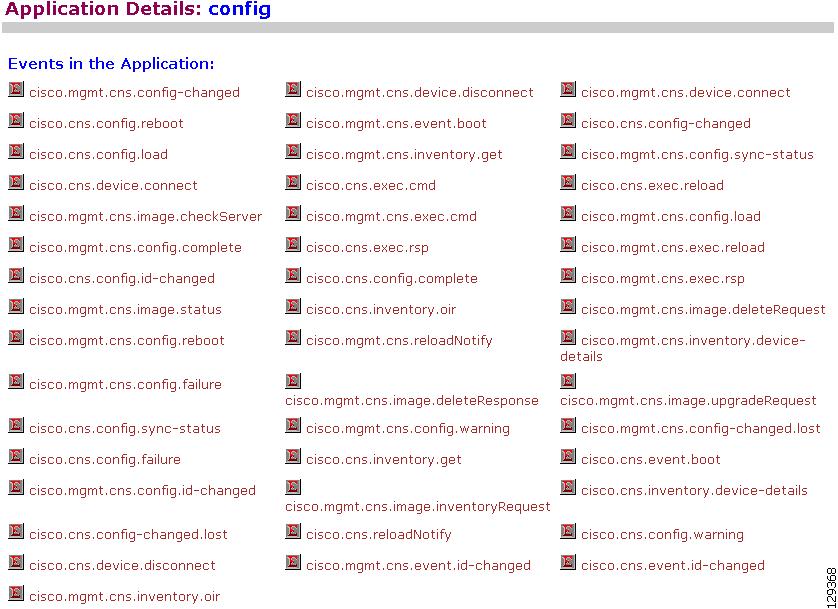
Viewing Events
From the Namespace Manager main page, click View Events . The events list for the current application (config) appears (see Figure 7-1).
Adding Events
The events list for the current application (config) appears (see Figure 7-1).
Step 1![]() From the Namespace Manager main page, click
Add Events
.
From the Namespace Manager main page, click
Add Events
.
The Event information page appears (see Figure 7-2).
Figure 7-2 Event Information Page
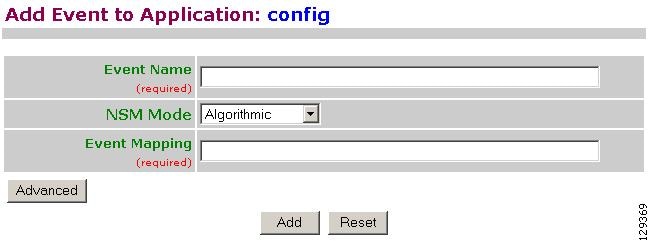
Step 3![]() Use the drop-down arrow to select the NSM Mode.
Use the drop-down arrow to select the NSM Mode.
- Algorithmic – Mapped events qualified with group name or device name are returned from NSM. This is the preferred mode for all users. It allows you to provision the selected group(s) of device(s).
- Non-Algorithmic – Mapped events are returned from NSM without group name or device name. You are forced to provision all device(s).
Step 4![]() Enter a valid Event Mapping.
Enter a valid Event Mapping.
For example: cisco.mgmt.cns.exec.reload
Step 5![]() To define separate parameters for Subscriber Mapping and Publisher Mapping, click
Advanced
.
To define separate parameters for Subscriber Mapping and Publisher Mapping, click
Advanced
.
The advanced event information page appears (see Figure 7-3).
Figure 7-3 Advanced Event Information Page
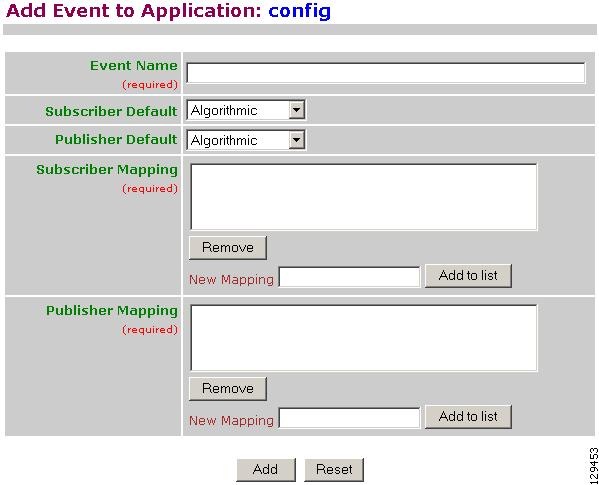
Step 6![]() Enter information in the appropriate fields, then click
Add
.
Enter information in the appropriate fields, then click
Add
.
Editing Events
Step 1![]() From the Namespace Manager main page, click
Edit Events
.
From the Namespace Manager main page, click
Edit Events
.
The Event information page appears (see Figure 7-4).
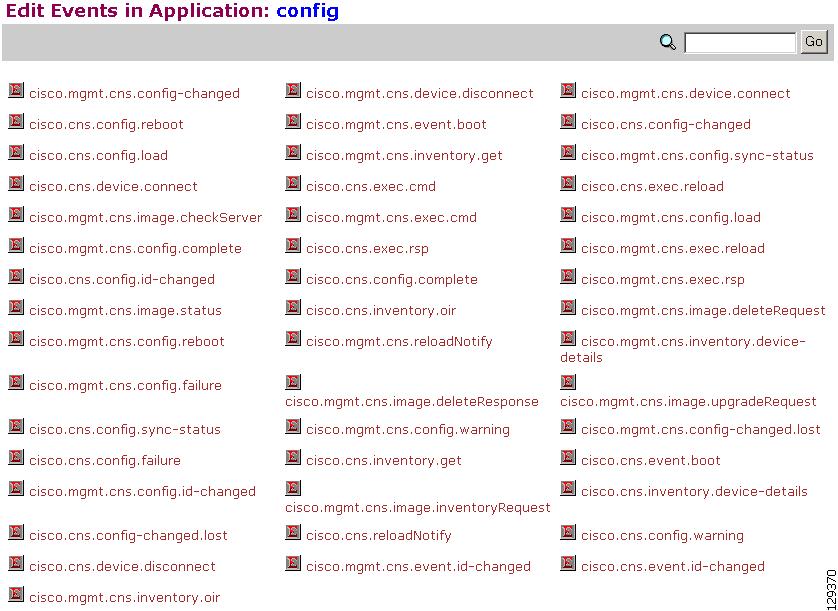
Step 2![]() Click on the Event you want to edit.
Click on the Event you want to edit.
The Edit Event parameters page appears (see Figure 7-5).
Figure 7-5 Edit Event Parameters
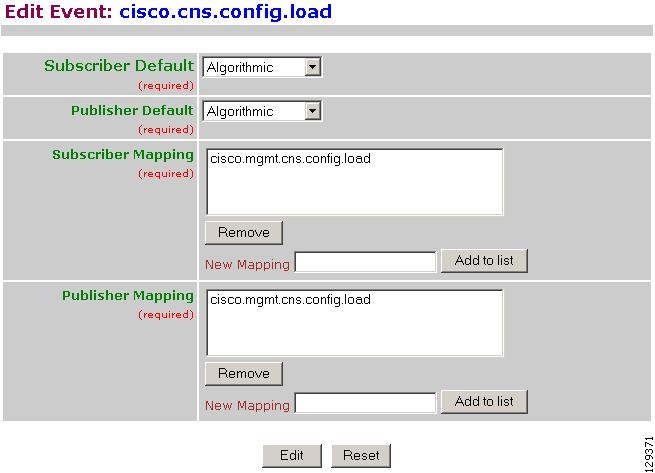
Step 3![]() Modify all applicable fields, then click
Edit
.
Modify all applicable fields, then click
Edit
.
Deleting Events
Step 1![]() From the Namespace Manager main page, click
Delete Events
.
From the Namespace Manager main page, click
Delete Events
.
The Delete Event list page appears (see Figure 7-6).
Figure 7-6 Event List for Deleting Events
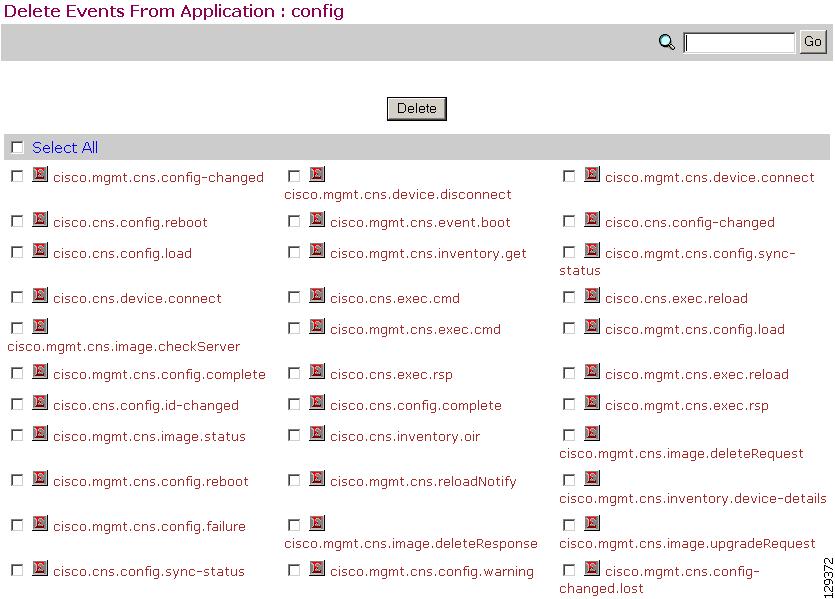
Step 2![]() Check to select the Event(s) you want to delete, then click
Delete
.
Check to select the Event(s) you want to delete, then click
Delete
.
Step 3![]() To Delete the selected Event(s), click
OK
.
To Delete the selected Event(s), click
OK
.
 Feedback