- Preface
- Product Overview
- Graphical User Interface
- Device and Subdevice Manager
- Users Account Manager
- Configuration and Image Update Jobs Manager
- Groups
- Namespace Manager
- Query Manager
- Data Manager
- Directory Manager
- Parameters Manager
- Templates
- Security Manager
- Log Manager
- Service Manager
- Bulk Data Manager
- Email Manager
- Image Service
- Upgrade or Downgrade Cisco IOS Image
- Backup and Restore
- PIX Firewall Device Support
- ASA Firewall Device Support
- IMGW Device Module Development Kit
- Troubleshooting
- Software Licenses and Acknowledgements
- Index
Data Manager
To access Data management tasks, log into the system (see “Logging In” section). Then, from the Home page, click the Tools tab. The Tools page appears.
From the Tools page, click Data Manager . The Data Manager page appears. The Data Manager functions include:
Scheduling Data Backup
Step 1![]() From the Data Manager Overview page, click
ScheduleBackup
.
From the Data Manager Overview page, click
ScheduleBackup
.
The backup information dialog box appears (see Figure 9-1).
Figure 9-1 Backup Schedule Parameters
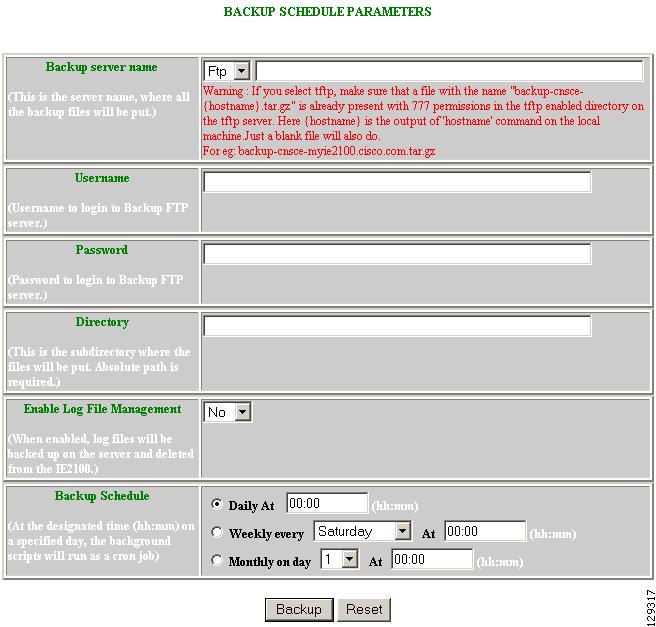
Step 2![]() To specify where you want the backup data to be stored, enter the FTP server name in the
FTP Server Name
field.
To specify where you want the backup data to be stored, enter the FTP server name in the
FTP Server Name
field.
Table 9-1 shows valid values for these fields.
Step 3![]() To specify the username to log into the FTP server, enter a valid username in the
Username
field.
To specify the username to log into the FTP server, enter a valid username in the
Username
field.
Step 4![]() To specify the password to use to log into the FTP server, enter a valid value in the
Password
field.
To specify the password to use to log into the FTP server, enter a valid value in the
Password
field.
Step 5![]() To specify the subdirectory where the data file is put, enter the absolute path in the
Directory
field.
To specify the subdirectory where the data file is put, enter the absolute path in the
Directory
field.
Step 6![]() Choose whether to
Enable Log File Management
.
Choose whether to
Enable Log File Management
.
Step 7![]() To specify the backup schedule, complete the fields in the
Backup Schedule
pane.
To specify the backup schedule, complete the fields in the
Backup Schedule
pane.

Note The time base for the host system should be set to Coordinated Universal Time (UTC).
Step 8![]() To cancel the backup operation, click
Cancel
.
To cancel the backup operation, click
Cancel
.
Step 9![]() To start the backup operation, click
Backup
.
To start the backup operation, click
Backup
.
Updating Product List
The product list is a mapping between product name of the network modules as specified in the pricing list and the numeric identification number stored in EPROM. As new products are added, this list grows and hence the need for the Cisco Configuration Engine to update this list whenever new products are added. This list can be downloaded from the Cisco web site at: http://www.cisco.com .
Step 1![]() From the Data Manager page, click
Update Product List
.
From the Data Manager page, click
Update Product List
.
The Update Product List dialog box appears (see Figure 9-2).
Figure 9-2 Update Product List
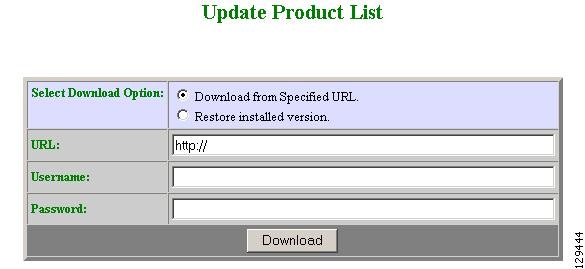
Step 2![]() Select the appropriate download option.
Select the appropriate download option.
Table 9-2 shows valid values for these fields.
Step 4![]() Enter your username and password.
Enter your username and password.
Step 5![]() To download the product list, click
Download
.
To download the product list, click
Download
.
Managing Disk Space
Step 1![]() From the Data Manager page, click
Manage
Disk Space
.
From the Data Manager page, click
Manage
Disk Space
.
The Setup Disk Space Notification dialog box appears (see Figure 9-3).
Figure 9-3 Disk Space Notification

Step 2![]() Set the notification percentage to the value that triggers an e-mail notification.
Set the notification percentage to the value that triggers an e-mail notification.
Table 9-3 shows valid values for these fields.
Step 3![]() Set the appropriate e-mail address for notification e-mail.
Set the appropriate e-mail address for notification e-mail.
Step 4![]() To save these entries, click
Save
.
To save these entries, click
Save
.
 Feedback