Inventory Management
Available Languages
Table Of Contents
Scheduling Inventory Polling and Collection
Displaying Inventory Graphs and Reports
Displaying Hardware and Software Reports
Displaying a Year 2000 Compliance Report
Displaying a Detailed Device Report
Displaying Capacity Information
Inventory
You have now added devices to your network and created static and dynamic views. You are ready to use your device views to generate some reports.
The Inventory tasks let you collect and monitor your network inventory data so that you can plan upgrades and rollouts.
The following sections are presented in this chapter:
•
Scheduling Inventory Polling and Collection
•
For detailed information on Inventory, refer to the online help.
Scheduling Inventory Polling and Collection
Scenario: After you populate the server with device inventory data, you want to schedule polling and collection of inventory data.Two methods are available for scheduling inventory polling and collection:
•
•
Both inventory poller and inventory collector changes are displayed in all Change Audit reports. Use Change Audit options to determine the changes that have occurred in your network inventory over a specified period of time.

Note
Scheduling Inventory Polling
To set your inventory polling schedule, perform the following steps:
Step 1
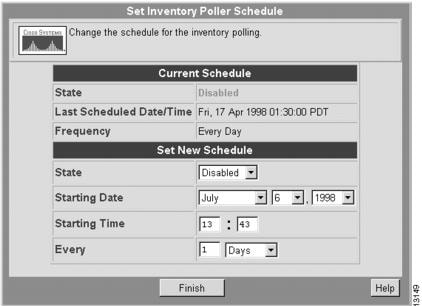
The Set Inventory Poller Schedule dialog box displays the current polling schedule. (See .)
Figure 4-1 Set Inventory Poller Schedule Dialog Box
Step 2
•
•
•
•
Step 3
The new schedule appears.
Scheduling Collection
To set the parameters for your inventory collection schedule, perform the following steps:
Step 1
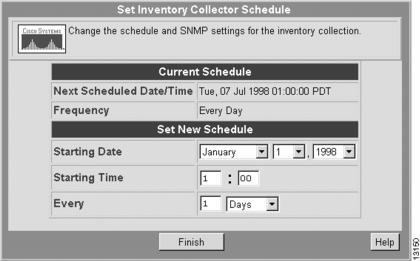
The Set Inventory Collector Schedule dialog box appears. (See .)
Figure 4-2 Set Inventory Collector Schedule Dialog Box
Step 2
•
•
•
Step 3
The new schedule appears.
Displaying Inventory Graphs and Reports
Scenario: As the network administrator, you need to upgrade all Cisco IOS release 10.3 routers on the network to release 1.1. To determine the scope of the work, you generate the appropriate reports and graphs.To display a Software Version graph, perform the following steps:
Step 1
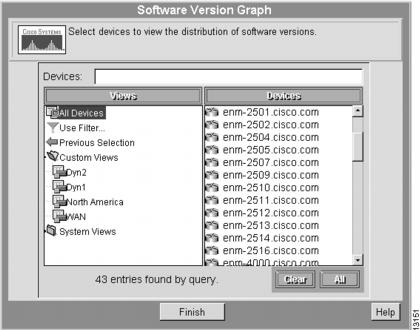
The Software Version Graph dialog box appears. (See .)
Figure 4-3 Software Version Graph Dialog Box
Step 2
The device selection dialog box displays the names of the managed devices that are routers.
Step 3
Step 4
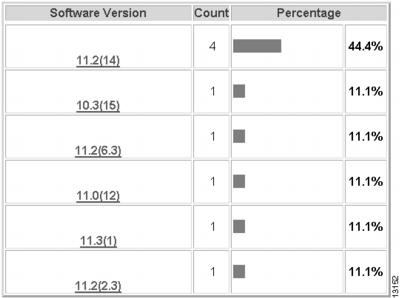
The Software Version Graph displays the Cisco IOS versions installed on your managed routers. The count is the total number of devices on which each version is installed. The percentage column displays a bar graph and the numerical percentage of the devices for each software version. (See .)
Figure 4-4 Software Version Graph
Step 5
The report or graph appears.
Step 6
Displaying Hardware and Software Reports
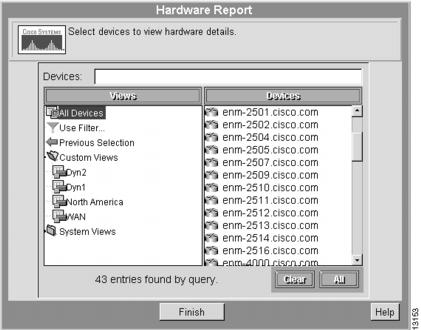
Scenario: You want to see reports that display hardware and software information about your network devices. You want to know the types of chassis that reside on all routers and the software versions they are running.To display hardware and software reports, perform the following steps:
Step 1
The Hardware Report dialog box appears. (See .)
Step 2
Figure 4-5 Hardware Report Dialog Box
Step 3
The Hardware Report displays information for each device.
Step 4
Step 5
Step 6
The report appears in the Device Center right frame.
Step 7
Step 8
Note
Step 9
Displaying a Year 2000 Compliance Report
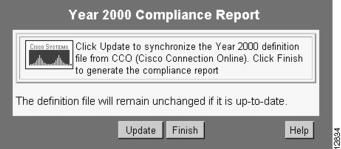
Scenario: You want to see which of the devices on your network are compliant with the Year 2000.To display devices compliant with the Year 2000, perform the following steps:
Step 1
The Year 2000 Compliance Report dialog box appears. (See .)
Figure 4-6 Year 2000 Compliance Report Dialog Box
Step 2
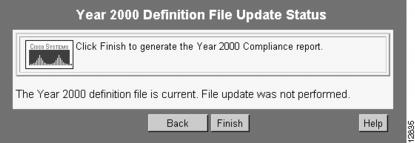
The Year 2000 Definition File Update Status confirmation screen shows whether the file was updated. (See .)
Figure 4-7 Year 2000 Definition File Update Status
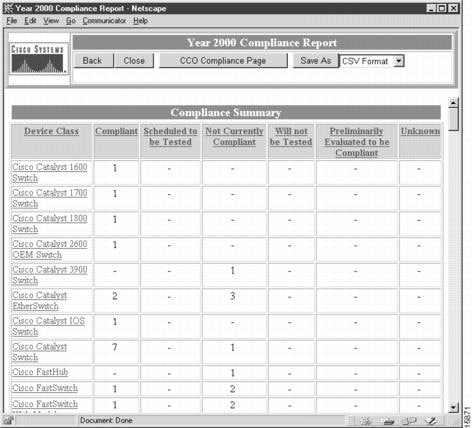
Step 3
Figure 4-8 Year 2000 Compliance Report
Step 4
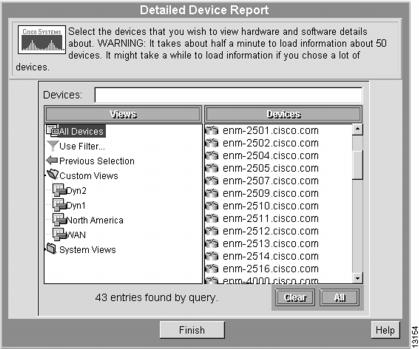
Displaying a Detailed Device Report
Scenario: You want to see device inventory data for all Catalyst switches.To see device information, including system and chassis descriptions, chassis cards, interfaces, Cisco IOS image, and Flash memory information, you can generate a detailed device report.
Note
To display a detailed device report, perform the following steps:
Step 1
The Detailed Device Report dialog box appears. (See .)
Figure 4-9 Detailed Device Report Dialog Box
Step 2
The report appears.Step 3
Step 4
Step 5
(a)
(b)
(c)
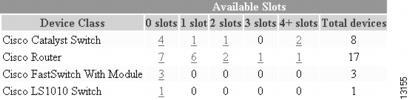
Displaying Capacity Information
Scenario: You want to know how many slots are available in each device class, then view detailed capacity information about selected devices.To display a capacity planning report, perform the following steps:
Step 1
The Chassis Slot Summary appears. (See .)
Figure 4-10 Chassis Slot Summary
Step 2
Step 3
This completes the chapter on Inventory.
 Feedback
Contact Cisco
- Open a Support Case

- (Requires a Cisco Service Contract)
This Document Applies to These Products
- Collaboration Endpoints - Retired Products
- Conferencing - Retired Products
- Contact Center - Retired Products
- Optical Networking - Retired Products
- Routers - Retired Products
- Security - Retired Products
- Servers - Unified Computing (UCS) Retired Products
- Storage Networking Retired Products
- Switches - Retired Products
- Video - Retired Products
- Wireless - Retired Products