About the pxGrid Cloud Identity Source
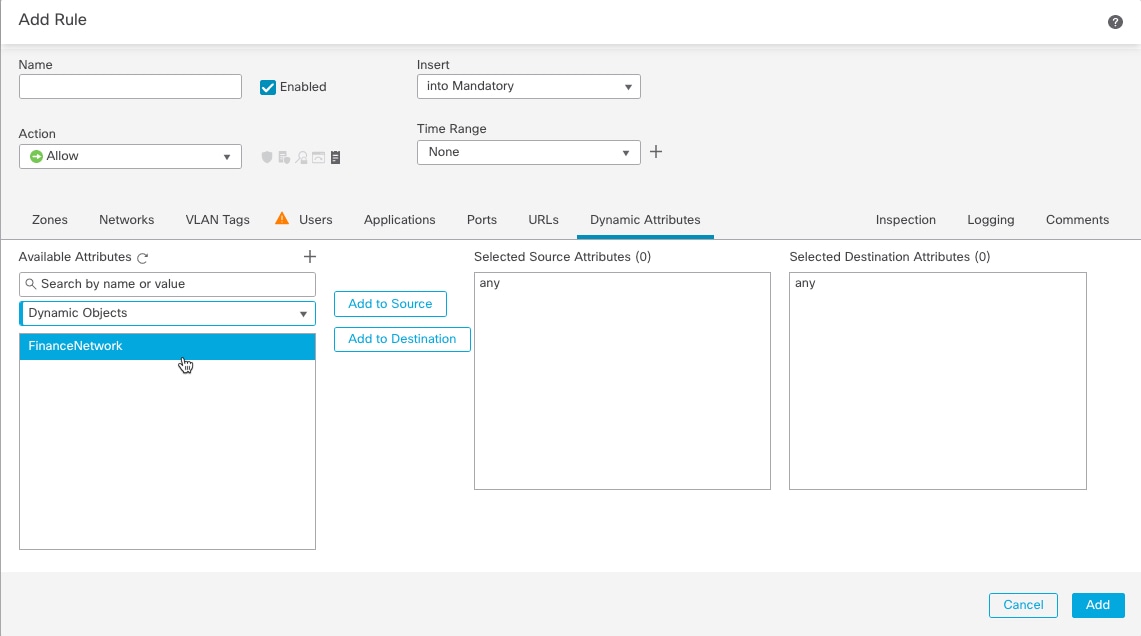
The Cisco Identity Services Engine (Cisco ISE) pxGrid cloud identity source enables you to use subscription and user data from Cisco ISE in Cloud-Delivered Firewall Management Center access control rules. Also, the identity source uses constantly changing dynamic objects from Cisco ISE in access control policies in the Cloud-Delivered Firewall Management Center.
The pxGrid cloud identity source also uses:
-
The Cisco Platform Exchange Grid (pxGrid), which enables multivendor, cross-platform network system collaboration in things like security monitoring and detection systems, network policy platforms, asset and configuration management, identity, and access management. pxGrid Cloud is the cloud-based interface to Cisco ISE.
More information about pxGrid can be found in resources such as What is PxGrid? on devnet.
-
The Cisco Digital Network Architecture (Cisco DNA) delivers automation, security, predictive monitoring, and a policy-driven approach. It provides end-to-end network visibility and uses network insights to optimize network performance and deliver the best user and application experience.
To use the pxGrid cloud identity source with the Cisco Security Cloud Control, you must Create a Cisco Account.
-
What is pxGrid? on devnet
-
Cisco Platform Exchange Grid Cloud on devnet
-
Prerequisites
-
ISE-PIC is not supported
-
Cisco ISE 3.1 patch 3 and all later patches and versions
Limitations of the pxGrid Cloud Identity Source
Before you set up the pxGrid cloud identity source, note the following:
How the pxGrid Cloud Identity Source Works
The following figure shows how the identity source works.
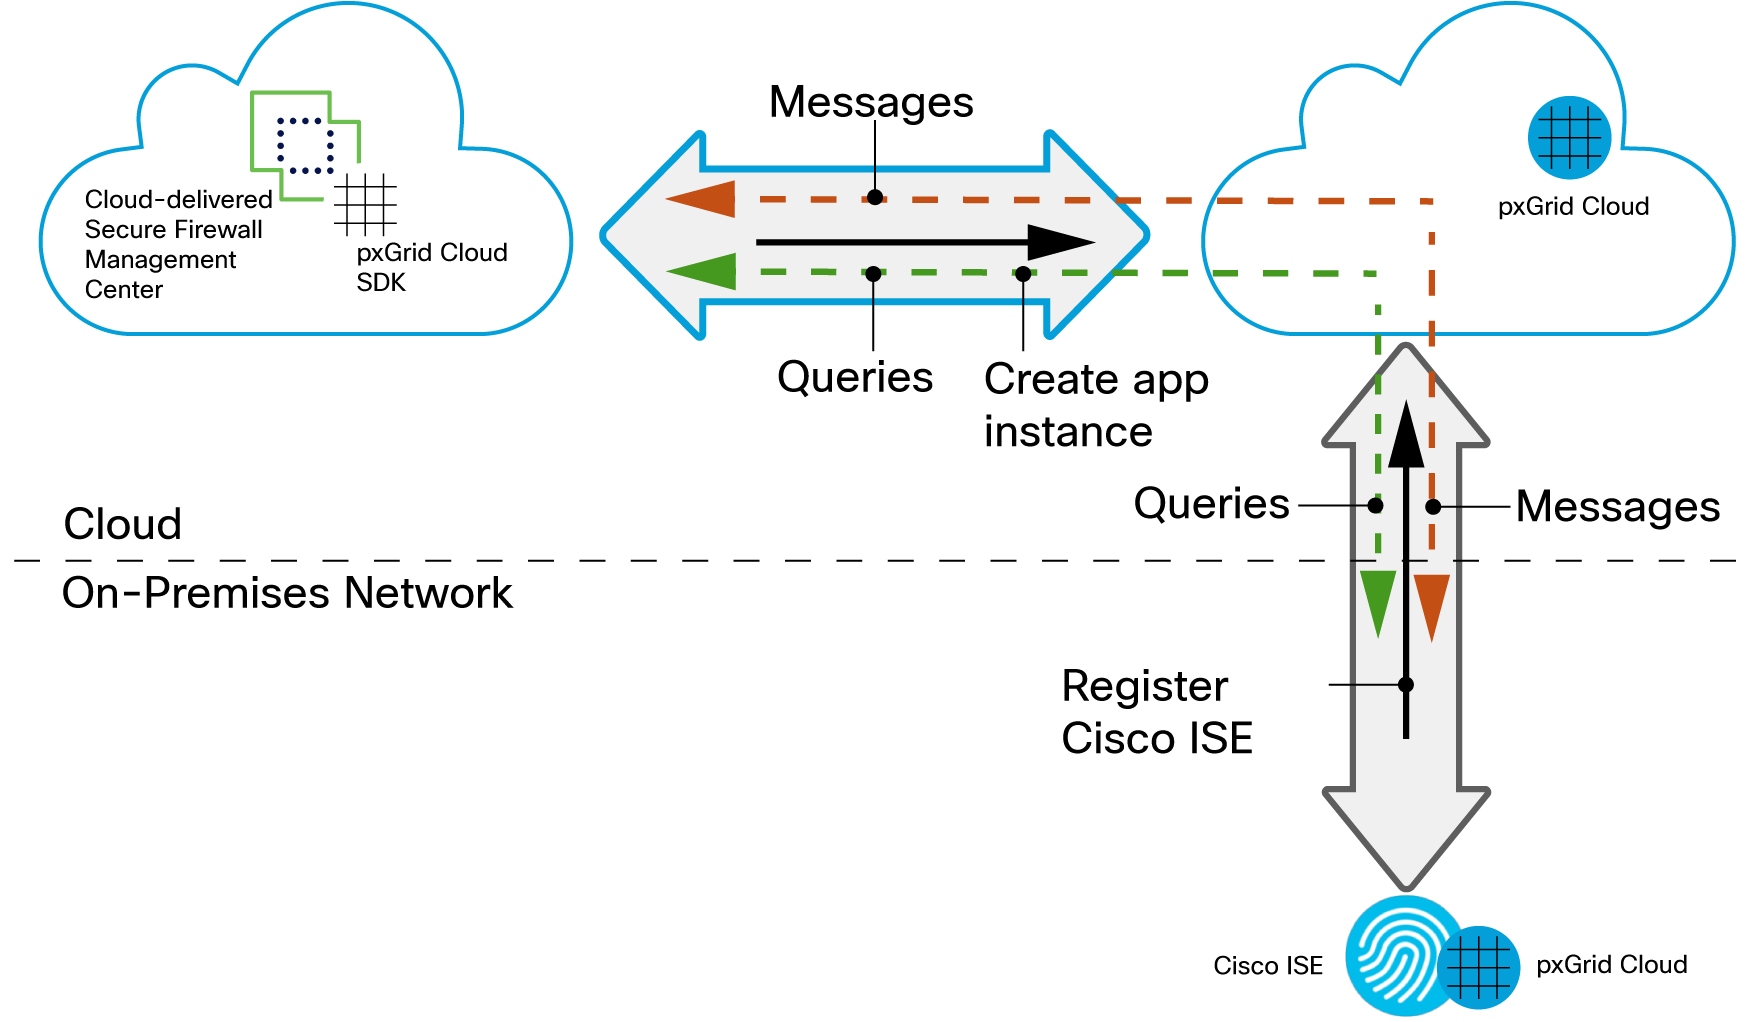
Your Cloud-Delivered Firewall Management Center uses the pxGrid Cloud SDK to programmatically retrieve user information from an on-premises Cisco ISE server so these users can be used in identity policies on the Cloud-Delivered Firewall Management Center.
To authorize and authenticate this data exchange, you must:
-
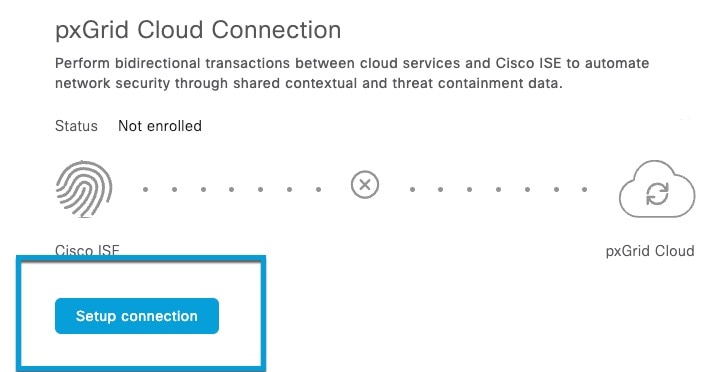
In Cisco ISE, enable the use of pxGrid Cloud.
-
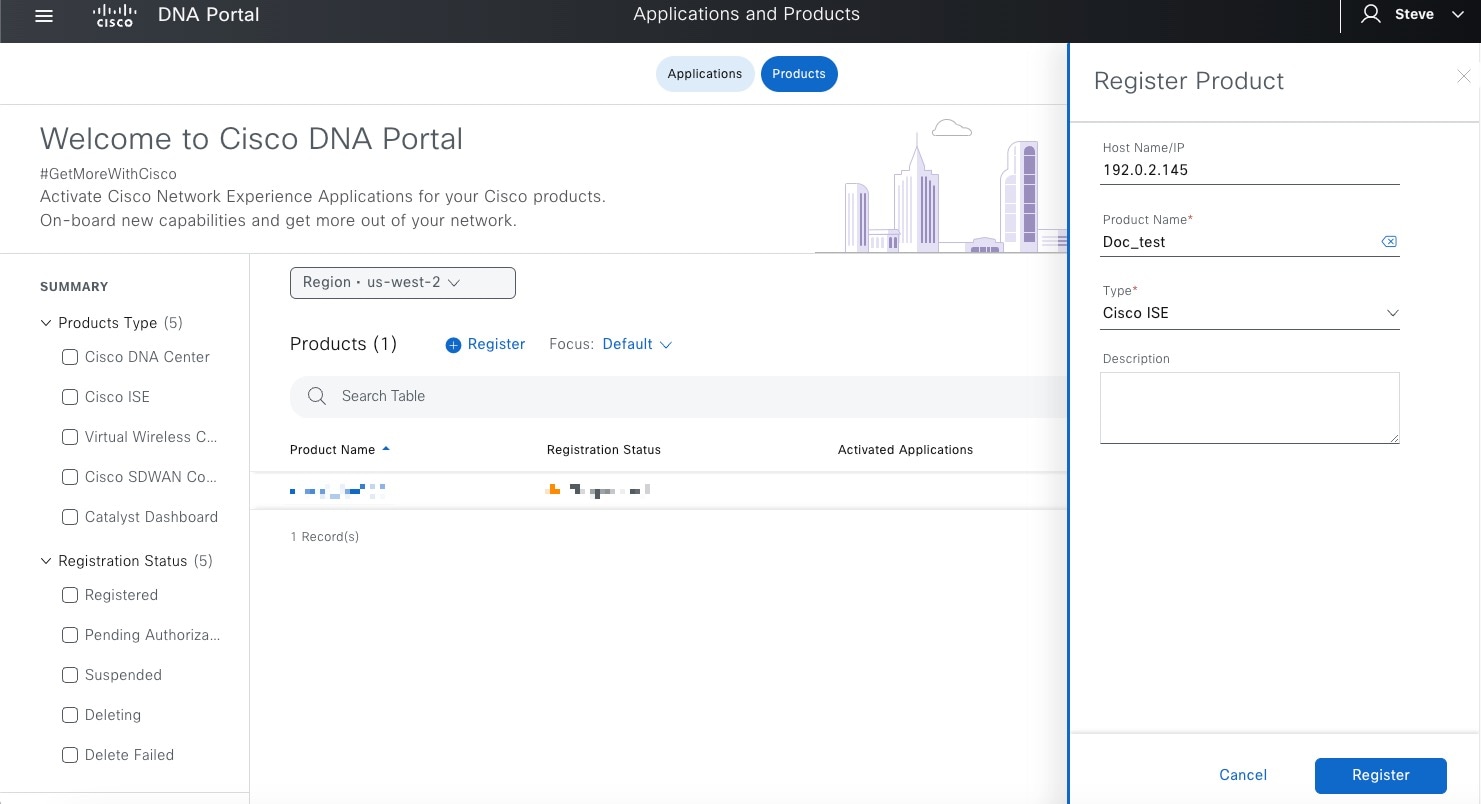
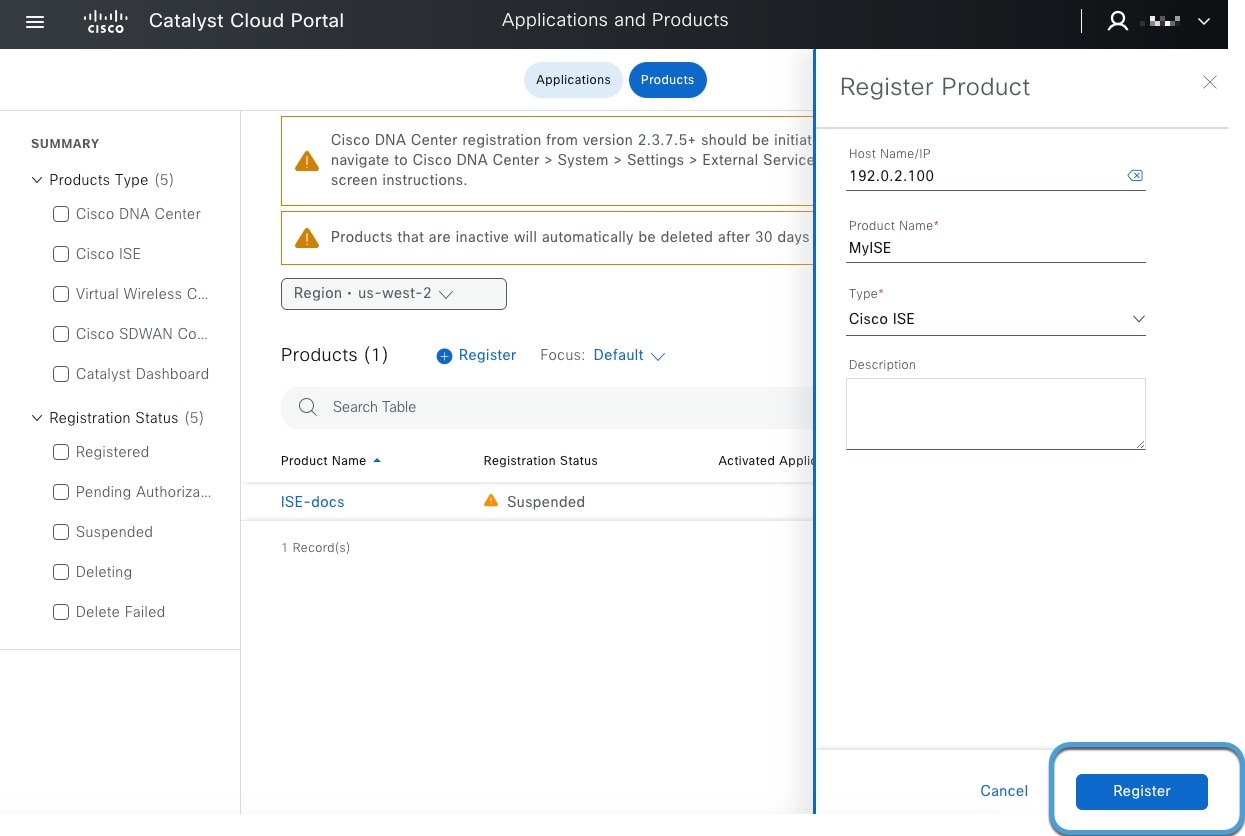
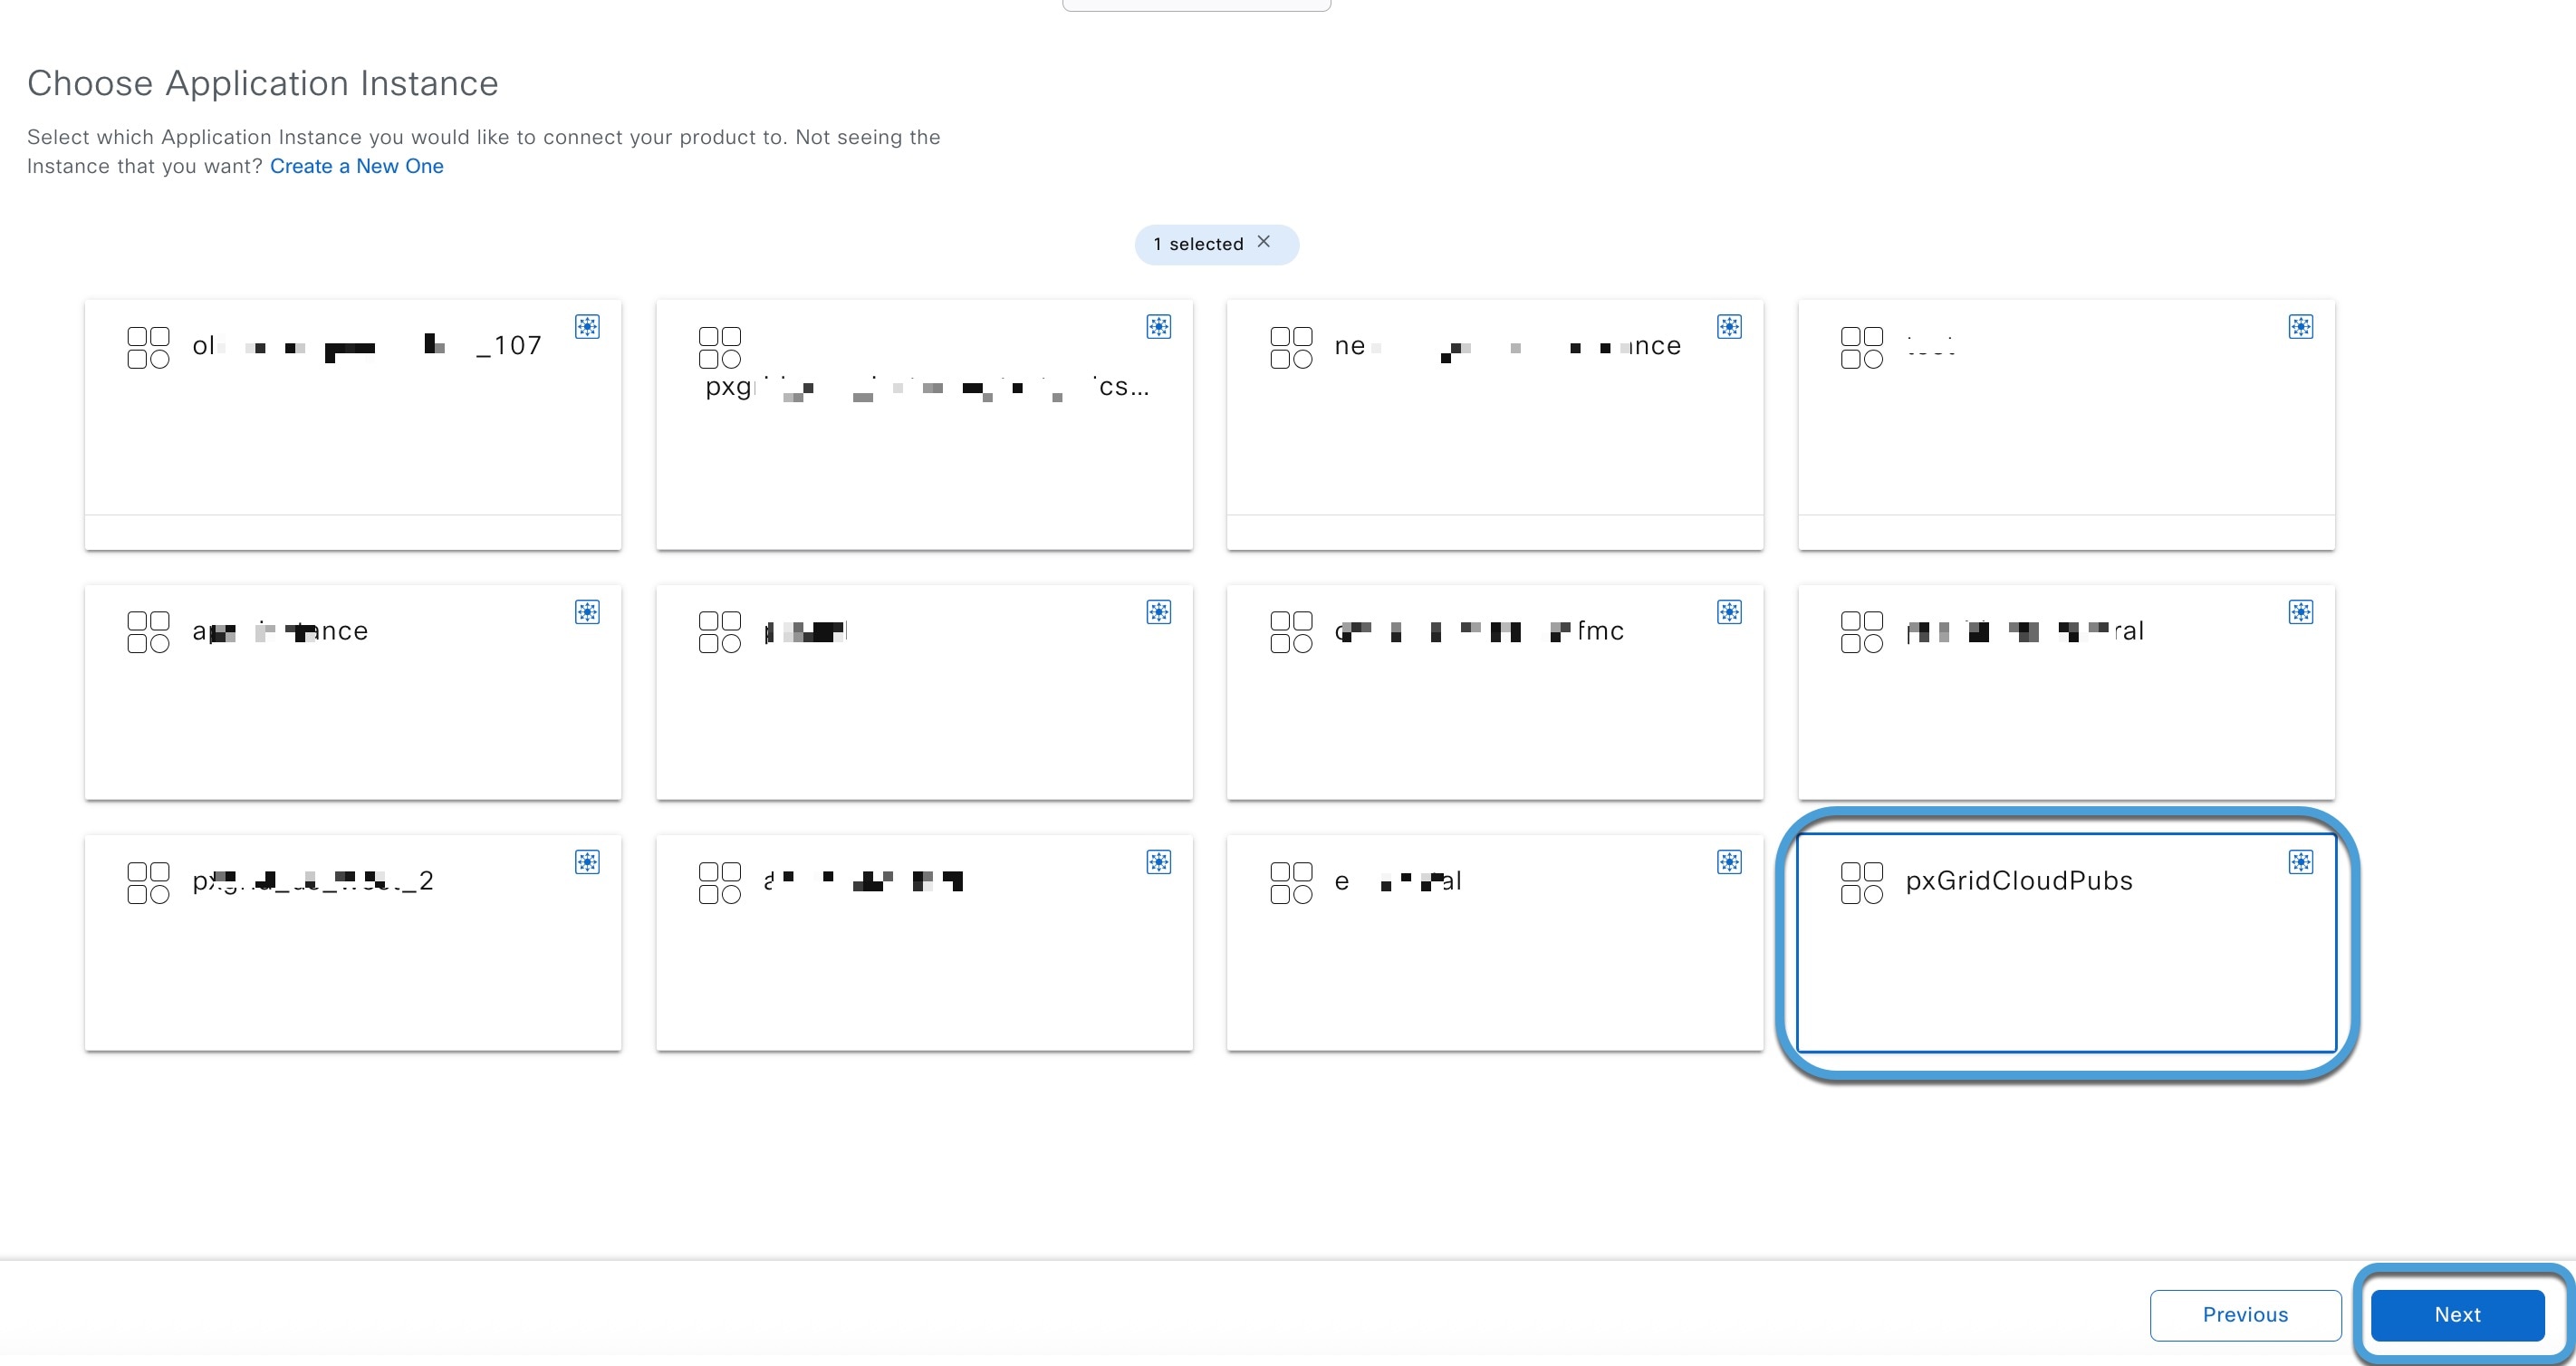
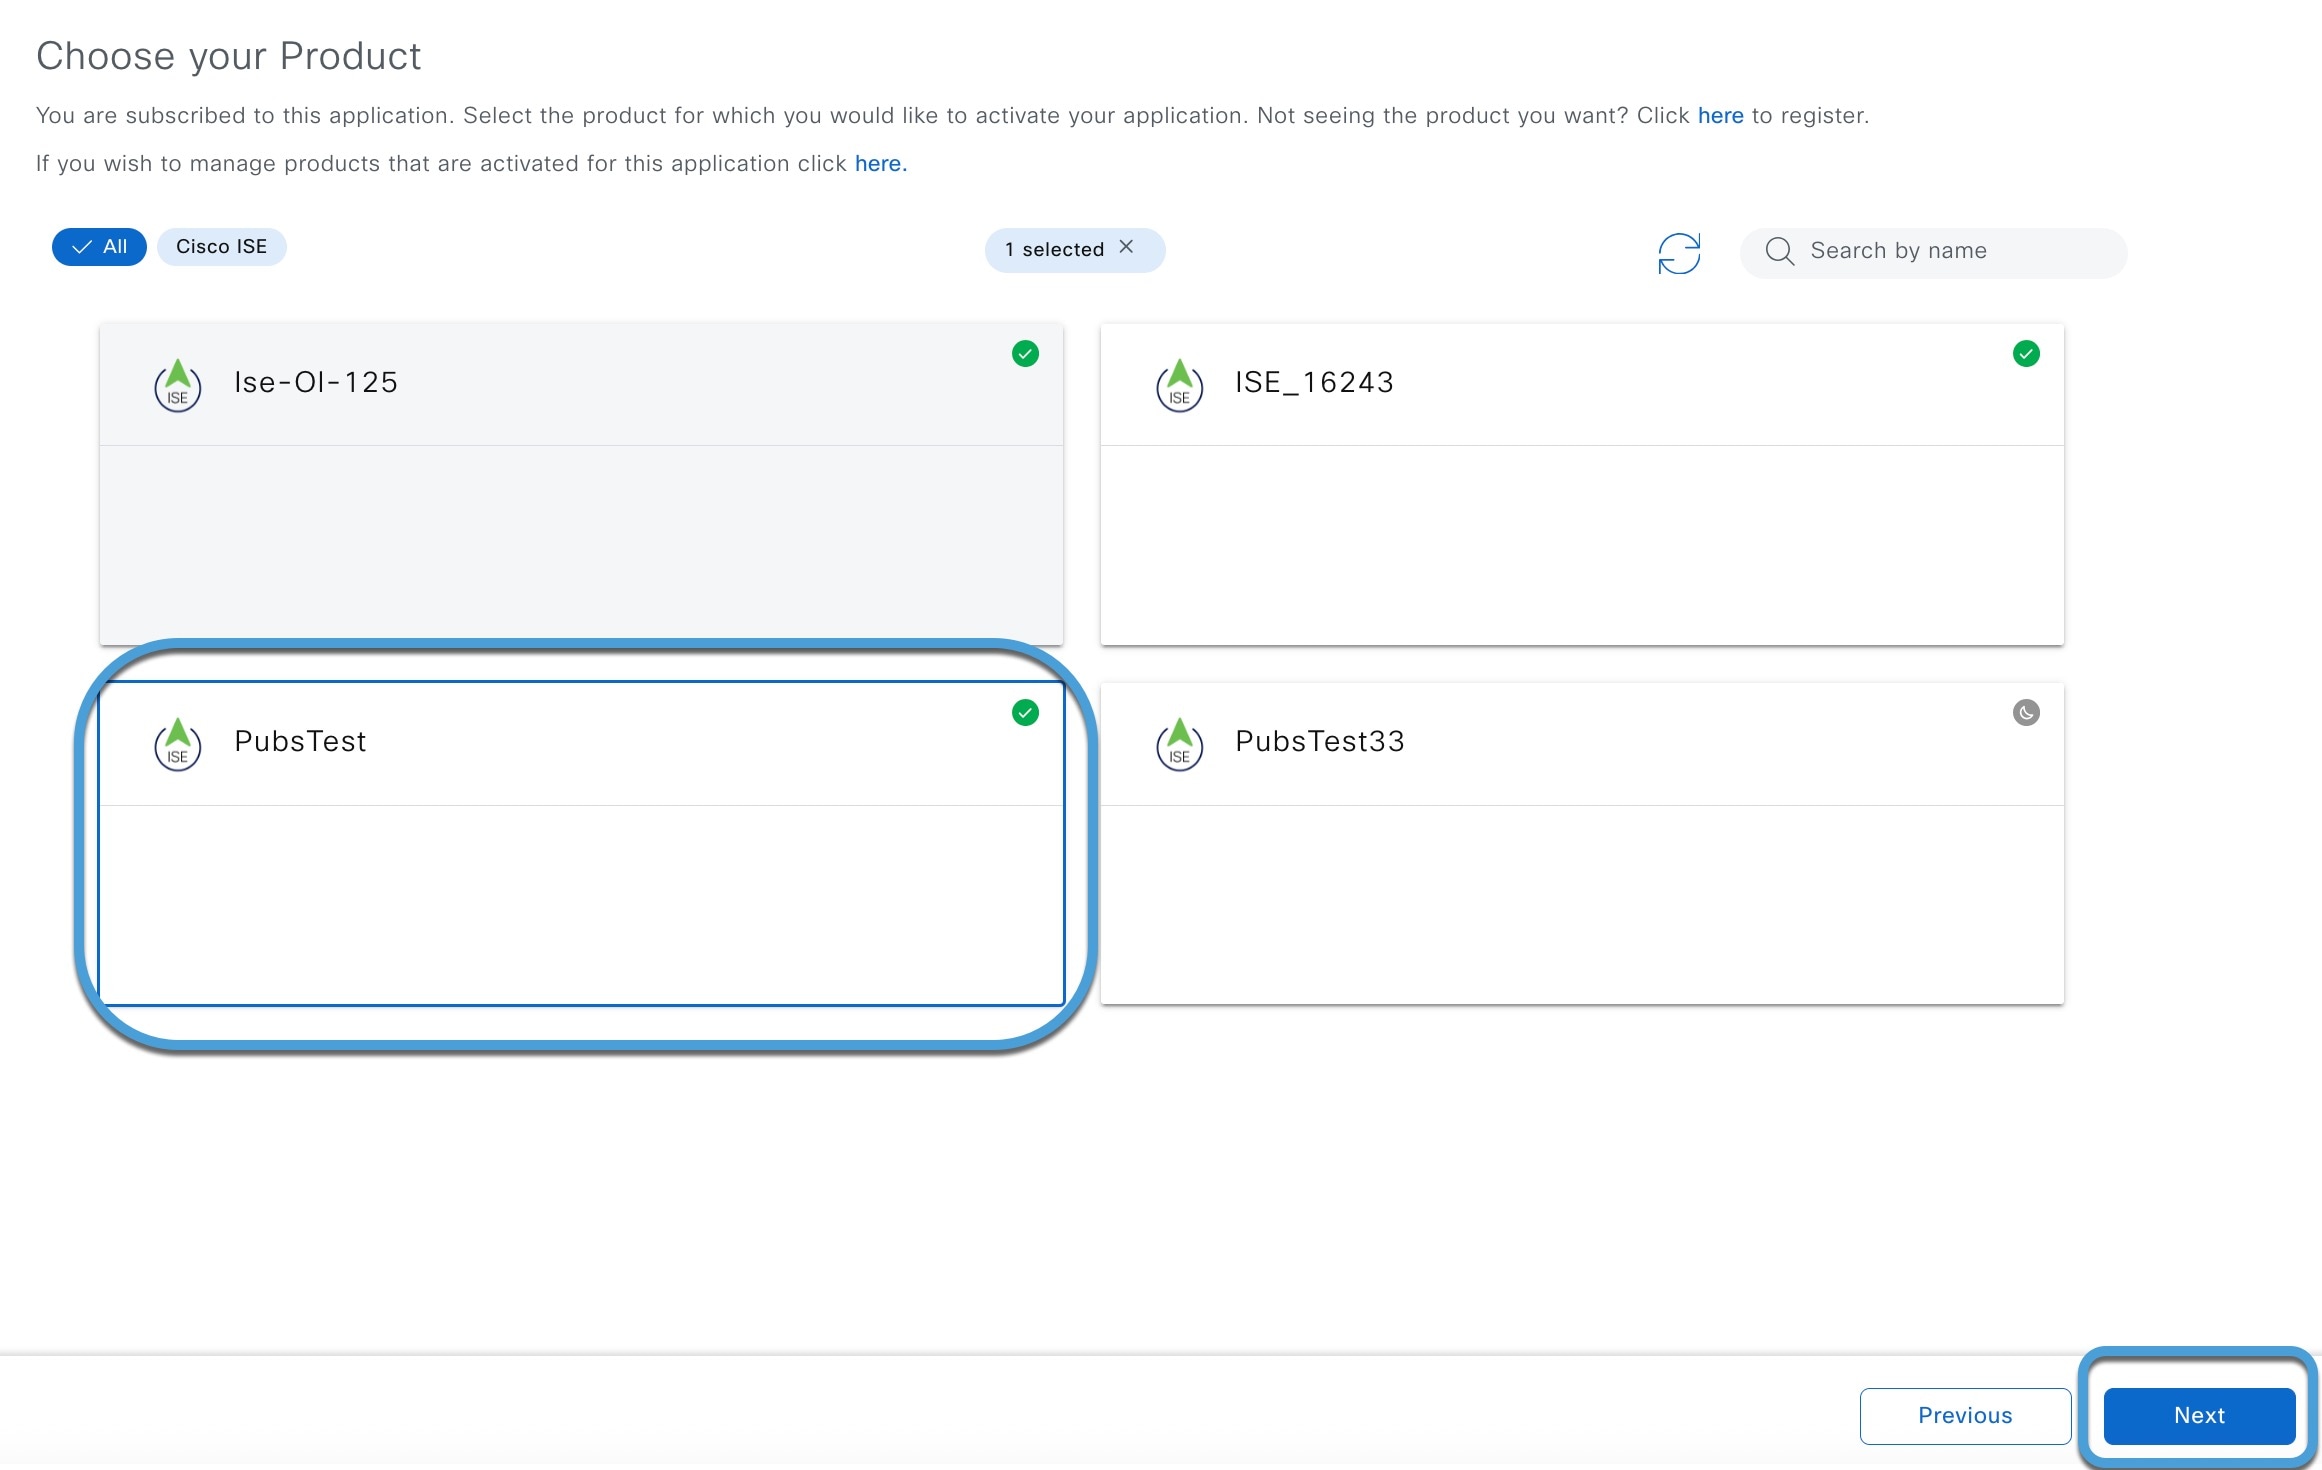
Register Cisco ISE as a product in pxGrid Cloud, which authenticates Cisco ISE and pxGrid Cloud and enables them to communicate with each other.
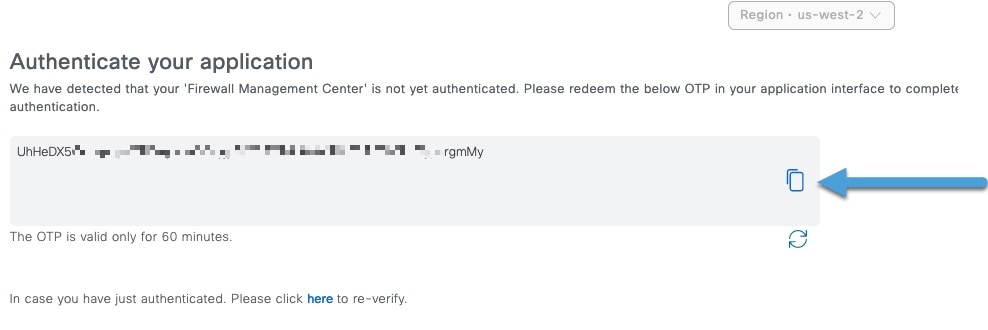
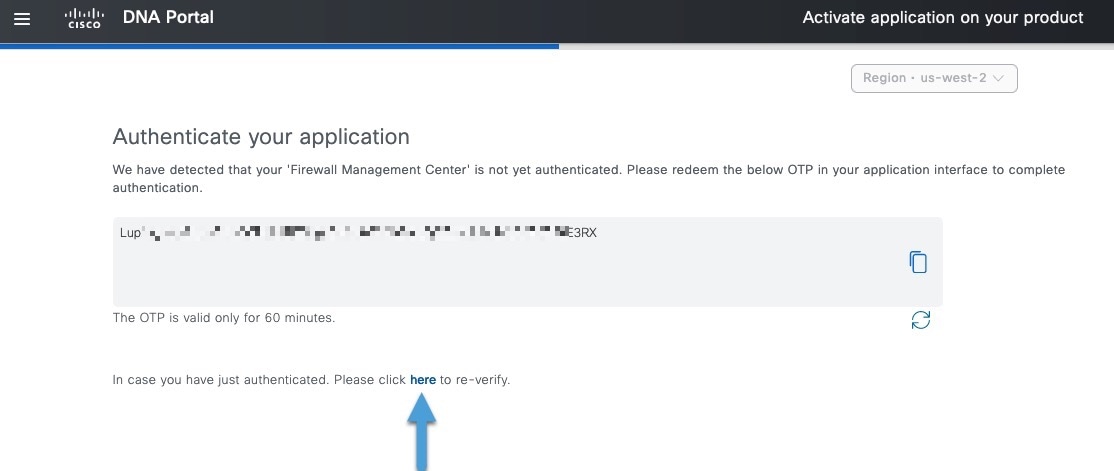
The authentication process requires you to paste a one-time password (OTP) from pxGrid Cloud into Cisco ISE.
-
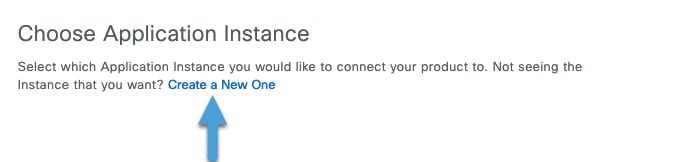
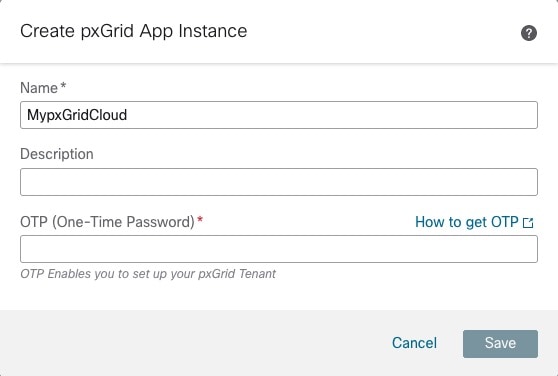
In pxGrid Cloud, create an "app instance" that generates an OTP for you to use in the Cloud-Delivered Firewall Management Center to authenticate the two with each other.
-
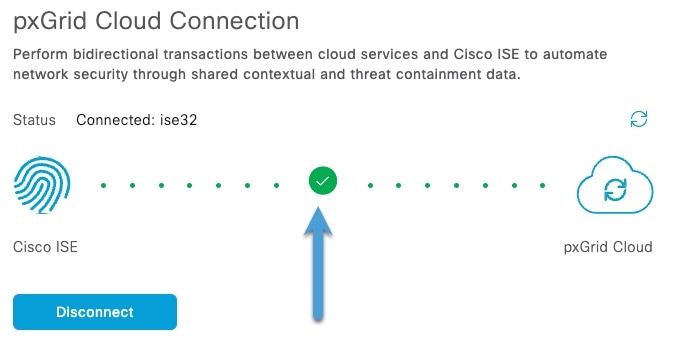
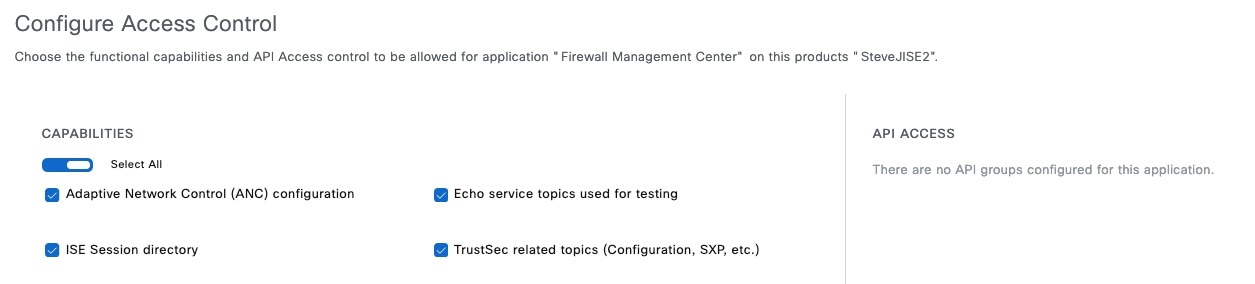
After completing all the preceding tasks, the Cloud-Delivered Firewall Management Center (which includes the pxGrid Cloud SDK) can query Cisco ISE using pxGrid Cloud and retrieve sessions containing user information, SGT, endpoint profile, and other details.
-
Many types of dynamic objects can be filtered and sent to the Cloud-Delivered Firewall Management Center as dynamic objects to be used in access control rules. These include: SGT, endpoint profile, posture status, and machine authentication.
We retrieve user information from Cisco ISE and group information from either Microsoft Active Directory or Azure Active Directory.


 )
)
 )
)
 Feedback