Information About PKI
Public Key Infrastructure (PKI) is a framework that manages digital certificates and public-key encryption to secure communications and authenticate identities.
-
PKI provides mechanisms for issuing, managing, and revoking digital certificates.
-
It involves Certificate Authorities (CAs) that validate and sign certificates.
-
PKI supports secure data exchange and identity verification in network environments.
CAs and Digital Certificates
Certificate Authorities (CAs) are trusted entities that manage certificate requests and issue digital certificates to participating entities, providing centralized key management and authentication in public key cryptography.
-
CAs issue digital certificates to hosts, network devices, or users.
-
Digital certificates contain identifying information and the entity’s public key.
-
CAs are trusted third parties that validate identities and sign certificates.
How CAs and Digital Certificates Work
Certificate Authorities (CAs) manage certificate requests and issue certificates to participating entities such as hosts, network devices, or users. The CAs provide centralized key management for the participating entities.
-
Digital signatures, based on public key cryptography, digitally authenticate devices and individual users.
-
Each device or user has a key pair: a private key (kept secret) and a public key (shared).
-
Anything encrypted with one key can be decrypted with the other.
-
A signature is formed when data is encrypted with a sender’s private key; the receiver verifies it using the sender’s public key.
-
This process relies on the receiver having a copy of the sender’s public key and being certain of its authenticity.
-
Digital certificates link the digital signature to the sender and contain identifying information and the public key.
-
The CA that signs the certificate is a trusted third party for validating identities and creating certificates.
-
To validate the CA’s signature, the receiver must know the CA’s public key, which is typically pre-installed in web browsers or handled out of band.
Trust Model, Trust Points, and Identity CAs
The trust model in PKI is hierarchical, involving multiple configurable trusted Certificate Authorities (CAs). Trust points and identity CAs are key components in this model.
-
A trust point is the information about a trusted CA configured on a device, including the CA certificate or certificate chain and revocation checking information.
-
The process of securely obtaining and storing a trusted CA’s root certificate or certificate chain is called CA authentication .
-
An identity CA is a trust point that issues identity certificates to devices for associating with key pairs.
Supporting reference information for Trust Model, Trust Points, and Identity CAs
The PKI trust model allows each device to be configured with a list of trusted CAs. During security protocol exchanges, a peer certificate can be authenticated if it was issued by one of these trusted CAs. The device locally stores the self-signed root certificate of the trusted CA or the certificate chain for a subordinate CA.
Example of Trust Point and Identity CA Usage
For example, when a device enrolls with a trust point, it obtains an identity certificate from the identity CA. This certificate is then associated with a key pair, enabling secure authentication and communication within the network.
CA Certificate Hierarchy
The CA Certificate Hierarchy is a structure that organizes multiple trusted Certificate Authorities (CAs) into a chain or bundle, enabling secure services by validating certificates through a sequence of intermediate and root CAs.
-
Multiple trusted CAs are typically installed as a bundle on all hosts.
-
NX-OS PKI infrastructure supports importing certificate chains, but only one chain can be installed at a time.
-
Managing several CA chains requires a facility to download CA bundles containing multiple intermediate and root CAs.
CA Certificate Hierarchy Reference Information
CA Certificate Hierarchy involves the installation and management of multiple trusted CAs to ensure secure communication between hosts.
Example of CA Certificate Hierarchy
For instance, when deploying secure services, an administrator may need to install a CA bundle that includes several intermediate and root CAs to ensure all certificates are trusted across the network.
Importing CA Bundle
The import CA bundle process in Cisco NX-OS enables the installation of multiple CA certificates under trustpoint labels using the pkcs7 file format.
-
The crypto CA trustpoint command binds CA certificates, CRLs, identity certificates, and key pairs to a named label.
-
All related files are stored in the NX-OS certstore directory and tagged with the trustpoint label.
-
The import command supports the pkcs7 option to provide a CA bundle file in pkcs7 format.
Reference Information for Importing CA Bundle
The crypto CA trustpoint command is used to associate CA certificates, CRLs, identity certificates, and key pairs with a specific label. These files are stored in the NX-OS certstore directory and are identified by the trustpoint label.
-
SSL applications can access CA certificates by specifying the NX-OS certstore as the CA path during SSL initialization, without needing to know the trustpoint label.
-
To bind to an identity certificate, clients must use the trustpoint label as the binding point.
-
The import pkcs command is enhanced to install CA certificates under a trustpoint label.
-
The pkcs7 option allows the import of a CA bundle file in pkcs7 format.
-
Each CA chain in the bundle is installed under its own label, formed by appending an index to the main trustpoint label.
Once installed, there is no logical binding of all CA chains to a bundle.
|
Attributes |
Trustpoint Label |
CA Bundle (pkcs7) |
|---|---|---|
|
File Storage |
Stored in certstore under label |
Stored in certstore, each chain under indexed label |
|
Binding |
Label used for binding |
No logical binding of all chains to bundle |
 Note |
TIP: Use the pkcs7 option to efficiently import multiple CA certificates as a bundle. |
Example: Importing a CA Bundle Using pkcs7
For example, to import a CA bundle in pkcs7 format, use the import command with the pkcs7 option. Each CA chain will be installed under a unique label derived from the main trustpoint label.
Import the CA Certificate Bundle in PKCS7 Format
To support the import of the CA certificate bundle which consists of multiple independent certificate chains, the option of ‘pkcs7’ is introduced in the crypto import command.
Procedure
|
Step 1 |
configure terminal Example:Enters global configuration mode. |
|
Step 2 |
crypto ca import <baselabel> pksc7 <uri0> force There are two input arguments in the command. The source file which is the ca bundle file is given in the <uri0> , the input file has to be in pkcs7 format indicating that it is a cabundle file. Multiple certificate chains will be extracted out of the cabundle. The command will generate multiple trustpoints with ca certificate chain attached to each one. Import command generates two configurations which are global CA bundle configuration and CA bundle sub-configuration with each trustpoint generated. The force option removes the CA bundle and related trustpoint configurations, imports a new CA bundle with the same bundle name, and generates fresh trustpoint configurations related to the cabundle. |
|
Step 3 |
crypto ca cabundle <bundle-name> The bundle-name is same as baselabel for import case. You can use the no form of this command to delete the, CA bundle, trustpoints, and related certificate chains. After importing CA bundle under a particular baselabel name and generating all the trustpoints, if a user try to execute the import command again under the same baselabel name, it will throw error saying CA bundle already exists. The user can use force option to modify the existing CA bundle. Maximum number of Cabundles supported is 20. |
|
Step 4 |
exit Example:Exits configuration mode. |
|
Step 5 |
(Optional) show crypto ca certificates Example:Displays the CA certificates. |
|
Step 6 |
(Optional) copy running-config startup-config Example:Copies the running configuration to the startup configuration. |
RSA Key Pairs and Identity Certificates
RSA key pairs and identity certificates are fundamental components for device authentication and secure communication with certificate authorities (CAs).
-
Each device can generate one or more RSA key pairs, each associated with a trust point CA for enrollment.
-
Only one identity certificate and one key pair are allowed per trust point CA.
-
The subject name in the identity certificate is the device's fully qualified domain name (FQDN).
Relationship between Trust Points, RSA Key Pairs, and Identity Certificates
Trust points, RSA key pairs, and identity certificates are interrelated to enable secure device authentication and application trust.
-
A trust point corresponds to a specific CA that the device trusts for peer certificate verification for any application (such as SSH).
-
A device can have many trust points, and all applications on the device can trust a peer certificate issued by any of the trust point CAs.
-
A trust point is not restricted to a specific application.
-
A device enrolls with the CA that corresponds to the trust point to obtain an identity certificate. Devices can enroll with multiple trust points, obtaining separate identity certificates from each. The certificates are used by applications depending on the purposes specified in the certificate by the issuing CA, stored as certificate extensions.
-
When enrolling with a trust point, an RSA key pair must be generated and associated to the trust point before generating the enrollment request. The association between the trust point, key pair, and identity certificate remains valid until explicitly removed by deleting the certificate, key pair, or trust point.
-
You can generate one or more RSA key pairs on a device, and each can be associated to one or more trust points. However, only one key pair can be associated to a trust point, allowing only one identity certificate from a CA.
-
If a device obtains multiple identity certificates (each from a distinct CA), the certificate that an application selects for a security protocol exchange is application specific.
-
It is not necessary to designate one or more trust points for an application. Any application can use any certificate issued by any trust point as long as the certificate purpose satisfies the application requirements.
-
Only one identity certificate from a trust point and one key pair associated to a trust point are needed. A CA certifies a given identity (or name) only once and does not issue multiple certificates with the same name. If multiple identity certificates are needed for a CA and the CA allows it, another trust point must be defined for the same CA, with another key pair associated and certified.
The software allows you to generate RSA key pairs with a configurable key size (modulus). The default key size is 512. You can also configure an RSA key-pair label, with the default label being the device's fully qualified domain name (FQDN).
Example: RSA Key Pair and Identity Certificate Enrollment
For example, a device generates an RSA key pair labeled with its FQDN, associates it with a trust point for a specific CA, and enrolls to obtain an identity certificate. This certificate is then used by applications such as SSH for secure communication.
Multiple Trusted CA Support
Multiple Trusted CA Support allows a device to trust multiple Certificate Authorities (CAs) by configuring multiple trust points, each associated with a distinct CA.
-
Enables configuration of multiple trust points on a device.
-
Allows association of each trust point with a different CA.
-
Facilitates certificate verification from peers using any of the trusted CAs.
Reference Information for Multiple Trusted CA Support
The device can be configured with multiple trusted CAs, eliminating the need to enroll with the specific CA that issued a peer's certificate.
Example of Multiple Trusted CA Support
For example, if a device is configured with three trusted CAs, it can verify certificates from peers issued by any of those CAs, improving interoperability in environments with multiple certificate authorities.
PKI Enrollment Support
PKI enrollment is the process by which a device obtains an identity certificate from a certificate authority (CA) for secure communications.
-
Enrollment involves generating an RSA key pair on the device.
-
The device creates a certificate request and forwards it to the CA.
-
The issued certificate is received from the CA and stored in nonvolatile memory on the device.
Supporting reference information for PKI Enrollment Support
PKI enrollment is essential for enabling secure device authentication and encrypted communications in network environments.
-
Enrollment is required for applications like SSH that depend on device identity certificates.
-
Generate RSA key pair on the device.
-
Generate and forward certificate request to the CA.
-
Receive signed certificate from the CA.
-
Store the certificate in nonvolatile storage (bootflash).
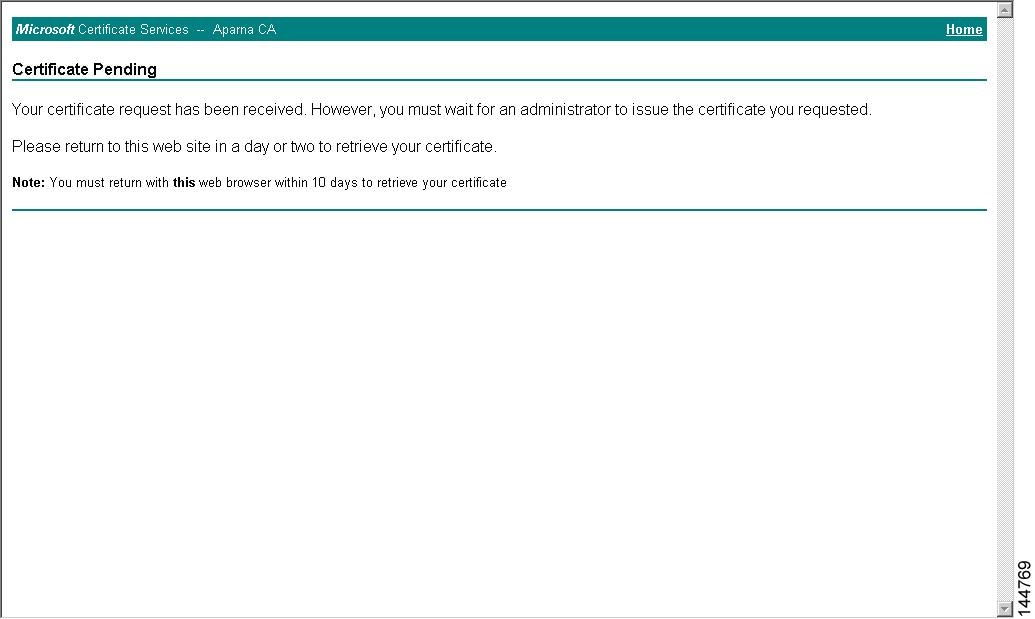
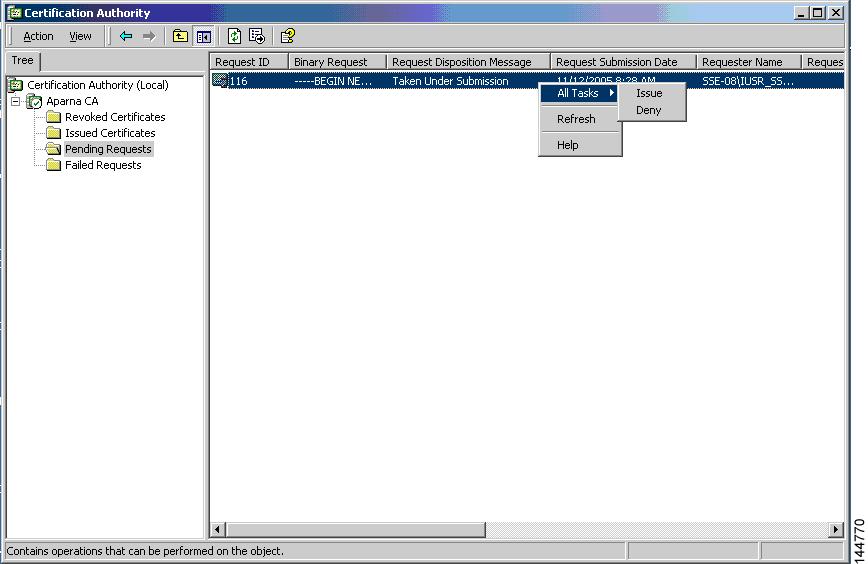
Note |
The CA administrator may be required to manually approve the enrollment request at the CA server when the request is received by the CA. |
Example of PKI Enrollment Support
For example, when a device is configured for SSH, it initiates PKI enrollment by generating a key pair, sending a certificate request to the CA, and storing the signed certificate for secure SSH sessions.
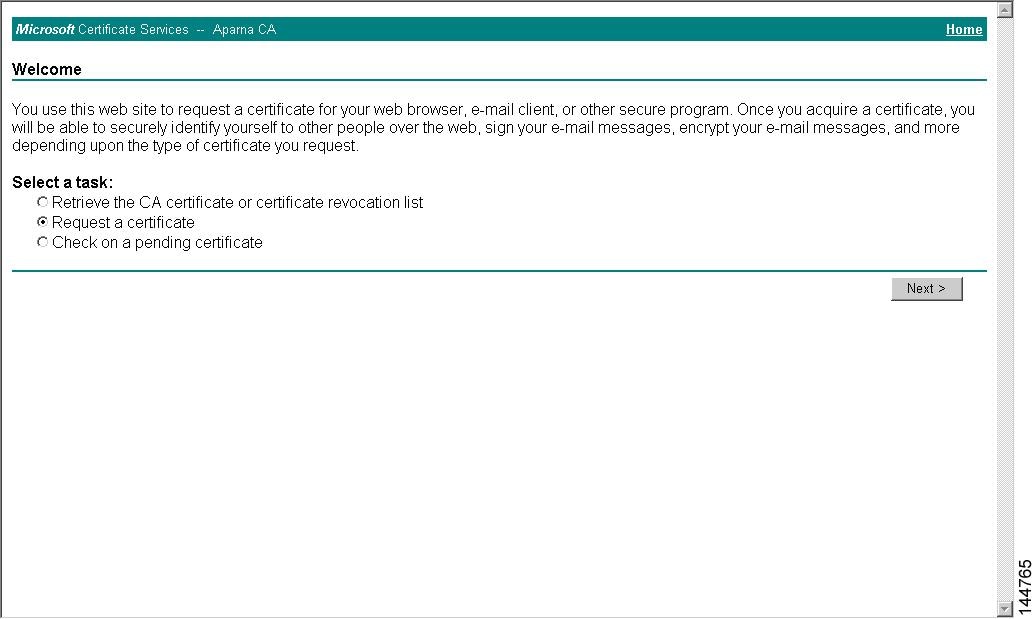
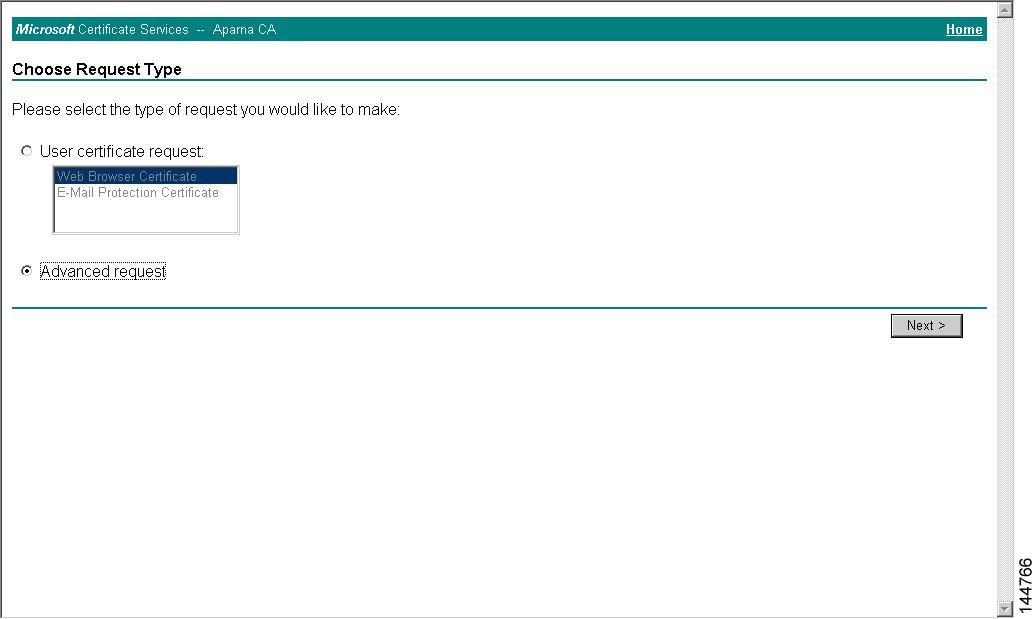
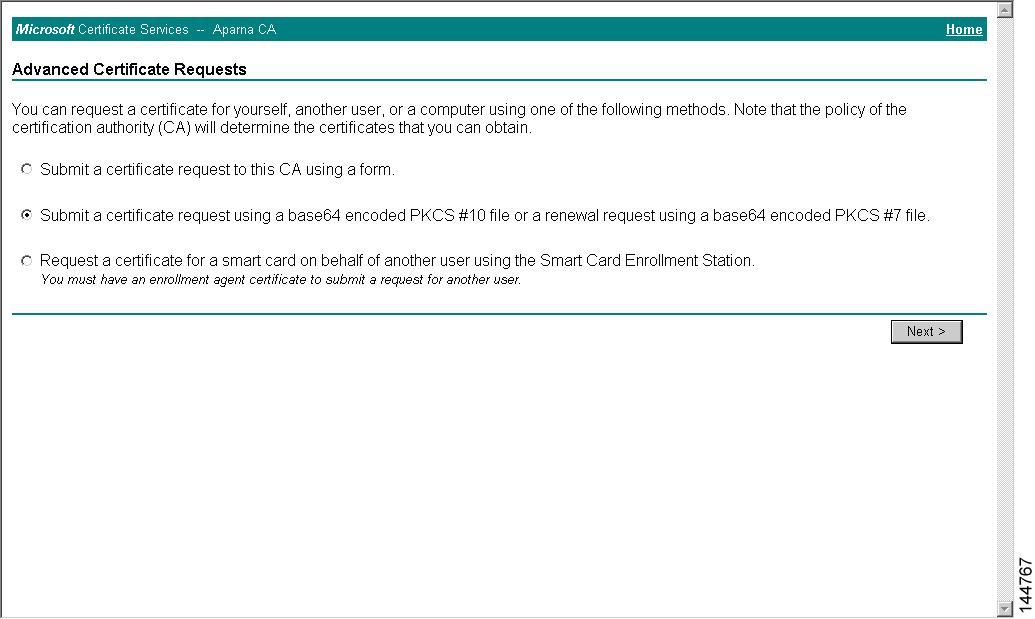
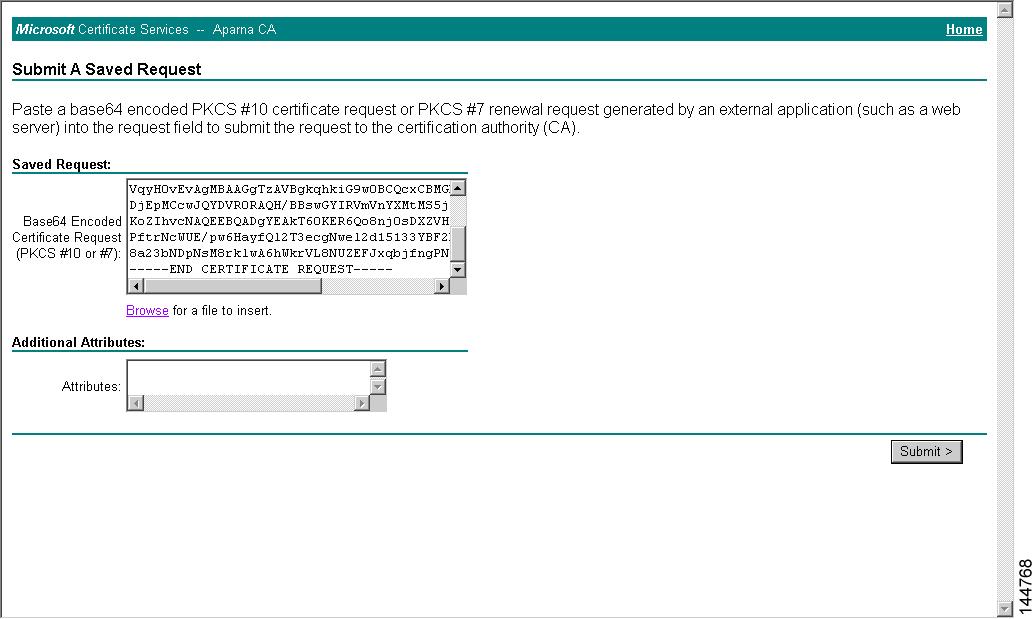
Manual Enrollment Using Cut-and-Paste
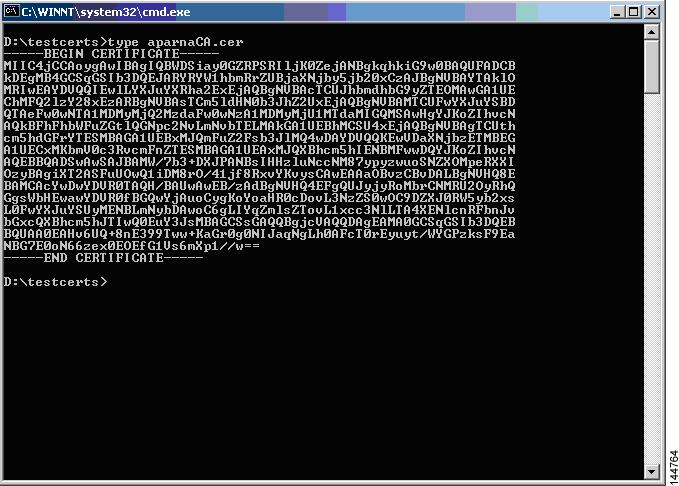
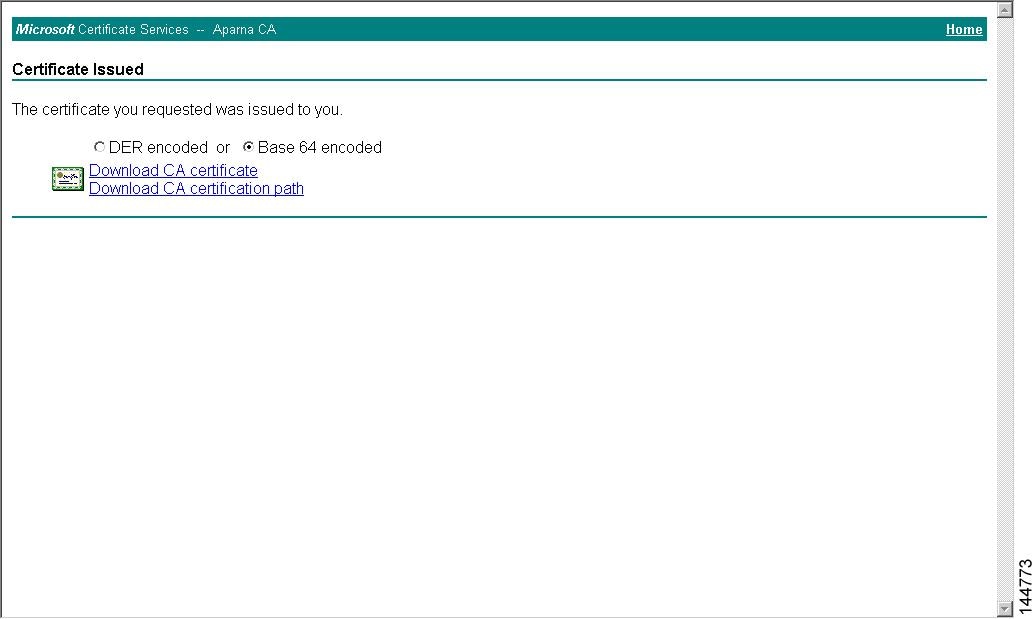
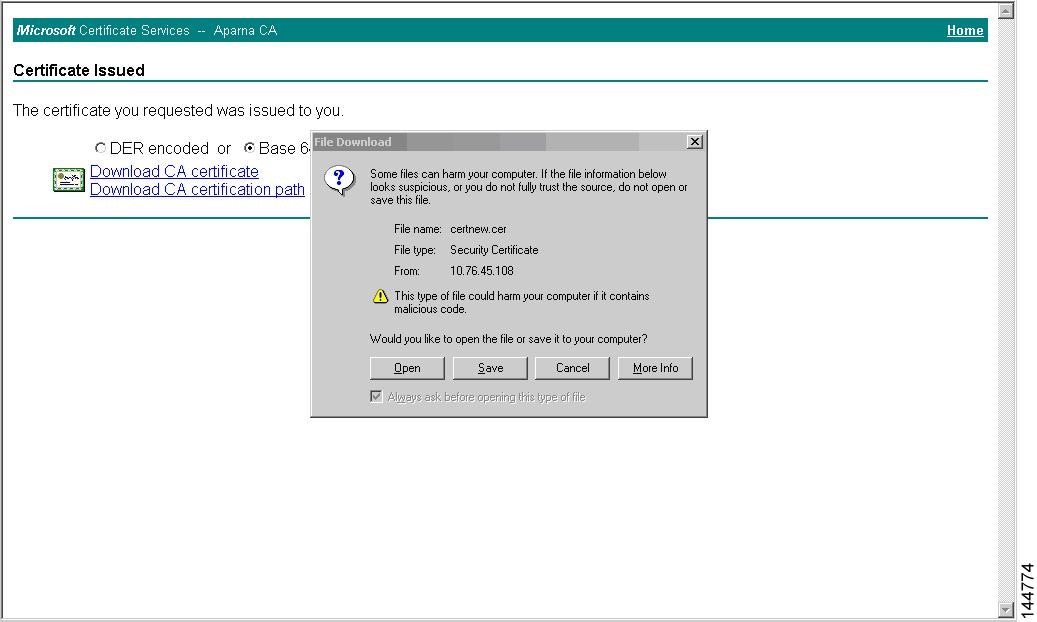
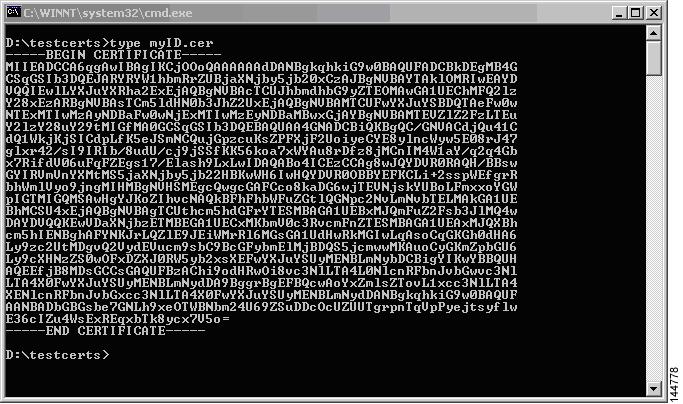
Manual enrollment using cut-and-paste is a process where certificate requests and issued certificates are transferred between a device and a CA by copying and pasting base64-encoded text.
-
Supported by the Cisco NX-OS software.
-
Involves manual transfer of certificate requests and certificates.
-
Uses base64-encoded text for communication with the CA.
Steps for Manual Cut-and-Paste Enrollment
To manually enroll a certificate using cut-and-paste, perform the following steps:
-
Create an enrollment certificate request, which the Cisco NX-OS device displays in base64-encoded text form.
-
Cut and paste the encoded certificate request text in an e-mail or in a web form and send it to the CA.
-
Receive the issued certificate (in base64-encoded text form) from the CA in an e-mail or in a web browser download.
-
Cut and paste the issued certificate to the device using the certificate import facility.
Multiple RSA Key Pair and Identity CA Support
-
Multiple identity CAs allow a device to enroll with more than one trust point, resulting in multiple identity certificates from distinct CAs.
-
The device can participate in SSH and other applications with many peers using certificates issued by CAs acceptable to those peers.
-
The multiple RSA key-pair feature enables the device to maintain a distinct key pair for each CA, matching policy requirements such as key length without conflicts.
Reference Information for Multiple RSA Key Pair and Identity CA Support
With this feature, the device can generate multiple RSA key pairs and associate each key pair with a distinct trust point. When enrolling with a trust point, the associated key pair is used to construct the certificate request.
Peer Certificate Verification
Peer certificate verification is the process by which a device checks the authenticity and validity of certificates received from peers during secure communications.
-
Ensures the peer certificate is issued by a locally trusted Certificate Authority (CA).
-
Checks that the peer certificate is valid and not expired at the time of verification.
-
Verifies that the peer certificate has not been revoked by the issuing CA.
Peer Certificate Verification Process and Methods
The PKI support on a device can verify peer certificates. The software verifies certificates received from peers during security exchanges for applications, such as SSH. The applications verify the validity of the peer certificates. The software performs several steps when verifying peer certificates, including checking the issuing CA, certificate validity, and revocation status.
-
Verifies the certificate is issued by a trusted CA.
-
Checks the certificate validity period.
-
Confirms the certificate is not revoked.
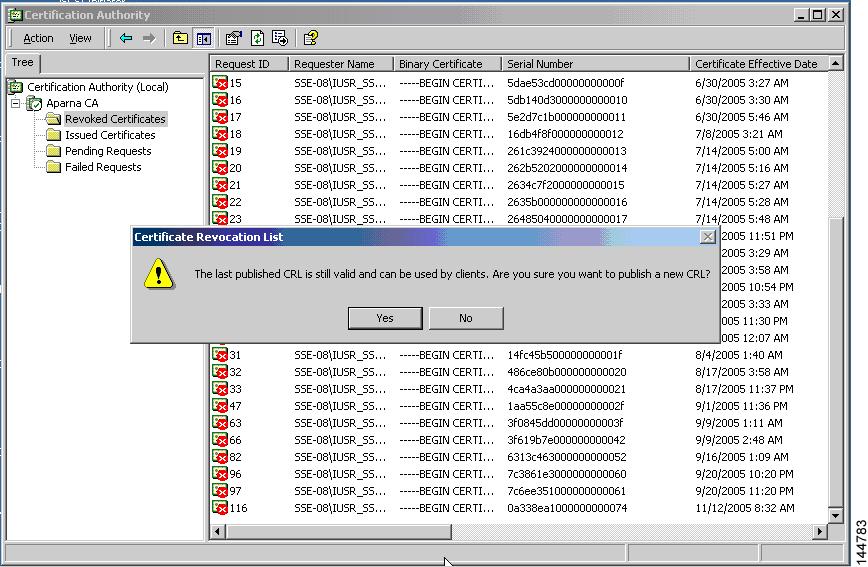
For revocation checking, the software supports the certificate revocation list (CRL). A trust point CA can use this method to verify that the peer certificate has not been revoked.
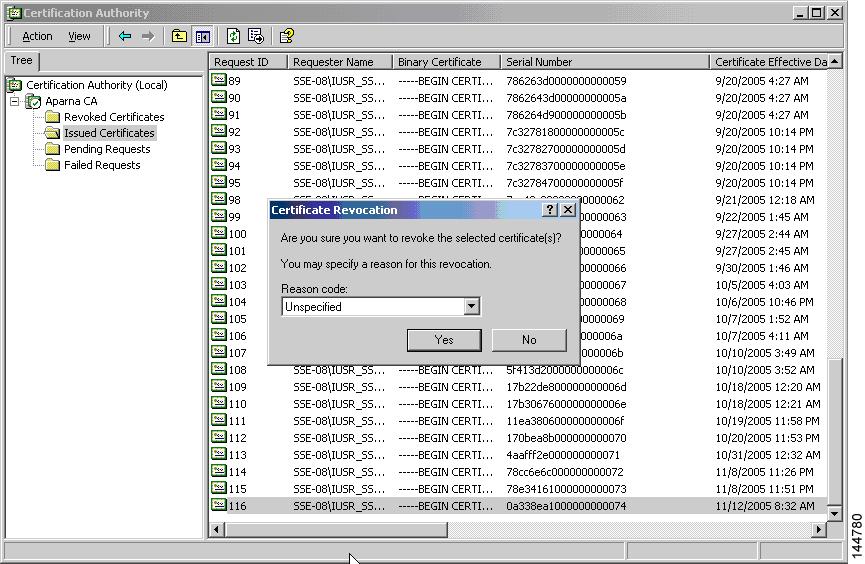
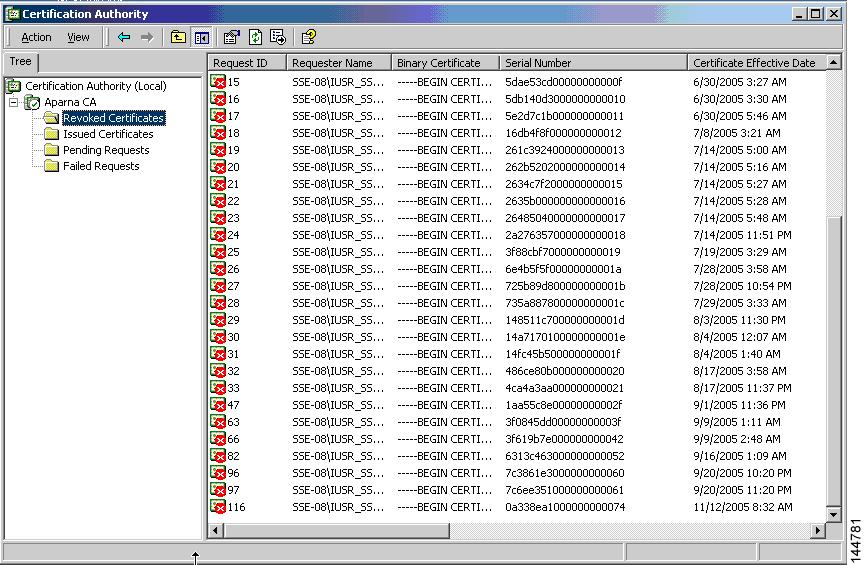
Certificate Revocation Checking
Certificate revocation checking is a process that determines whether a CA certificate is still valid or has been revoked.
-
The software can check the revocation status of CA certificates.
-
Applications can use different revocation checking mechanisms in a specified order.
-
The available methods are CRL, NDcPP: OCSP for Syslog , none, or a combination of these methods.
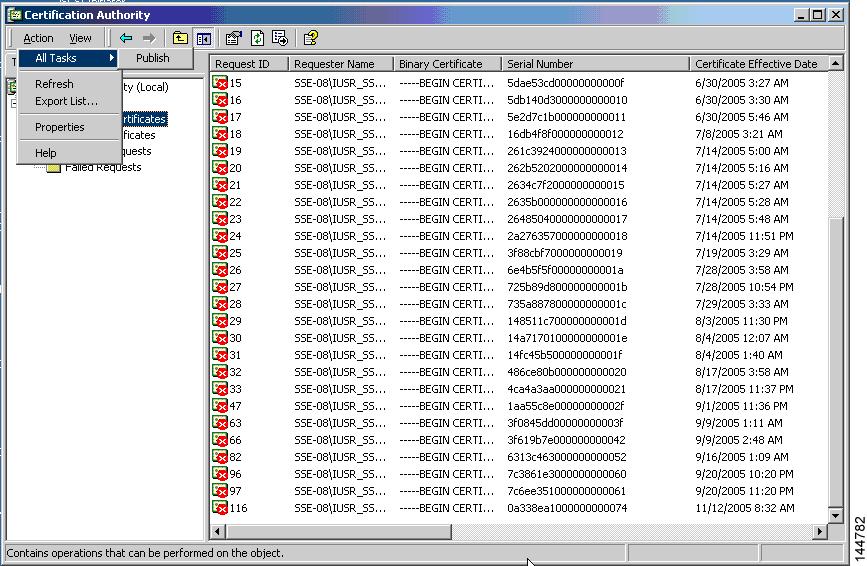
CRL Support
Certificate revocation lists (CRLs) are maintained by certificate authorities (CAs) to provide information about certificates that have been revoked before their expiration dates.
-
CRLs are published by CAs in a repository and referenced in issued certificates.
-
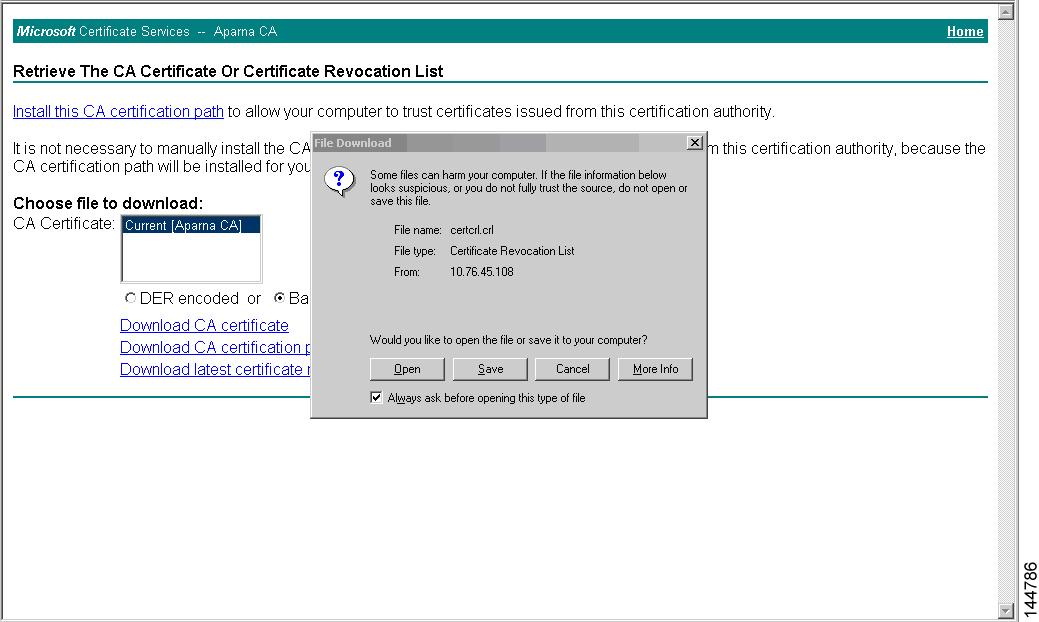
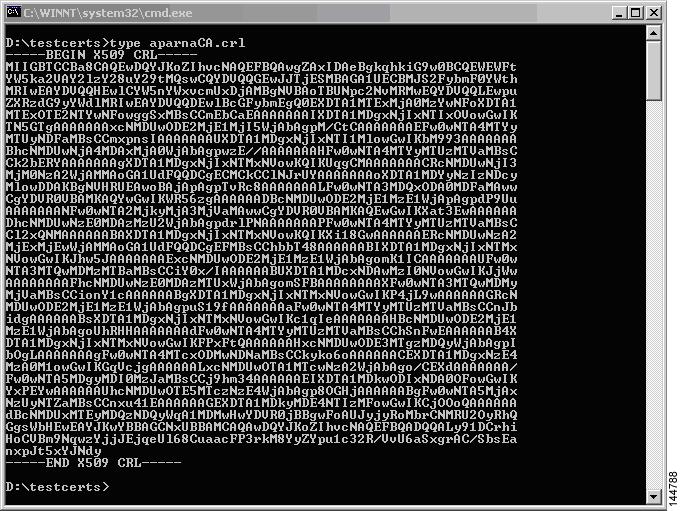
Clients can download and cache CRLs locally to verify the revocation status of peer certificates.
-
The software allows manual configuration and caching of CRLs for trust points in the device bootflash (cert-store).
How CRLs are used for certificate revocation checking
CRLs enable clients to determine if a certificate has been revoked by consulting the latest list published by the issuing CA.
-
Clients obtain the latest CRL from the issuing CA to check certificate status.
-
Locally cached CRLs can be used until they expire.
-
The software checks the CRL from the issuing CA only if it has already been cached and revocation checking is configured to use the CRL.
Example of CRL usage in certificate verification
For example, when a client verifies a peer’s certificate, it can use a cached CRL from the issuing CA to determine if the certificate has been revoked. If the CRL is not cached or revocation checking is not configured to use the CRL, the certificate is considered not revoked unless other revocation methods are configured.
NDcPP: OCSP for Syslog
OCSP for Syslog is a method that enables clients to validate the revocation status of server certificates by querying an external OCSP responder, rather than maintaining a local list of revoked certificates.
-
Allows real-time certificate revocation status checks via an OCSP responder.
-
Reduces the need for clients to store and manage local certificate revocation lists.
-
Depends on the availability of the OCSP responder and the inclusion of an OCSP responder URL in the server certificate.
How OCSP for Syslog Works
OCSP for Syslog enables a client to send the server certificate to an external OCSP responder (CA) server, which validates the certificate and confirms its revocation status.
Example: OCSP Validation in Syslog
For example, when a remote syslog server presents a certificate containing an OCSP responder URL, the client forwards this certificate to the OCSP responder. The CA server then validates the certificate and returns its status, allowing the client to determine if the certificate is valid or revoked without maintaining a local revocation list.
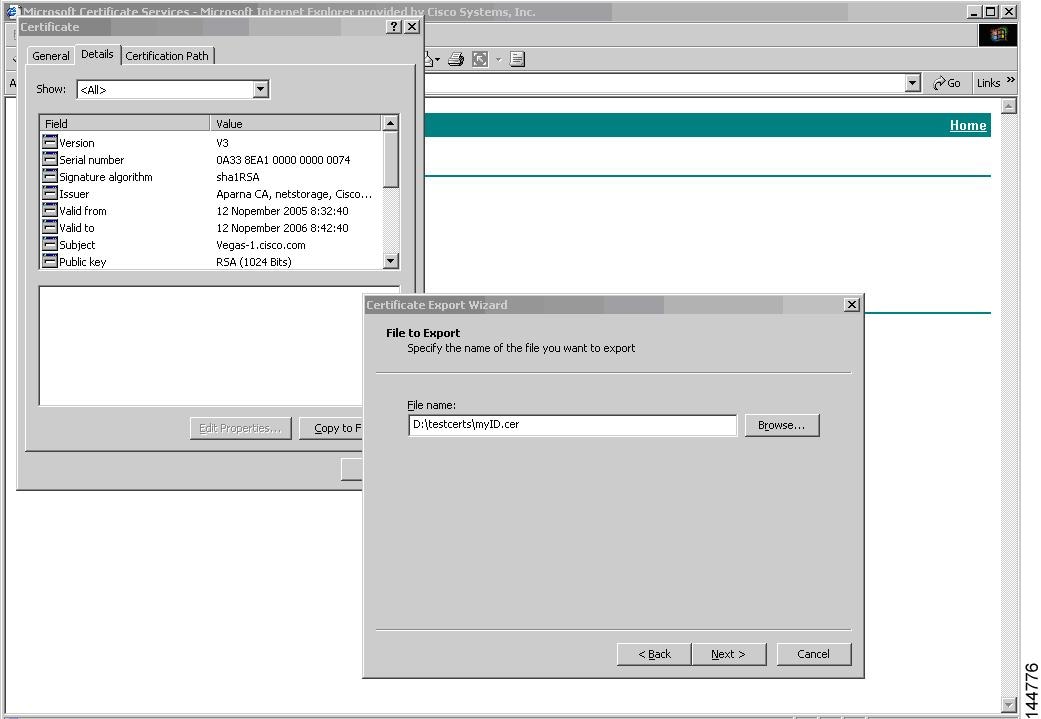
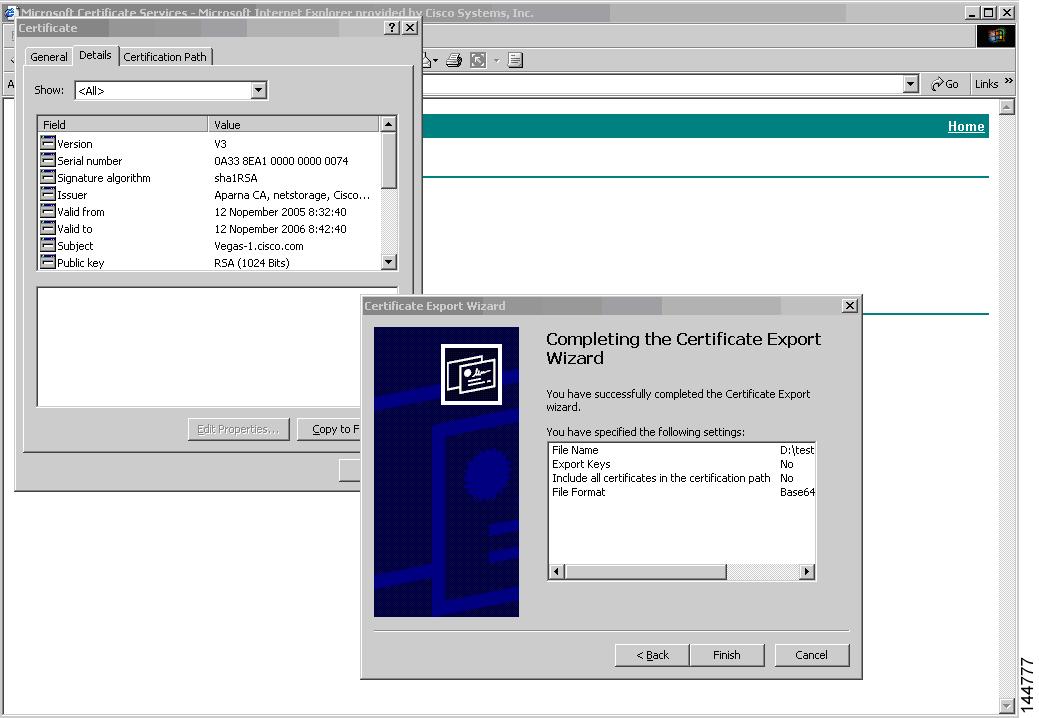
Import and Export Support for Certificates and Associated Key Pairs
Import and export support for certificates and associated key pairs enables secure management of digital certificates and RSA key pairs using standard formats.
-
Certificates and key pairs can be imported in standard PEM (base64) format as part of the CA authentication and enrollment process.
-
Identity information in a trust point can be exported to a password-protected PKCS#12 file, which includes the RSA key pair, identity certificate, and CA certificate (or chain).
-
Exported PKCS#12 files can be imported to the same or replacement device for recovery or migration purposes.
Reference Information for Import and Export of Certificates and Key Pairs
Import and export operations for certificates and key pairs are essential for secure device authentication, backup, and recovery.
Example: Importing and Exporting Certificates
For example, after a system crash, a previously exported PKCS#12 file containing the RSA key pair, identity certificate, and CA certificate can be imported to restore the device's identity and trust relationships.


 Feedback