Share Reports

Space Utilization reports can now be shared from the dashboard with Cisco Spaces users and external recipients. Enter an email address and an optional message; recipients receive an email with a report snapshot and a link to the shared report. Cisco Spaces users sign in to view the report; external recipients verify access with a PIN generated during authorization.

Senders can manage shared access from the dashboard—approve or reject requests, revoke access, and review re-share requests when recipients share the report with others.

Share a Report

Allows you to share a selected utilization report view with others via email for collaboration and information sharing.

Use this task to generate and share a view of campuses, buildings, or floors by email in the Space Utilization App.

The Share this view feature is available for Campuses, Buildings, and Floors.

Procedure


Step 1

In the left navigation menu, select either Campuses, Buildings, or Floors.

A table listing the selected location parameter is displayed.

Step 2

Use Search field or browse to the specific location and select it from the list.

The Details window of the selected location parameter is displayed.

Step 3

To share the selected view, click Share this view.
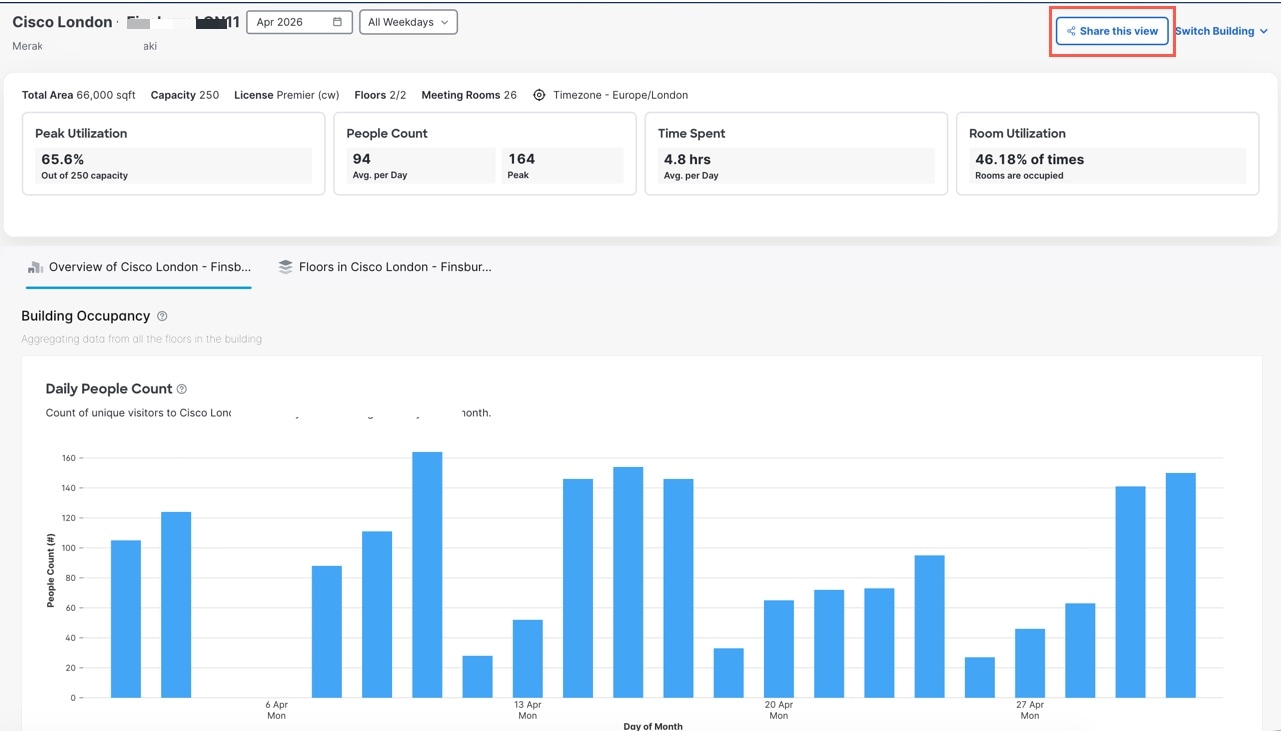
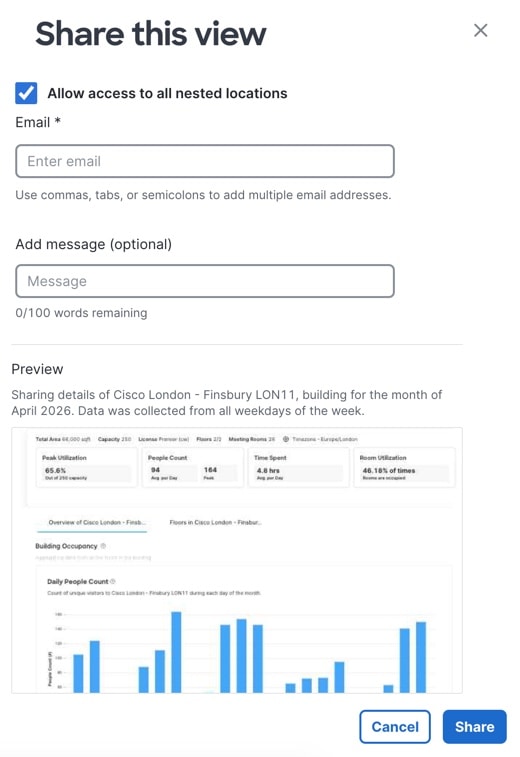
Figure 1. Share this view option for Building
Figure 2. Share this view slide-in window

Step 4

(Optional) To share information for all nested locations, check Allow access to all nested locations.

Step 5

In the Email field, enter the recipient's email address.

Step 6

Optional) Enter a message in the Add message field.

Step 7

Review the report preview to confirm the shared information.

Step 8

Click Share to send the report. A confirmation message appears when the report is successfully sent.

The recipient receives the shared view link.

The selected view is shared successfully with the specified recipient, enabling collaboration and information sharing.

What to do next

When the recipient opens the shared link, depending on the access level and the report state, the recipient should:
  1. Sign in through the dashboard login flow.

  2. Verify access through an email PIN.

  3. Reset or change a PIN.

  4. Request access from the report owner.

The appropriate access control measures are applied based on the recipient's context and the report's status.