Cisco Cyber Vision Classic UI Administration Guide, Release 5.6.0

PDF

Cisco Cyber Vision Classic UI Administration Guide, Release 5.6.0

Understanding concepts

Want to summarize with AI?

Log in

Guides users through core Cyber Vision concepts, including filters and their usage, component and device identification, activity and flow monitoring, external communications, time span configuration, tagging, properties, vulnerability detection and notification, credentials management, variable accesses, group hierarchies, conduits, and active discovery.


Describes the core concepts required to understand the system functionality.


Filters

A filter is a data visualization mechanism that

  • enables users to refine and restrict datasets presented in dashboards and preset views,

  • allows selection of devices, activities, or attributes using predefined criteria, and

  • operates using inclusive or exclusive logic to control which data appears in each view.

Filters provide flexibility. They allow the combination of multiple categories, such as device tags, networks, and sensors, to produce precise visualizations. Applying different filter types helps focus analysis on specific risks, behaviors, and assets.

Filter combination

You can define filters in several categories simultaneously. The process first filters activities using all activity-based filters. Then, it filters devices using their specific criteria. This sequence results in the preset dataset that Cyber Vision uses to precompute your view. To further refine your dataset, select a time frame.


Use filters in the Cyber Vision Center

Use filters in the Cyber Vision Center to refine your data view.

Use filters to narrow the list of devices or activities for analysis or monitoring in dashboards and preset views.

Procedure

  1. From the main menu, choose Explore.

  2. From the navigation bar, select a preset from the preset category.

Filters become available for refining data visualization according to the chosen criteria.


Filter categories and usage options

Use filters to organize and view data about your devices and activities. Each filter helps you focus or expand the data shown in dashboards and preset views.

Table 1. Filter types

Filter type

Description

Risk score

Filters devices based on individual risk rating and supports both inclusive and exclusive ranges.

Networks

Filters based on device IP address ranges or VLAN IDs. Affects activities and devices with corresponding network attributes.

The system selects activities with at least one device in the corresponding network.

Only devices with at least one IP address in the network range are selected in device lists.

Device tags

Selects devices by tags using inclusive or exclusive rules. Combining tags broadens or narrows the results. Exclusive filters exclude all components with the selected device tags.

Activity tags

Filters activities with specific tags. Exclusive filtering hides activities only if all activity tags are excluded.

Groups

Filters devices by membership in groups or subgroups. Inclusive and exclusive logic applies. Activity selection requires at least one endpoint in a selected group.

Sensors

Filters based on the analyzing sensor using inclusive or exclusive rules.

Keyword

Searches devices by name, property, IP/MAC address, or tags.

Filter application logic:

  • You can combine filters across multiple categories at once. The result is the intersection of all selected categories.

  • When you apply both device and activity filters, you further refine datasets in dashboards or preset views.

Notes:

  • Negative (exclusive) selections are not supported for multiple network filters in version 4.0.0.

  • For activity tags, activities are included if at least one tag is selected. They are hidden only if all tags match the excluded tag set.

Examples:

  • To remove both broadcast and ARP activities, select both tags for exclusion.

  • Use device tag filters to restrict views to device types, such as controllers or HMIs. You can also see their communication partners on maps.


Components

A component is a network object that

  • represents a physical or logical network endpoint such as a network interface, PC, SCADA station, broadcast, or multicast address,

  • is detected through details such as MAC address and, if available, IP address, and

  • is visually represented in the center by a specific icon, grouping, and border style.

  • The center groups components within devices. In the UI, the components of a device appear together inside a bordered area in the drawer and on the technical sheet.

  • The center displays components that are not assigned to a device with a double border.


Types of component icons

Component icons visually differentiate component types in the UI.

Table 2. Component icons

Icon type

Example image

Description

Manufacturer

A detected manufacturer

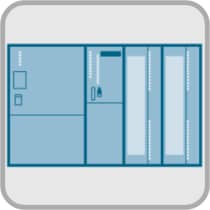
SIEMENS PLC

A S7-300 PLC

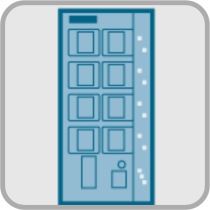
A Scalance X300 switch

Default cogwheel

Used when the manufacturer is undetected or icon not assigned

Public IP

Represents a public IP

Broadcast

Broadcast destination component

Multicast

Multicast destination component

Icons in both the map and the component’s panel display the manufacturer, model, and additional component information.


Component detection in Cyber Vision

Cyber Vision detects components from network activity using Deep Packet Inspection (DPI):

  • Components are discovered by observing emissions or receptions on the network.

  • Detection details include MAC address, IP address, manufacturer, and model. They also include operating system, firmware, tags, and activity timestamps.

  • DPI inspects the communication flows between components to extract these attributes.

Note

MAC addresses correspond to physical network interfaces, while IP addresses depend on network configuration.


View component details

Display information about a specific component.

After you discover and aggregate components, access technical details as needed. Analyze activity to troubleshoot issues or manage assets.

Procedure

  1. From the main menu, choose Explore.

  2. Select the required preset from the preset category.

  3. Select the relevant preset view.

  4. Click the component count in Devices.

  5. Select a component to display its details.

You see detailed component information in the drawer.


Devices

A device is a network entity that

  • aggregates multiple components with similar properties,

  • represents a physical machine in an industrial network, including a switch, engineering station, controller, PC, or server,

  • and simplifies management, inventory, and data presentation within Cyber Vision.

Device aggregation details

  • Devices aggregate components based on shared attributes such as IP address, MAC address, NetBIOS name, tags, and properties detected in network protocols.

  • Aggregation logic uses rules, prioritizing attributes such as controller tags and brands to define device type and assign properties at the device level.

  • Devices enhance application performance and make network visualization more effective by grouping related components under one entity.

Device representation examples

  • When you click on a Schneider controller, a side panel opens to show its components grouped as a device.

  • The list of a Rockwell Controller device components in Cyber Vision shows technical details like activity time, IP addresses, MAC addresses, and tags. If a “Controller” component is found, the device gets a “Controller” tag to define its type. Brand tags like “Rockwell Automation” may also be added if detected.


Device icons and visual indicators

Device icons and visual indicators help you identify your network devices.

  • If a device has a double border, you see the manufacturer’s icon when the device is recognized, a specific model icon when it is known, or a default cogwheel when the device is unknown.

  • The red counter badge on a device icon indicates the number of vulnerabilities detected for that device.


Activities

An activity is a network communications entity that

  • represents the communications exchanged between devices or components,

  • is represented as a connecting line or arrow that links devices or components, and

  • encompasses multiple types of flows in both directions between components.

Network activity details

Activities let you see how devices or components in a network interact by showing their communication flows. The system updates the visual display depending on whether both the source and destination components are known. When possible, the mapping uses arrows.

Devices or components with no visible activity may still have communicated. The system detects a device or component only if it has participated in network activity. If you do not see visible activity, the other device or component may not be included in your current selection or preset filters.


View activity details on the map

Review detailed information about communications between your devices or components using the activity map.

Procedure

  1. From the main menu, choose Explore.

  2. Select the required preset in the preset categories.

  3. Select the Map preset view.

  4. Click the communication link between two devices or components.

    The details drawer appears and shows you information about the communication and the flows exchanged.

  • You can review details such as

    • The date of the first and last communication

    • Details such as name, IP, MAC, group, and criticality

    • Flow tags, number of flows, number of packets, volume of data exchanged, and number of events


Flows

A flow is a network communication event that represents a single exchange of data between two system components or devices.

Flows can be analyzed for properties such as endpoints, ports, activity times, and tags.

An activity is a collection of flows that occur between two or more components or devices. The Map shows an activity using a line that links the relevant components or devices.


Access a flow

You can view detailed information about a flow and its properties.

Procedure

  1. From the main menu, choose Explore.

  2. Select the appropriate preset and preset view.

  3. Click a component or device on the map.

  4. Open the technical sheet and select the Activity tab.

  5. View the list of flows.

You see detailed information for each flow, including source, destination, ports, activity times, and tags.

What to do next

To manage many flows, apply filters to sort by component name, port, or tags. Choose a flow to view its technical sheet, where you can find additional properties and tags.


External communications

External communications are network interactions that

  • occur between monitored network components or devices and external (non-monitored) components or devices,

  • are logged and listed in Cisco Cyber Vision,

  • are typically identified based on IP addresses that do not match private address formats.

External communication indicators

  • By default, communications involving IP addresses outside standard private ranges are considered external. Private-format IPs are considered internal. If your industrial network uses public IPs for internal purposes, you can define which IP ranges are internal or external on the Network Organization administration page in Cyber Vision center.

  • Components with external communications are shown with an icon bordered in orange. Devices are shown with a double orange border.

  • External components and their flows are not stored or displayed to optimize system performance.


View external communications

Monitor and review connections between internal devices and external endpoints for security and activity tracking.

Cyber Vision records external communications between network devices and outside endpoints. External devices and their flows are not tracked. This approach helps keep the interface clear and optimizes performance.

Procedure

  1. From the main menu, choose Explore.

  2. Select the appropriate preset and then select the Map preset view.

  3. Select the component or device you want to review.

    Icons with an orange border (single or double) indicate external communications.

  4. Click External communications.

  5. Review the displayed list of external communications in the technical details.

  6. (Optional) To save the data, click Export to CSV.

You can view and optionally export all logged external communications for the selected device or component.


Time spans

A time span is a data viewing filter that

  • enables users to focus on network activity during a specific period,

  • determines which historical or real-time information is displayed in monitoring views, and

  • helps users analyze trends, detect anomalies, or investigate incidents within the chosen interval.

Application of time spans in monitoring views

In Cisco Cyber Vision, time spans are applied throughout monitoring views to limit or expand the period of network data you analyze. This helps tailor data visualization for ongoing and retrospective investigation.


Set a time span for data visualization

Select and adjust the period for which network data is displayed in Cisco Cyber Vision.

Use a time span to filter displayed network activity in the various preset views. This helps you focus on recent events, conduct historical analysis, or investigate specific incidents.

Procedure

  1. From the main menu, choose Explore.

  2. Select appropriate preset and preset view.

  3. To set a time span, click the pencil icon.

  4. To set the TIMESPAN SETTING, select a Duration, or define a custom period in the Time window.

    Note

    While configuring a Time window, if you do not select an end date, it defaults to the current date and time.

  5. Click OK.

  6. Click Refresh to update and display network data for the selected period.

The data view updates to reflect activity within the chosen time span.

What to do next

If no data is visible in the current view, the time span may be set to an interval when no activity occurred. If data is missing or the view is empty, adjust the time span.


Network tags

Network tags are metadata labels that:

  • succinctly describe and categorize network components and activities,

  • are visually denoted by icon color and description based on their category, and

  • support network exploration, filtering, and behavioral analysis.

  • Device tags: Device tags represent the functions and properties of a device or component. They are synthesized at both the component and device (aggregation) levels.

  • Activity tags: Activity tags describe the protocols used in network flows. They are synthesized at both the flow and activity (group of flows) levels.

Tag classification and usage information

  • Tags are added directly by the system automatically based on data received from the sensor.

  • Tags are classified under categories in the filtering area.

  • Device tag categories include levels such as "Device – Level 0–1" and "Device – Level 2."

  • Device levels correspond to ISA–95 international standard definitions.

  • You can set criteria for network views and filters by leveraging tags to organize and focus on relevant network data.

  • In Monitor mode, use tags with port and flow properties to help define network behaviors inside industrial networks.

Tag types include IO Module, Wireless IO Module, and more.


Locate tag information in Cyber Vision

View and analyze the tags associated with devices, activities, or components in Cisco Cyber Vision.

Use this procedure to identify or review tag assignments for devices, activities, or components. This helps manage, filter, and report in your network environment.

Procedure

  1. From the main menu, choose Explore.

  2. Select the appropriate preset and preset view.

  3. Select the relevant device, activity, or component.

  4. Open the Technical sheet.

  5. Click Basics, then Tags.

You can view and analyze the tags associated with the selected device, activity, or component.


Properties

Properties are informational attributes that

  • provide key details about a device, component, or flow (such as IP address, MAC address, hardware version, or serial number),

  • are extracted or inferred from network traffic and device/computer identification, and

  • may be normalized across all platforms or specific to certain protocols or vendors.

Application of properties

  • Properties categorize and group devices, generate tags, and define network behaviors, especially in Monitor mode.

  • When Cisco Cyber Vision supports new protocols, more protocol-specific and vendor-specific properties become available.

  • The combination of properties and tags helps define and monitor behavior within the industrial network environment.

  • Some properties apply to all devices and components. Others are unique to specific protocols or vendors and can change as support expands.


View properties

Locate and view the properties of your devices and components in Cisco Cyber Vision.

Procedure

  1. From the main menu, choose Explore.

  2. Select the preset and view required for your search.

  3. Select a device or a component.

  4. Click Technical sheet.

  5. Under Basics, click Properties.

You see the properties grouped by type in the selected panel or technical sheet.


Vulnerabilities

A vulnerability is a security weakness that

  • is detected on a device or component,

  • can be exploited by an attacker to perform unauthorized or harmful actions on a network, and

  • may result from software flaws, misconfigurations, or unpatched components.

In Cisco Cyber Vision, vulnerabilities are identified by correlating device and component properties with security rules stored in the Knowledge database. These rules are sourced from computer emergency response teams (CERTs), manufacturers, and partner organizations such as Schneider and Siemens. When a device or component matches a rule from the Knowledge database, Cisco Cyber Vision registers a vulnerability.

Note

Always update the Knowledge database in Cisco Cyber Vision as soon as possible after notification of a new version. This helps protect your network against vulnerabilities.

Severity measurement

Cisco Cyber Vision uses a score based on the Common Vulnerability Scoring System (CVSS) to measure the severity of each vulnerability. This score reflects criteria such as ease of attack, potential impact, component criticality, and attack vector (remote or local), and ranges from 0 (least critical) to 10 (most critical).


Acknowledge a vulnerability for a device

Suppress notifications and track when you have reviewed or addressed a vulnerability on a device.

Use this procedure when you have reviewed a reported vulnerability and do not want to receive further notifications for it on a specific device.

Before you begin

Make sure you have access to the device and can view vulnerabilities in the Explore menu.

Procedure

  1. From the main menu, choose Explore.

  2. Select the desired preset from the preset category.

  3. Select the required preset view.

  4. Click device.

  5. Click the count for Vulnerabilities from the drawer.

  6. Click the vulnerability you want to acknowledge.

  7. Add a comment, then click Acknowledge for the device.

You stop receiving notifications about this issue for the device until you cancel the acknowledgement.

What to do next

Cancel the acknowledgement to reverse this action.


How vulnerability detection and event notification work

Summary

Cisco Cyber Vision matches your device or component properties with rules in the Knowledge database to detect vulnerabilities. You receive notifications about new detections and status changes.

The key components involved in the process are:

  • Knowledge database: Stores rules from computer emergency response teams (CERTs), manufacturers, and partners.

  • Device and component properties: These are system-normalized details of devices or components.

  • Cisco Cyber Vision detection engine: Correlates properties and rules to identify vulnerabilities.

Workflow

The process involves these stages:

  1. Always update the Knowledge database in Cisco Cyber Vision as soon as possible after notification of a new version.

  2. Cisco Cyber Vision checks device or component properties against the latest rules.

  3. If a device or component matches a rule, Cisco Cyber Vision detects the vulnerability.

  4. Cisco Cyber Vision generates an event to notify you for each vulnerable component.

  5. Cisco Cyber Vision generates additional events whenever a vulnerability is acknowledged or resolved.

Result

You receive event notifications about new, acknowledged, or resolved vulnerabilities for your monitored network devices and components.


Credentials

A credential is a security element that

  • includes logins and passwords exchanged between components over the network,

  • sometimes carries sensitive information, such as plaintext passwords if unsafe, and

  • may be visible on network monitoring platforms, thereby exposing them to anyone on the network.

Credential visibility on network monitoring platforms

Credential frames are extracted from network traffic using deep packet inspection. If credentials are visible in systems such as Cisco Cyber Vision, secure the underlying network protocols to prevent others on the network from accessing credentials.


View credentials for a component

Use this task to access and review credentials detected for a component, including protocol and user details.

Before you begin

Ensure you have appropriate access rights to view credentials for the desired component.

Procedure

  1. From the main menu, choose Explore.

  2. Select the desired preset and select the preset view.

  3. Select the component device you want to review.

  4. Click Credentials in the drawer to see detected credentials.

The Credentials panel displays the number of detected credentials, the transmission protocol, the associated username and password, and information about credential exposure. If any password appears in plain text, ensure it is secured, even if it is hashed in another location.


Variable accesses

Variable accesses are process control monitoring records that

  • track when devices, such as PLCs or data servers, read from or write to variables,

  • record which component performed each access, and

  • log the timestamp of each event for operational supervision and security auditing.

Table 3. Feature History Table

Feature

Release Information

Feature Description

Detect and process variable data

Release 5.3.x

Sensors capture and relay measurable variables, such as pressure or temperature, to Cisco Cyber Vision Center.

Enable Variables Storage in the Admin > Data Management > Ingestion Configuration page of Cisco Cyber Vision Center. This allows the center to add the variables to the database for processing.

Significance of variable accesses

Industrial process equipment, like PLCs and OPC data servers, use variables to store values such as temperatures, control settings, or sensor readings. A variable access occurs whenever a system component reads or writes one of these values. Each access is associated with a specific variable name and a physical memory address on the equipment.

Monitor variable accesses to maintain process integrity. Unexpected writes can indicate an attacker attempting to influence equipment operation. Solutions like Cisco Cyber Vision automatically report detected variable accesses, helping operators identify unauthorized or abnormal activity.

Examples:

  • Reading the temperature of an industrial oven from its PLC controller is a variable access.

  • Writing a new temperature setpoint to the oven’s PLC is also a variable access.

  • Multiple controllers may access the same variable, as when one PLC reads a value that another PLC writes.


Variable accesses details

The variable accesses table provides detailed information on each variable access detected on industrial network equipment. You can review, sort, and investigate variable activity for operational or security purposes.

Table 4. Fields in the variable accesses table

Field

Description

Variable name

The identifier or label of the variable accessed.

Type

Indicates whether access is READ or WRITE, but does not show the variable’s value.

Component

Shows which device or system accessed the variable (for example, a PLC model or OPC server).

First accessed

The timestamp of the first access event for the variable by the component.

Last accessed

The timestamp of the most recent access for the variable by the component.

To locate variable access information

  • To view more details about variable accesses, open the technical sheet for the component. For a focused view, select Automation or refer to PLC access reports.

  • The component list view displays the total number of variable accesses per device. You can sort this list by the "var" column.

  • For detailed information on a specific component’s variable accesses, click the component.


Enable variable processing in a sensor template

Variable processing enables the center to detect and collect measurable variables from network traffic for monitoring and analysis. Sensors identify these variables and return them to the center.

Before you begin

Enable Variable Storage.

  1. From the main menu, choose Admin > Data Management > Ingestion Configuration.

  2. Enable Variable Storage and save changes.

    Note

    Variable Storage is disabled by default.

Procedure

  1. From the main menu, choose Admin > Sensors > Templates.

  2. Locate the template and select Edit from the Actions column.

    Note

    You can also create a new template.

  3. Locate the protocols with variable inspection capability.

  4. Check the checkbox under the Variable Processing column.

  5. Save changes.

After you complete the configuration, the center sends information to the sensors. The sensors process and identify the variables. You can view detected variables in the center.

What to do next

To view Variable accesses , choose Explore > All Data > Device list, select a device, click Variable in the drawer, then click Automation.


Group hierarchies

A group hierarchy is a network organization method that

  • allows nesting of groups within parent groups,

  • enables layering and structured representation of devices and components, and

  • facilitates flexible grouping based on user needs.

Filtering data using groups

You can use groups created in the system as criteria to filter data within Cisco Cyber Vision.

  • Created groups are added to filters, helping to refine datasets and compose presets.

  • Filtering by group improves data management and analysis.


Create and customize groups

Organize devices and components into a meaningful group to improve network management and representation.

Use groups to organize devices and components in a hierarchy by location, process, severity, or type. Nesting groups enables a more structured data representation.

Before you begin

Ensure your user account has Admin, Product, or Operator access.

Procedure

  1. From the main menu, choose Explore.

  2. Select the desired preset and preset view.

  3. Select the devices or components to group.

  4. Click Manage selection.

  5. To create a new group, click Create a new group with selection.

  6. Enter group details:

    • Under Basic information, provide the name, description, parent group, and industrial impact.

    • Under Customization, specify color and properties.

    • To add a custom property, click Add new property. Enter a Label, and specify a Value.

  7. Click OK to create the group.

The system creates a customized group. This improves organization, visibility, and the management of devices and components.

What to do next

You can manage group hierarchies.

  • To create new parent group, select groups and click Create a new parent group from the manage group icon.

  • To move a group into another group, click Move to existing group from the manage group icon.

  • To delete a group, select it from the preset view and click the delete icon in the drawer.


Group properties

Group properties allow you to store customized information about a group. This includes both standardized labels and user-defined labels.

  • Predefined labels are aligned with the 62443 standard, which specifies security policies and requirements.

  • Users can add custom property labels as needed for additional classification.


Lock groups

Prevent additions, removals, or deletion of a group to secure its structure.

Locking a group is useful when you want to freeze its composition and prevent any accidental or unauthorized changes. Once locked, you cannot add or remove components or delete the group until it is unlocked.

Procedure

  1. From the main menu, choose Explore.

  2. Select the desired preset, then choose Map view.

  3. Select the group you want to lock.

  4. Click the edit icon in the drawer.

  5. Enable the lock option, then click OK to confirm.

The group is locked. ou cannot add components, remove components, or delete the group until you unlock it.

What to do next

If you need to make changes, unlock the group before editing its components or deleting it.


Conduits

A conduit is a network grouping mechanism that

  • aggregates activity among related devices and components,

  • enhances visibility into network interactions within the group, and

  • simplifies monitoring and management of grouped resources.

Usage

Conduits enable you to combine multiple devices or components into a single group for tracking and analyzing network activity. With conduits, you can identify patterns, detect anomalies, and apply policies across all group members instead of configuring devices or components individually.


Active Discovery

Active Discovery is a feature that sends broadcast or unicast messages to targeted subnetworks or devices to accelerate network discovery and provide more reliable data than passive DPI. Returned responses are analyzed and tagged as Active Discovery.

  • Enables data enrichment for components not detected by passive monitoring.

  • Obtains information that is not frequently exchanged, such as firmware versions.

  • Supports configurable execution, including fixed time intervals or one-time jobs.

Supported Protocols and Devices

The following table lists the protocols supported by Active Discovery for broadcast and unicast messaging.

Table 5. Supported Protocols

Broadcast

Unicast

EtherNet/IP

EtherNet/IP

Profinet

SiemensS7

SiemensS7

SNMPv2c

ICMPv6

SNMPv3

ICMPv6

WMI

Active Discovery is available on the following devices:

  • Cisco Catalyst IE3300 10G Rugged Series Switch

  • Cisco Catalyst IE3400 Rugged Series Switch

  • Cisco Catalyst IE9300 Rugged Series Switch

  • Cisco Catalyst 9300 Series Switch

  • Cisco Catalyst 9400 Series Switch

  • Cisco IC3000 Industrial Compute Gateway

  • Cisco IR8340 Integrated Services Router Rugged