Cisco Cyber Vision Classic UI Administration Guide, Release 5.6.0

PDF

Cisco Cyber Vision Classic UI Administration Guide, Release 5.6.0

API Token

Want to summarize with AI?

Log in

Provides a secure method for authenticating REST API requests to Cisco Cyber Vision. This mechanism enables external applications to access or modify data within the Center.


An API token is a random password used to authenticate requests to Cisco Cyber Vision for accessing or modifying data through the REST API.

  • Authenticates requests from external applications.

  • Allows data access and modification within the Center.

  • Supports integration with external solutions like SOC.

API Token Management

Cisco Cyber Vision provides a REST API that requires a token created through the API administration page for access.

Note

Best practice: create one token per application so you can remove or expire accesses separately.

Create an API token

Follow these steps to create an API token.

Procedure

  1. From the main menu, choose Admin > API > Token.

  2. Click + New token.

    The Token window appears.

  3. Enter a name.

  4. Use the Status toggle button to disable authorization for the token if you plan to use it later and want to prevent access until then.

  5. Set an Expiration time.

  6. Click Create.

    After the token creation, token appears in the list available on the API page.

  7. Click Show to view the token.

  8. Click copy icon to copy it.

What to do next

For more information about the REST API refer to the REST API user documentation available on cisco.com.


API Documentation

The API Documentation is a development feature that provides comprehensive route specifications, data response models (data type, code values and meaning), and request testing capabilities.

  • Route exploration and parameter configuration

  • Real-time request testing for GET, DELETE, and POST methods

  • Data model and response type definitions

You will get real results from the Center dataset. Specifications about routes are available such as the route's structure, and parameters and arguments that can be set. An URL is generated and curl can be used in a terminal as it is.

However, for an advanced use, you must create an application that will send requests to the API (refer to the REST API documentation).

API Documentation Features and Usage

Routes are classified by 's elements type, including activities, baselines, components, flows, and groups.

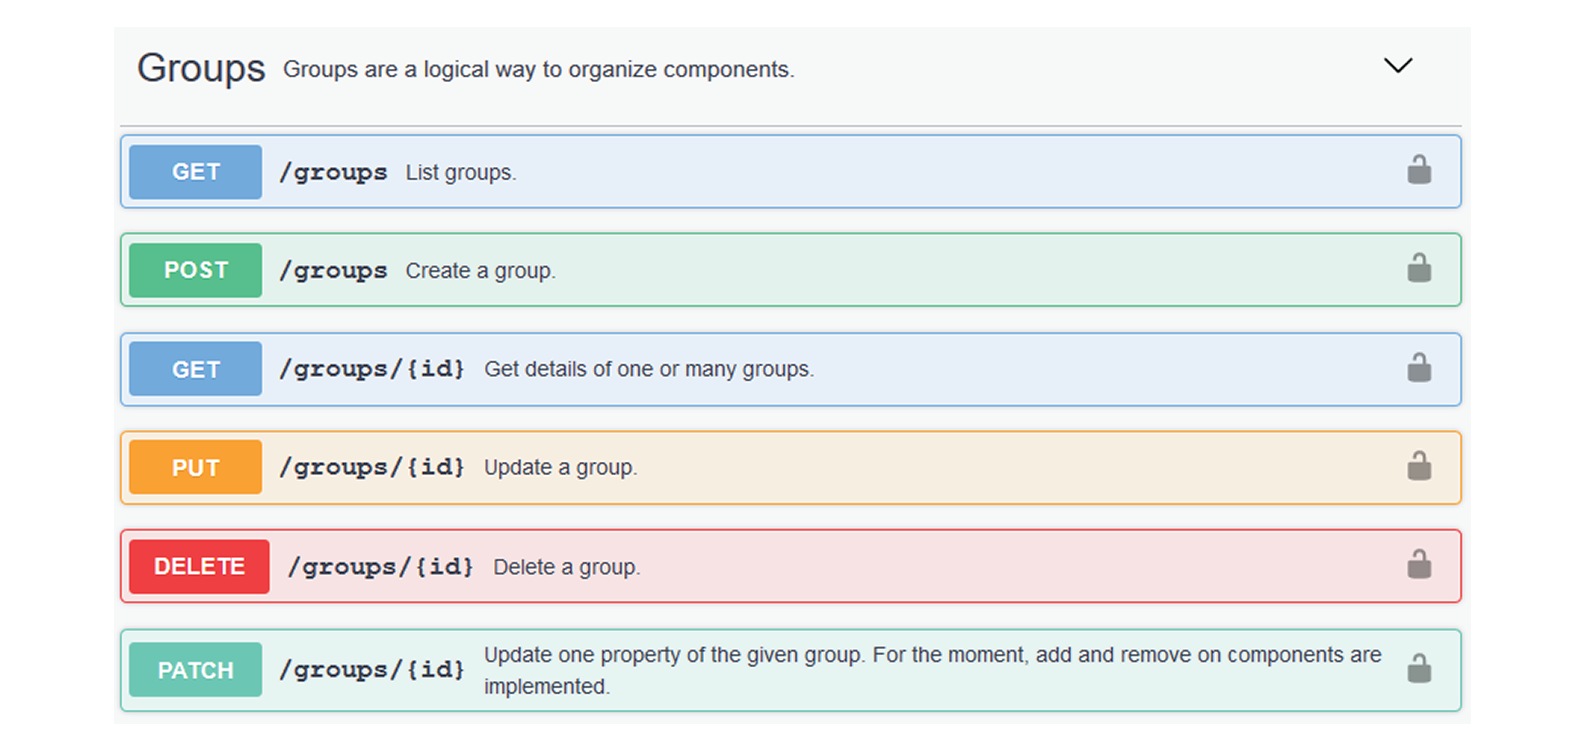
The following image illustrates the category "Groups" containing all possible group routes:

All routes other than GET will modify data on the Center. As some actions cannot be reversed, use DELETE, PATCH, POST, PUT with caution.


Authorize API communication

To authorize API communications:

Procedure

  1. From the main page, choose Admin > API.

  2. Click Token to create and/or copy a token .

  3. Click Documentation .

  4. Click Authorize .

    The Available authorizations panel appear.

  5. Paste the token in Value field.

  6. Click Authorize .

  7. Click Close.

    Close lockers displays. They indicate that routes are secured and authorization to use them is up.


Use an API route

To use a route:

Procedure

  1. Click a route to deploy it.

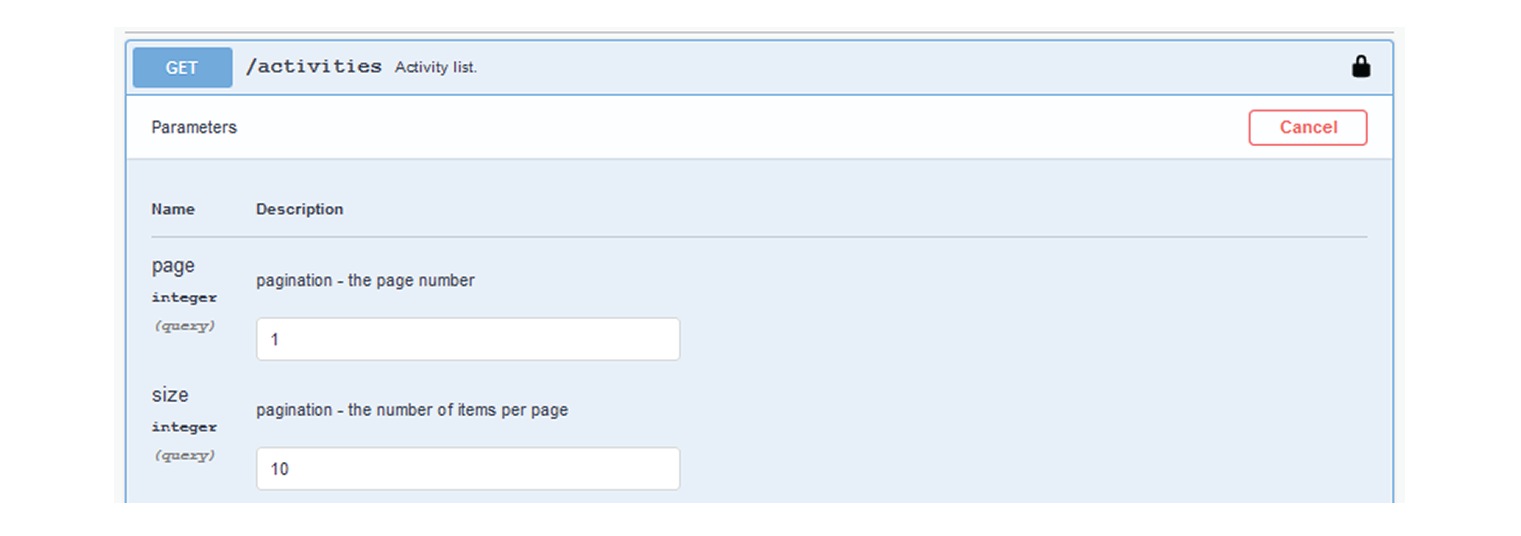
    In the example, we choose Get activity list.

  2. Click Try it out.

  3. Set the Parameters.

    In the example, we set page to 1 and size to 10.

  4. Click Execute.

    Note
    You can only execute one route at a time.

    A loading icon appears for a few moments. Responses display with curl, Request URL and the server response that you can copy or even download.

  5. When you are finished, click the Authorize button.

  6. Log out to clear the token variable, and click Close.
