Cisco Security Cloud Control: On-Premises Firewall Management Center Integration

PDF

Cisco Security Cloud Control: On-Premises Firewall Management Center Integration

Onboard an On-Premises Firewall Management Center to Security Cloud Control Firewall Management

Want to summarize with AI?

Log in

This concept explains how to onboard an On-Premises Firewall Management Center to Security Cloud Control Firewall Management, enabling centralized device visibility, shared policy management, and streamlined provisioning using recommended integration methods and best practices. It also outlines important limitations and configuration guidelines for a successful onboarding process.


Security Cloud Control Firewall Management provides two methods to onboard on-premises Firewall Management Centers.

Security Cloud Control complements FMC by enabling:

Limitations and Guidelines

  • Onboarding an on-premises Firewall Management Center also onboards all devices registered to it. Disabled or unreachable devices may appear in the Security Devices page in Security Cloud Control but cannot be managed or queried.

  • Onboarding does not cascade policies from on-premises Firewall Management Center to Security Cloud Control or Cloud-Delivered Firewall Management Center. To migrate Firewall Threat Defense devices to Cloud-Delivered Firewall Management Center, use the built-in Migrate FTD to Cloud-Delivered Firewall Management Center feature. For more information, refer to Migrate Threat Defense to Cloud-delivered Firewall Management Center.

  • We recommend creating a dedicated user on the on-premises Firewall Management Center with administrator-level permissions specifically for Security Cloud Control communication. If you log in to on-premises Firewall Management Center with the same credentials during onboarding, the process will fail. This recommendation applies only to credentials-based onboarding, not to direct integration.

  • For this dedicated user, set the Maximum Number of Failed Logins to zero.

  • For on-premises Firewall Management Centers version 7.4 or later, if a switchover causes a loss of cloud connectivity, disable and then re-enable SecureX, Security Cloud Control, or Cisco Security Cloud (depending on your version) to restore the connection.
Auto onboard an On-Premises Firewall Management Center integrated with Cisco Security Cloud

This method is not available to Government customers. Government customers must use the credentials method to onboard an On-Premises Firewall Management Center to Security Cloud Control.

The auto-discovery and onboarding feature is enabled by default in Security Cloud Control. All on-premises Firewall Management Centers running version 7.2 or later and integrated with Cisco Security Cloud are automatically discovered and onboarded to Security Cloud Control. The associated Firewall Threat Defense devices are onboarded to Security Cloud Control.

Security Cloud Control also onboards the on-premises Firewall Management Center high-availability (HA) pair.

Before you begin

Ensure that outbound traffic is allowed from port 443 on the on-premises Firewall Management Center.

Procedure

1.

Integrate the on-premises Firewall Management Center you want to onboard with Cisco Security Cloud and register it with a Security Cloud Control tenant. For more information, see Integrate an On-Premises Firewall Management Center With Cisco Security Cloud.

2.

Log in to the Security Cloud Control tenant that was registered with the on-premises Firewall Management Center.

3.

Choose Administration > Integrations > Firewall Management Center.

All on-premises Firewall Management Centers associated with your tenant are displayed in the FMC tab. For more information, see View Onboarded On-Premises Firewall Management Center.


Integrate an On-Premises Firewall Management Center With Cisco Security Cloud

This procedure describes how to integrate the On-Premises Firewall Management Center with Cisco Security Cloud. By enabling Cisco Security Cloud integration, your management center gets registered to the Cisco cloud tenancy.

Before you begin

When onboarding an on-premises Firewall Management Center:

  • If you already have a Security Cloud Control tenant, you will be prompted to confirm whether you want to attach the on-premises Firewall Management Center to that existing tenant.

  • If you do not have a tenant or account, the on-premises Firewall Management Center integration wizard will automatically create a new tenant for you during the registration task the onboarding process. This tenant is a free tier provided exclusively for on-premises Firewall Management Center AI Assist enablement. Allow the wizard to manage tenant creation so that you do not receive a trial tenant that would later require conversion. The wizard manages this process to provide a seamless experience.

  • If you intend to use the Cloud-Delivered Firewall Management Center or manage firewalls using the Security Cloud Control, you must purchase a base license and device entitlements. For detailed licensing information and product options, refer to the Security Cloud Control Licensing Overview.

Procedure

1.

Based on your on-premises Firewall Management Center version, do the following:

  • For on-premises Firewall Management Center version between 7.2 and 7.4.x, click Enable Secure X.

  • For on-premises Firewall Management Center version 7.6 or later, click Cisco Security Cloud.

  • For on-premises Firewall Management Center version 10.0 or later, click Security Cloud Control.

A separate browser tab opens to log you in to your Security Cloud Control account. Make sure this page is not blocked by a pop-up blocker.

2.

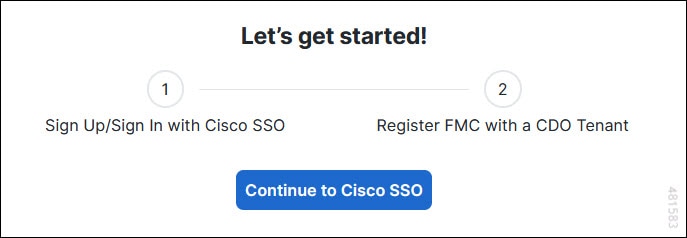
Click Continue to Cisco SSO.

Figure 1. Cisco Security Cloud Welcome Page
3.

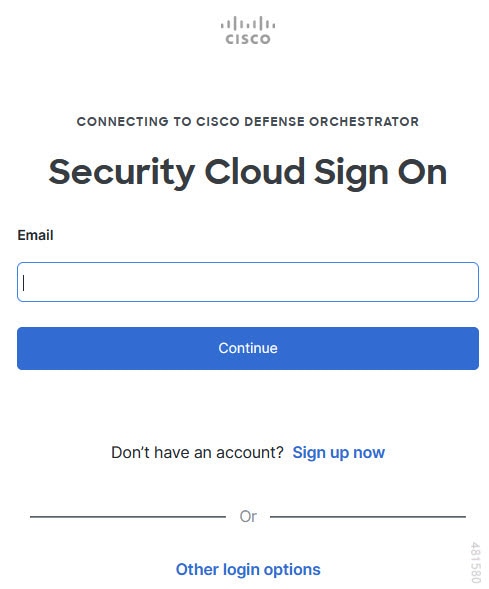
Log in to your Security Cloud Control account.

Figure 2. Cisco Security Cloud Sign On
Cisco Security Cloud Sign On page.

If you do not have a security cloud sign on account to log in to Security Cloud Control and you want to create one, click Sign up now in the Security Cloud Sign On page. See Create a New Cisco Security Cloud Sign On Account.

4.

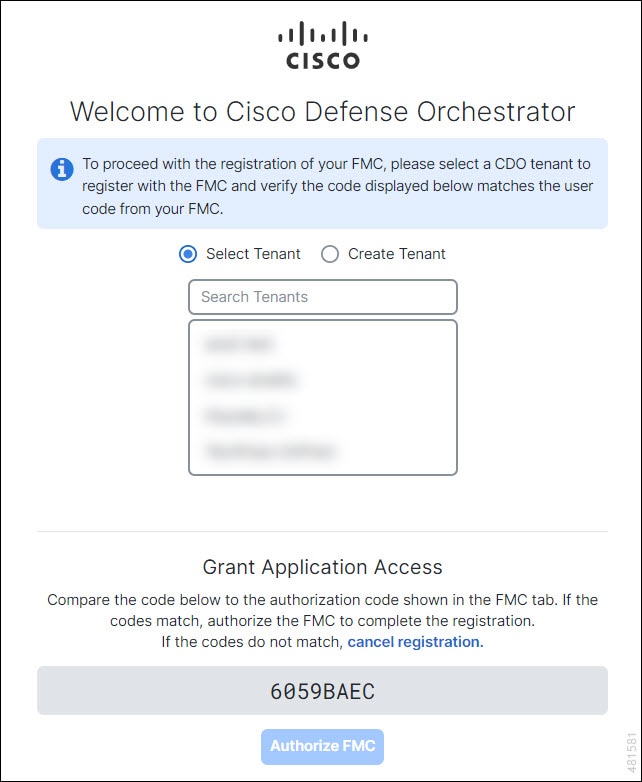
Choose a Security Cloud Control tenant that you want to use for this integration. The on-premises Firewall Management Center and the managed devices get onboarded to the Security Cloud Control tenant that you choose here.

Figure 3. Choose the Security Cloud Control Tenant

If you do not already have a Security Cloud Control tenant or if you want to use a new tenant for this integration, create a new tenant.

5.

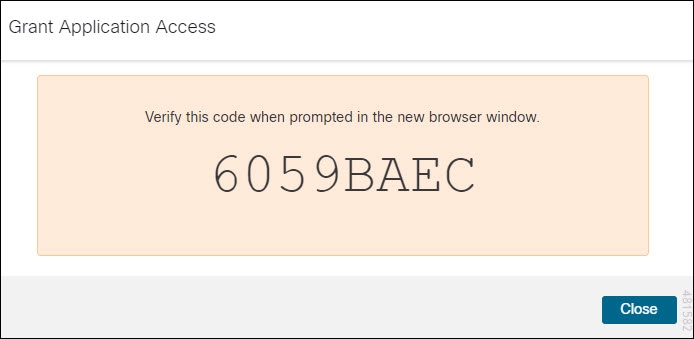
Verify that the code displayed in the Security Cloud Control login page matches the code provided by the on-premises Firewall Management Center.

Figure 4. Verification Code in the on-premises Firewall Management Center
6.

Click Authorize FMC.

7.

In the on-premises Firewall Management Center UI, click Save to save the configuration.

You can view the task progress under Notifications > Tasks.

The registration task can take up to 90 seconds to complete. If you must use on-premises Firewall Management Center while the registration task is in progress, open the on-premises Firewall Management Center in a new window.


Onboard an On-Premises Firewall Management Center to Security Cloud Control with Credentials

To onboard an on-premises Firewall Management Center to Security Cloud Control with credentials, follow this procedure:

Before you begin

These prerequisites must be met:

  • For Cloud Secure Device Connector (SDC): Allow inbound traffic on port 443 of the on-premises Firewall Management Center.

    The SDC reaches the on-premises Firewall Management Center by allowing inbound traffic on port 443.

    Security Cloud Control connects to Cloud SDC, which then connects to On Premises FMC that allows inbound traffic on port 443.

    Both the Security Cloud Control and the SDC are hosted in the cloud.

  • For On-Premises Secure Device Connector (SDC): Allow outbound connectivity on port 443 of the SDC.

    The SDC requires connectivity to the Security Cloud Control, making it imperative to permit outbound traffic from the SDC to the Security Cloud Control. No additional port configuration is required on on-premises Firewall Management Center.

    Security Cloud Control connects to Cloud SDC, which then connects to On Premises FMC that allows inbound traffic on port 443.

Procedure

1.

Choose Administration > General Settings.

2.

Click Plus sign. to onboard an on-premises Firewall Management Center.

3.

Click Firewall Management Center.

4.

Select the Use Credentials card.

5.

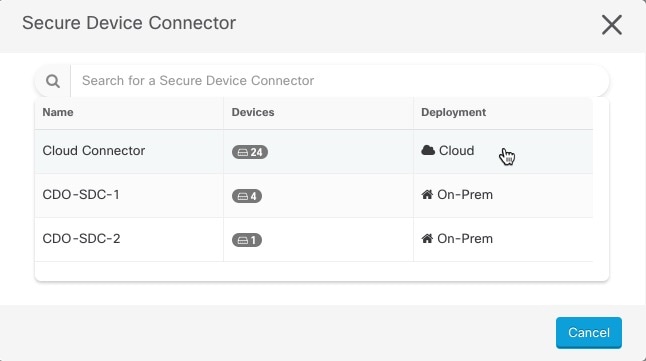
Click the Secure Device Connector button and select an SDC installed in your network.

If you would rather not use an SDC, Security Cloud Control can connect to your on-premises Firewall Management Center using the Cloud Connector. Your choice depends on how you connect Security Cloud Control to your managed devices.

Figure 5. Choose a Secure Device Connector

Secure Device Connector page with the chosen secure device connector.
6.

Enter the device name and location and click Next.

7.

Enter the Username and Password of the account credentials you want to use to access the on-premises Firewall Management Center. Click Next.

8.

After you onboard the device, you can add labels to your on-premises Firewall Management Center, or you can click Go to Services to view the page of onboarded devices. If the device is healthy, the FMC displays a Synced status.

Note

Devices managed by on-premises Firewall Management Center are automatically named as "<fmcname>_<manageddevicename>."


Redirect Security Cloud Control to an On-Premises Firewall Management Center

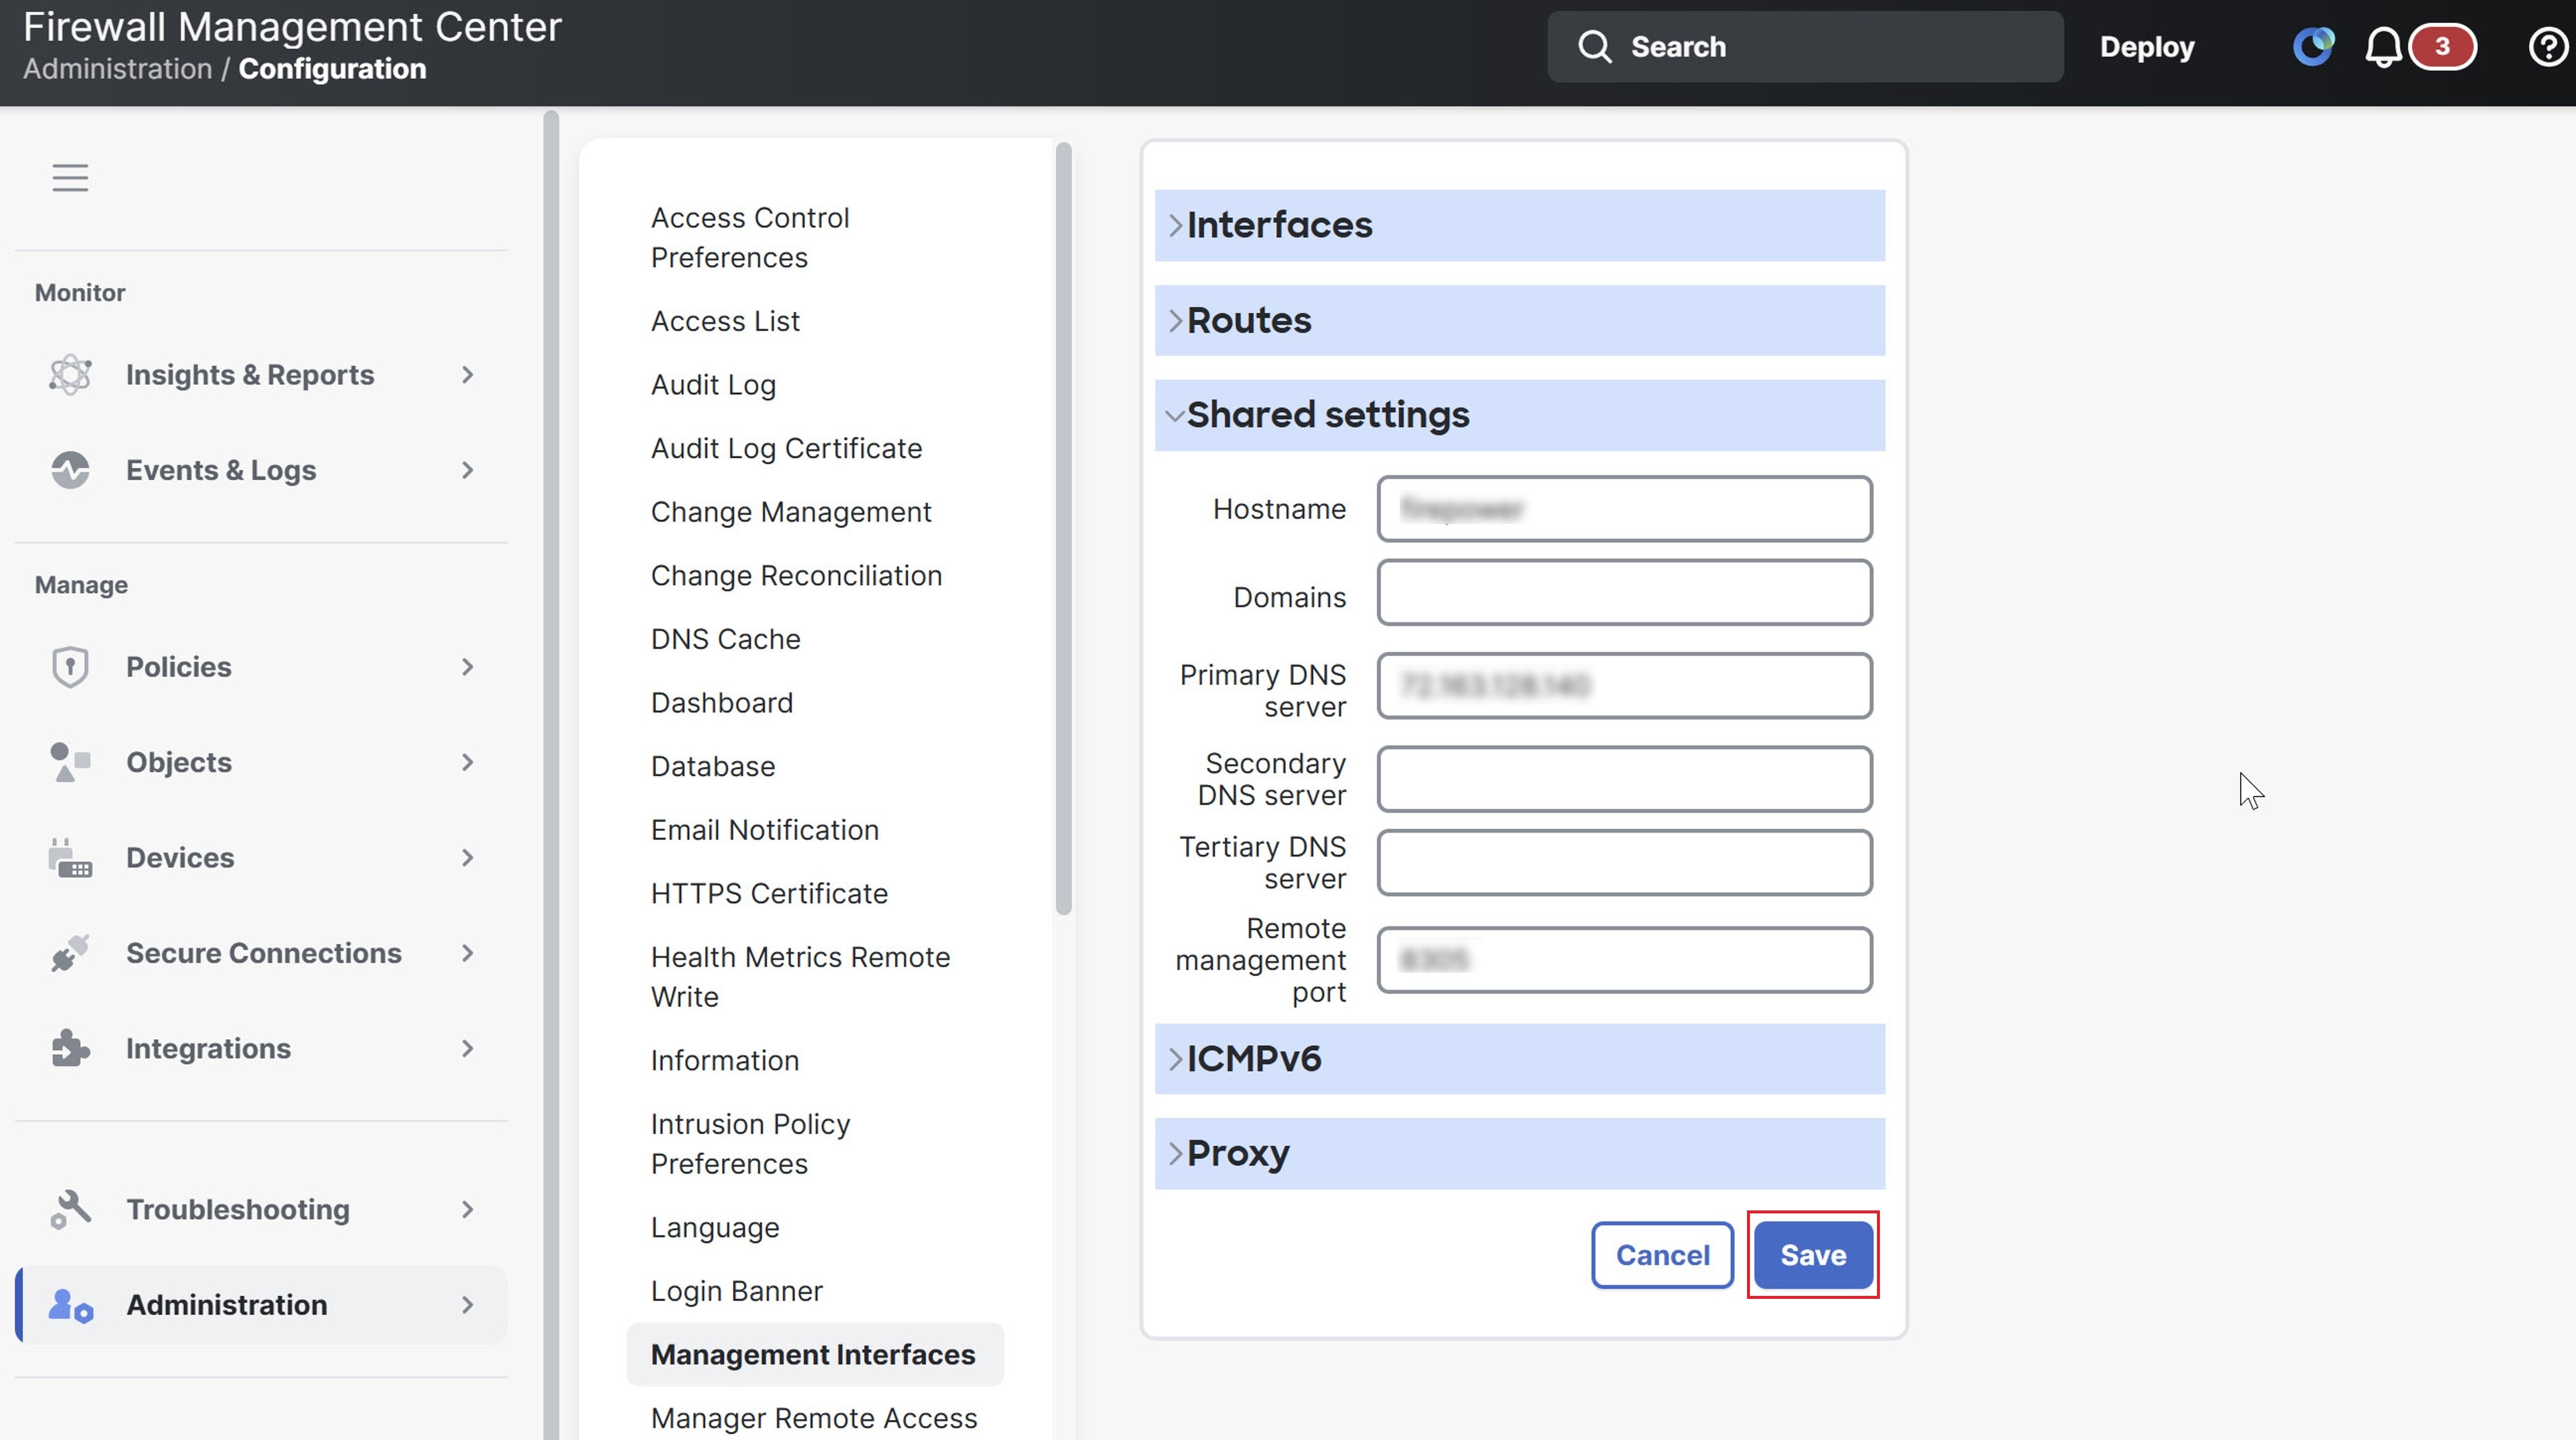
After you onboard an on-premises Firewall Management Center to Security Cloud Control, update the management interface's hostname in the on-premises Firewall Management Center UI so that it contains the FQDN. If you do not update the management interface's hostname, you cannot cross-launch from Security Cloud Control.

Use this procedure to update the management interface hostname and redirect from Security Cloud Control to on-premises Firewall Management Center:

Procedure

1.

Log in to the On-Premises Firewall Management Center UI.

2.

Choose Administration > Configuration.

3.

Click the Management Interfaces tab.

4.

Under Shared Settings, locate the Hostname field and enter the Firewall Management Center's FQDN.

5.

Click Save.

Cisco Firewall Management Center interface showing the Management Interfaces configuration page and shared settings.

Note

You may have to log out of Security Cloud Control before you can click Manage Devices in Firepower Management Center and cross-launch to the on-premises Firewall Management Center UI.