Mounting Kits

This chapter contains the following

Universal pole-mounted bracket (ANT-MK-U)

The Universal pole-mounted bracket (ANT-MK-U) is designed to provide stable, reliable support for antenna deployments.

The bracket simplifies the physical installation process of installaing an antenna to a pole.

Supported Antennas

The antennas compatible with and validated for this bracket are listed in the table.

Antenna PID

Description

ANT-3-5G2G1-P-O

A compact 3-in-1 multi-element antenna with 2 cellular (4G/5G FR1) ports and 1 passive GNSS port, designed for rugged environments like utilities and navigation.

ANT-4-5G4-O

A 4-port antenna supporting 5G FR1 and dual-band Wi-Fi with omni radiation pattern, suitable for fixed infrastructure and utility IoT deployments.

ANT-5-5G4G1-O

A multi-element 5-in-1 antenna with 4 cellular (4G/5G) ports and 1 active GNSS port, featuring omni radiation pattern and 45W power rating, designed for vehicle mount and fixed infrastructure.

ANT-7-5G4WL2G1-O

A 7-in-1 multi-band monopole antenna with 4 cellular (4G/5G) ports, 2 Wi-Fi ports, and 1 GNSS port, supporting LTE/5G FR1, dual-band Wi-Fi, and active GNSS, designed for vehicle and fixed infrastructure mounting.

Mechanical Specifications

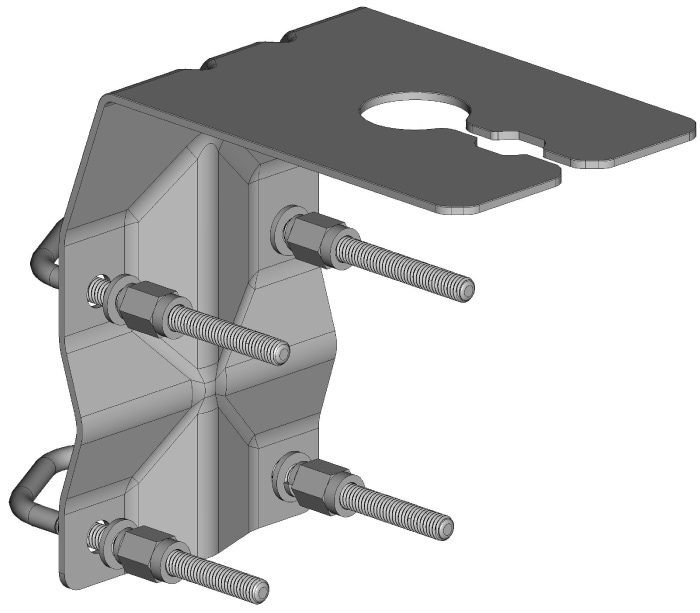
Figure 1. ANT-MK-U Bracket Front view
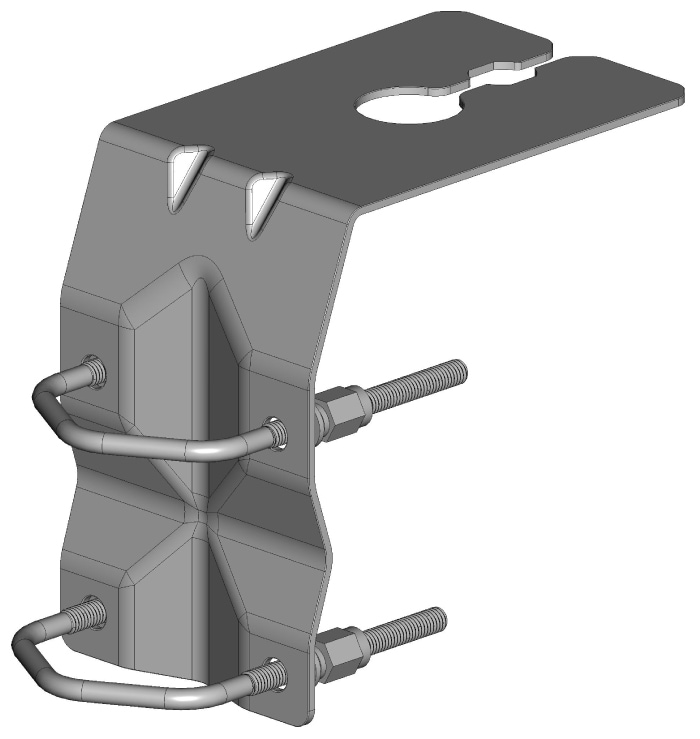
Figure 2. ANT-MK-U Bracket Rear view
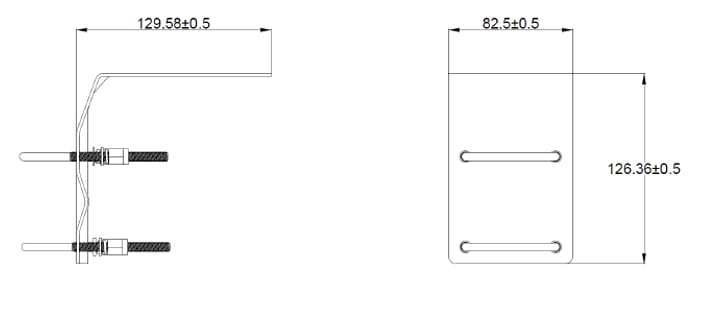
Figure 3. ANT-MK-U Bracket Dimensions

Dimensions in millimeters.

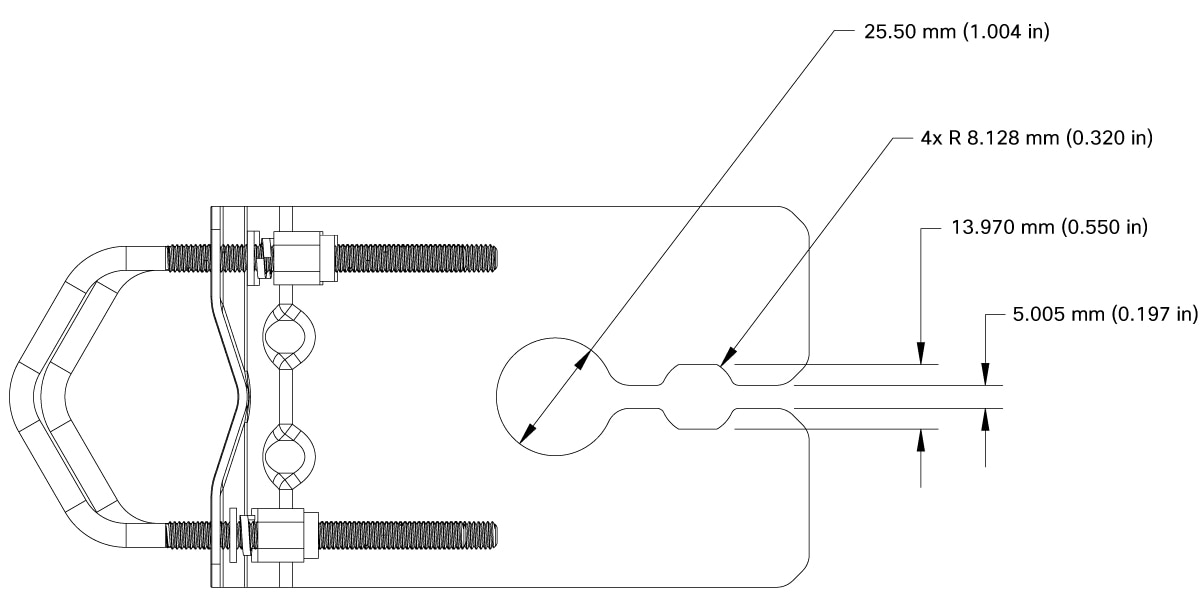
Figure 4. ANT-MK-U bracket Mounting Dimensions

Note


Use a pole of maximum diameter 53.975 mm (2.125 in).


Pole Bracket Installation

Mount the Cisco universal mounting bracket to a pole.

Before you begin

The hardware items required:

  • Pole (max 2.125” diameter)

  • Bracket

  • 2x U-bolts

  • 4x Plate washers

  • 4x Spring washers

  • 4x Nuts

The installation procedure provides instructions to pole mount the universal mounting bracket (ANT-MK-U).

Procedure


Step 1

Align the Universal Pole Mounting Bracket to a pole.

  • Position the bracket at the desired height and orientation.

  • The horizontal slotted antenna-mounting plate at the top.

  • The vertical bracket face aligned with the pole.

  • The upper and lower U-bolt positions aligned with the corresponding upper and lower bracket openings.

Step 2

Install the V-bolts.

Insert the V-bolts around the pole, threading the legs through the designated mounting holes on the bracket.

Step 3

Insert the hardware in order over each V-bolt leg.

  1. Plate washer against the bracket.

  2. Spring washer over the plate washer.

  3. Nut on the spring washer.

Step 4

Secure the bolts.

  1. Ensure that the bracket is level and centered.

  2. Tighten the nuts to a torque of 18–22 in-lbs (2–2.5 Nm) using a wrench.

  3. Maintain an even gap between the bracket and the pole by tightening the nuts in a diagonal cross-pattern.


What to do next

Install a supported antenna to the bracket.