Use this procedure to update time zone configuration in a standalone deployment. It helps you complete the related installation workflow and confirm the deployment state before continuing.
Update the timezone configuration for each VM in a standalone deployment and restart the VM to ensure a seamless change into the new timezone configuration.
From Cisco Optical Network Controller Release 25.1.2, you can update the timezone configuration. Previously, only the UTC timezone was supported. Now you can configure Cisco Optical Network Controller in your preferred timezone.
For standalone deployments, you must use the command to update the timezone in the CLI for each VM and then restart the VM according to the steps in this procedure to ensure a seamless change into the new timezone configuration.
Limitations
-
Alarms and logs are saved in UTC in the database, which minimizes impact during time zone transitions, although during the transition period, for example, during a switchover, you might briefly see alarms with different time zone stamps in the UI before the system converges to the final setting.
-
Do not make timezone changes frequently as they might cause inconsistencies and require reboots of VMs/services.
-
When cross-launching from Cisco Optical Network Controller, the time zone offset will remain the same, but the IANA time zone name displayed in the cross-launched application might differ from the one configured in Cisco Optical Network Controller. This discrepancy occurs because the same timezone offset can have multiple IANA timezone names.
-
TAPI data and notifications continue to use UTC +0000.
-
SNMP traps use epoch time without any time zone offset calculated on the epoch.
-
Developer logs and techdump data uses UTC.
Before you begin
You must perform these pre-checks on each VM before changing the timezone.
-
Make sure all the pods are running by running the sedo system status -w command.
This example shows a sample output where all pods are running. Verify status of every pod is
Running.root@vm1-cluster1-node1:~# sedo system status -w ┌──────────────────────────────────────────────────────────────────────────────────────────────────────────┐ │ System Status (Thu, 20 Nov 2025 09:55:35 UTC) │ ├────────┬──────────────────────────────┬──────────────────┬─────────┬───────────────────────┬─────────────┤ │ OWNER │ NAME │ NODE │ STATUS │ RESTARTS │ STARTED │ ├────────┼──────────────────────────────┼──────────────────┼─────────┼───────────────────────┼─────────────┤ │ onc │ monitoring │ concgha2-clb-vm1 │ Running │ 0 │ 5 days ago │ │ onc │ onc-alarm-service │ concgha2-clb-vm1 │ Running │ 3 (Latest 5 days ago) │ 1 week ago │ │ onc │ onc-apps-ui-service │ concgha2-clb-vm1 │ Running │ 3 (Latest 5 days ago) │ 1 week ago │ │ onc │ onc-circuit-service │ concgha2-clb-vm1 │ Running │ 3 (Latest 5 days ago) │ 1 week ago │ │ onc │ onc-collector-service │ concgha2-clb-vm1 │ Running │ 3 (Latest 5 days ago) │ 1 week ago │ │ onc │ onc-config-service │ concgha2-clb-vm1 │ Running │ 3 (Latest 5 days ago) │ 1 week ago │ │ onc │ onc-devicemanager-service │ concgha2-clb-vm1 │ Running │ 3 (Latest 5 days ago) │ 1 week ago │ │ onc │ onc-inventory-service │ concgha2-clb-vm1 │ Running │ 3 (Latest 5 days ago) │ 1 week ago │ │ onc │ onc-nbi-service │ concgha2-clb-vm1 │ Running │ 3 (Latest 5 days ago) │ 1 week ago │ │ onc │ onc-netconfcollector-service │ concgha2-clb-vm1 │ Running │ 0 │ 5 days ago │ │ onc │ onc-osapi-gw-service │ concgha2-clb-vm1 │ Running │ 3 (Latest 5 days ago) │ 1 week ago │ │ onc │ onc-pce-service │ concgha2-clb-vm1 │ Running │ 3 (Latest 5 days ago) │ 1 week ago │ │ onc │ onc-pm-service │ concgha2-clb-vm1 │ Running │ 3 (Latest 5 days ago) │ 1 week ago │ │ onc │ onc-pmcollector-service │ concgha2-clb-vm1 │ Running │ 0 │ 5 days ago │ │ onc │ onc-topology-service │ concgha2-clb-vm1 │ Running │ 3 (Latest 5 days ago) │ 1 week ago │ │ onc │ onc-torch-service │ concgha2-clb-vm1 │ Running │ 3 (Latest 5 days ago) │ 1 week ago │ │ system │ authenticator │ concgha2-clb-vm1 │ Running │ 0 │ 5 days ago │ │ system │ bgp │ concgha2-clb-vm1 │ Running │ 0 │ 5 days ago │ │ system │ controller │ concgha2-clb-vm1 │ Running │ 3 (Latest 5 days ago) │ 2 weeks ago │ │ system │ flannel │ concgha2-clb-vm1 │ Running │ 1 (Latest 5 days ago) │ 2 weeks ago │ │ system │ ingress-proxy │ concgha2-clb-vm1 │ Running │ 3 (Latest 5 days ago) │ 1 week ago │ │ system │ kafka │ concgha2-clb-vm1 │ Running │ 1 (Latest 5 days ago) │ 2 weeks ago │ │ system │ loki │ concgha2-clb-vm1 │ Running │ 4 (Latest 5 days ago) │ 2 weeks ago │ │ system │ metrics │ concgha2-clb-vm1 │ Running │ 3 (Latest 5 days ago) │ 2 weeks ago │ │ system │ minio │ concgha2-clb-vm1 │ Running │ 3 (Latest 5 days ago) │ 2 weeks ago │ │ system │ postgres │ concgha2-clb-vm1 │ Running │ 3 (Latest 5 days ago) │ 2 weeks ago │ │ system │ promtail-vff8n │ concgha2-clb-vm1 │ Running │ 1 (Latest 5 days ago) │ 2 weeks ago │ └────────┴──────────────────────────────┴──────────────────┴─────────┴───────────────────────┴─────────────┘
Procedure
Timezone configuration has been updated and Cisco Optical Network Controller webUI now displays time in the newly configured timezone.
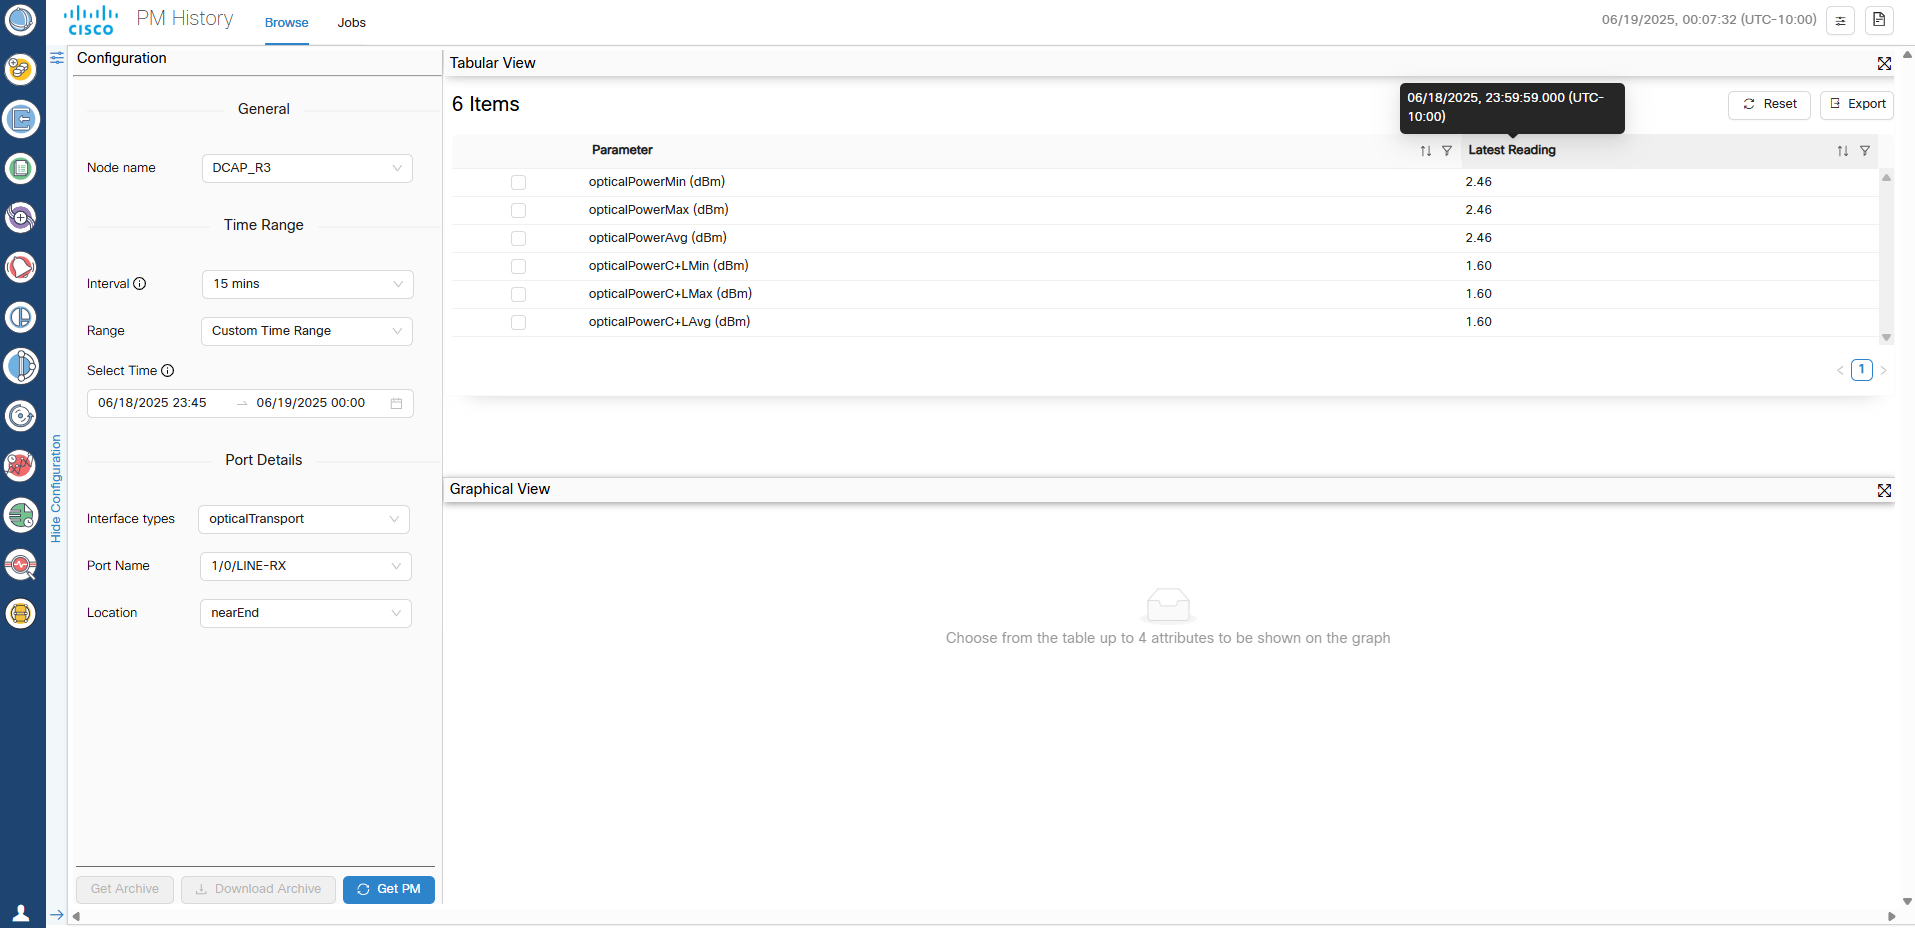
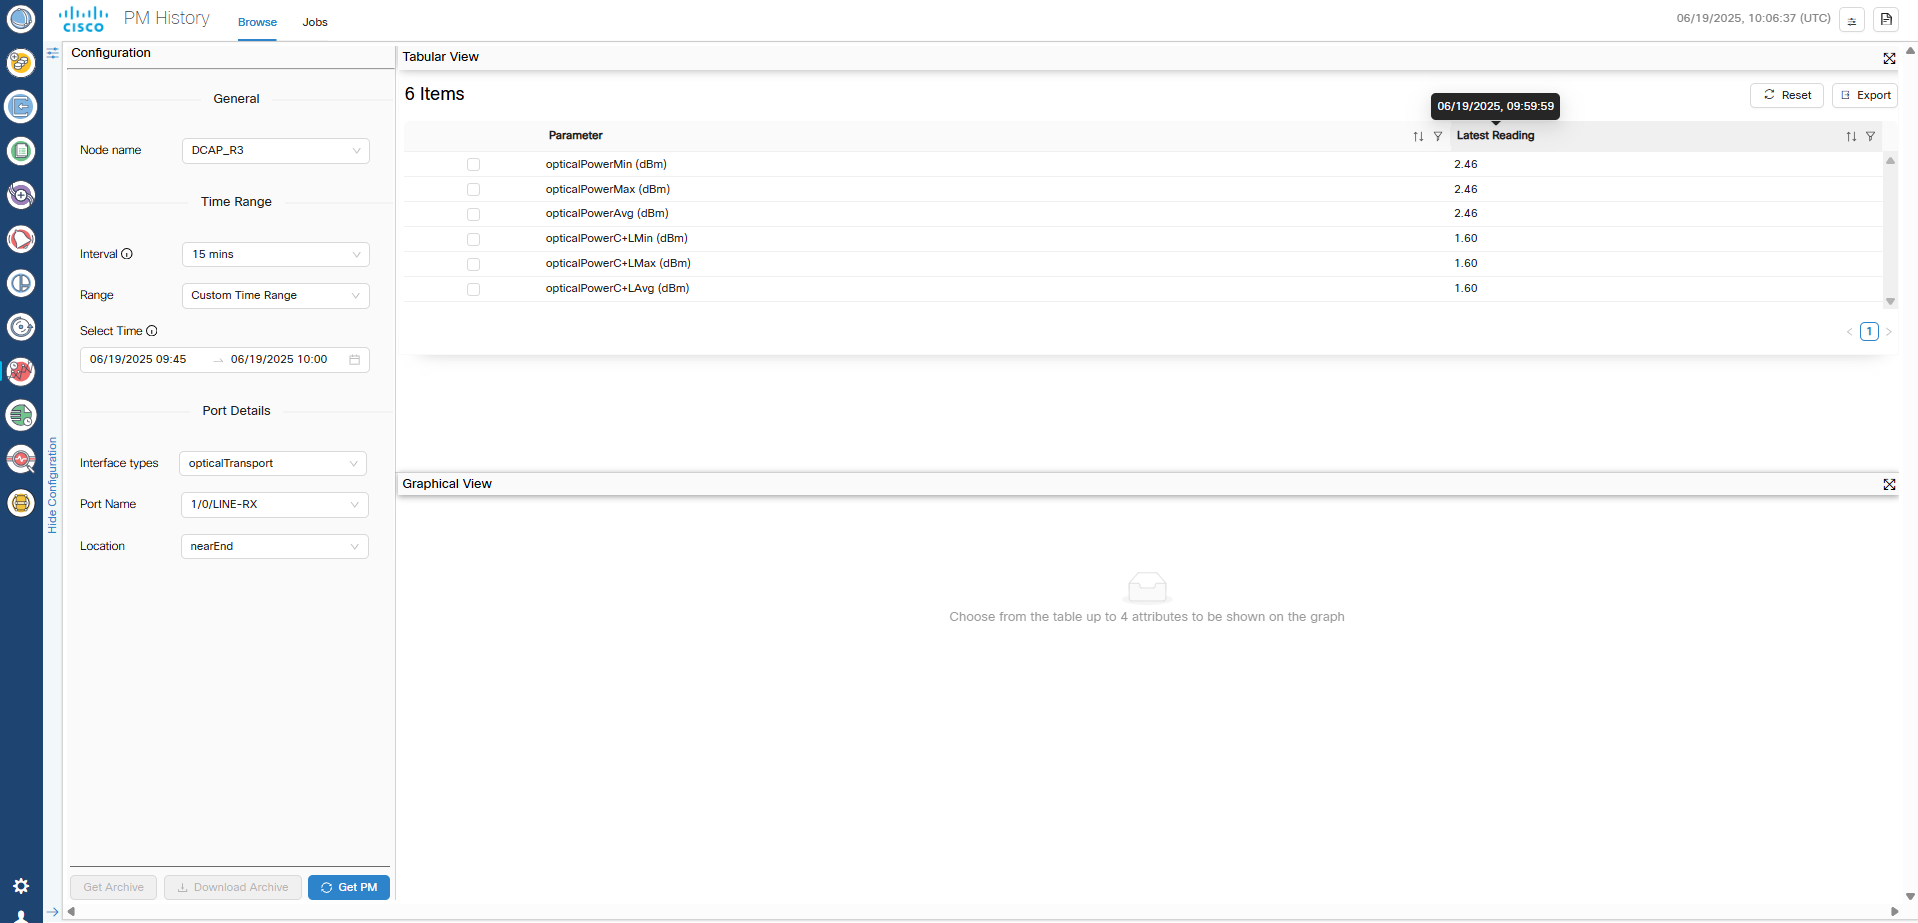
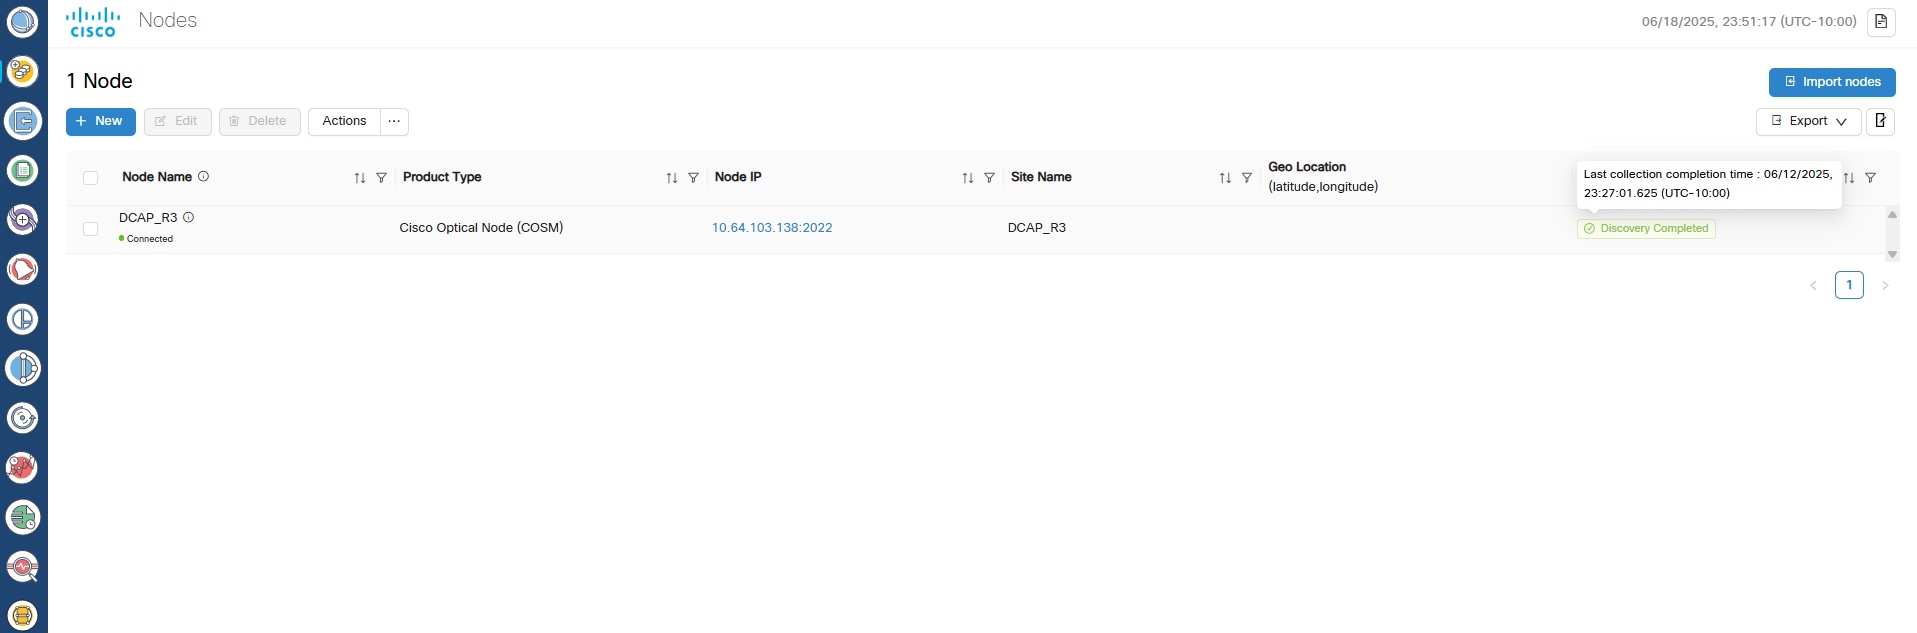
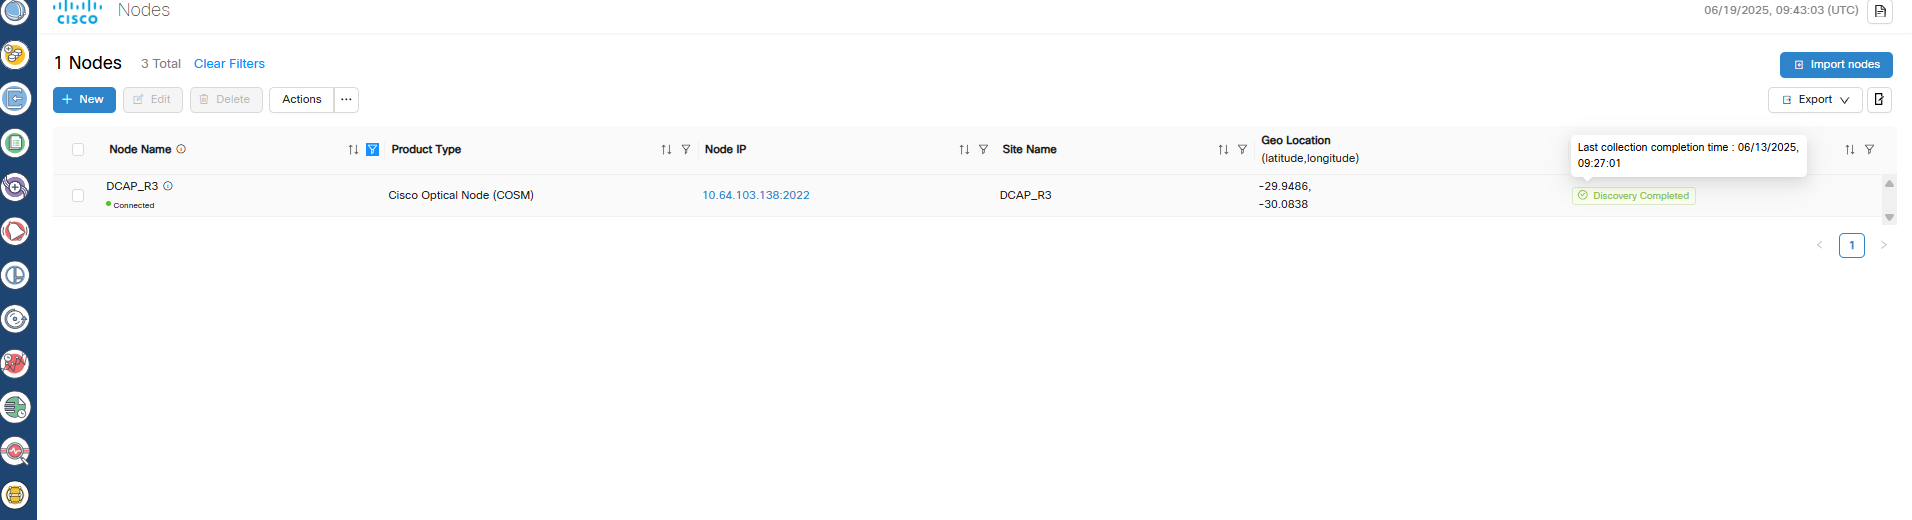
The following screenshots show the difference between the behaviour in 25.1.1 and 25.1.2. Note that the timestamps are displayed differently with the timezone name and offset included in the timestamp in Release 25.1.2.